
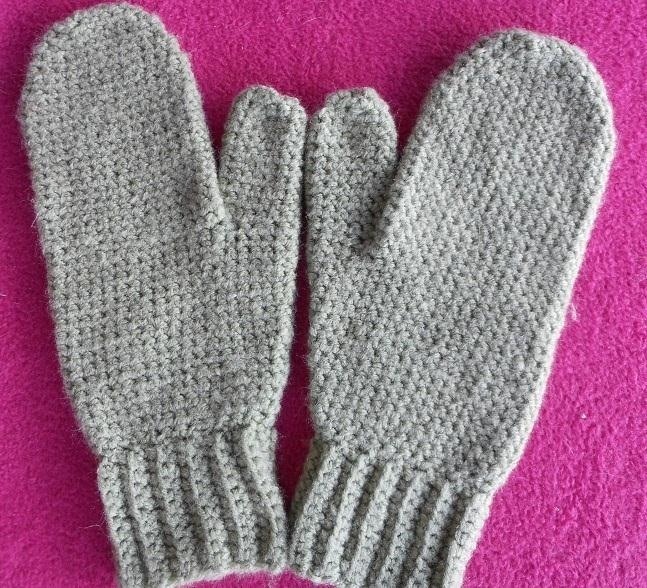
This is a simple pattern, designed to produce a well-fitting mitten. Both the right and left mittens worked the same up to the shaping for the top of the mitten. A slight adjustment for making one right and one left, then they are worked the same. The gusset for the thumb constructed with the increases made in the center of the gusset, rather than on each side. This makes it easy with a minimal amount of counting stitches as you go.
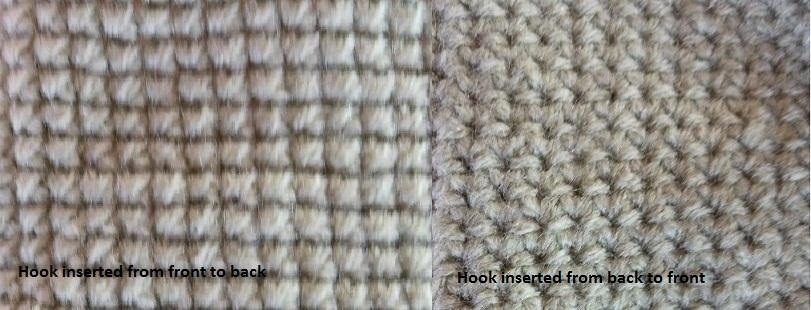
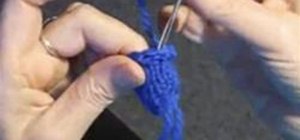
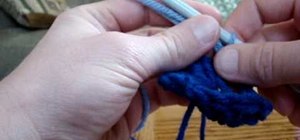
I have been crocheting for 56 years. In doing research for writing this pattern, checking terms and what works in illustrations, I discovered that I have been doing it wrong! I learned to insert the hook from the back to the front, and all the 'learn to crochet' postings currently available , as well as all the books on crocheting I consulted, all show that the hook is inserted from front to back. I'm working on correcting my backwards ways, but it is difficult to overcome 56 years of experience! Does it really matter? For this pattern, not really, except that they appear different. Keep this in mind as you look at the pictures. The pattern works either way.
Work on both mittens, rather than make them one at a time!
Materials:
4 oz. a worsted weight yarn. I used Red Heart Super Saver Acrylic in frosty Green.
Scraps of yarn for markers
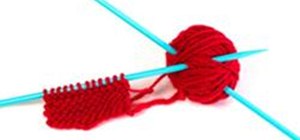
Size G crochet hook, yarn needles, row counter (optional, but strongly advised), small safety pins
Gauge: 8 sc = 2 inches, 9 rows = 2 inches.
Definitions:
Ch – chain
Sc – single crochet
Sl st – slip stitch
Yo – yarn over hook
Dec in next 2 sc – insert hook in sc, yo, pull up a loop, insert hook in next sc, yo, pull up a loop, yo, pull loop through all three loops on hook. Decrease made.
^ ....^ - usually a pattern uses asterisks to define a group of stitches to be repeated a number of times, but the use of them here just makes the text between them bold. Therefore I am using ^ .....^ instead.
I made this pair of mittens with a crocheted ribbed cuff. I am not entirely satisfied with it as it does not have the elasticity of a knit ribbing, and is a bit tight to get on. I have included instructions for both, but recommend the knitted cuff as it is easier to get on, and easier to start the mitten body from. The instructions for the knitted cuff follow those for the crocheted cuff. They are worked the same from round 2 on.
Crochet ribbed cuff:
Row 1: Ch 13, sc in 2nd ch from hook, sc in each ch. (12 sc, counting the ch at the beginning of the row.)
Row 2: Ch 1, sc in the back loop of each sc. (12 sc)
Rows 3 – 26: Repeat row 2.
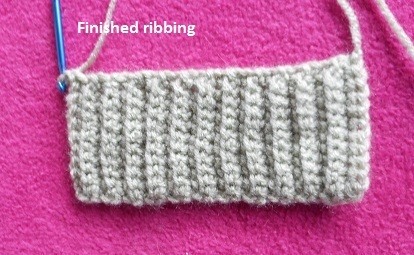
Slip stitch the ends together to form the cuff. Do not cut the yarn. Turn the cuff inside out. This is now the right side.
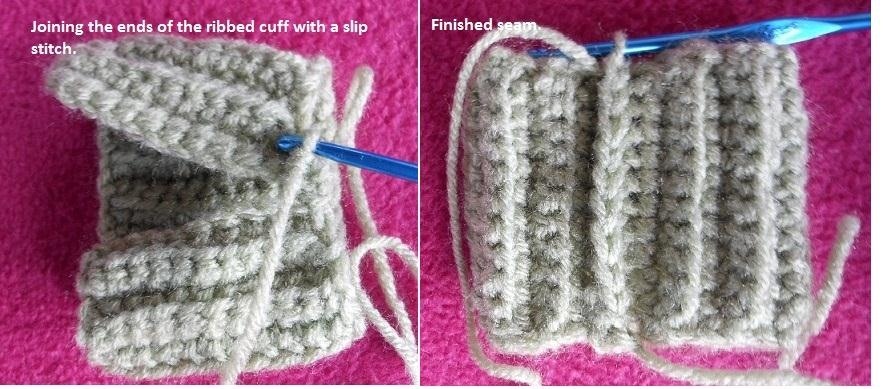
Make 1 sc in the top of each row, and 1 sc at the joining. (27 sc).
Thread a yarn needle with scrap yarn and tie loosely on to your working yarn. Attach the row counter.
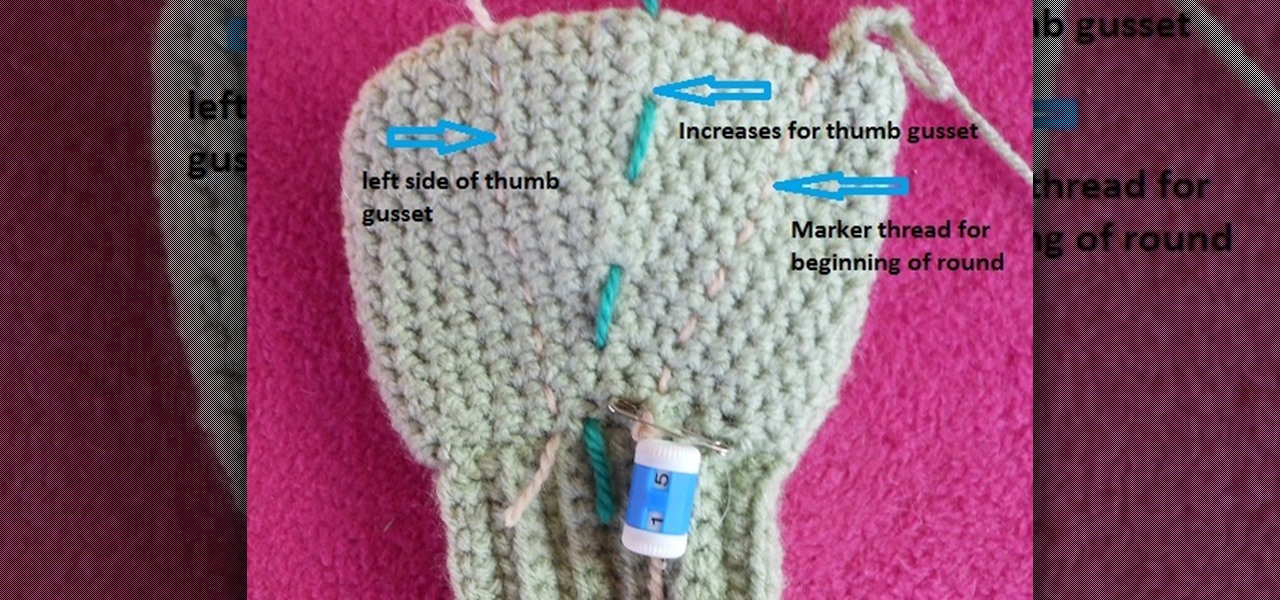
As you work, weave your marker yarn through your work at the beginning of the rounds. the marker thread will be used with changes made to shape the mitten tip.
Continue working without joining rounds.
Rnd 1: sc,2 sc in next sc, ^sc in next 3 sc, 2 sc in next sc,^ 6 times, sc (34 sc). Be sure to count your stitches!
Or to make a knit cuff
Knit ribbed cuff:
On a no. 8 needle, cast on 35 sts. Transfer sts to no. 4 double pointed needles (12, 12, 11). Casting on with a larger needle makes a more even edge, than casting on loosely. It also produces the ease necessary to slip the cuff over the wider part of the hand.
Row 1: Move the last st to the first needle and k2 together to join work, P1, continue with k1, p1 to the end of the row. Place a marker at the beginning of the next round shifting stitches around to keep the marker on the needle. (34)
Rows 2 – 20: work in k1, p1 ribbing.
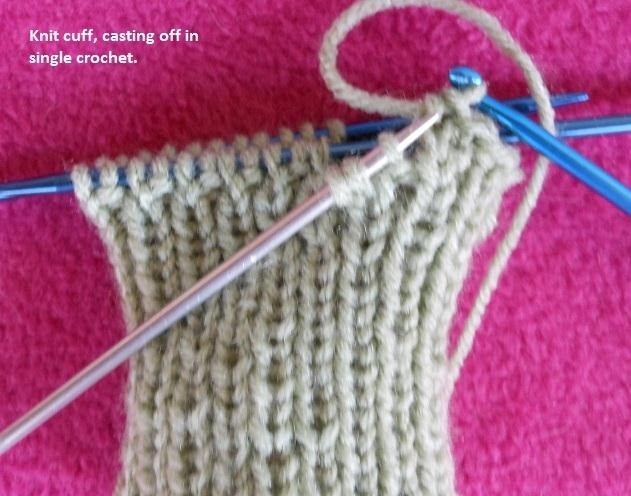
Row 21: k around
Row 22: bind off with a loose sc. (34).
Start the body of the mitten with round 2
Rnds 2 – 3: work even in sc (34 sc).
Rnd 4: sc in next 2 sc, 3 sc in next sc, sc in remaining sc in rnd (36 sc).
Rnds 5 – 6:work even in sc (36 sc).
Rnd 7: sc in next 3 sc, 3sc in next sc, sc in remaining sc in rnd (38 sc).
Rnds 8 – 9: work even in sc (38 sc).
Rnd 10: sc in next 4 sc, 3sc in next sc, sc in remaining sc in rnd (40 sc).
Rnds 11 – 12: work even in sc (40 sc).
Rnd 13: sc in next 5 sc, 3 sc in next sc, sc in remaining sc in rnd (42 sc).
Rnds 14 - 15: work even in sc (42 sc).
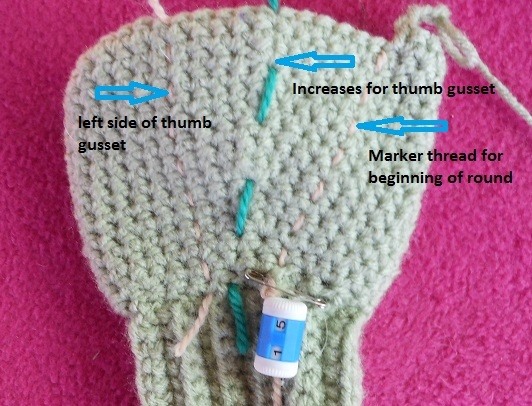
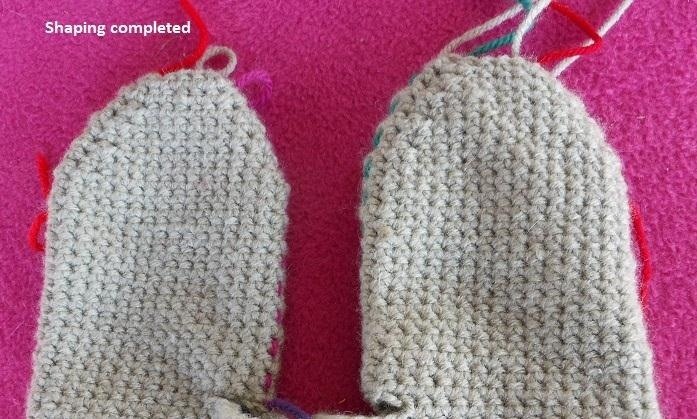
The shaping for the thumb gusset is complete.
I have added a marker to show the increases along the center of the gusset, and a marker to show the left side of the gusset.
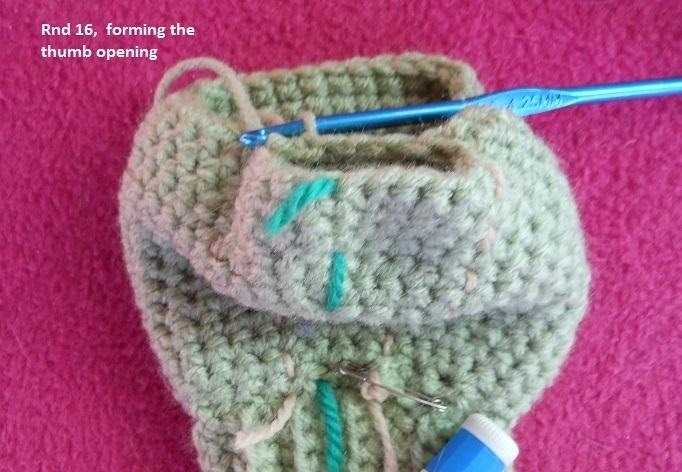
Rnd 16: sc in next 41 sc
Rnd 17: ch 3, skip the next 13 sc, sc in remaining sc in rnd (32 sc). Be sure to count your stitches!
Rnds 18 – 31: work even in sc (32 sc)
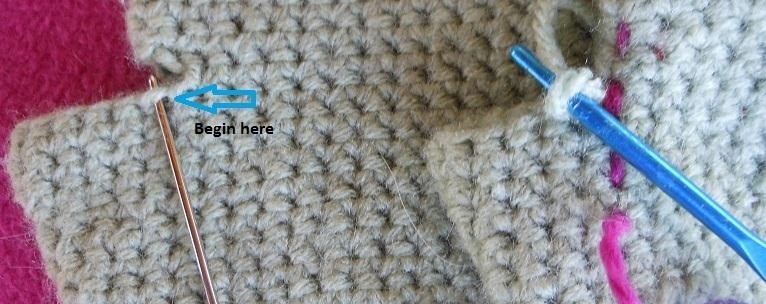
Complete both mittens to this point! It's time to make them right and left handed!
On one mitten, sc 4, move your marker thread to reset the beginning of the round 4 sc to the left of the original. This will be the left mitten. From here both mittens are worked the same. The new marker should be above the end of the thumb opening.

Count 16 sc from the beginning marker, place a marker between the 16th and 17th sc. I used a different color to help me keep track.
The decreases for the mitten tip start at the pinky side of the mittens. The decreases for the thumb side are made at the end of one round, and the beginning of the next round to keep them from being offset, as they would be if they were made at the beginning and end of the rounds.
Rnd. 32: 13 sc, dec in next 2 sc, sc, dec in next 2 sc, 11 sc, dec in next 2 sc, sc (29 sc)
Rnd 33: dec in next 2 sc, sc to the end of the rnd. (28 sc)
So why is there a difference in the number of scs in the first half of the round and the second – 13 vs 11? The two scs in the second half have been accounted for in the decrease, leaving 11 scs before the next decrease.
Rnd 34: 11 sc, dec in next 2 sc, sc, dec in next 2 sc, 9 sc, dec in next 2 sc, sc. (25 sc)
Rnd 35: dec in next 2 sc, sc to the end of the rnd. (24 sc)
Rnd 36: 9 sc, dec in next 2 sc, sc, dec in next 2 sc, 7 sc, dec in next 2 sc, sc. (21 sc)
Rnd 37: dec in next 2 sc, 6 sc, dec in next 2 sc, sc, dec in next 2 sc, 5 sc, dec in next 2 sc, sc. (17 sc)
Rnd 38: dec in next 2 sc, 5 sc, dec in next 2 sc, sc, dec in next 2 sc, 3 sc, dec in next 2 sc, sc. (14 sc)
Rnd 39: dec in next 2 sc, 4 sc, sl st in next 2 sc, tie off.
Thumb:
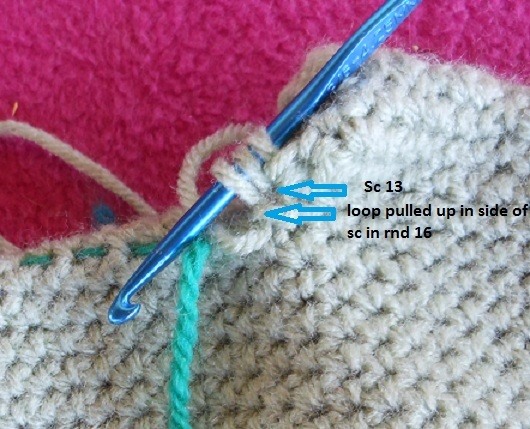
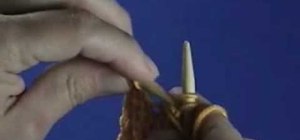
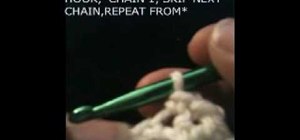
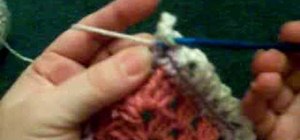
Rnd 1: Attach yarn in the first sc of the 13 sc in the opening. Ch 1, 11 sc, insert hook in next sc, yo, pull up a loop, insert hook in the side sc of round 16, yo,draw up a loop, yo, pull loop through 3 loops on the hook, (see picture below), 3 sc (across ch 3) , insert hook in the side sc of round 16, yo, draw up a loop, insert hook into the top of the ch at the beginning of the round, yo, pull up a loop, yo, pull loop through 3 loops on the hook. This completes round 1. (16 sc)
Place a marker after the last sc made. This will be the atarting point for all rounds in the thumb. Do not join the rounds.
One more decrease will be made in the second round on the palm side of each thumb.
Rnd 2: right mitten: 11 sc, dec in next 2 sc, sc to end of round. (15 sc)
Rnd 2: left mitten: 14 sc, dec in next 2 sc. (15 s)
From here the thumbs are worked the same.
Rnds 3 – 11: Work even on 15 sc. (15 sc)
Rnds 12 – 13: ^2 sc, dec in next 2 sc,^ 8 times, sc, sl st, tie off. (7 sc)
Finishing:
Turn the mittens inside out and use the ends of the yarn to sew up the seams on the top of the thumb, and the mitten tip. Weave all loose ends in. Turn mittens right side out and keep your hands warm!
P.S., These mittens are rather plain and are ready to embroider. There are some pretty good suggestions here on Wonder How To and you may want to explore the possibilities. I know I will.
Lorna
Just updated your iPhone? You'll find new emoji, enhanced security, podcast transcripts, Apple Cash virtual numbers, and other useful features. There are even new additions hidden within Safari. Find out what's new and changed on your iPhone with the iOS 17.4 update.


Be the First to Comment
Share Your Thoughts