


Despite packing some really nice camera specs, the OnePlus 3 and 3T don't take the best pictures. That's because, these days, great software is just as important as great hardware when it comes to image quality.
Qualcomm, who made the processors for the OnePlus 3 and 3T, has a terrific camera app called Snapdragon Camera. It was created specifically for devices that use Qualcomm's image signal processor, so it can tie hardware and software together in a way that results in better photos all around on supported phones.
But the Snapdragon Camera isn't officially available for OnePlus devices. To fix this, developer nvertigo67 has ported Qualcomm's camera app to work on the OnePlus 3 and 3T. Bottom line, this mod fixes grainy images, improves focus accuracy, and has just about as many features as the stock OxygenOS camera.
Requirements
- rooted OnePlus 3 or 3T
- TWRP installed
- stock firmware or OxygenOS-based custom ROM installed
Download Snapdragon Camera
To start off, you'll need to download the TWRP flashable Snapdragon Camera ZIP. So go ahead and tap the link below from your OnePlus 3 or 3T to grab it.

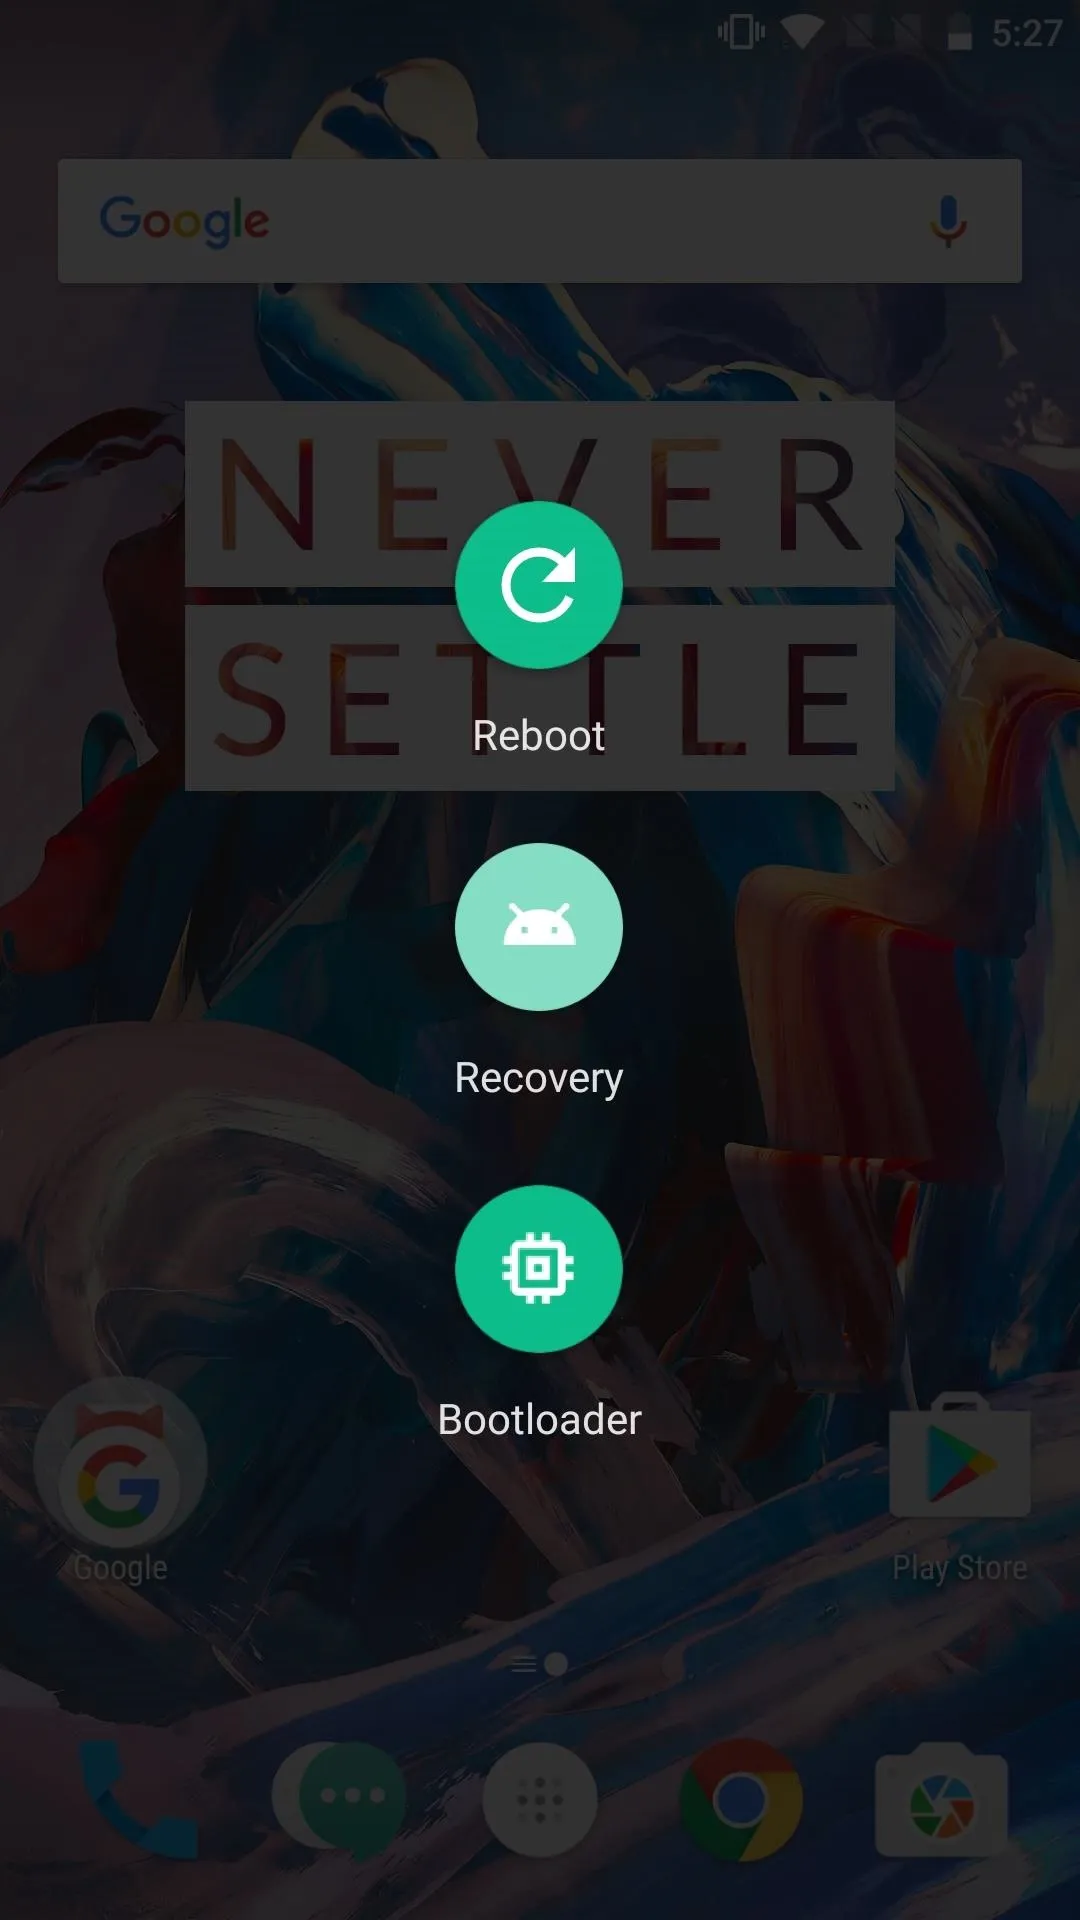
Reboot to TWRP & Install Snapdragon Camera
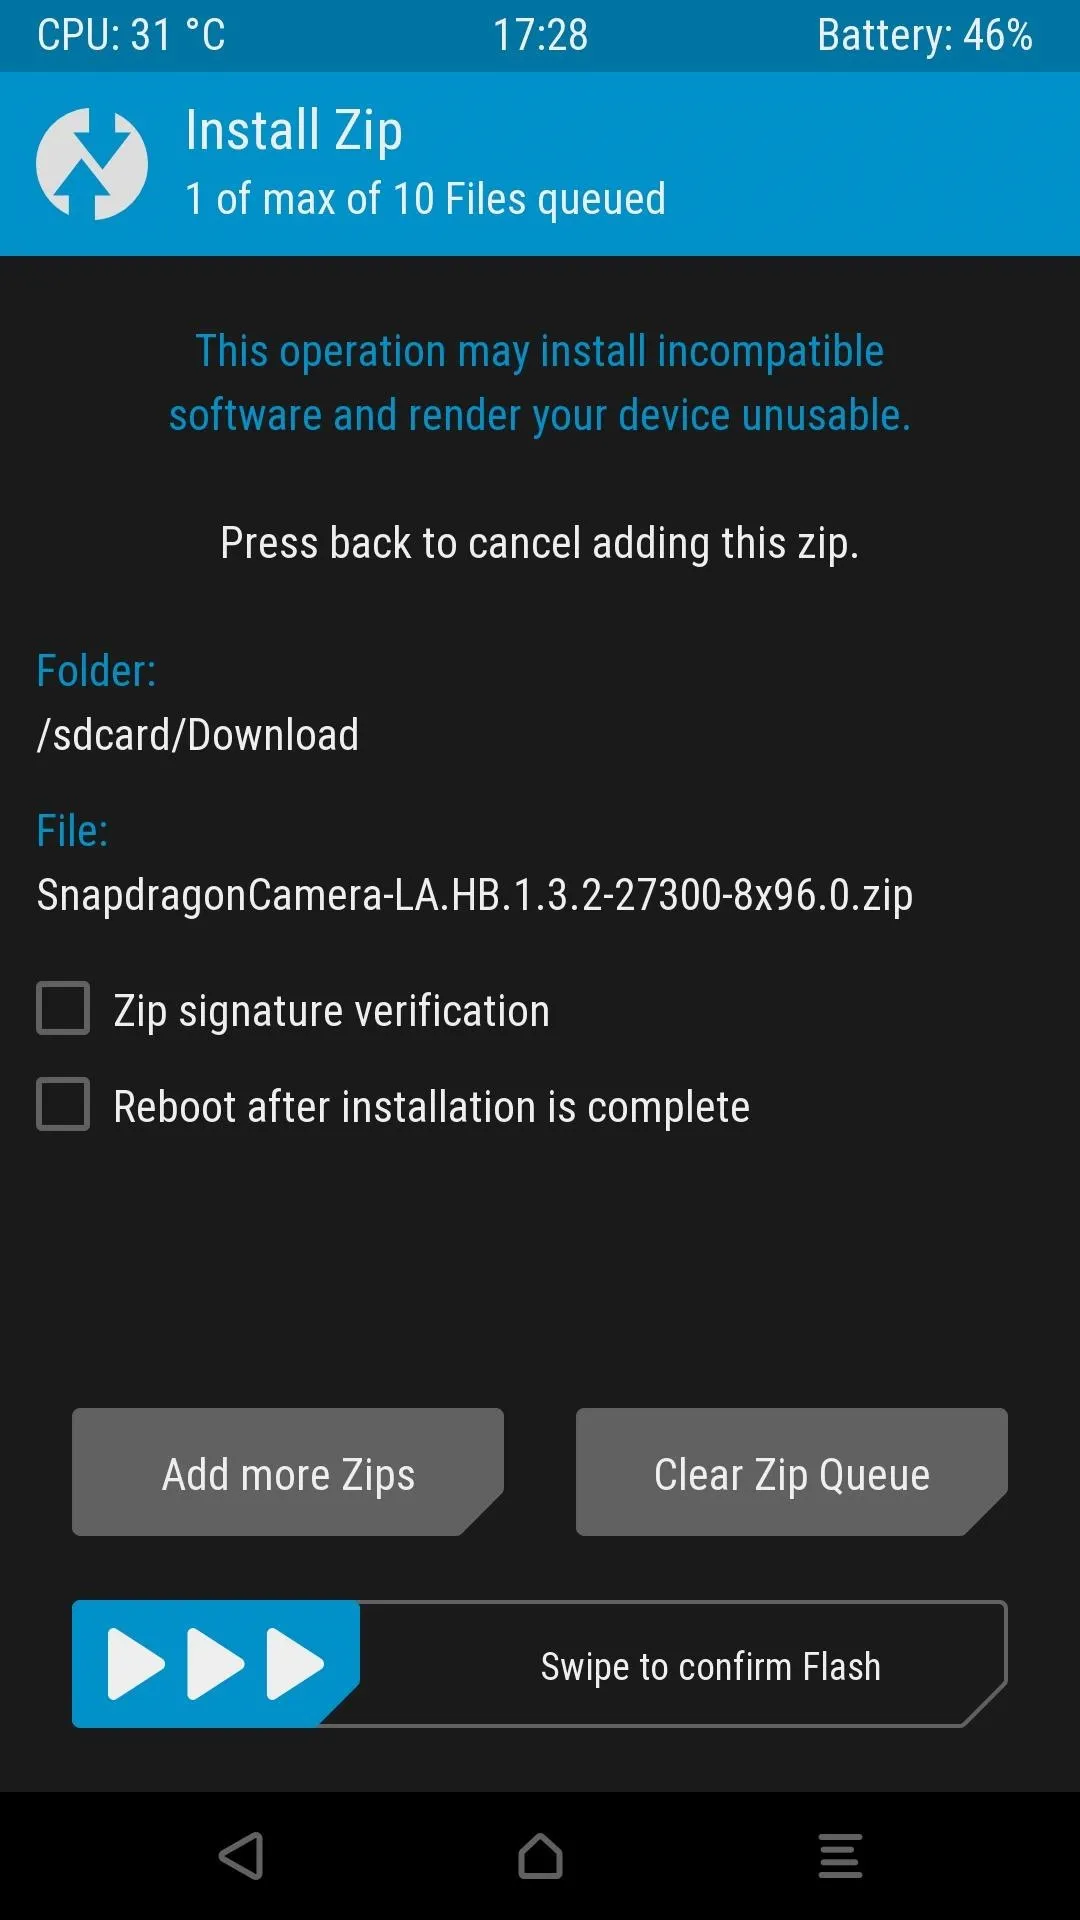
Next, reboot to TWRP by holding down the power button and selecting reboot, then tapping on "Recovery." Once you've rebooted to TWRP, it's always smart to create a NANDroid backup first. This way, you'll be protected in case something goes wrong while flashing the ZIP.
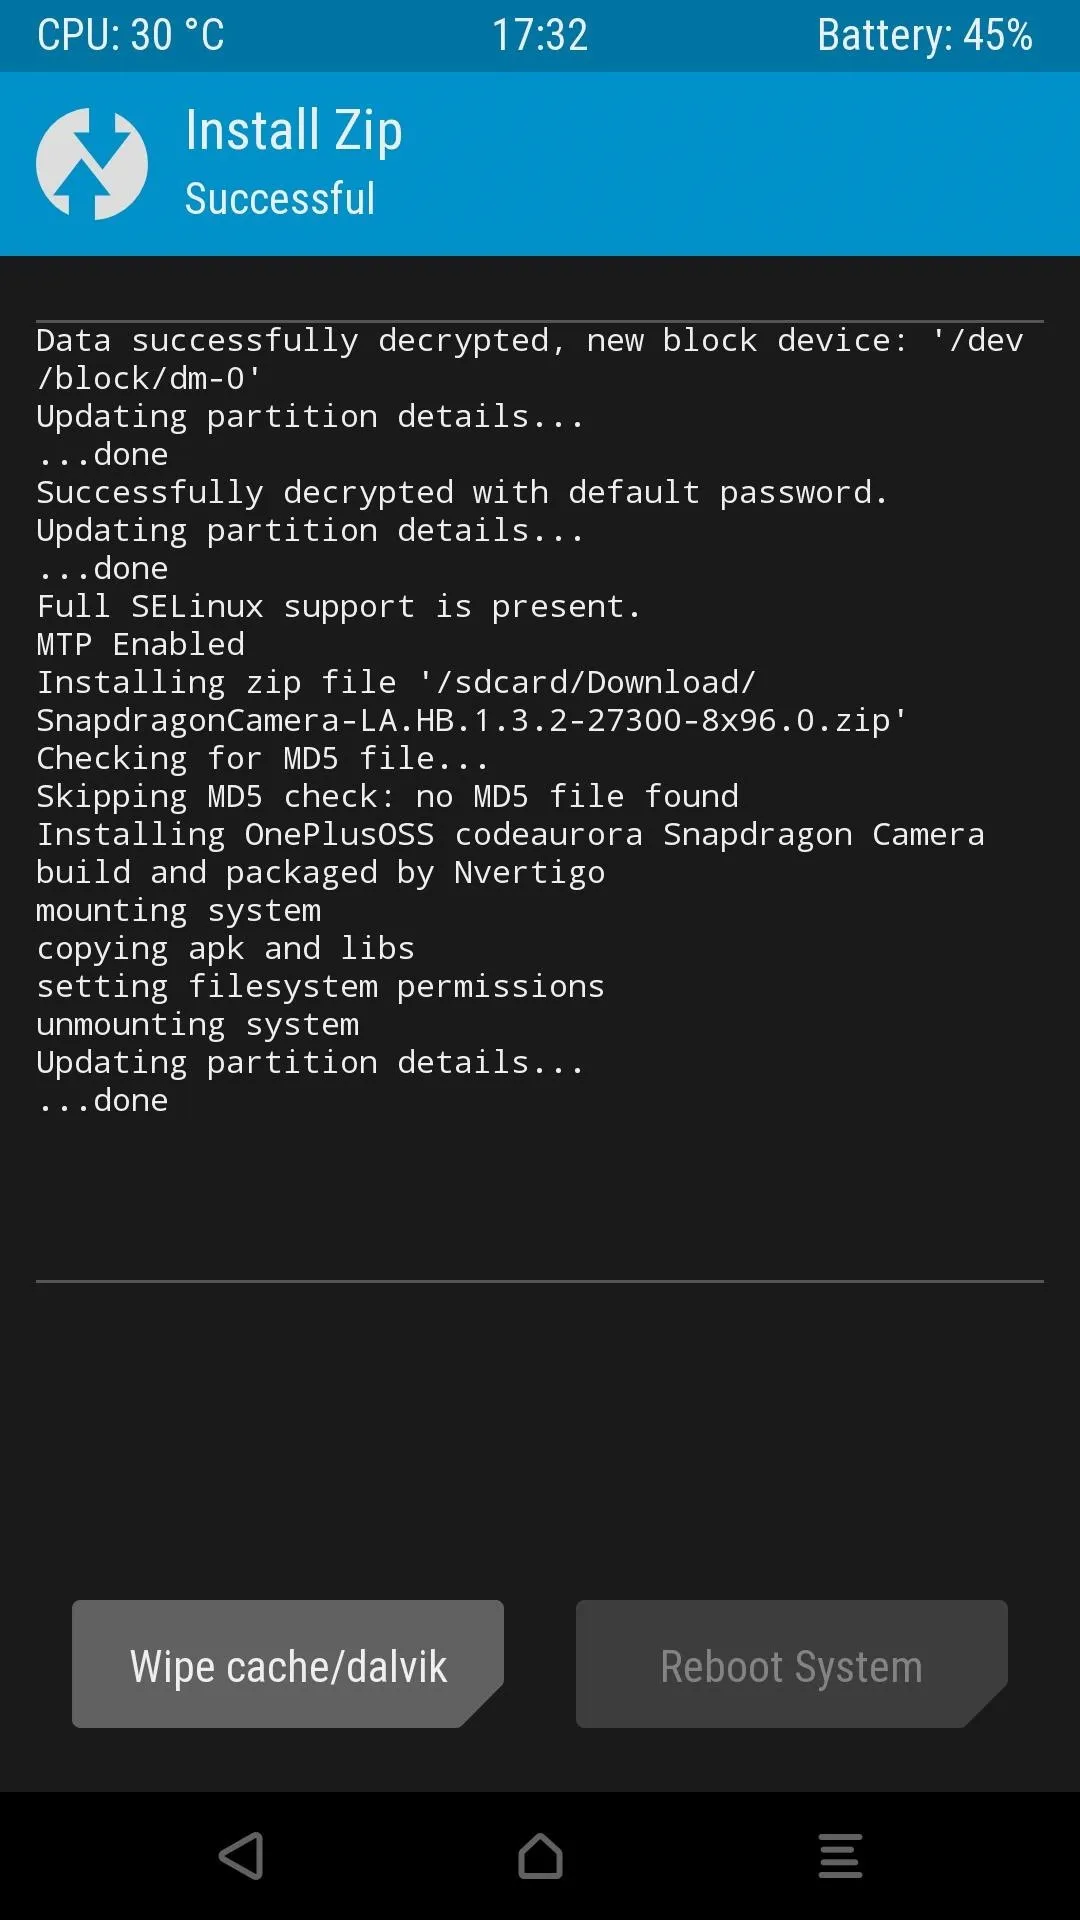
After you've created your NANDroid, go back to the TWRP main menu and press the "Install" button. Navigate to your Downloads folder, and select the previously downloaded ZIP. Then, slide the bottom bar to confirm the flash and begin the Snapdragon Camera installation. Tap "Reboot system" when it's done installing to wrap things up.
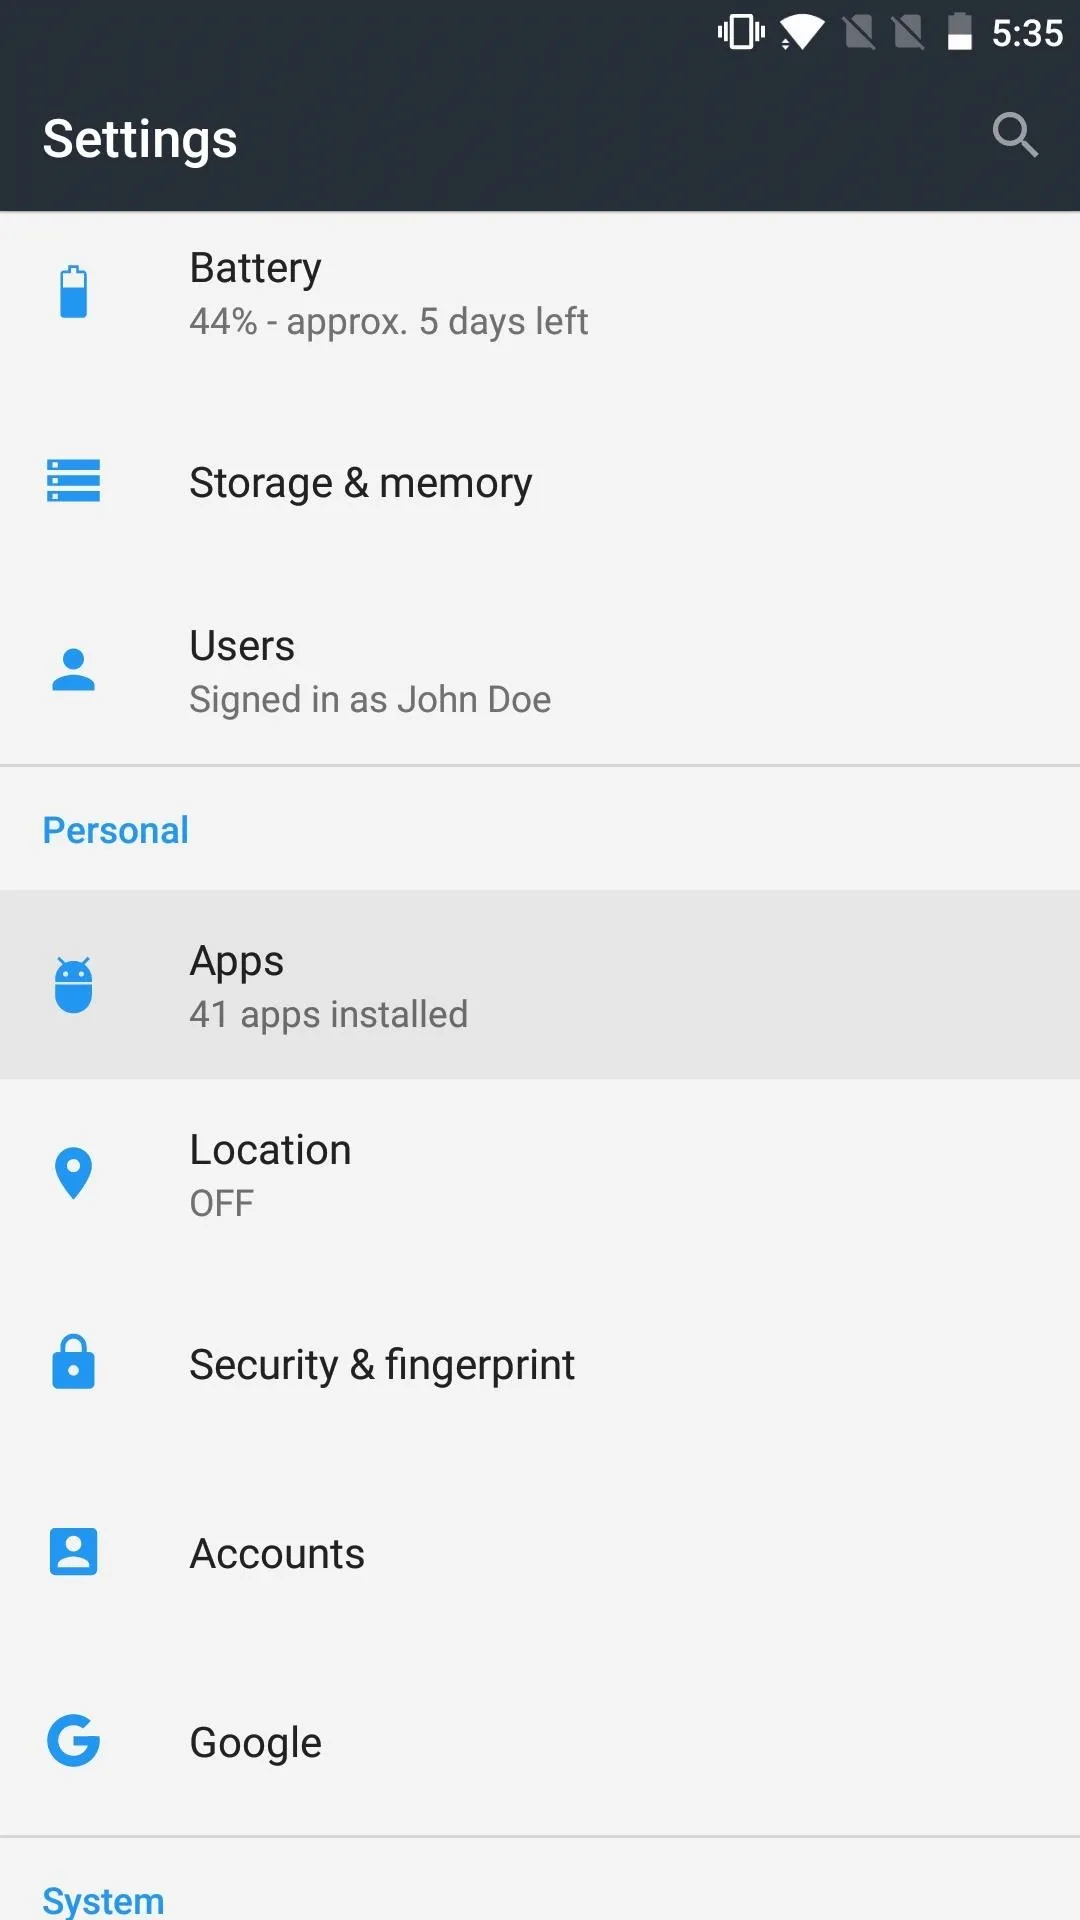
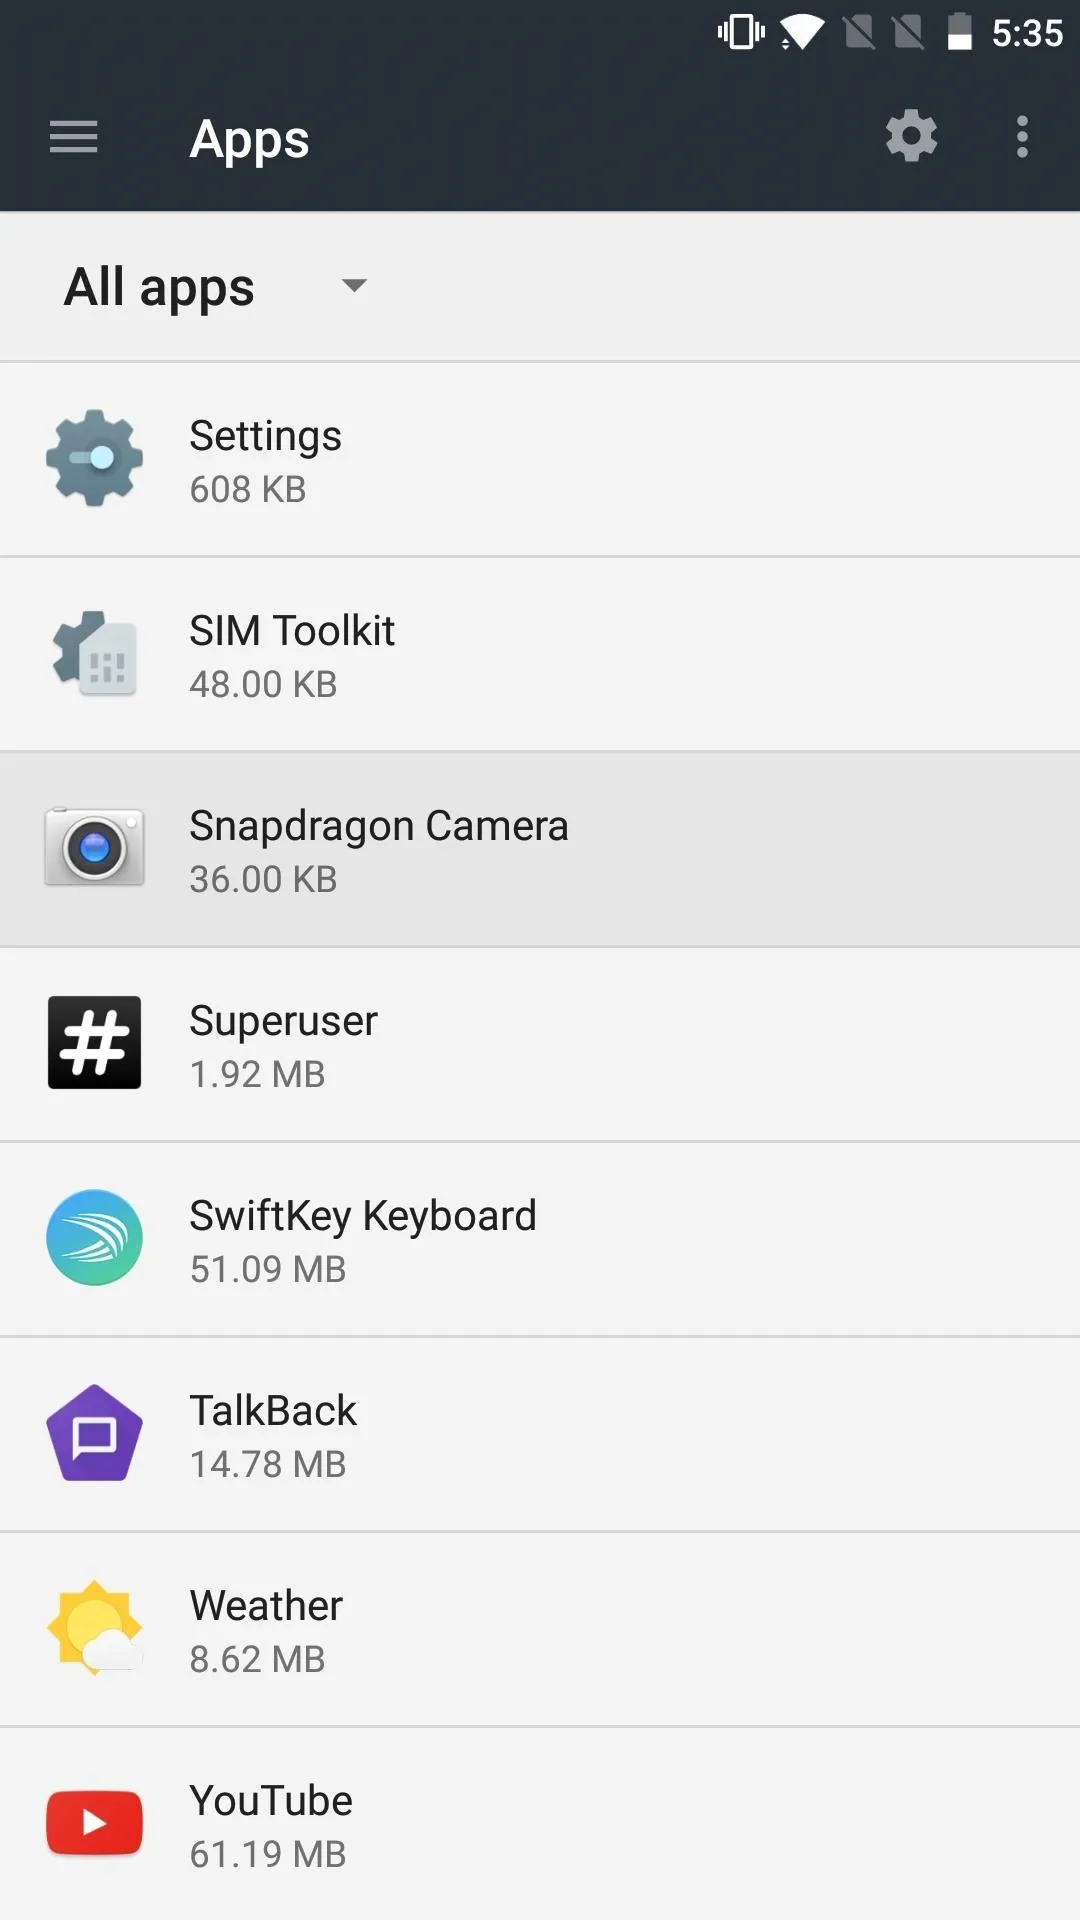
Grant Permissions
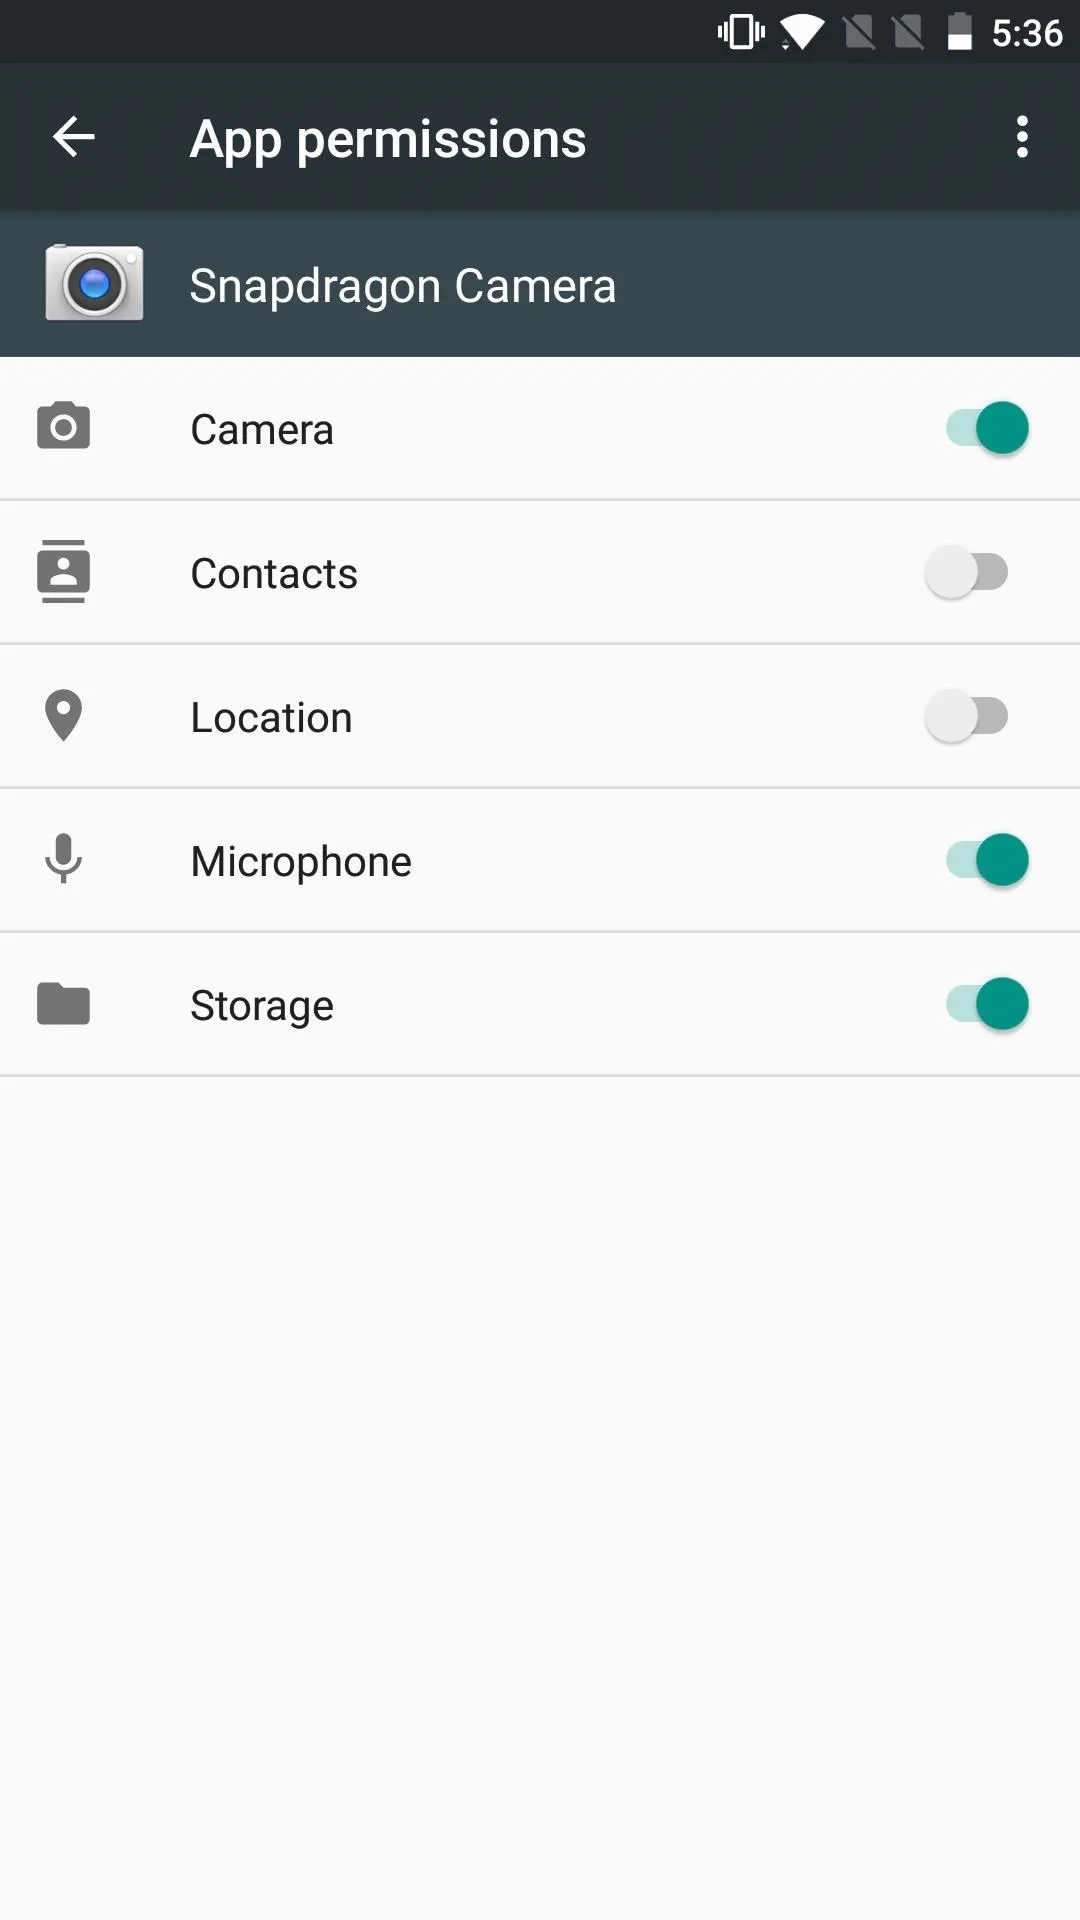
Before you can use the Snapdragon Camera, you'll have to grant a couple of permissions so that the app is able to access the hardware and software it needs to function. To do so, head to the Apps menu in Settings, then select "Snapdragon Camera." Next, tap "App Permissions," then grant at least the "Camera," "Microphone," and "Storage" permissions.
You can also grant the "Location" permission if you want to geotag your shots. The "Contacts" permission is there if you would like to share your photographs after taking them, but both of these permissions are optional.
Enjoy Your New Camera
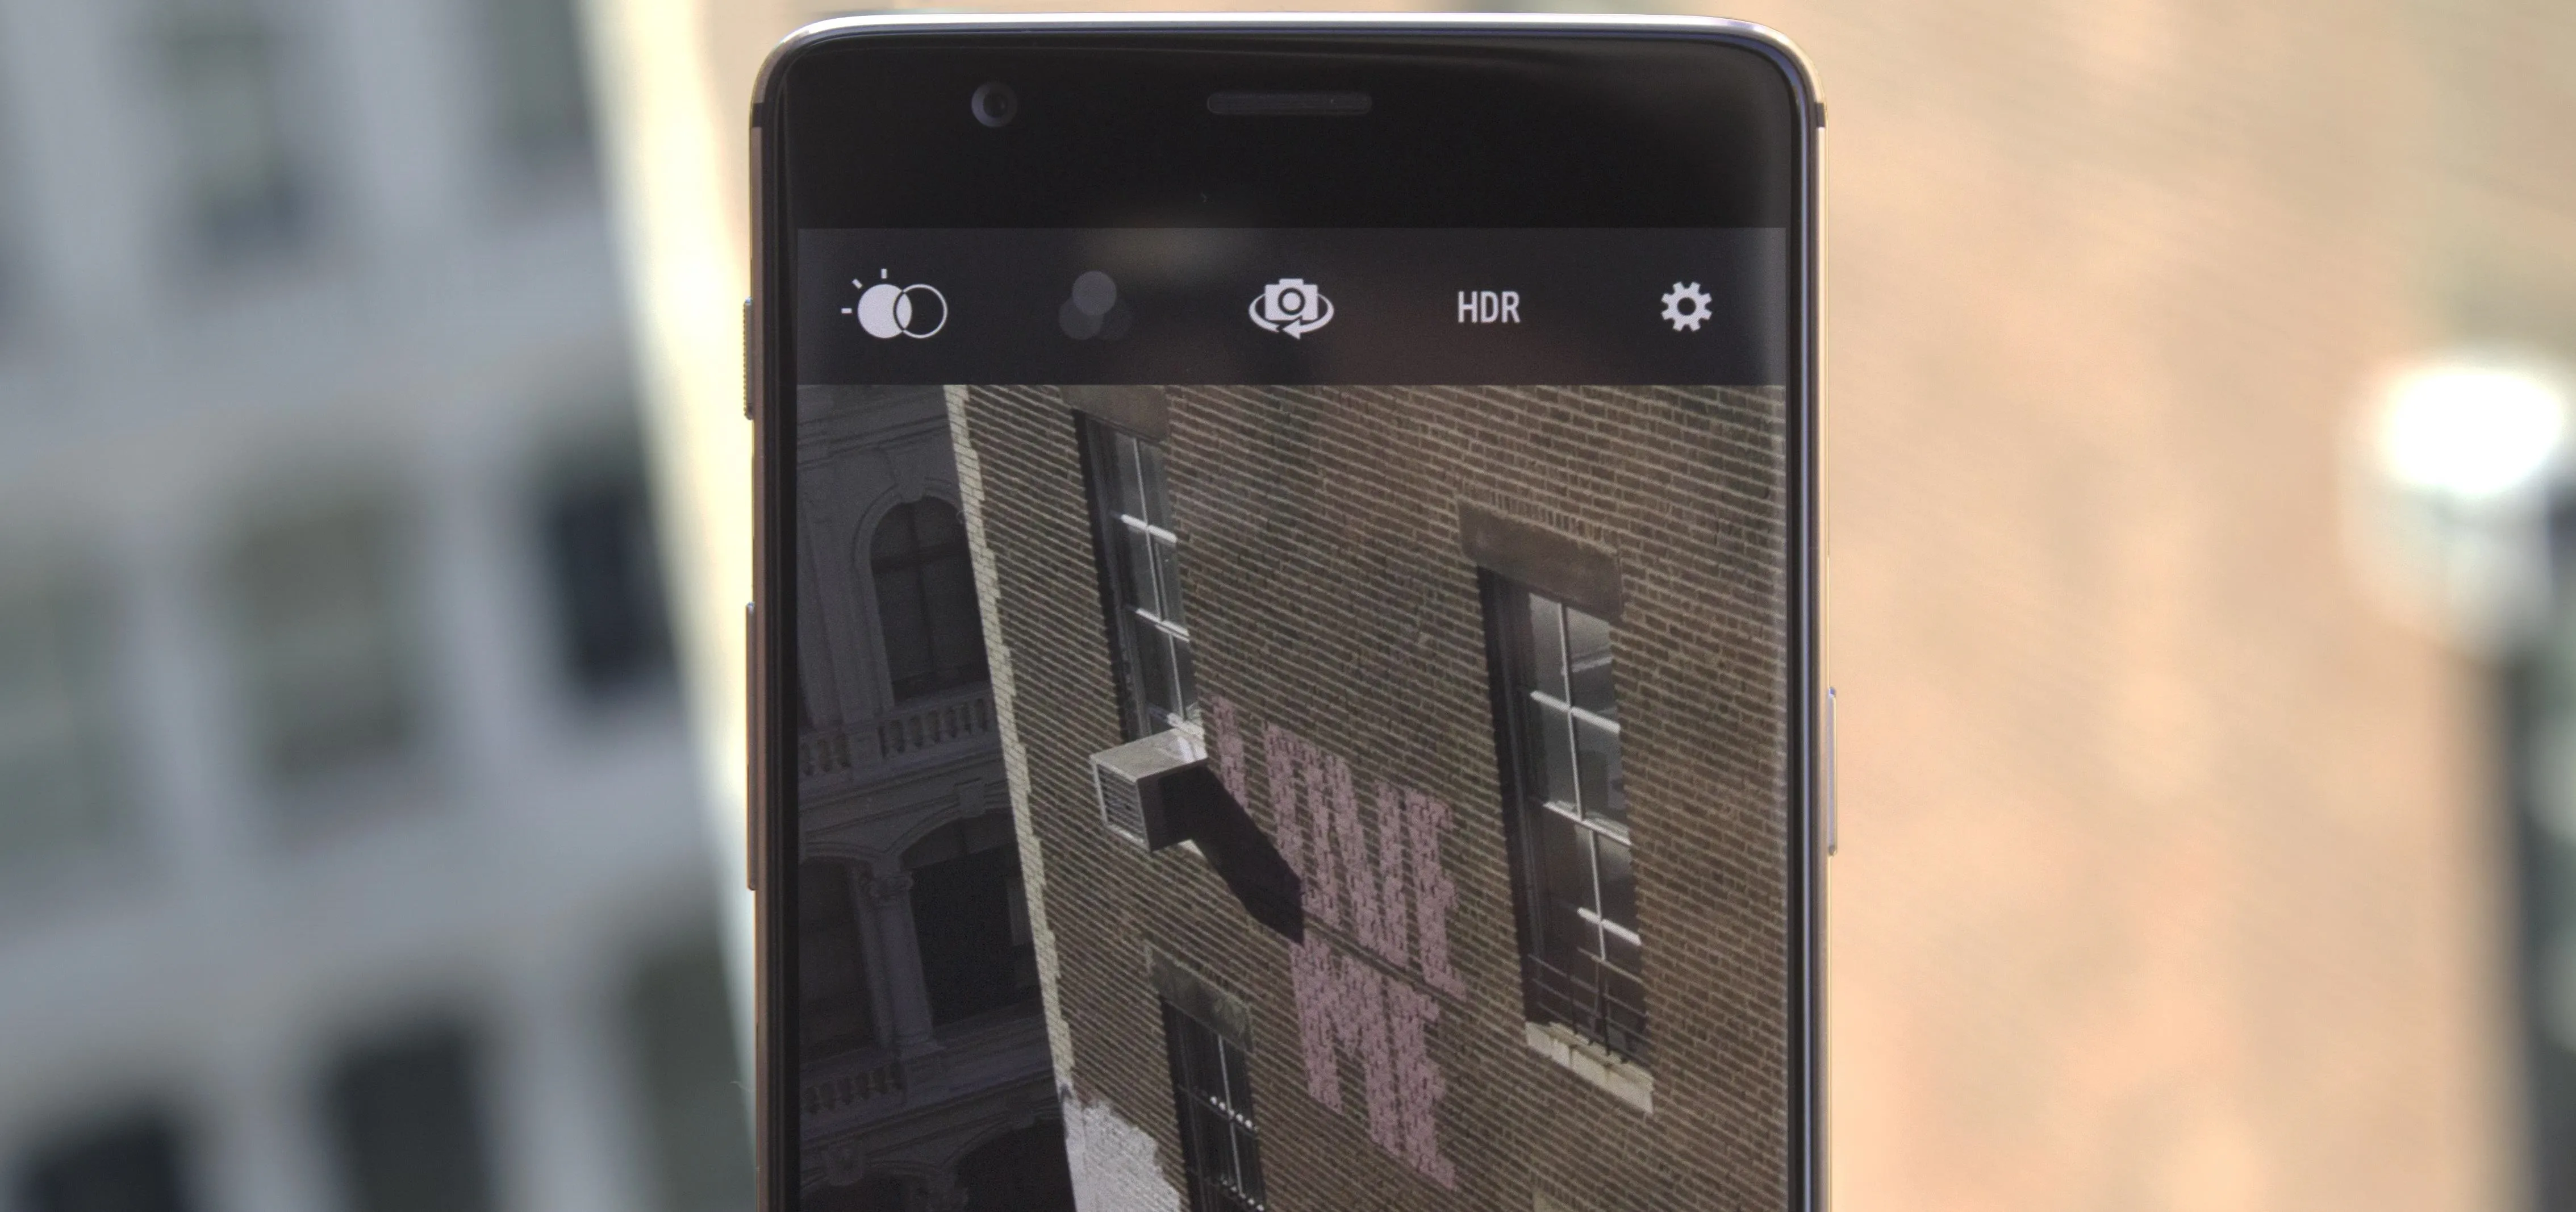
After you're done granting permissions, go ahead and try out the Snapdragon Camera. Be sure to look at the welcome screen to learn where everything is. Take a shot or two and you'll immediately notice that the picture quality is better overall and a lot less grainy. Not only that, the Snapdragon camera takes shots with a better aspect ratio and captures a lot more detail with vividly true colors.
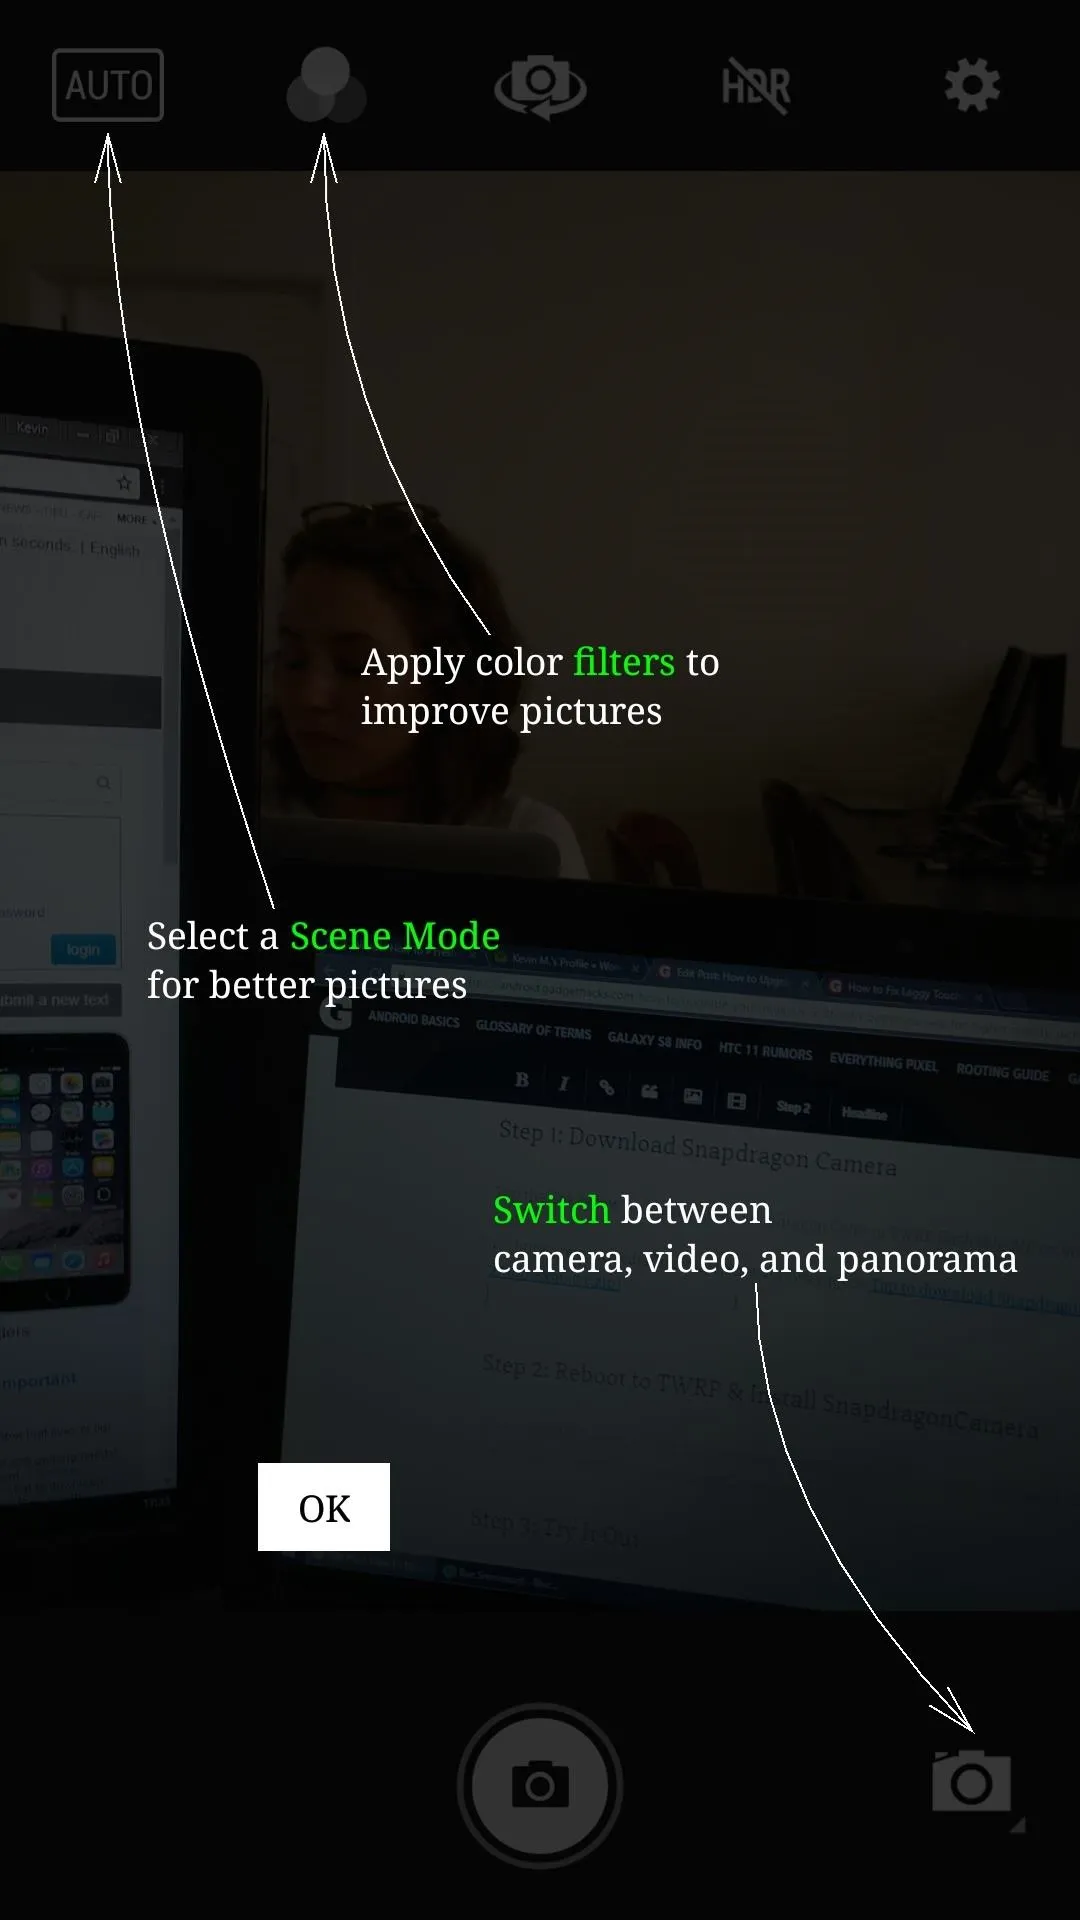
Welcome screen (1); shot taken with stock camera (2); shot taken with Snapdragon Camera (3).

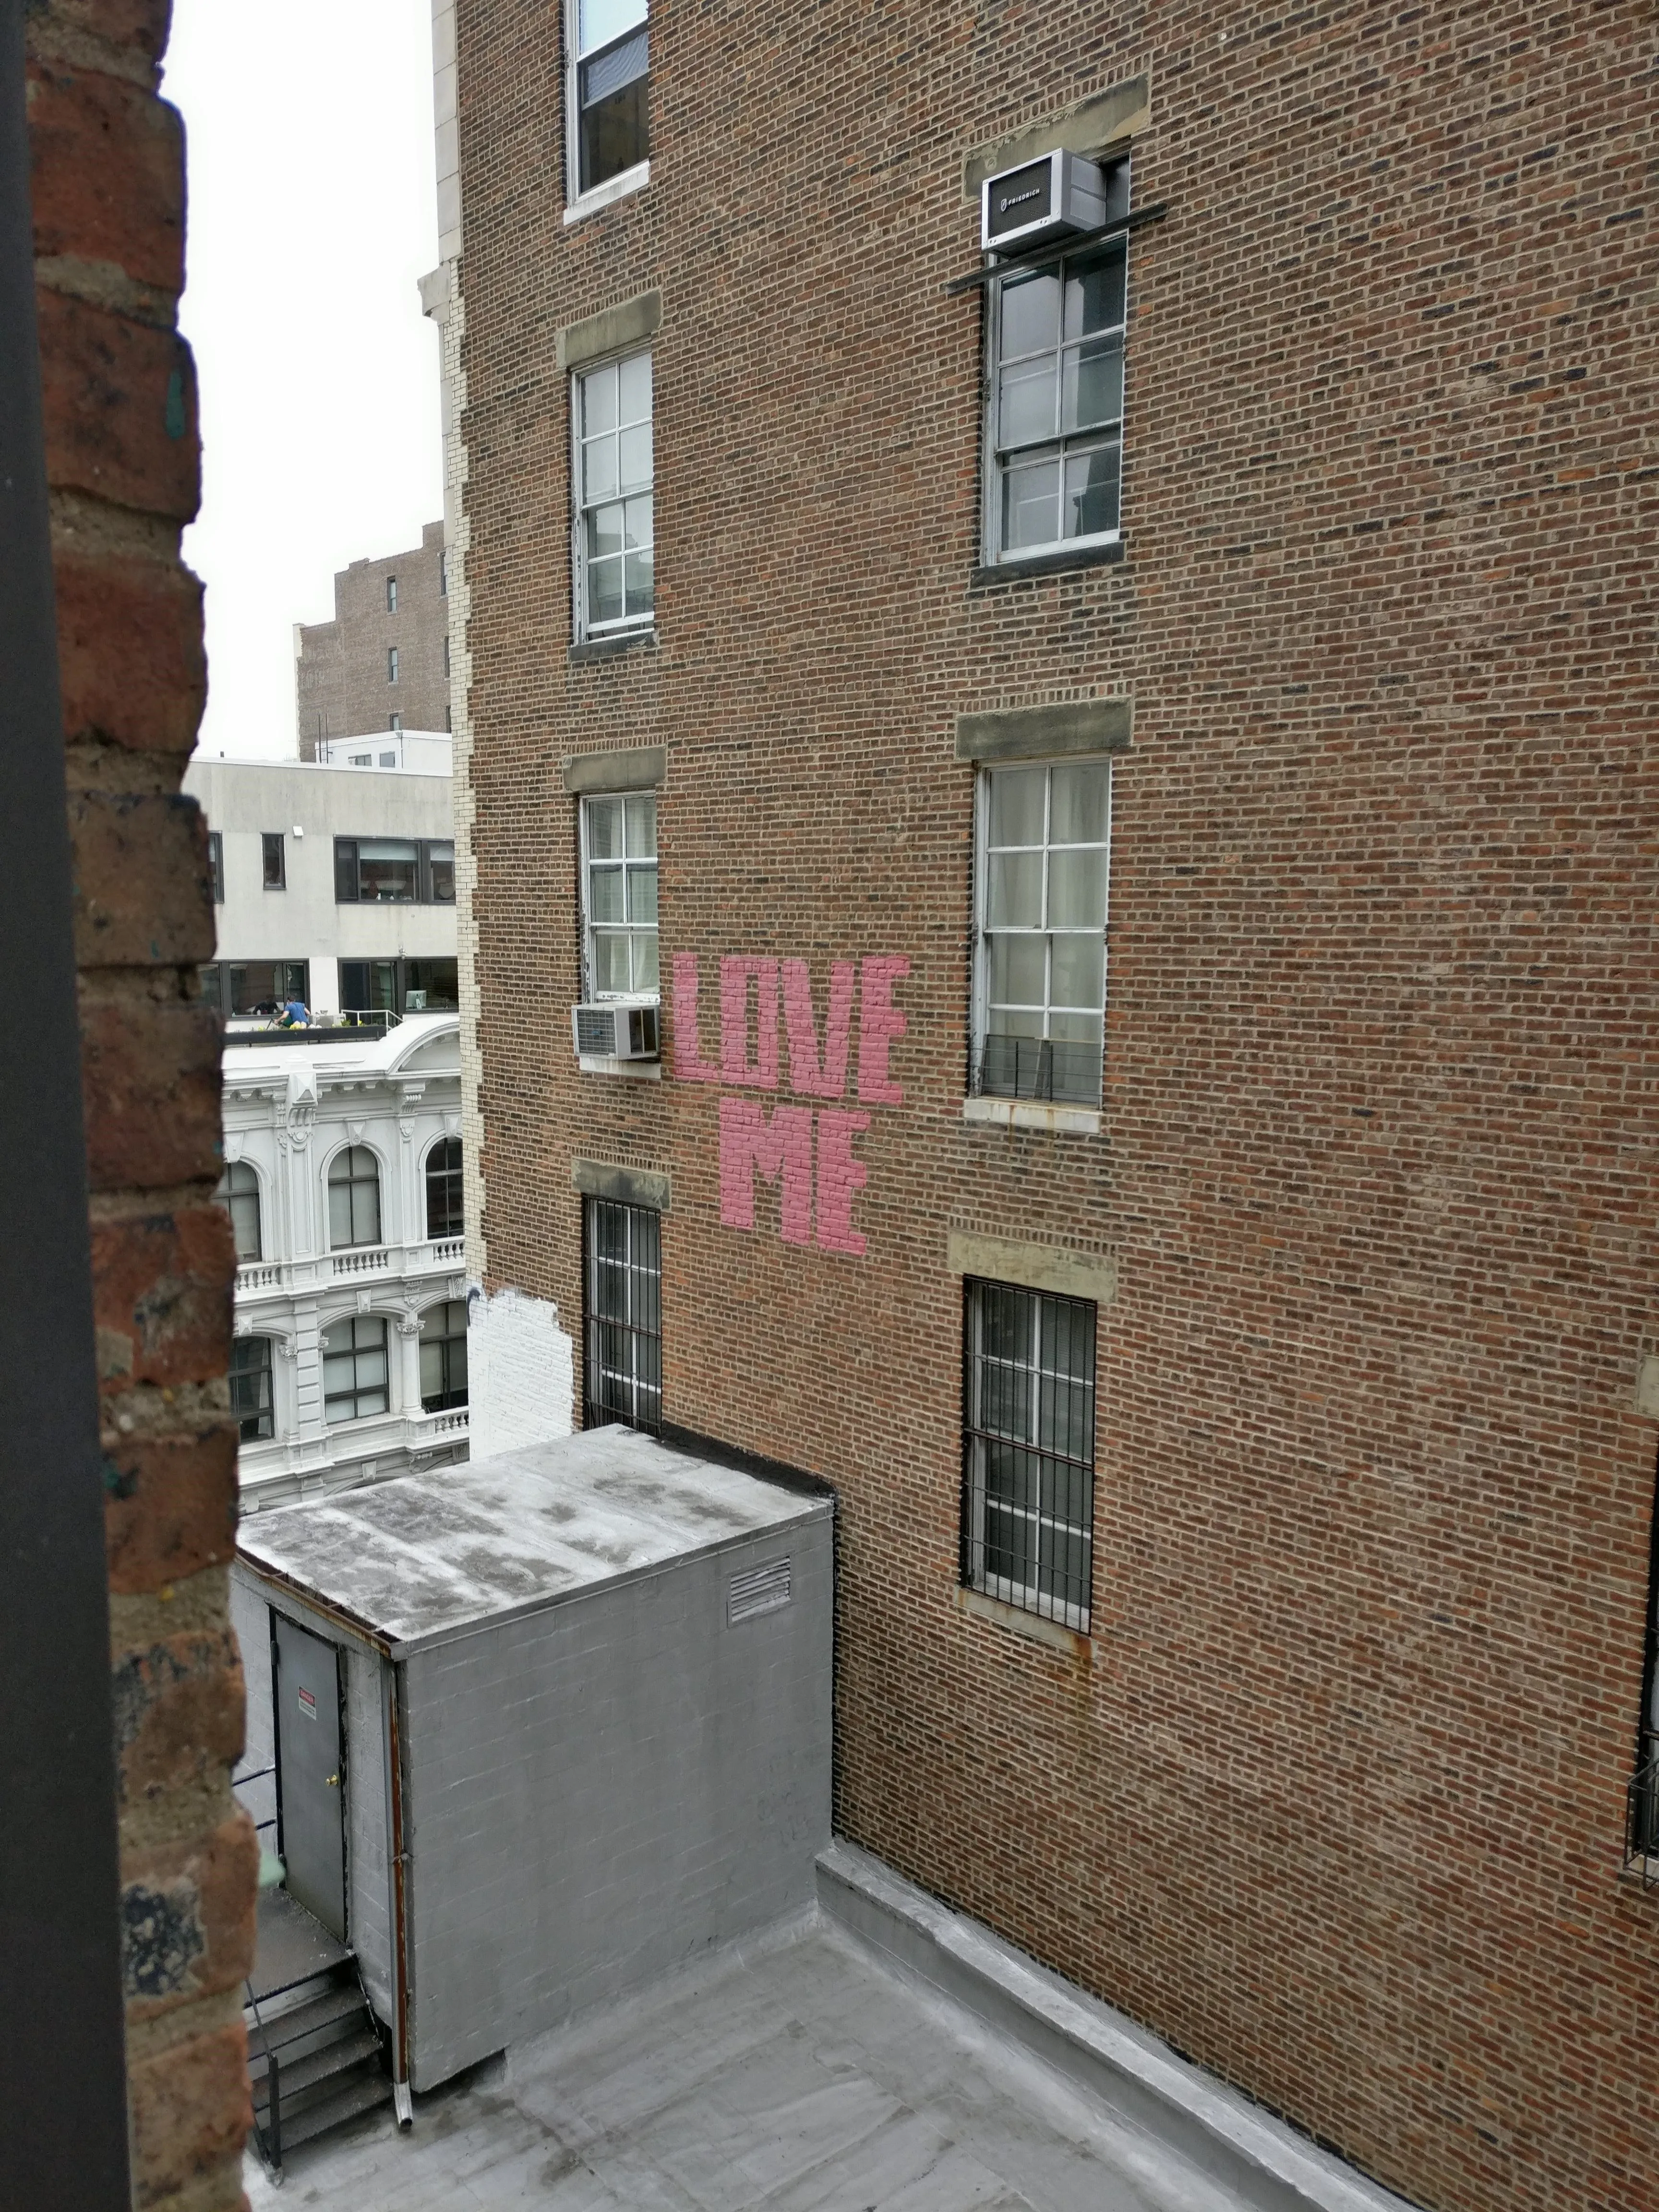
Welcome screen (1); shot taken with stock camera (2); shot taken with Snapdragon Camera (3).
To top it all off, the Snapdragon Camera also has over a dozen finely tuned modes covering all possible moments and situations. There's more than enough filters to make everyone happy, and the Settings menu gives you a decent amount of options to play around with (a lot more than on the Oxygen OS Camera).
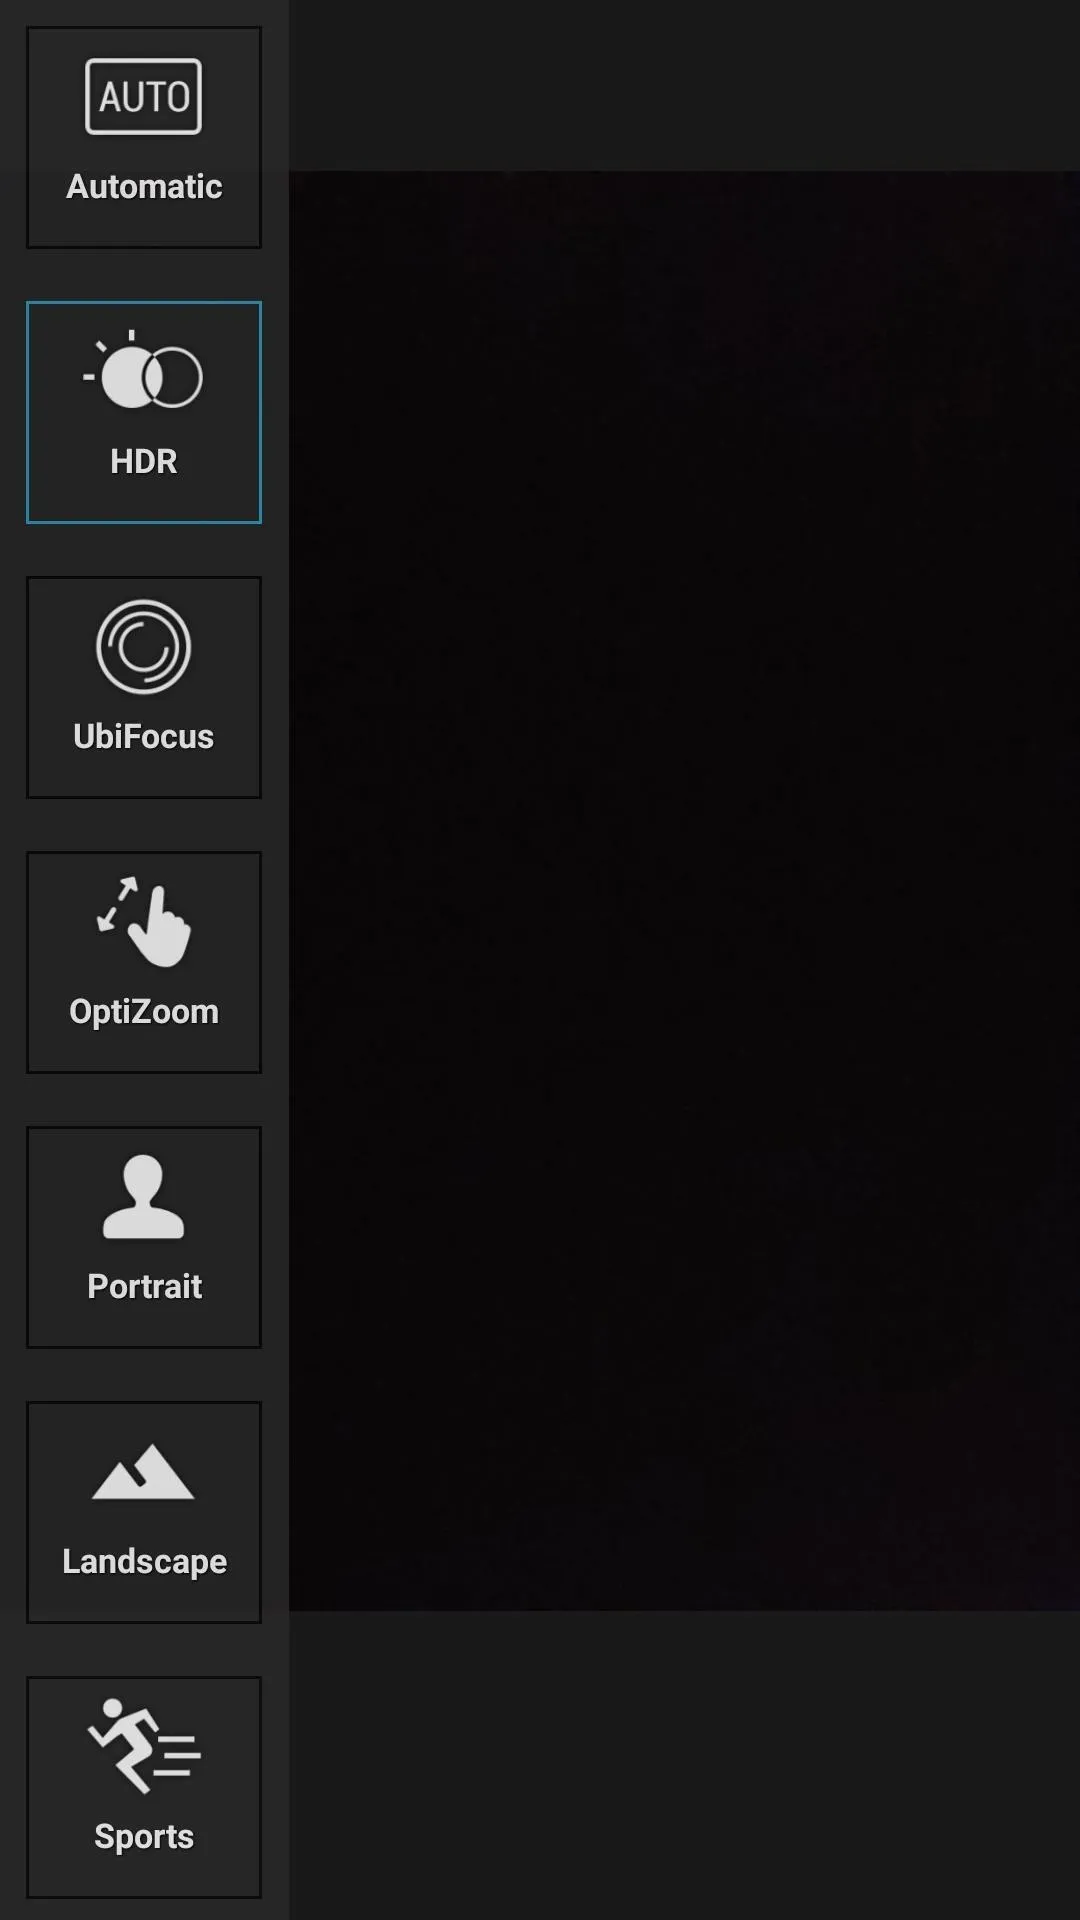
Some of the modes (1), settings (2), and filters (3) available in Snapdragon Camera.
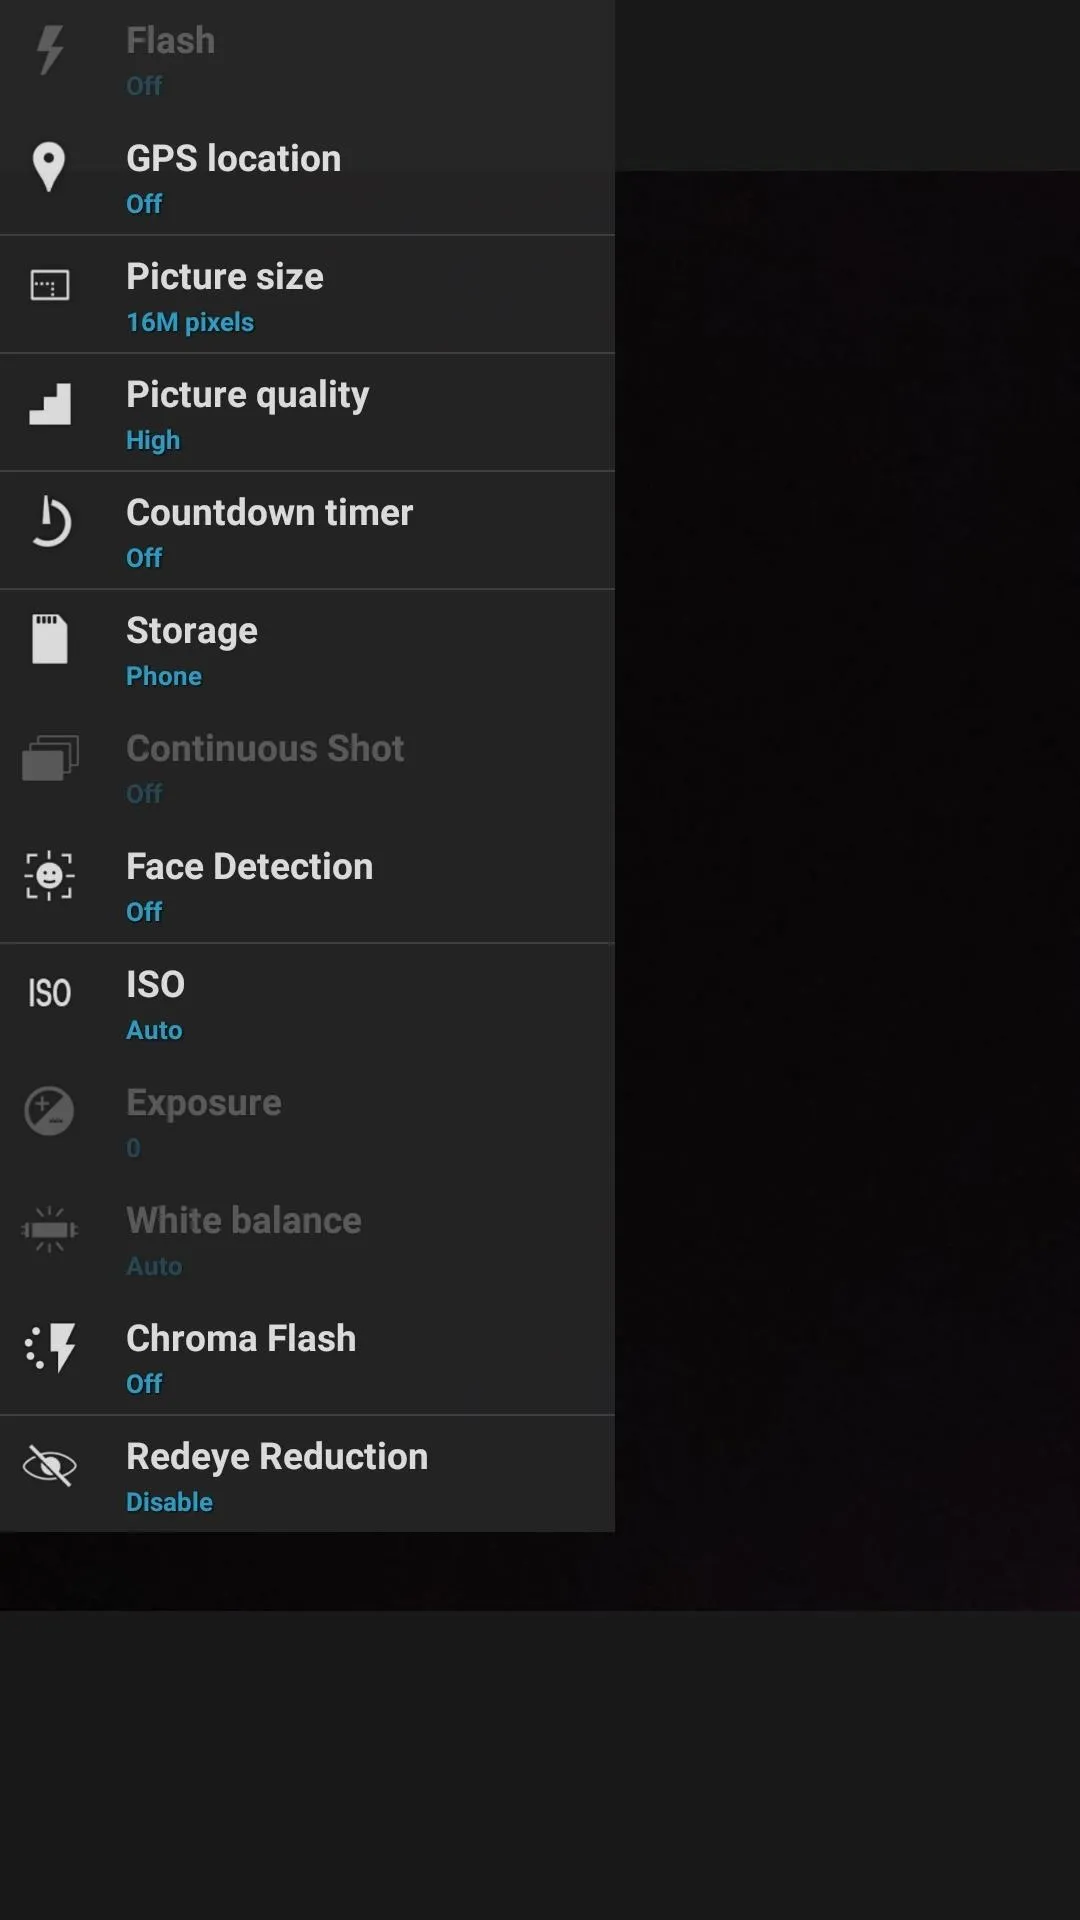
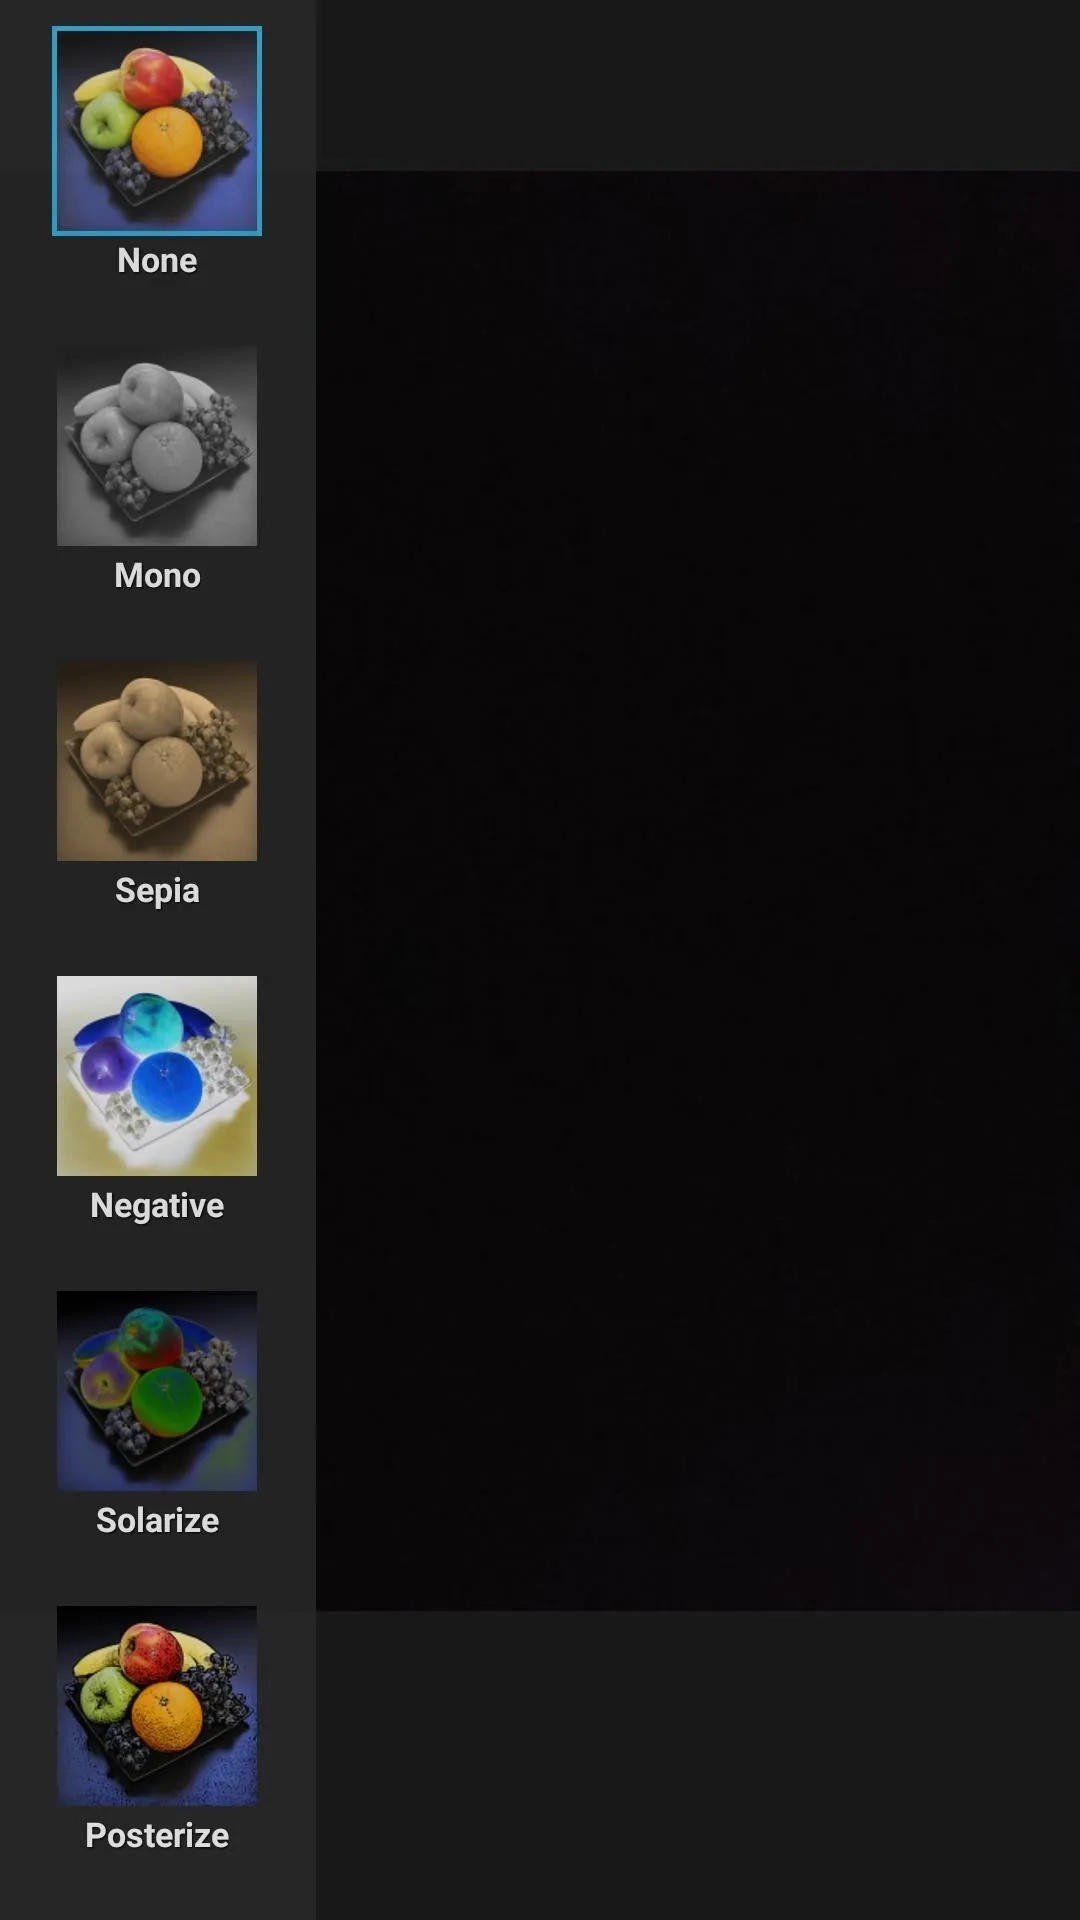
Some of the modes (1), settings (2), and filters (3) available in Snapdragon Camera.
How are you liking your new camera app? Share your thoughts in the comment section below.
- Follow Gadget Hacks on Facebook, Twitter, Google+, and YouTube
- Follow WonderHowTo on Facebook, Twitter, Pinterest, and Google+
Cover image and screenshots by Kevin M./Gadget Hacks


Comments
Be the first, drop a comment!