


Perhaps you've thought about rooting your OnePlus 5, but thought again when you heard SafetyNet would prevent you from using apps like Google Pay, Pokémon GO, or Netflix. Those are valid struggles when you root using traditional methods. There are no such worries when using Magisk, as it masks the fact that your device has been modified.
That means you can have your financial apps and use them too. You can play your favorite games. Magisk is a type of "systemless" root that goes straight to the boot partition to make changes, instead of modifying system files. Since Magisk does not modify system files directly, it can go undetected by apps incompatible with root.
Rooting has always been a cat and mouse game. For every modder who finds a way to get around security to gain root access, another developer produces a patch to prevent future access. Another good thing about Magisk is that it is constantly being updated to keep your root intact and your apps in working order. You must be using a device with a bootloader that is capable of being unlocked to flash Magisk, but that's rather easy with the OnePlus 5.
Before You Begin
First, you'll want to create a full backup of your OnePlus 5, as unlocking your bootloader will wipe your data. If you have any personal data you want to save (and who doesn't?), there are several apps that can assist you with the process of backing up data to the cloud or a separate storage device.
The trouble is, most of these apps require root or custom recovery, which you probably don't have yet. So your best options are either hooking your phone up to your PC and copying important files over that way, or using a non-root backup solution like Helium.
You'll also want to ensure that your OnePlus 5 is charged to at least 60%. If your battery dies during the process, you can potentially brick your device.
Grab your USB cable to connect to your phone to your PC or Mac. The cable that came out of the box with your OnePlus 5 often works best.
Unlock Your Bootloader & Install TWRP
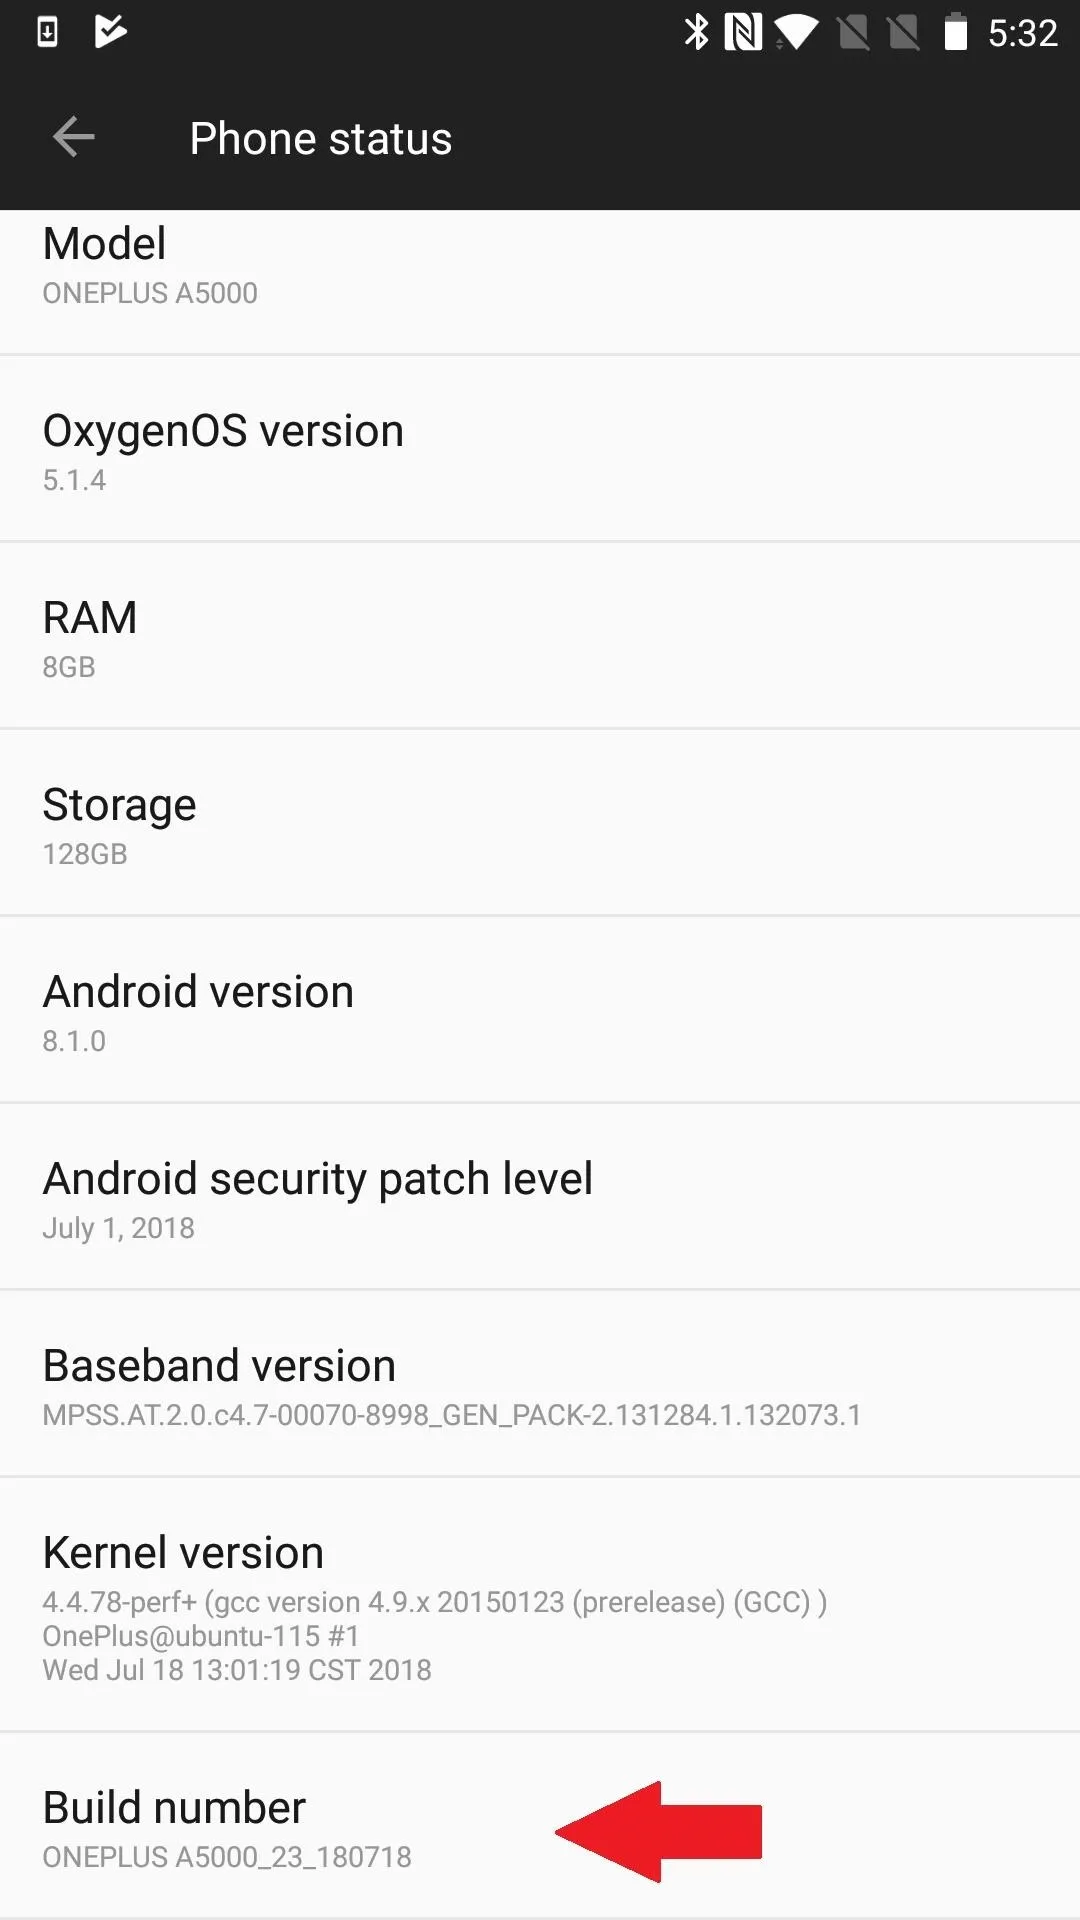
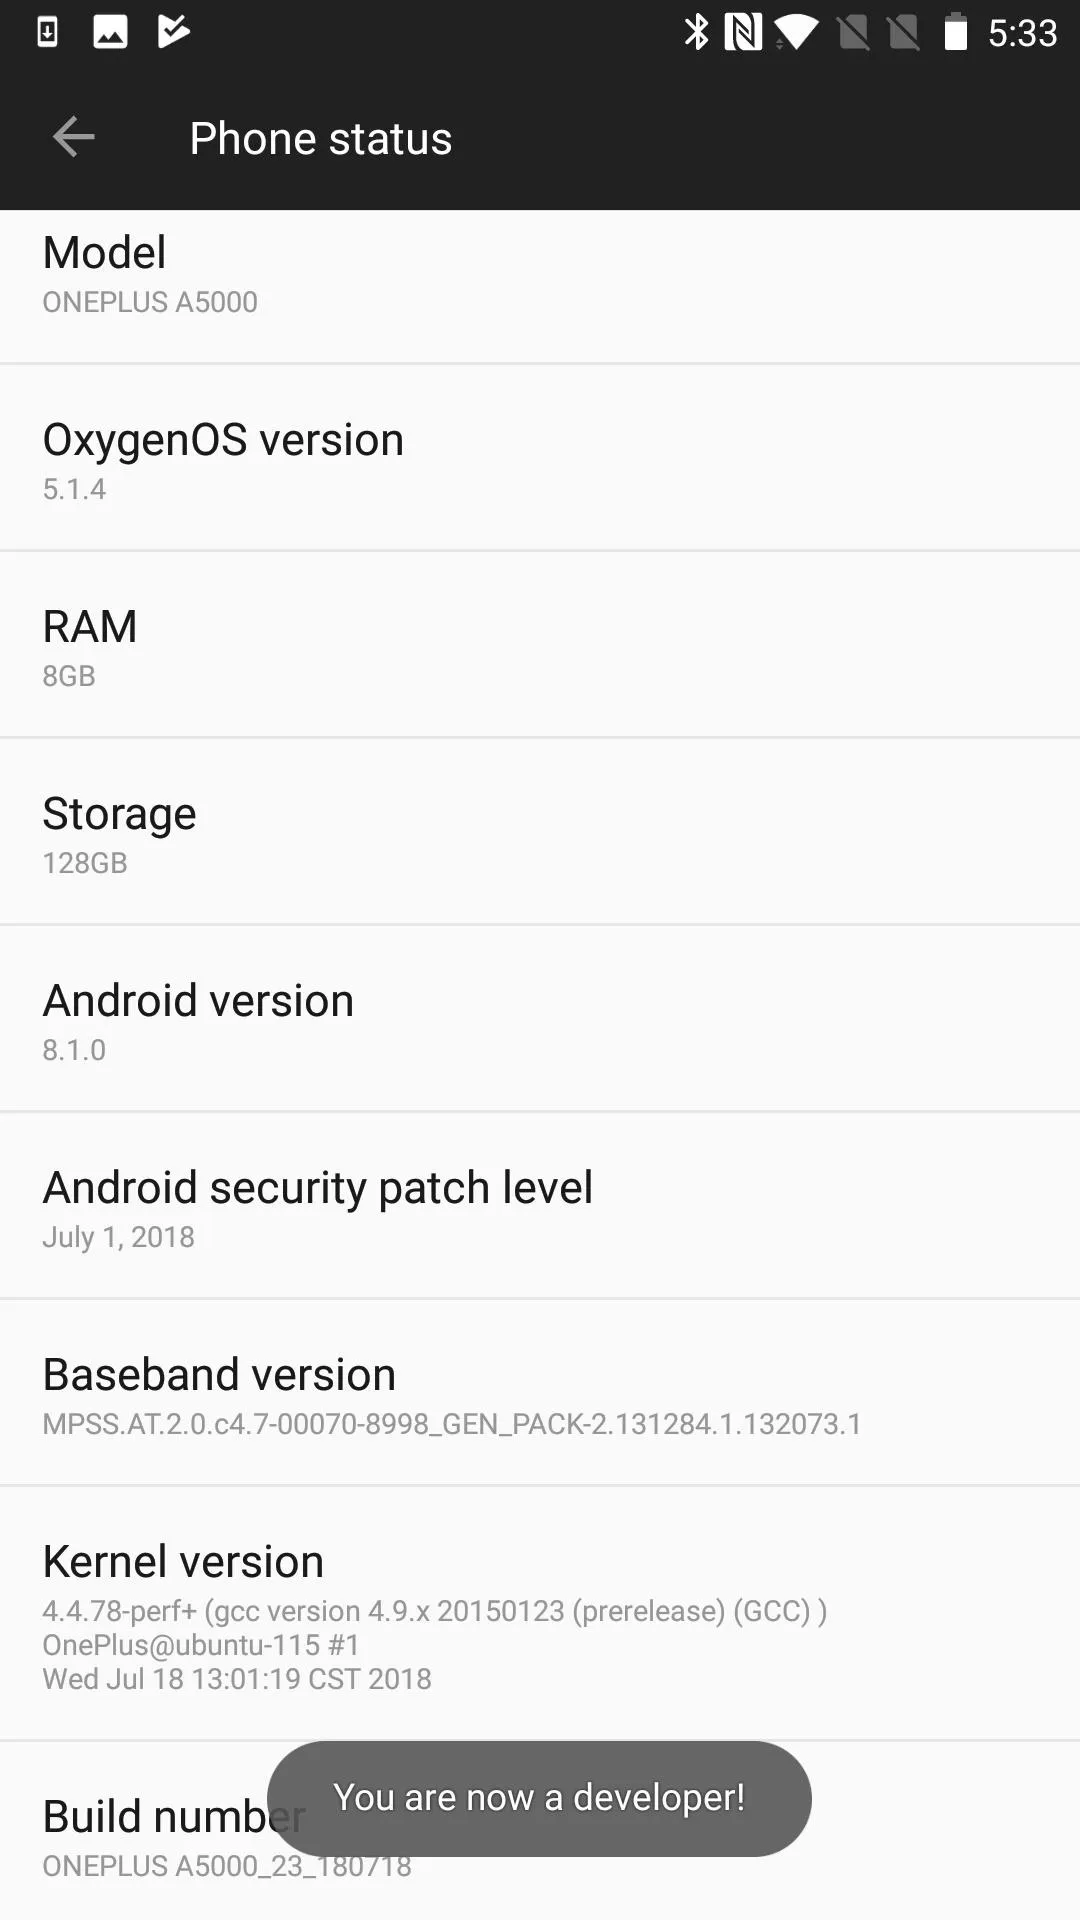
If you haven't already, you'll want to start by making sure your Developer Options are enabled. To accomplish this, go to Settings –> About Phone. Tap on your Build Version seven times until it says you are a developer. From there, go to Settings –> Developer Options and make sure the "OEM Unlocking" setting is turned on.
Next, you'll need to unlock your phone's bootloader — this is where you'll lose your existing data. Steps 1 and 2 in our guide to unlocking the bootloader on OnePlus 5 and installing TWRP does all the heavy lifting when it comes to explaining how to unlock the bootloader in a matter of minutes.
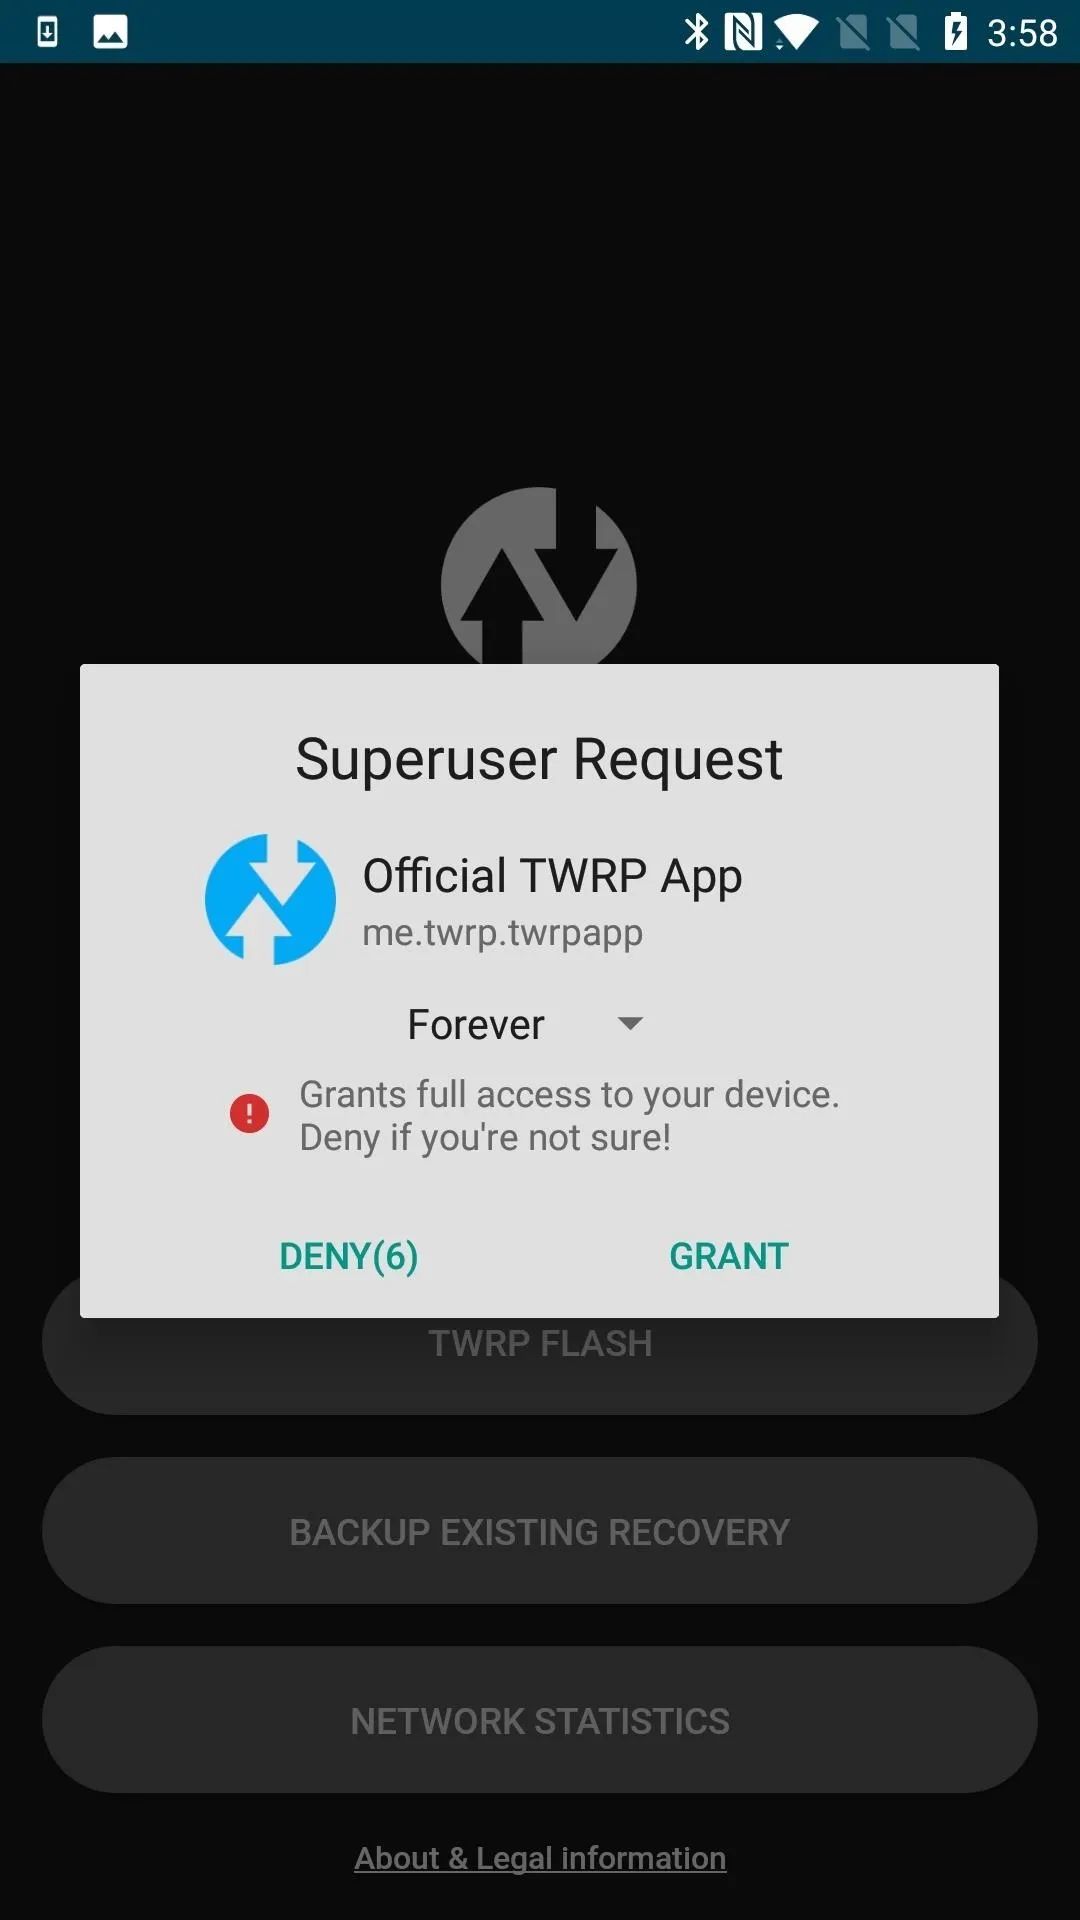
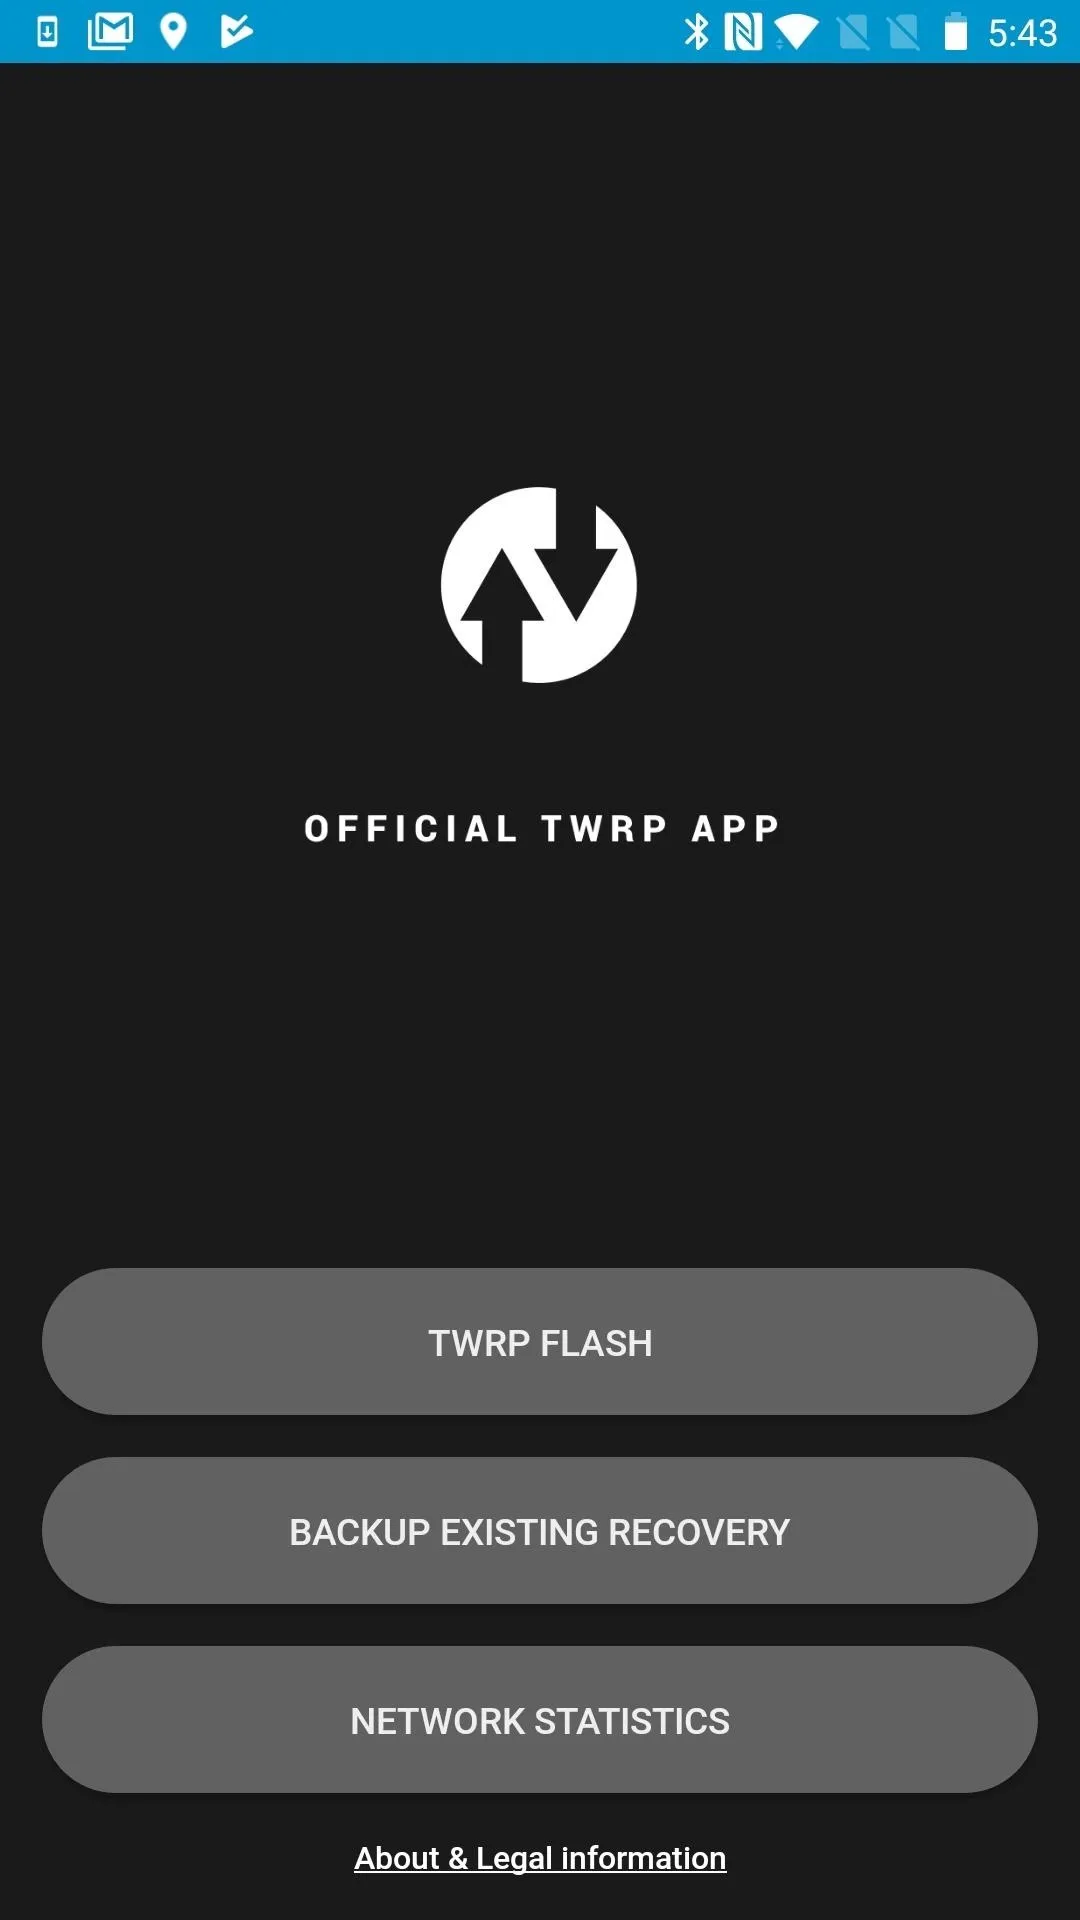
Now you'll need TWRP. Team Win Recovery Project is a custom recovery tool that helps make rooting and the installation of custom ROMs possible. TWRP also provides a simple and intuitive interface to make the process a little easier. The ease and functionality that come with using TWRP can also help you perform full backups, wipe your device, or even install a custom kernel if you desire. Before you reap the benefits, though, TWRP must be flashed as described in Steps 3 through 5 at the link below.
Install Magisk Manager
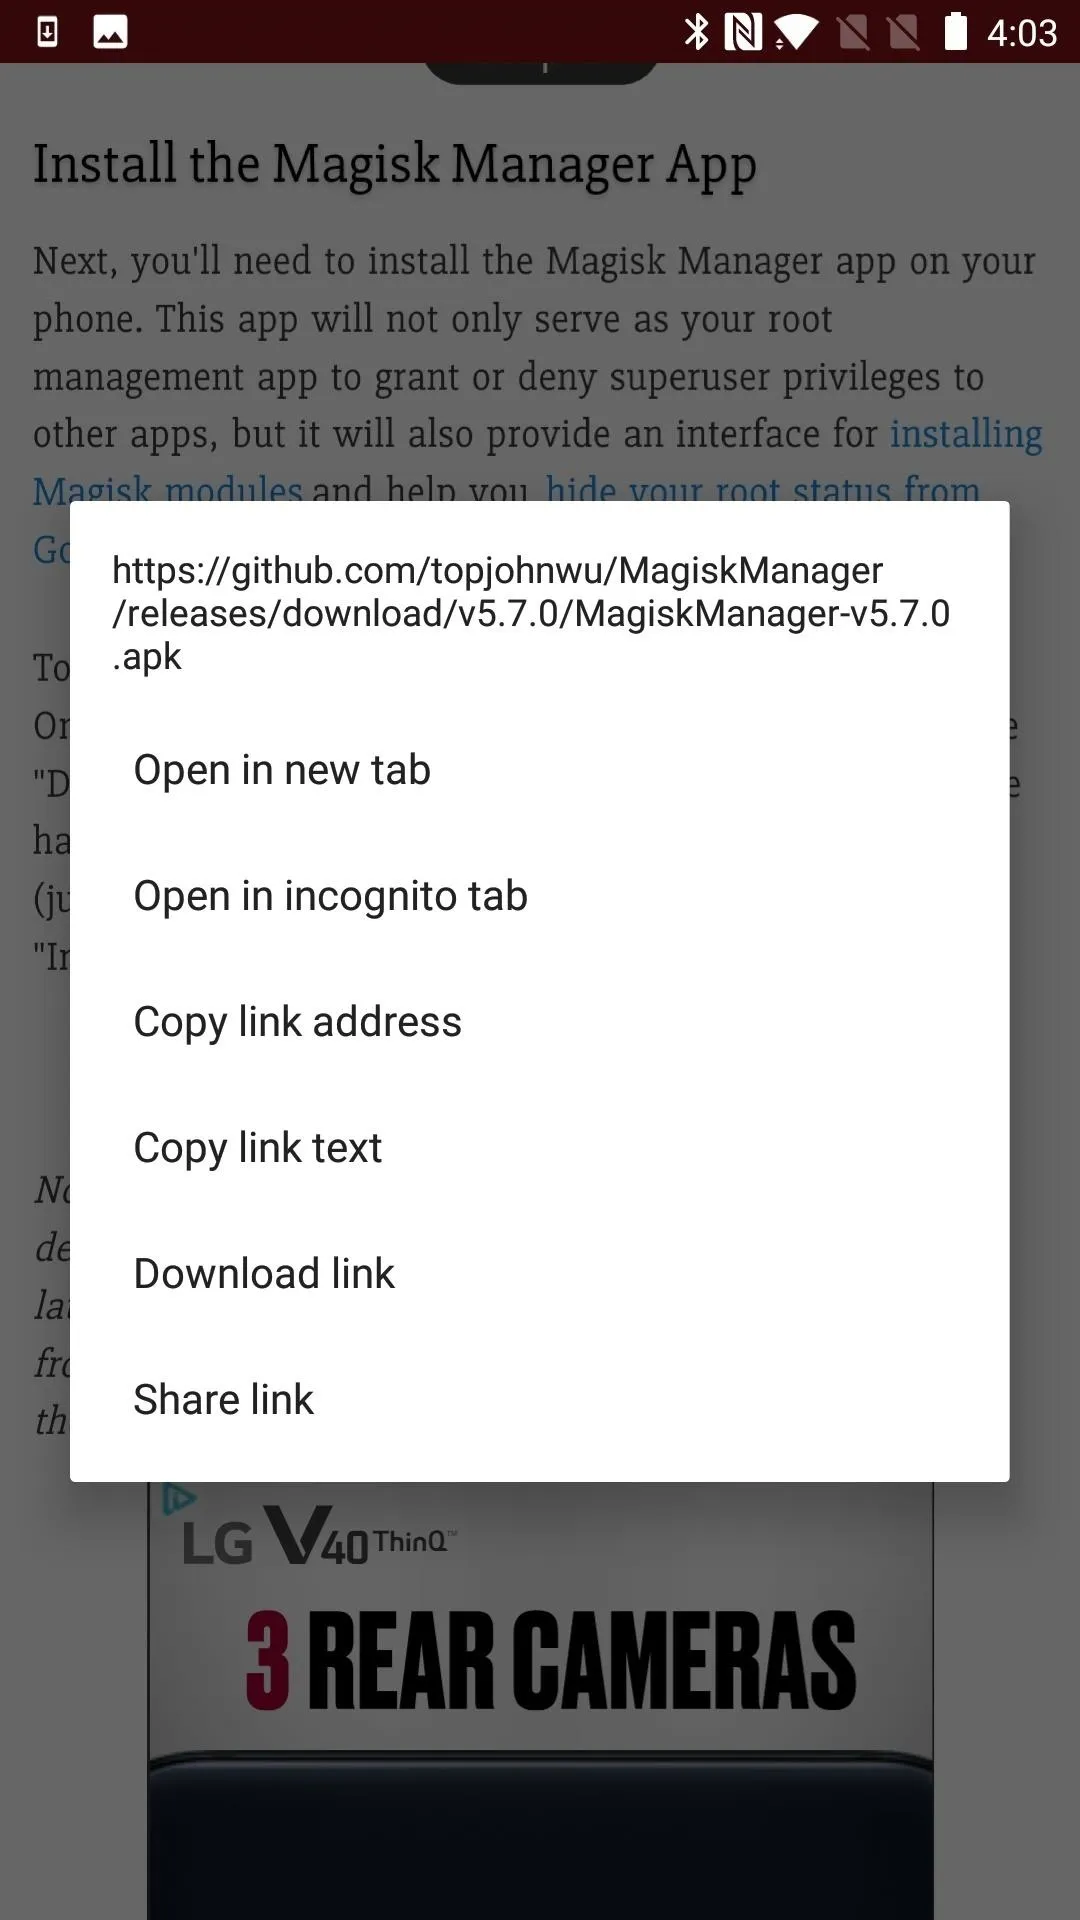
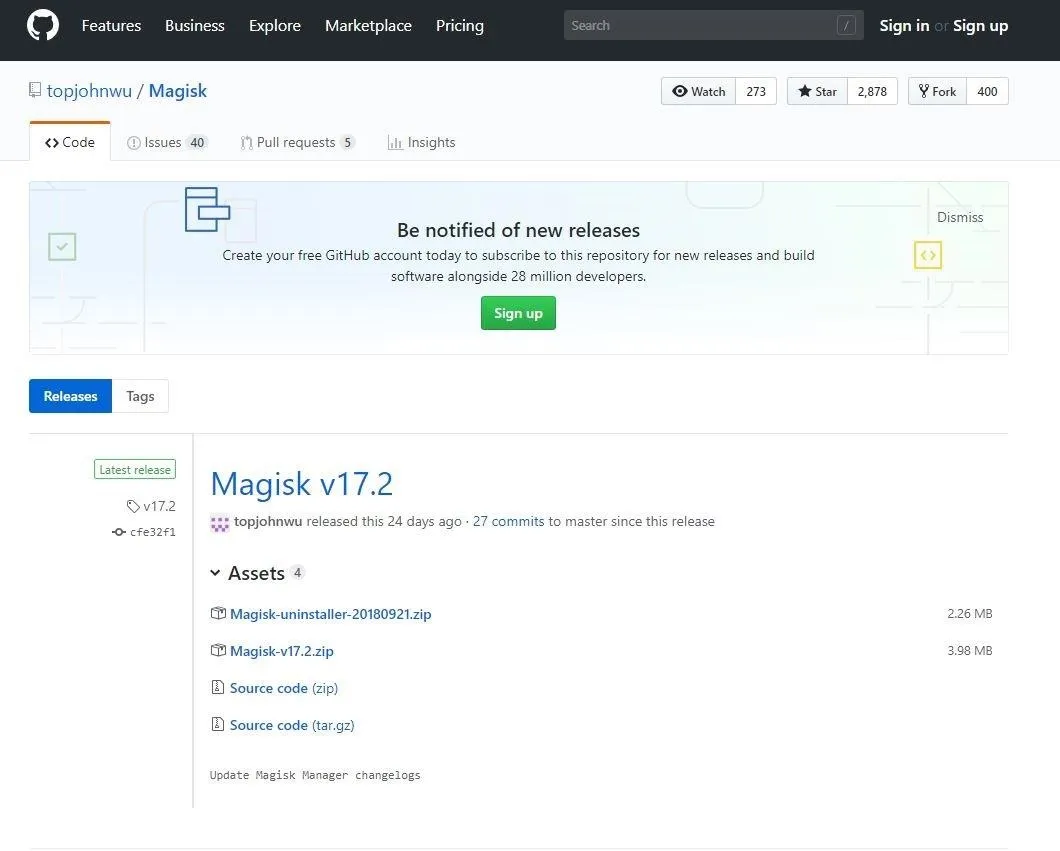
The Magisk Manager app will not only help you install modules and tweak settings when you are done rooting, but it also provides one of the main tools to root with — a current Magisk ZIP file. Download the latest Magisk APK file below directly to your OnePlus 5. You might have to long-press the link and select "Download Link," depending on your browser. The downloaded file will appear in your notification tray.
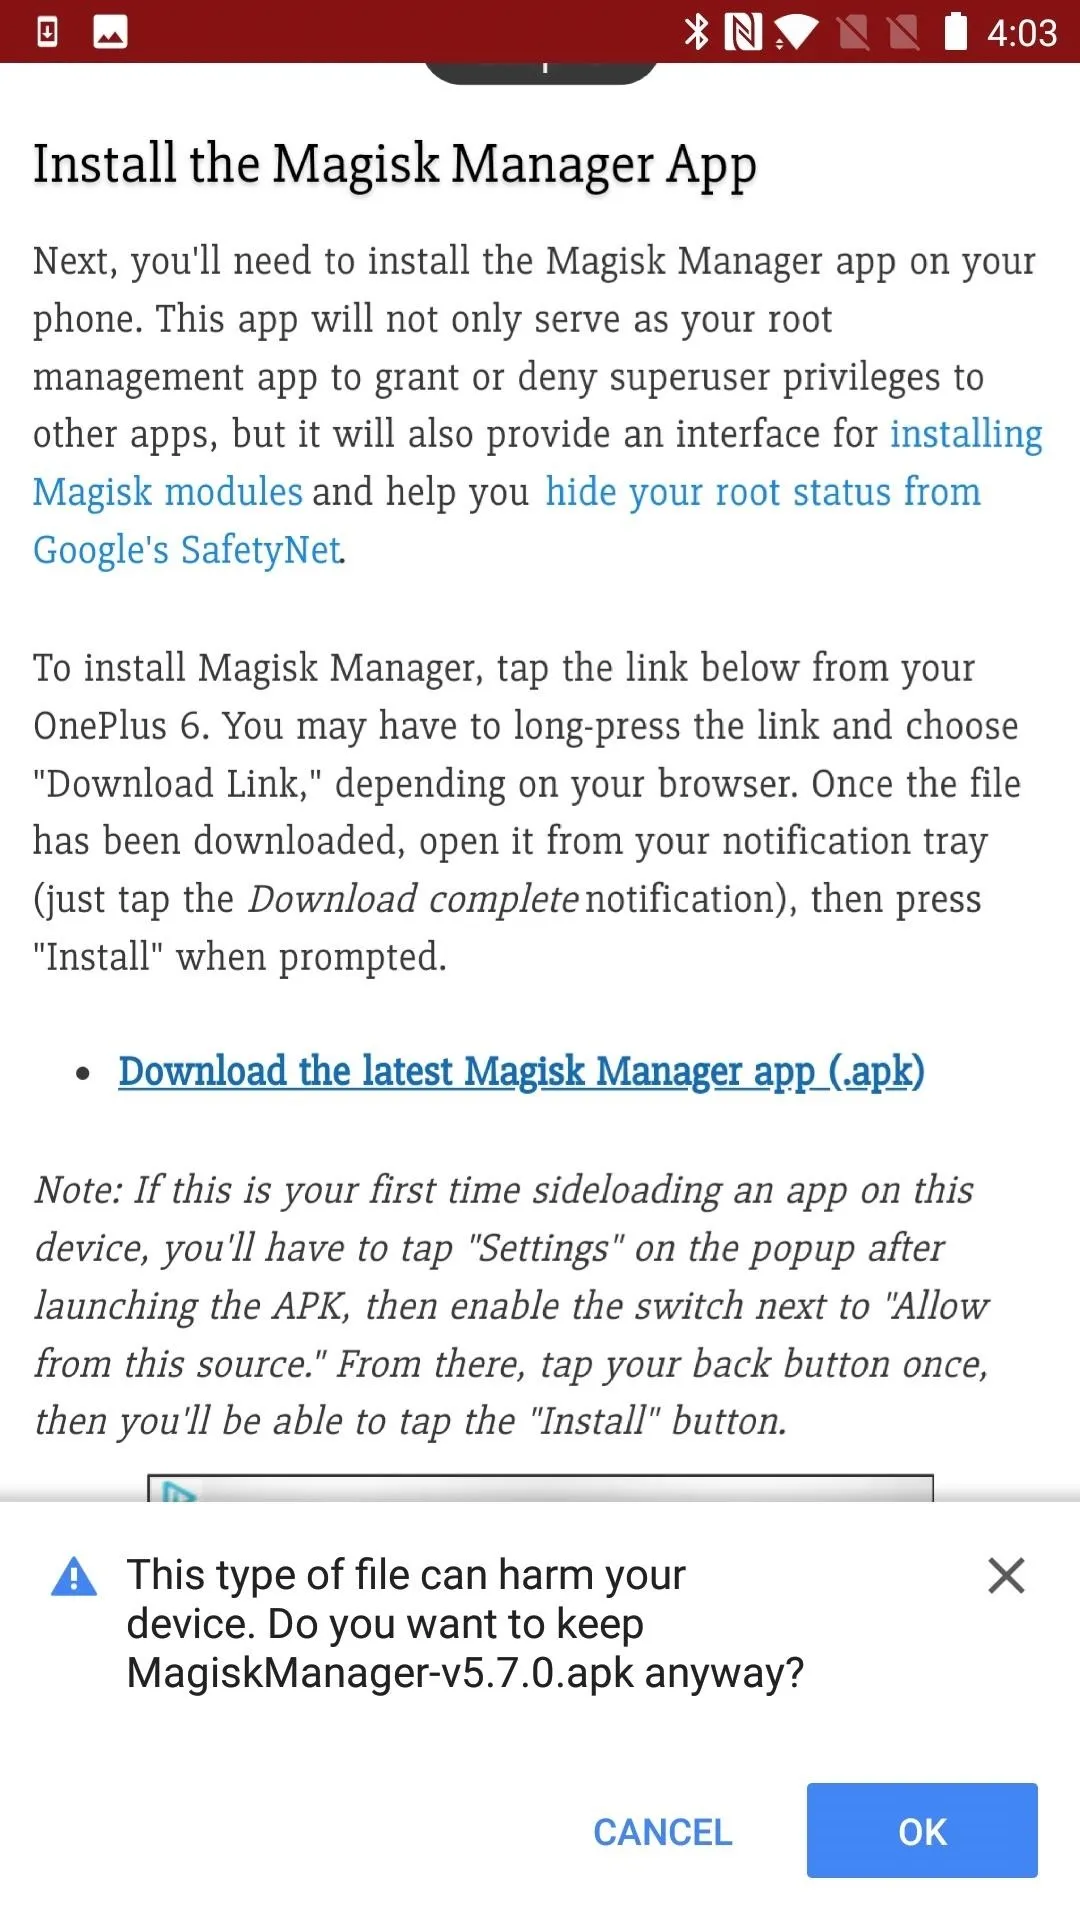
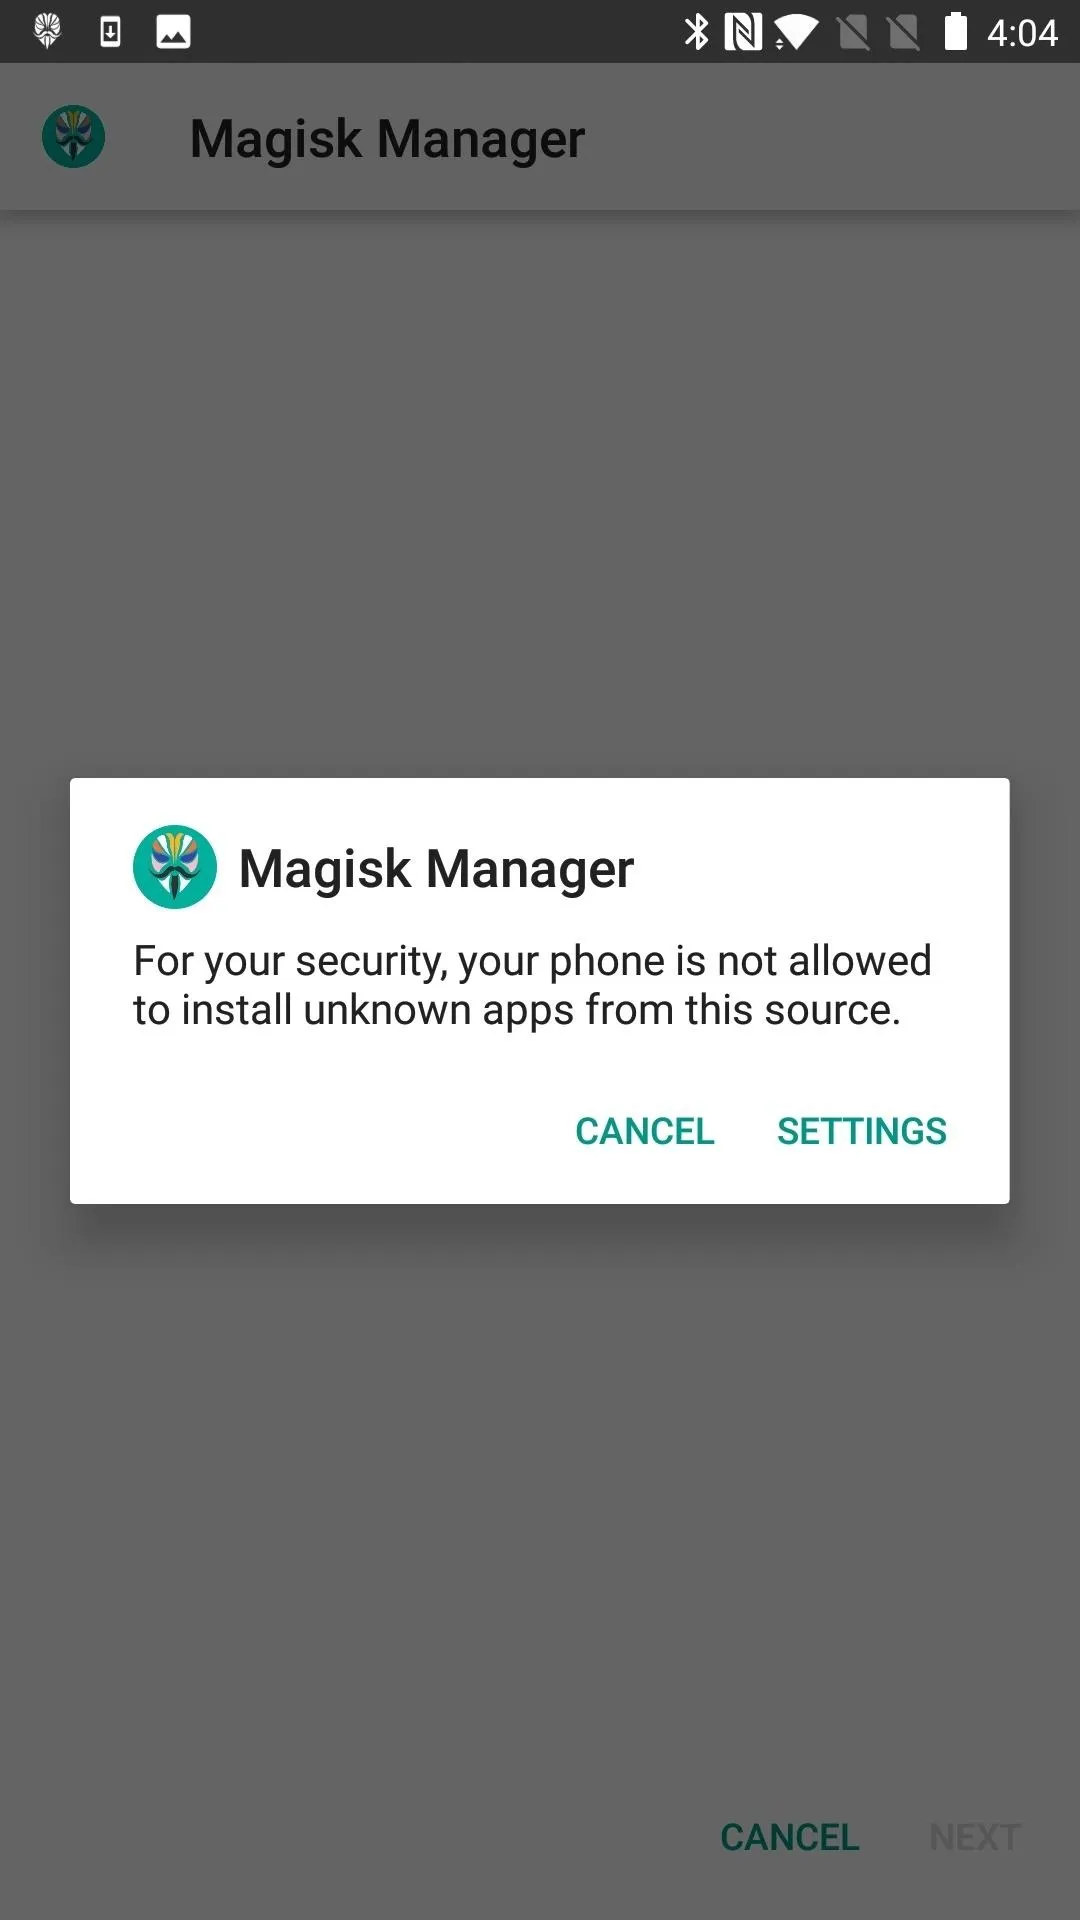
Tap on the APK file, and install when prompted. Enable downloads from unknown sources (press "Allow from this source") if necessary.
Download the Magisk ZIP
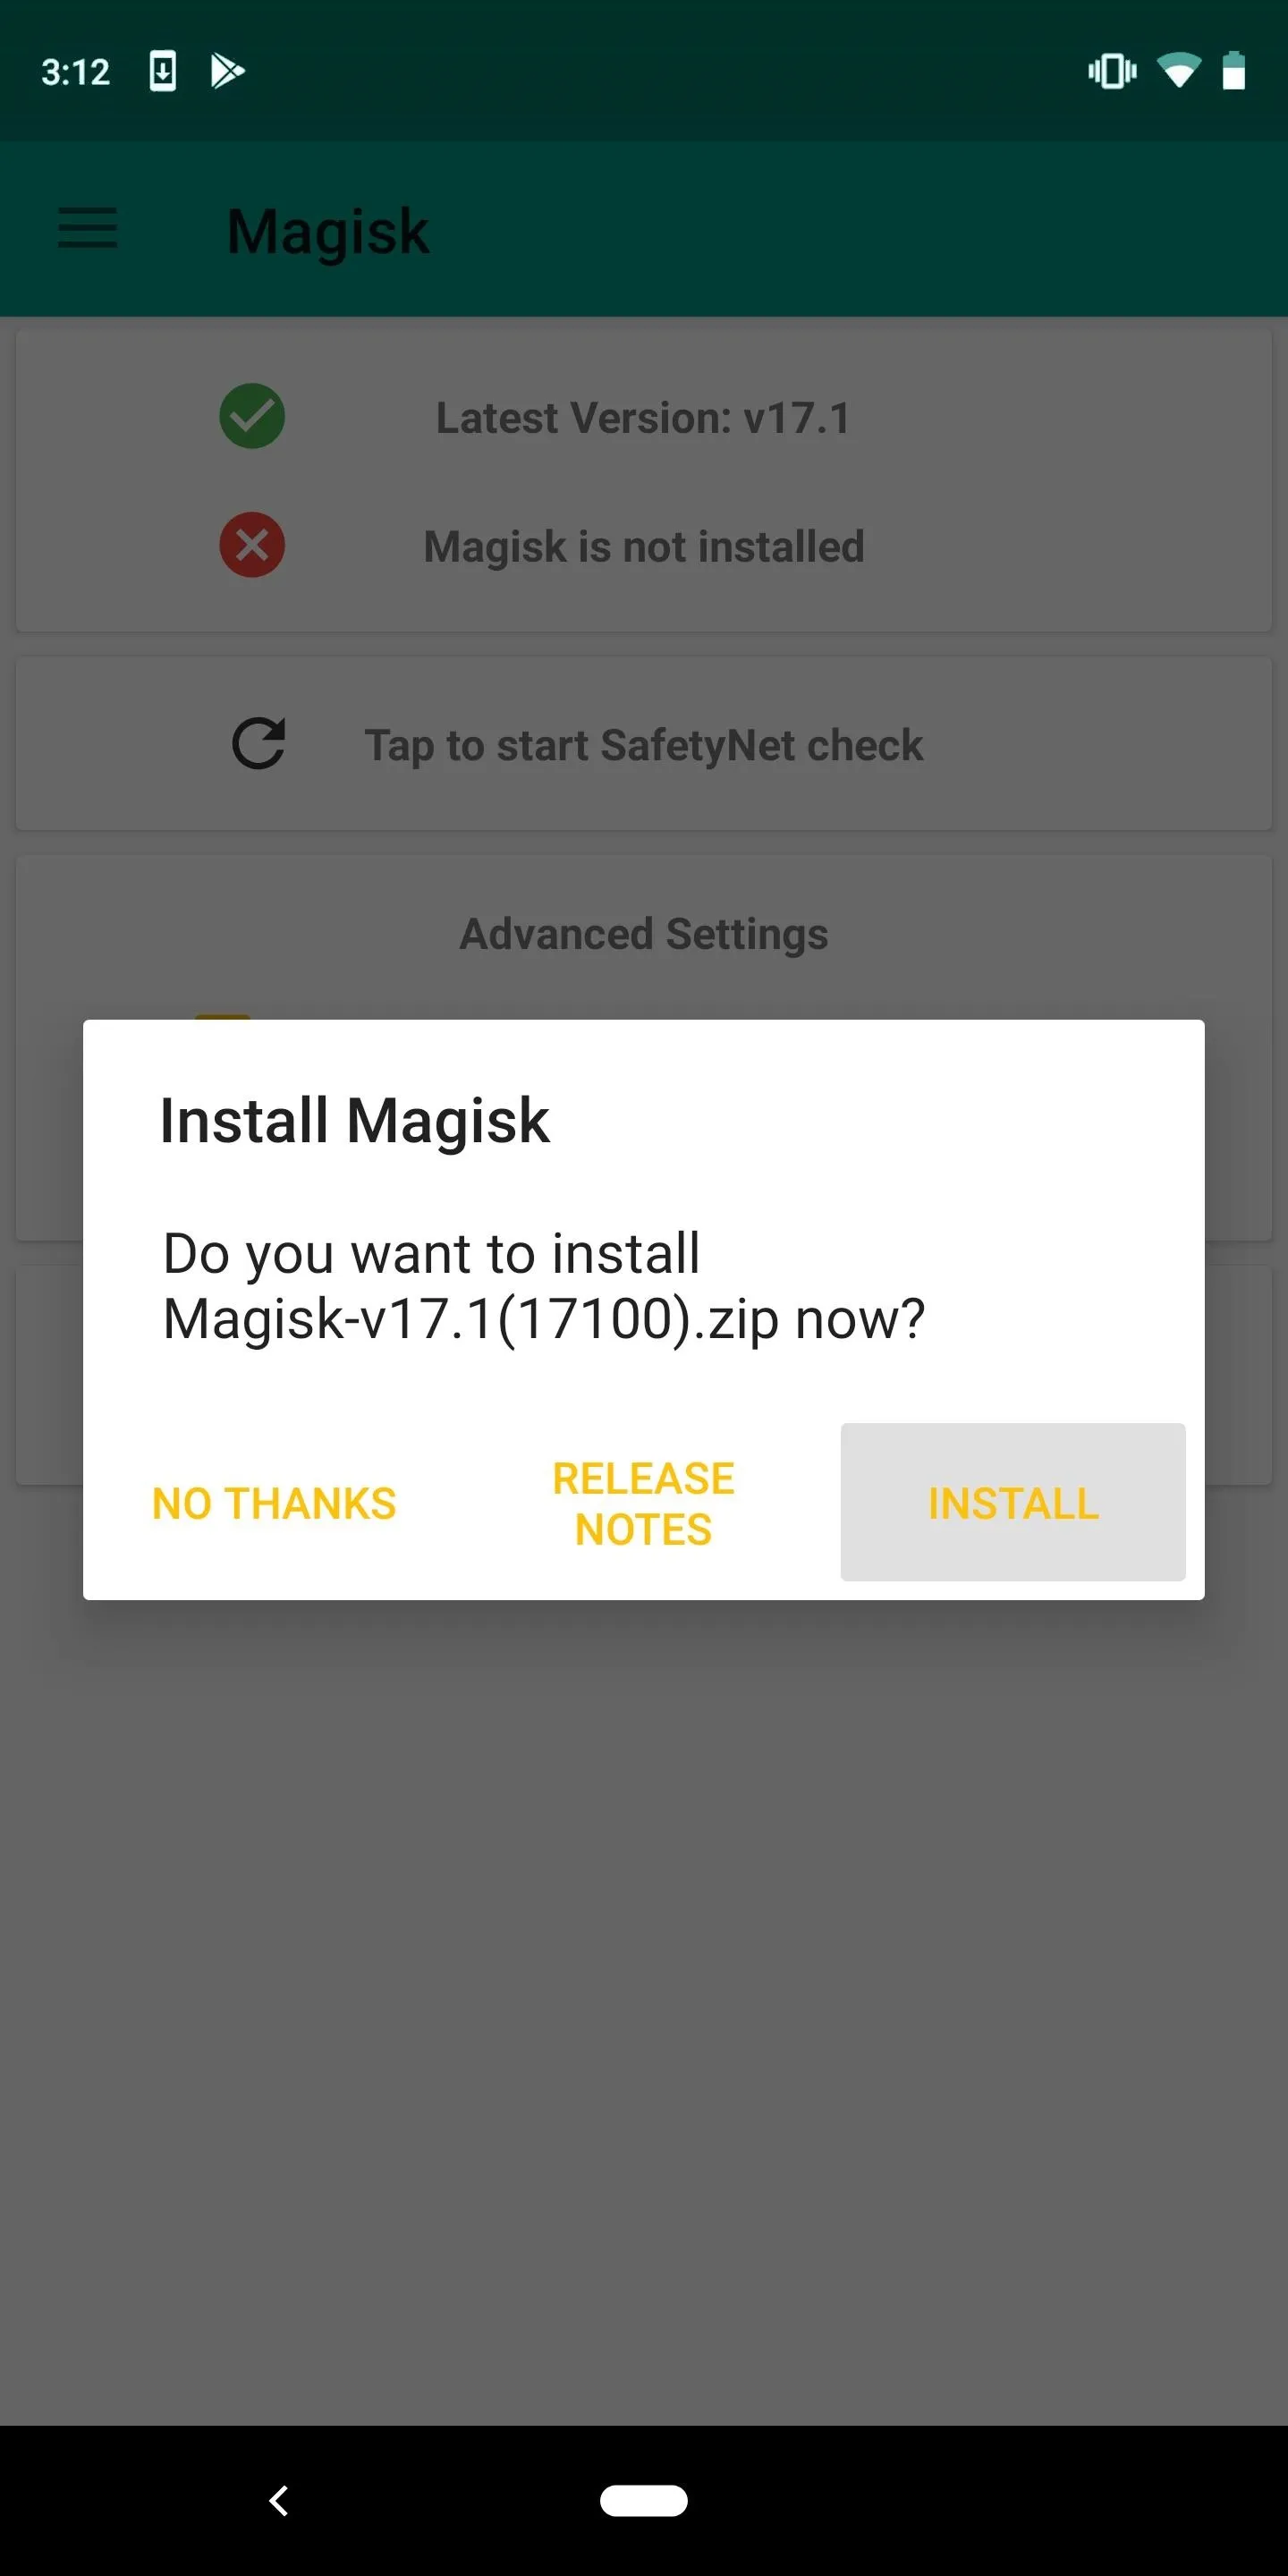
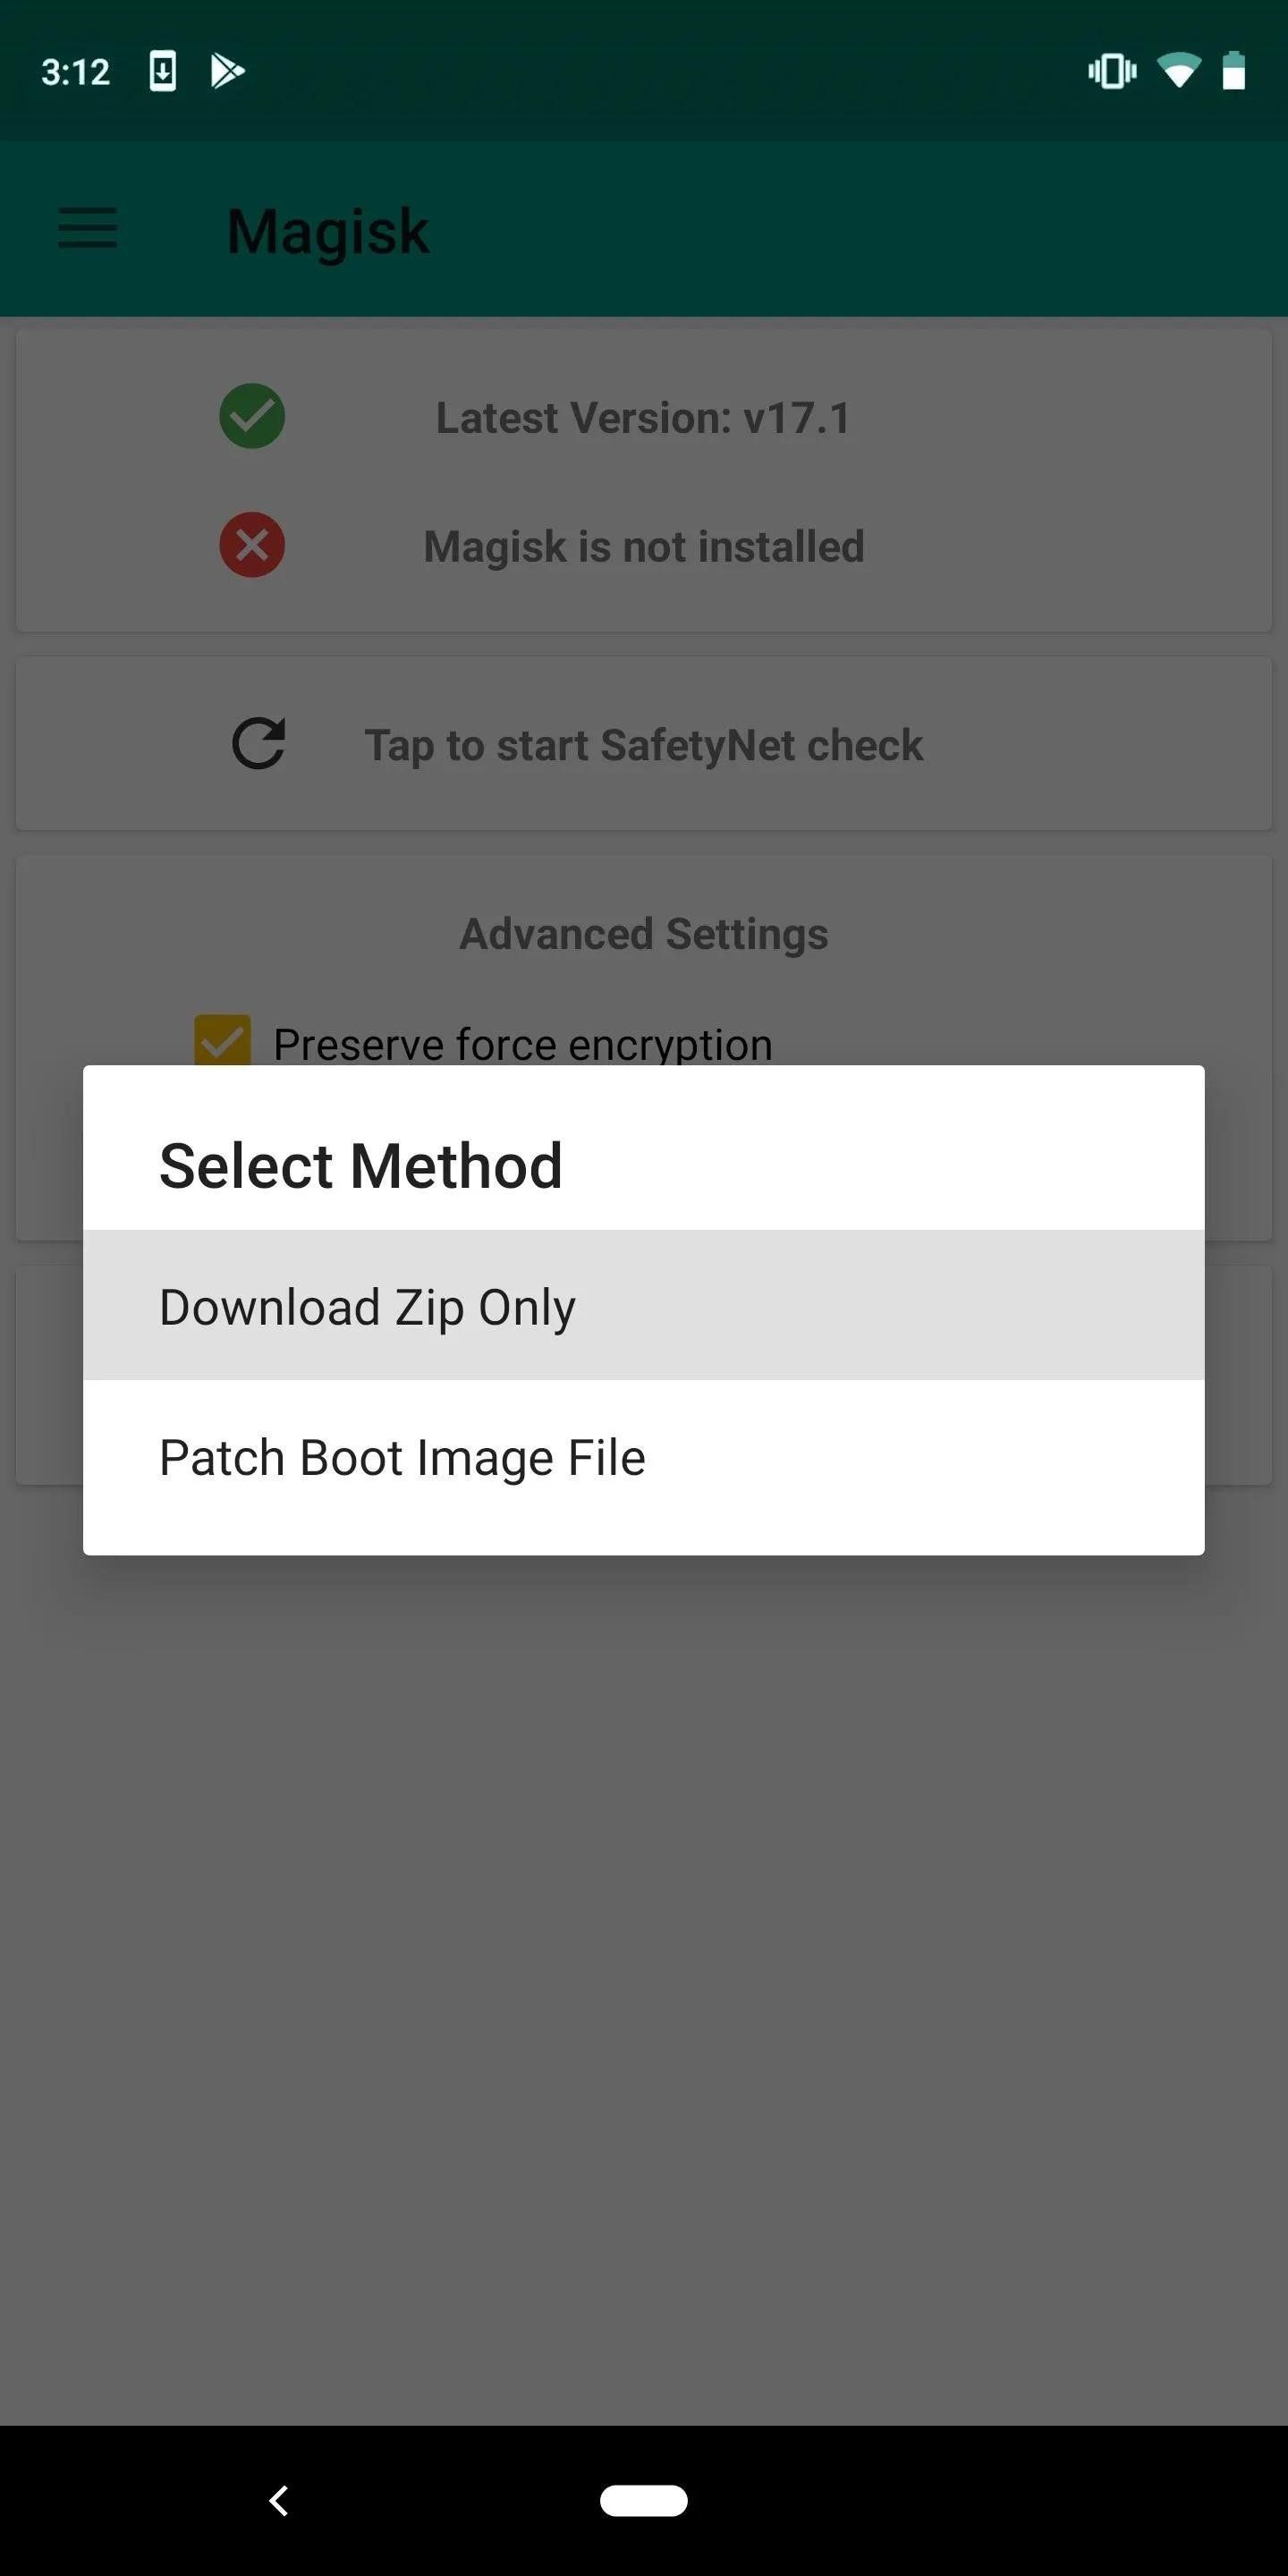
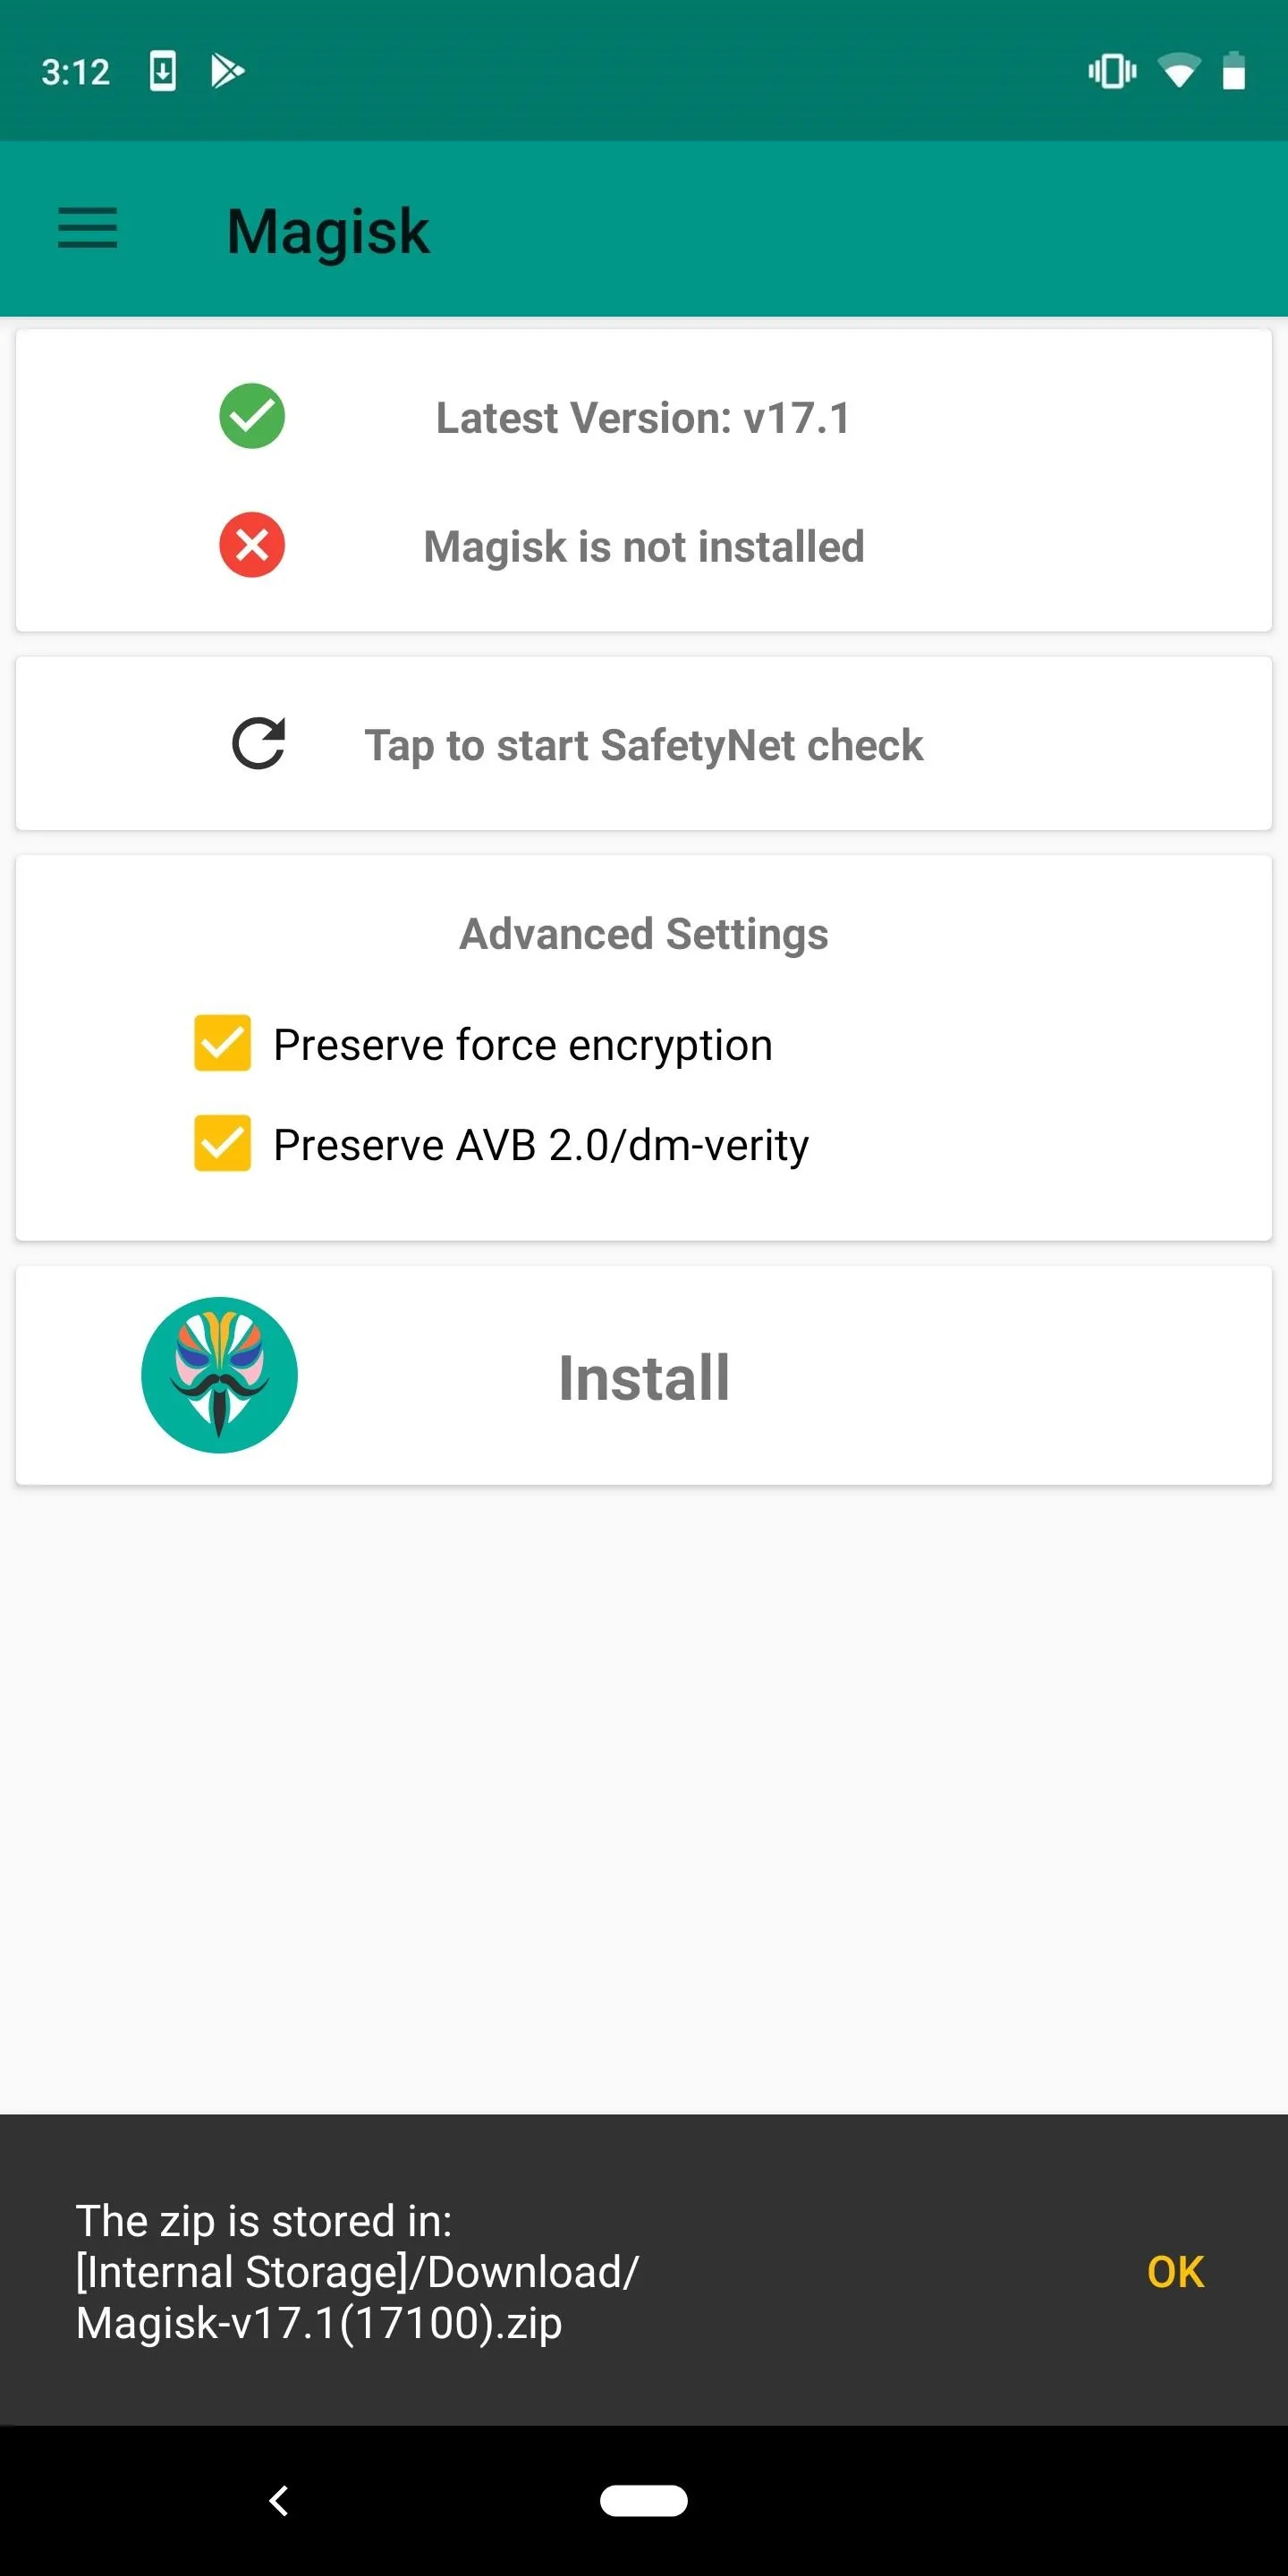
When you launch the Magisk Manager app you will receive a prompt asking if you want to install the Magisk framework. Tap "Install," then choose "Download Zip Only" and hit "Allow" on the permission request. If you don't see the prompt offering to install, and instead you see the message "Invalid Update Channel" at the top, try closing the app and reopening it.
Another option is to download the ZIP to your PC and transfer it to your device's internal storage via MTP connection, using the link below. You can just copy and paste; no need to use ADB. You may have to disable encryption, and you'll want to ensure that TWRP has mounted properly when you go to flash the file in the next step. Refer to the link below for more details.
Boot into TWRP
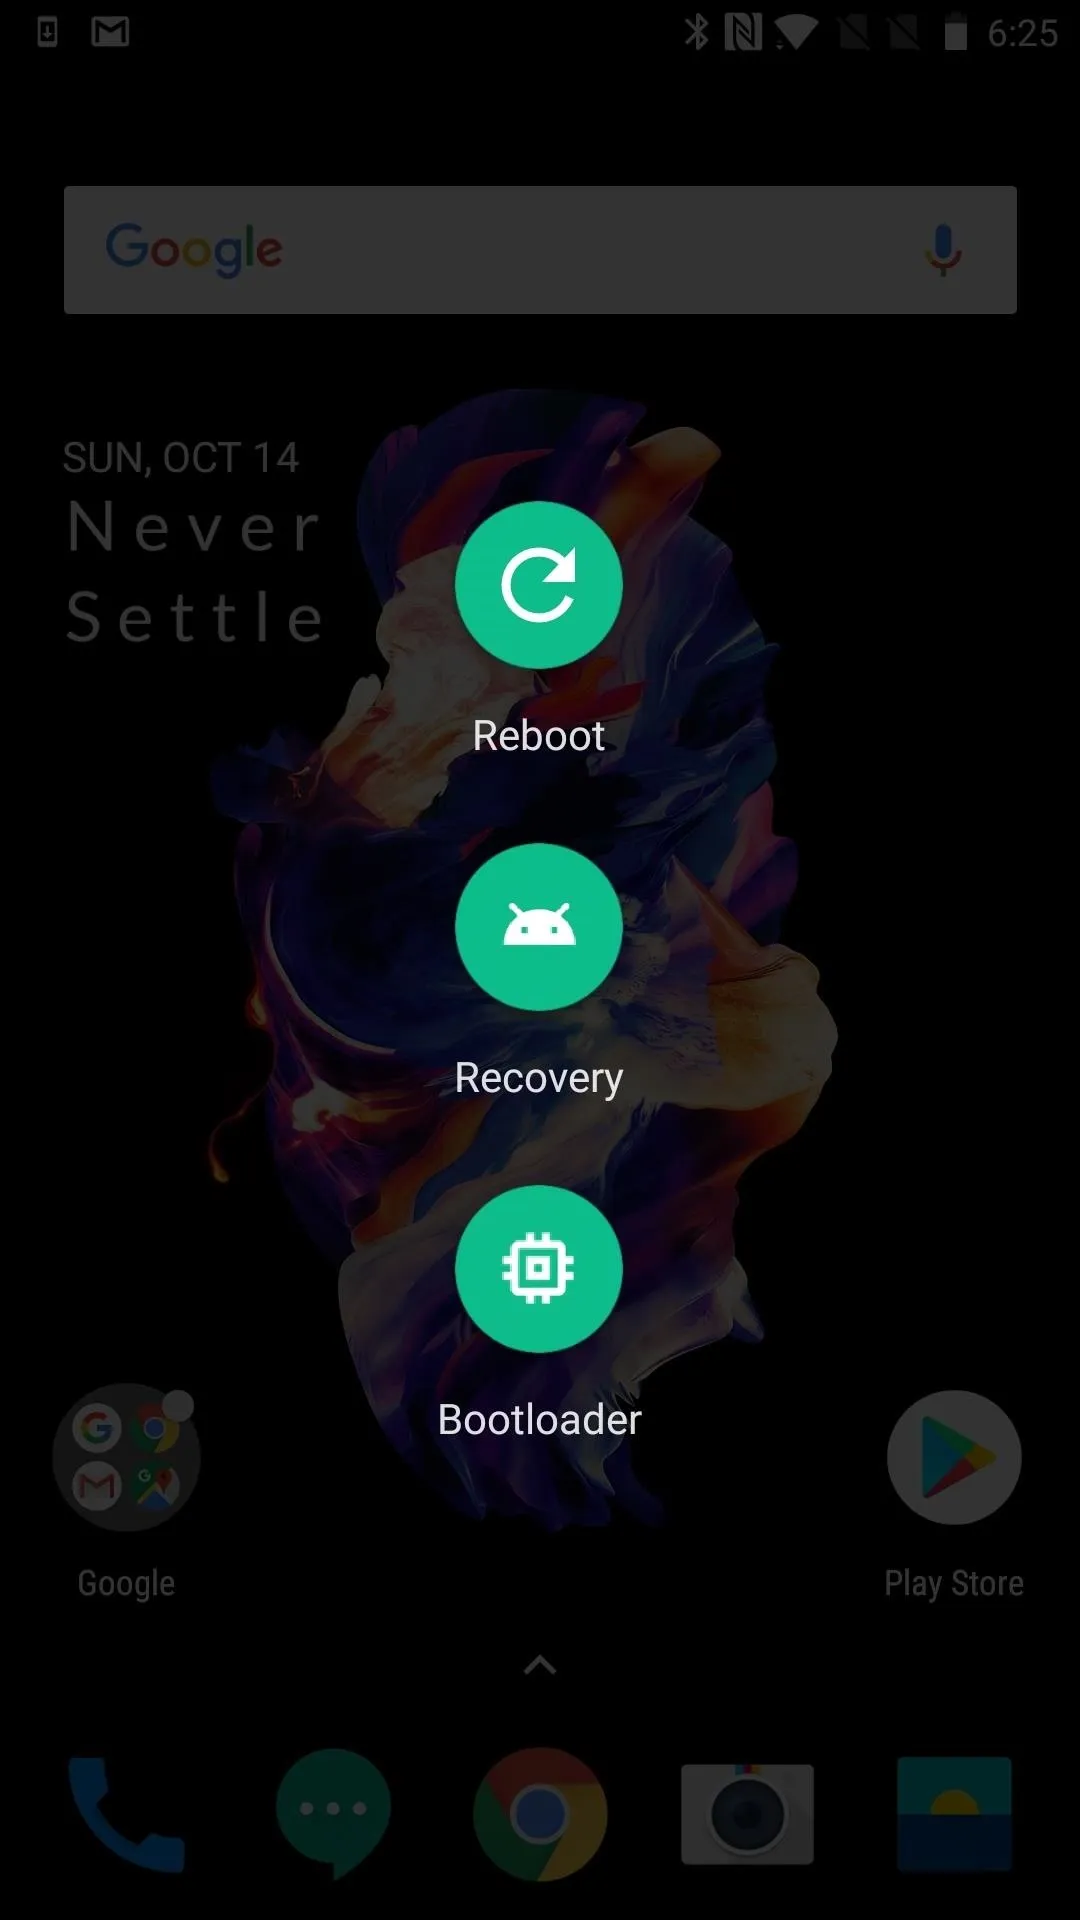
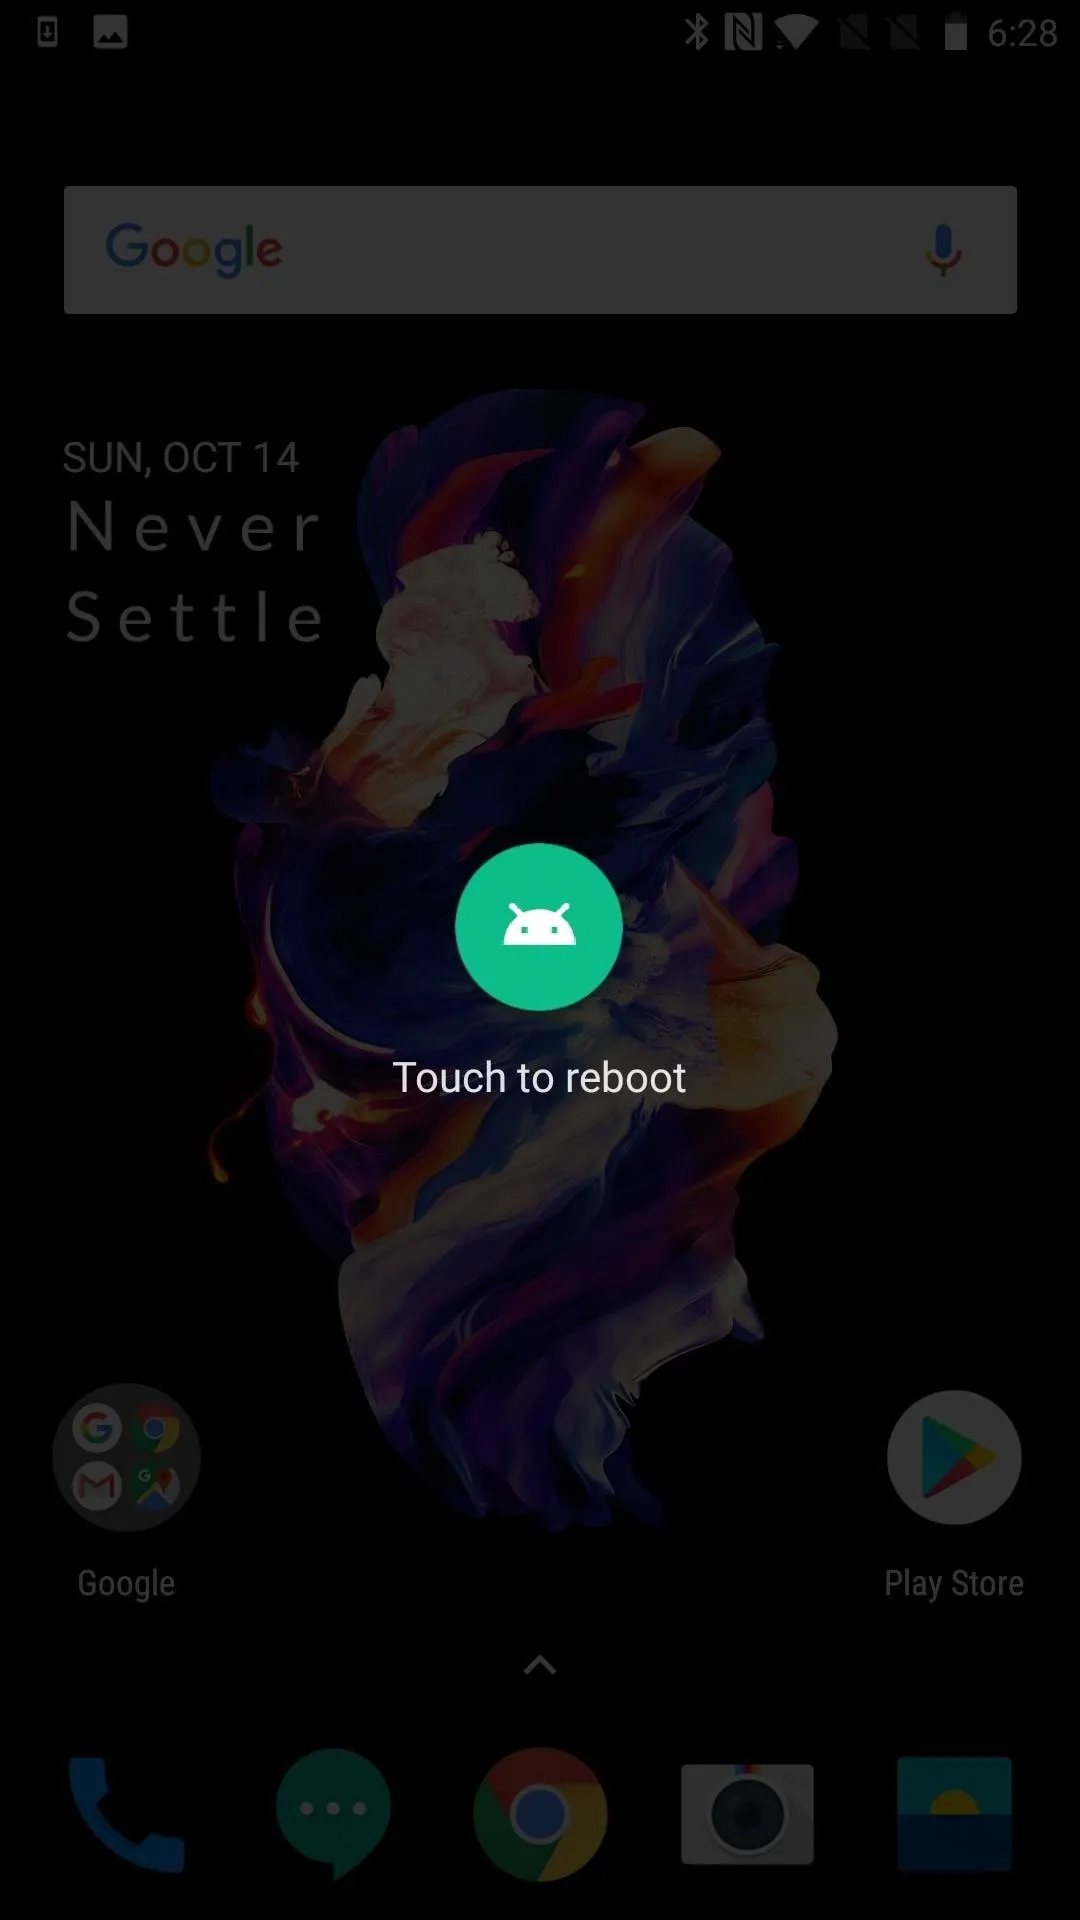
Give your phone a chance to download the file, but when it's finished it's time to boot into your new TWRP recovery. To do so, turn off your OnePlus 5 and simultaneously long-press the volume down and power buttons for a few seconds. Or, if you've enabled Advanced Reboot within Developer Options, you need only long-press the power key, tap "Reboot" once, press "Recovery," and hit the "Touch to Reboot" option.
Flash Magisk
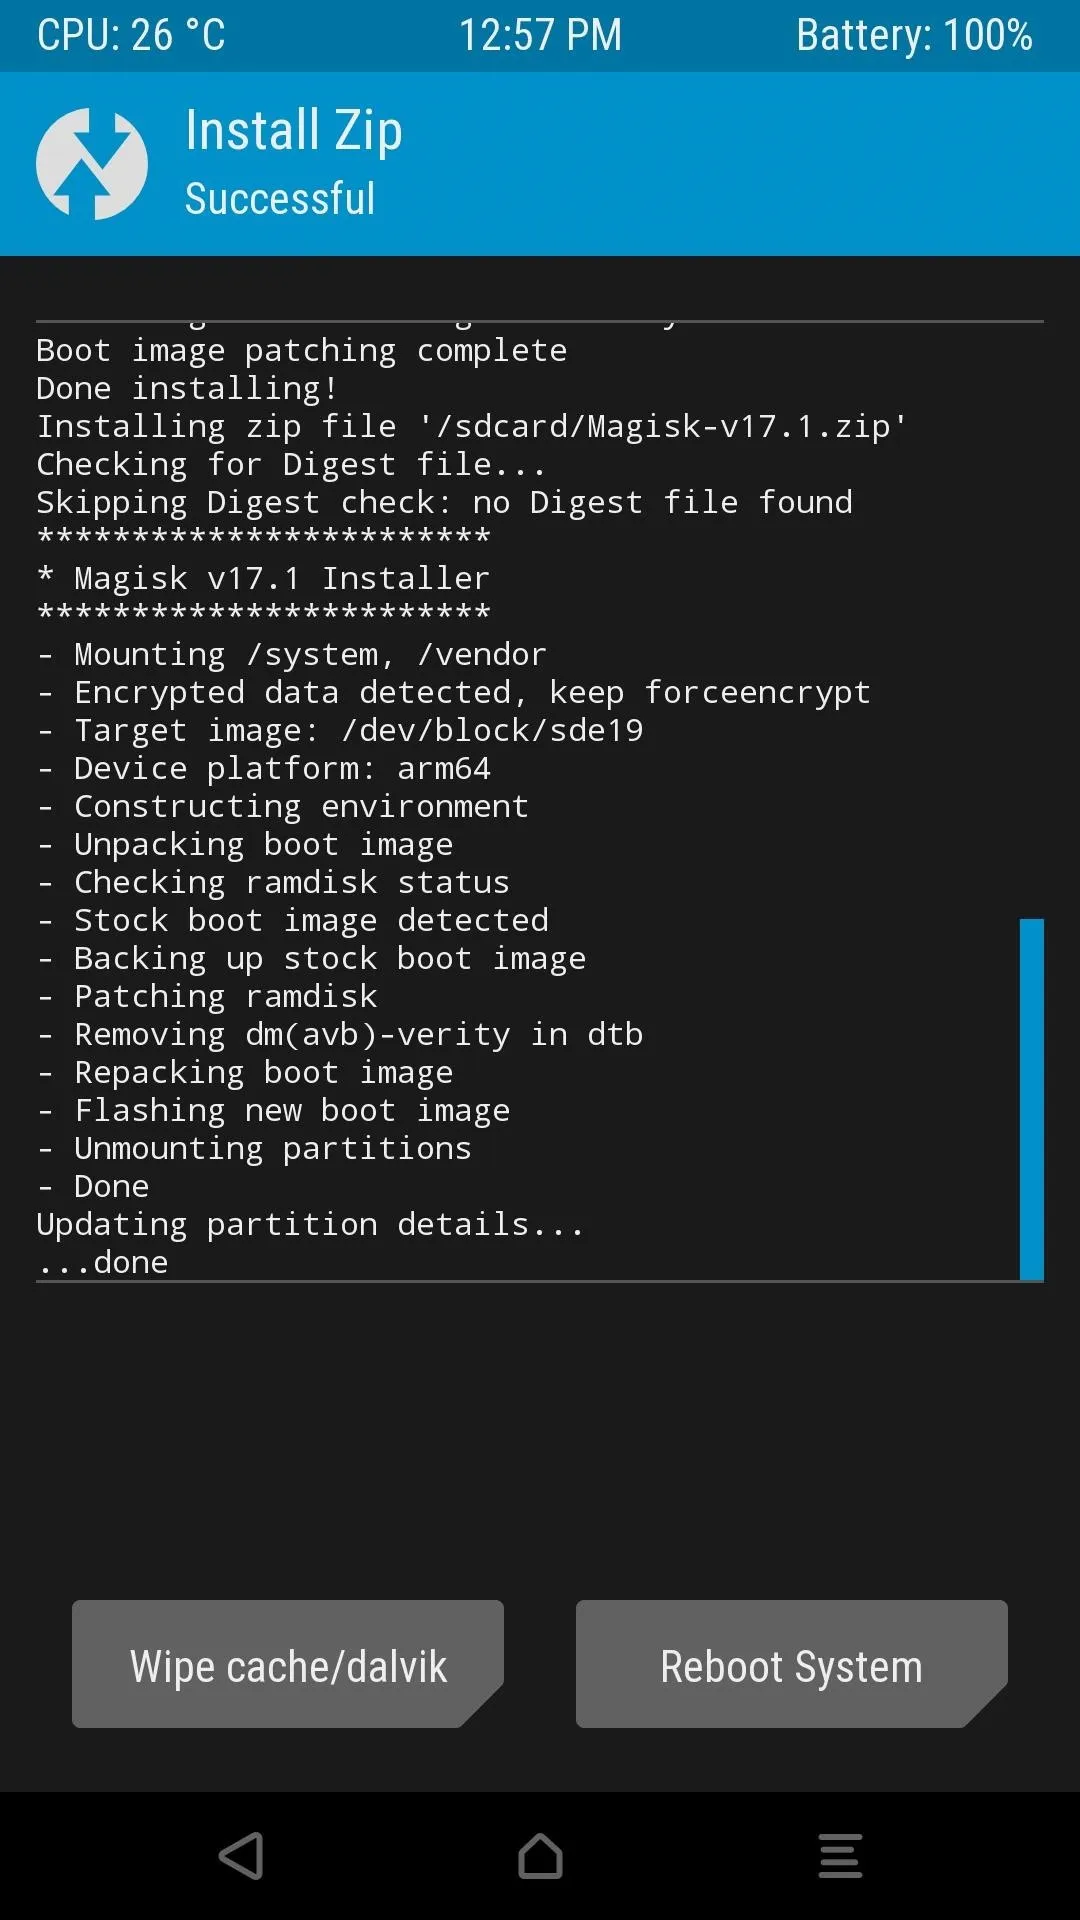
When TWRP opens, you should be prompted to enter your lock screen PIN or password to decrypt storage, unless you've already disabled encryption. Tap on the "Install" button on the TWRP recovery menu. Navigate to your Download folder and select the Magisk ZIP file, then swipe to confirm the flashing of the file. It doesn't take too long — approximately 30 seconds — and then you'll have a rooted phone. Finish up by tapping "Reboot System." If you miss the first prompt to reboot, make sure to do it manually anyway.
Verify Root
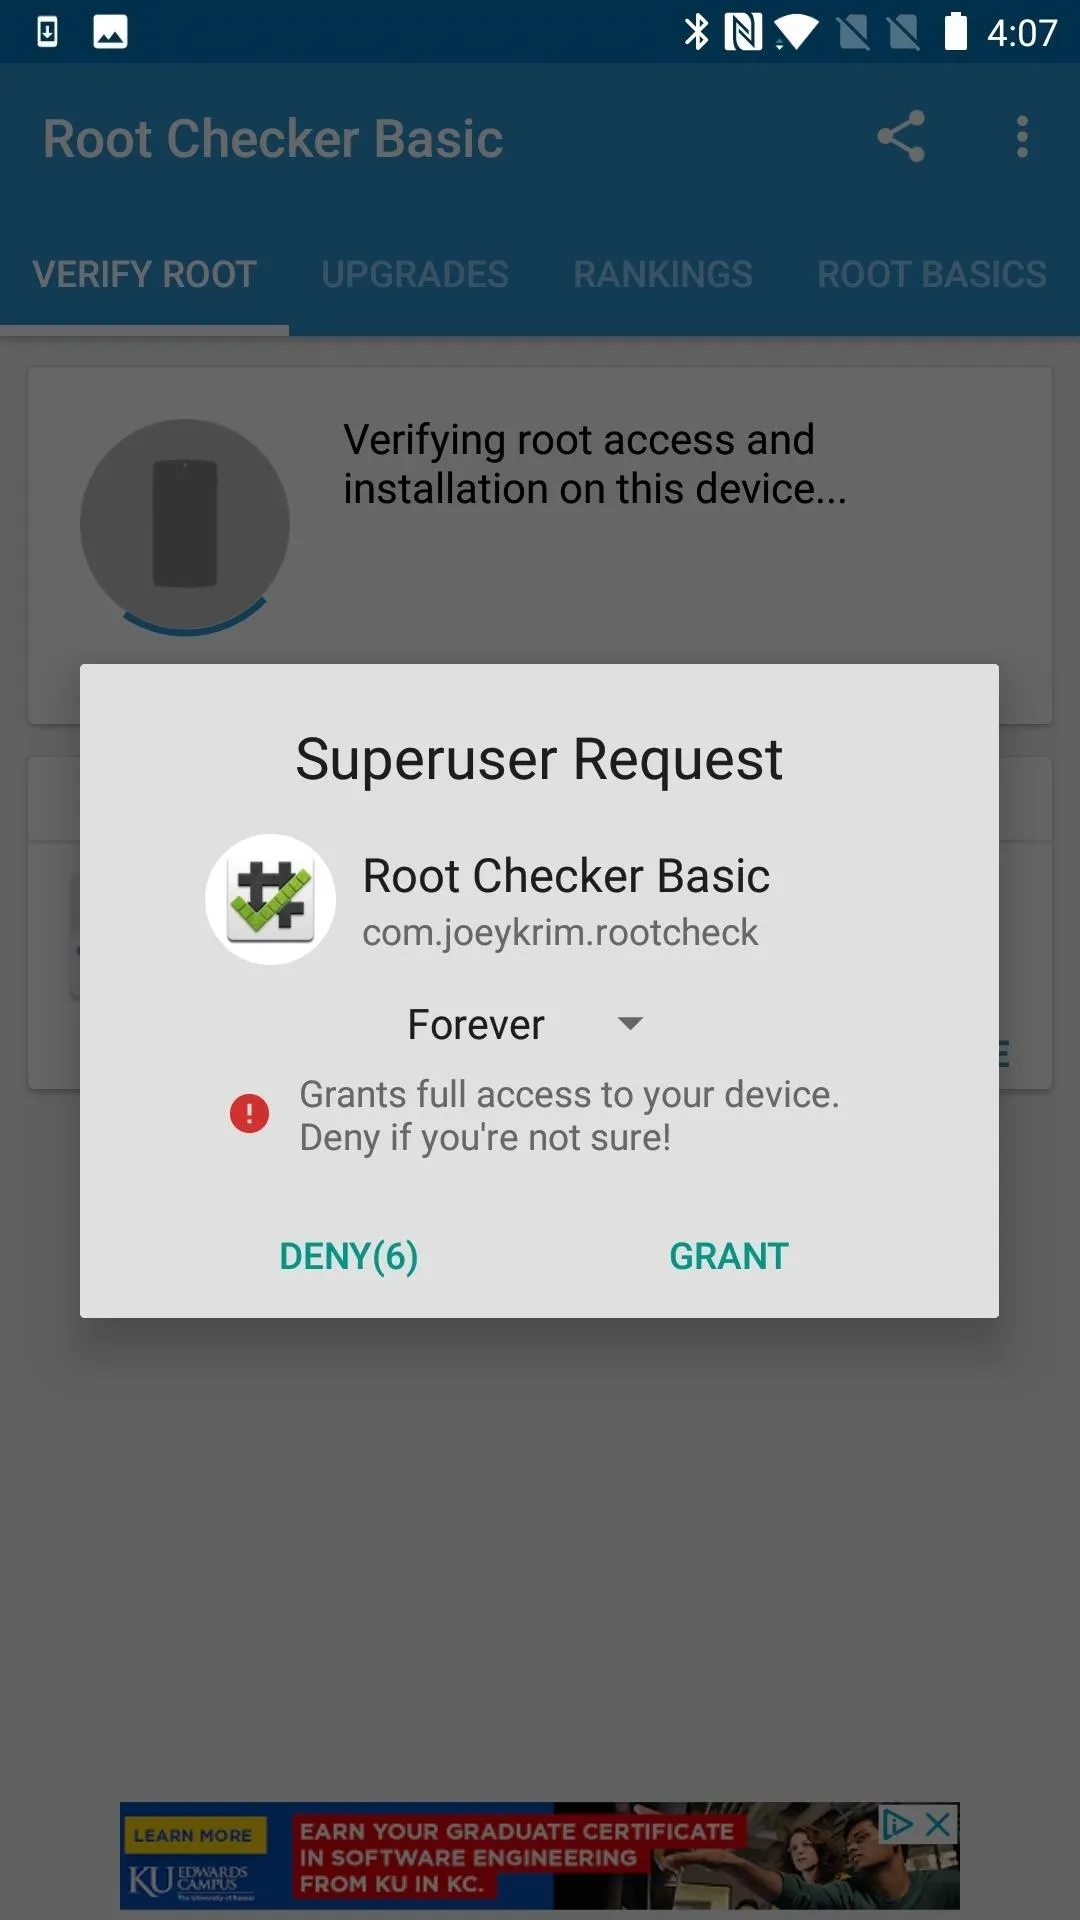
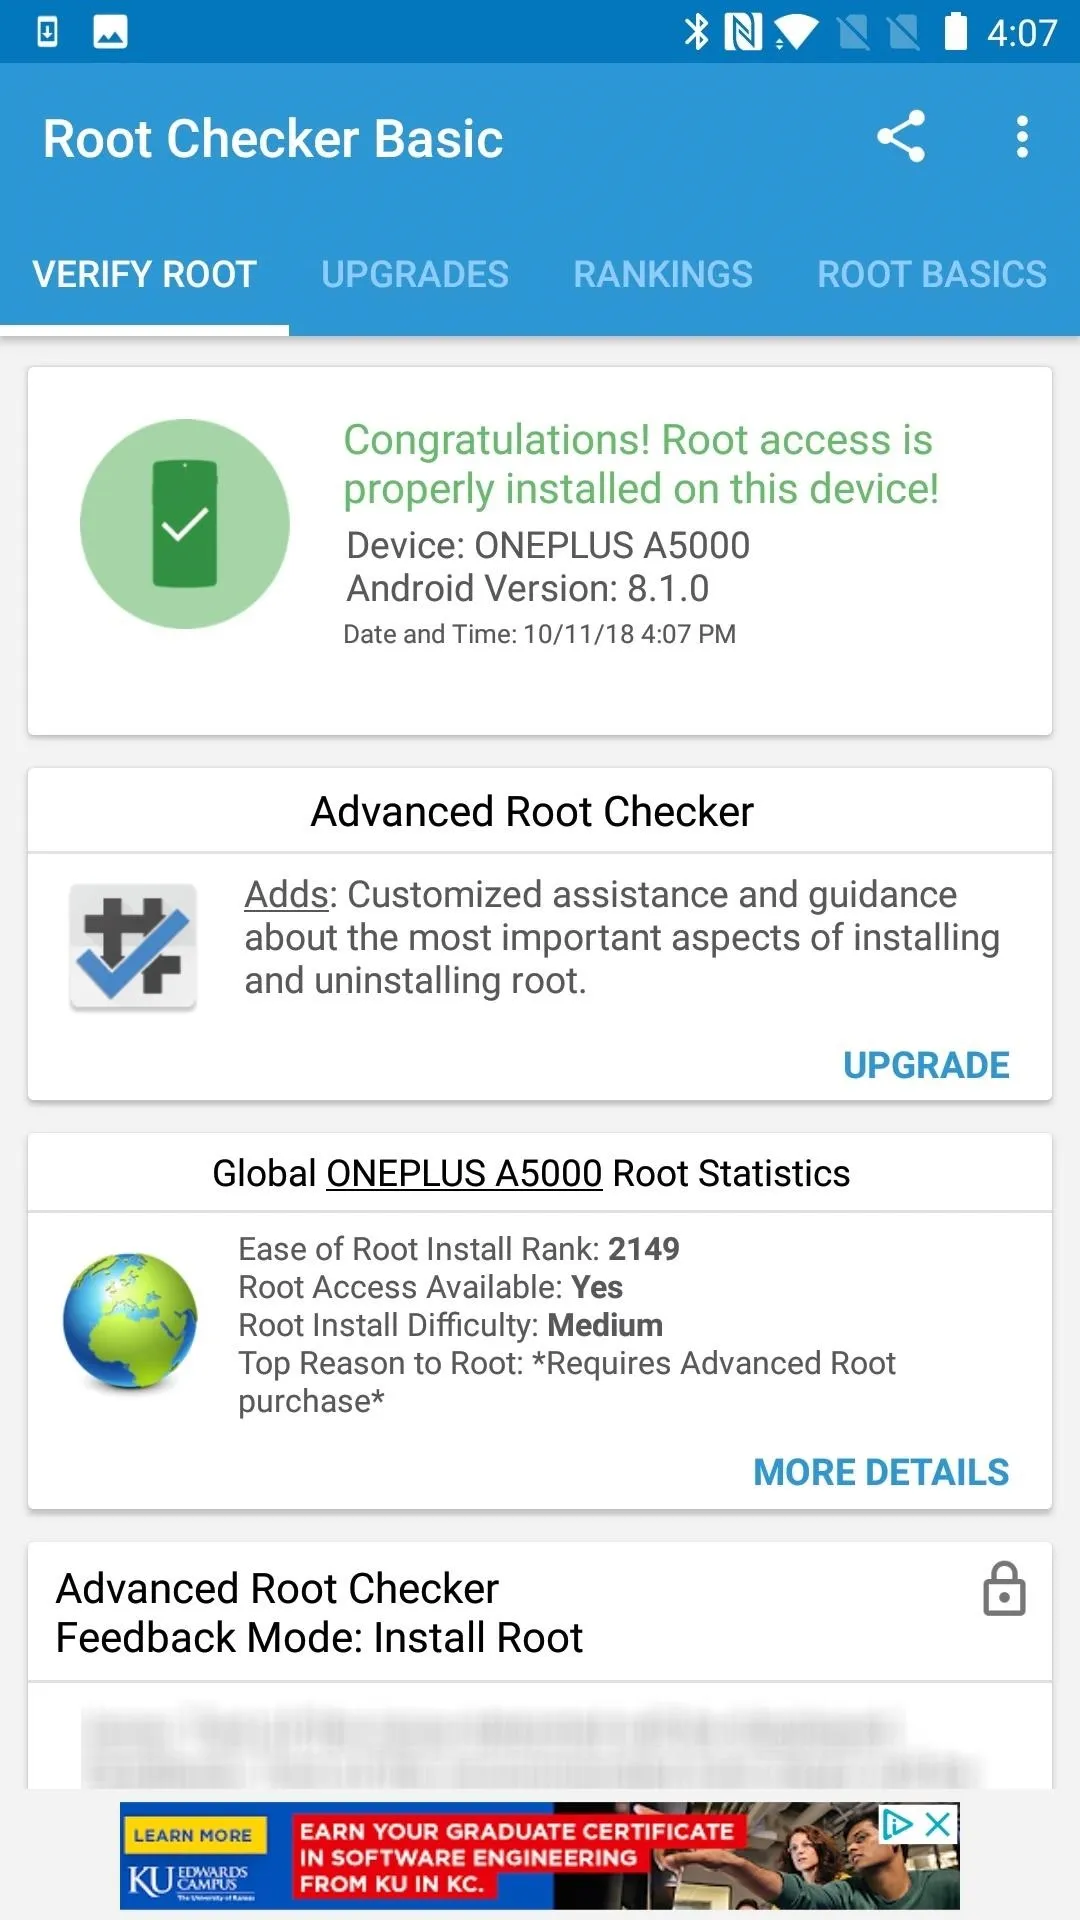
Achieving root can be an awesome feeling, and you've earned it at this point. However, it's easy enough to confirm that everything has gone as planned. Download "Root Checker" from Google Play and install on your OnePlus 5. Open the app and tap on "Verify Root."
- Play Store Link: Root Checker (free)
You'll see a popup message requesting superuser access, which you'll want to grant for the app to work properly. The results will be shown on your screen.
Verify SafetyNet Status
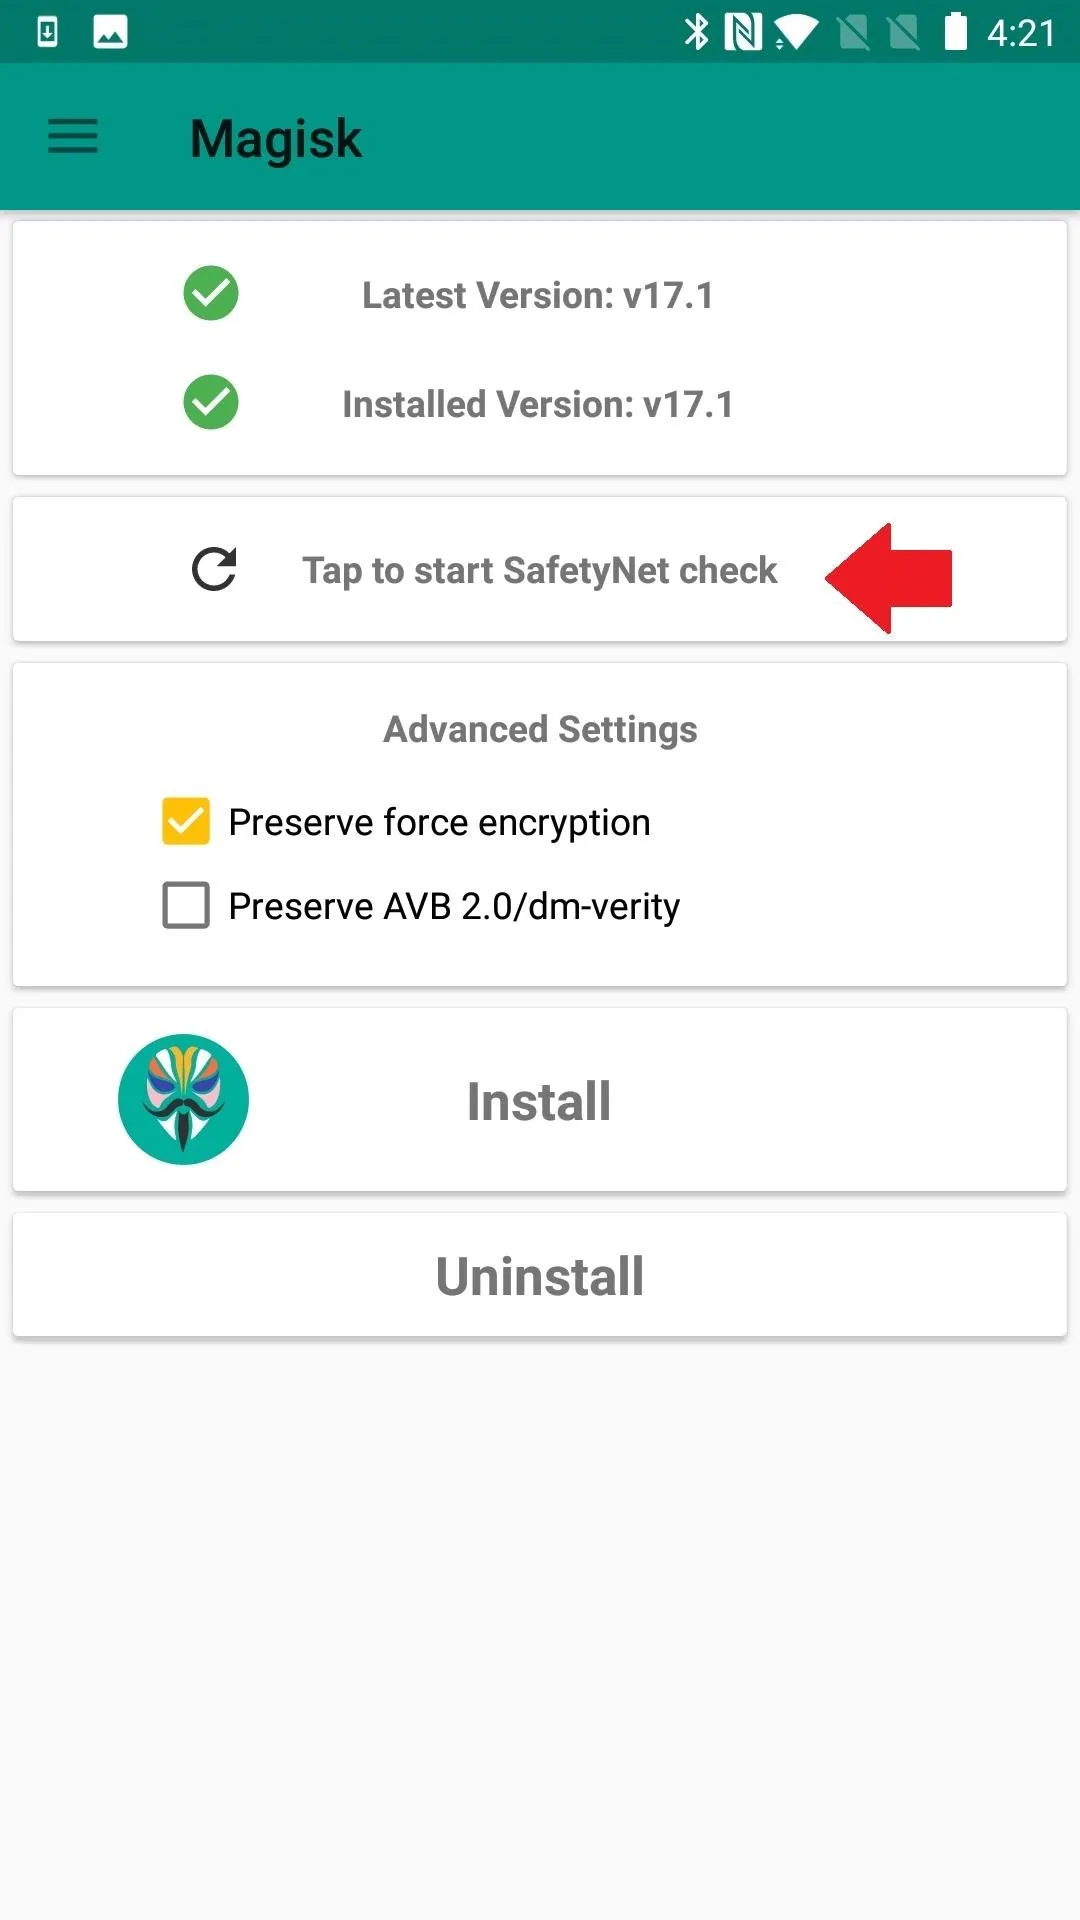
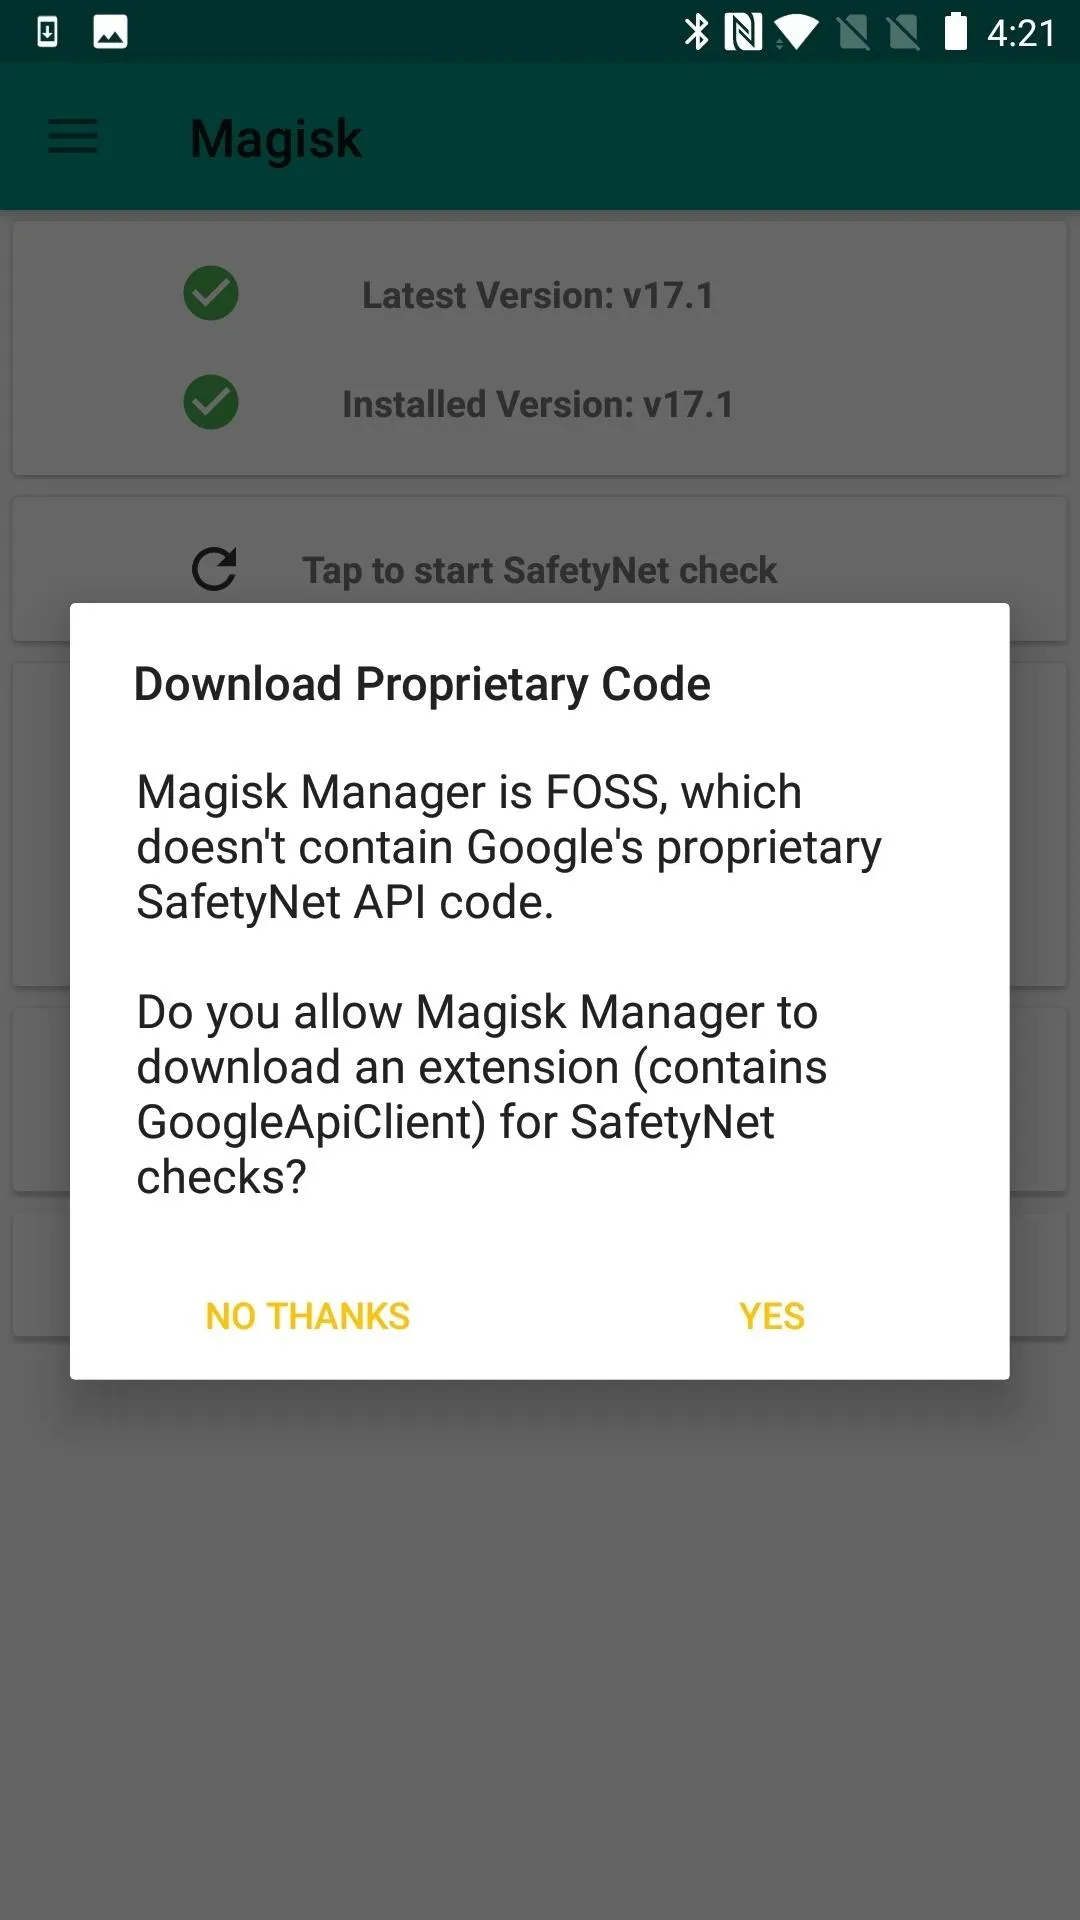
Part of the functionality of the Magisk Manager app is being able to confirm your rooted status will go undetected by Google's SafetyNet. It's SafetyNet that can potentially prevent you from using certain apps such as Google Pay, Pokémon GO, and Netflix. From the Magisk Manager app's main menu, press "Tap to start SafetyNet check" to confirm its status. Tap "Yes"on the "Download Proprietary Code" window that pops up. If all is well, SafetyNet should pass without requiring anything else from you.
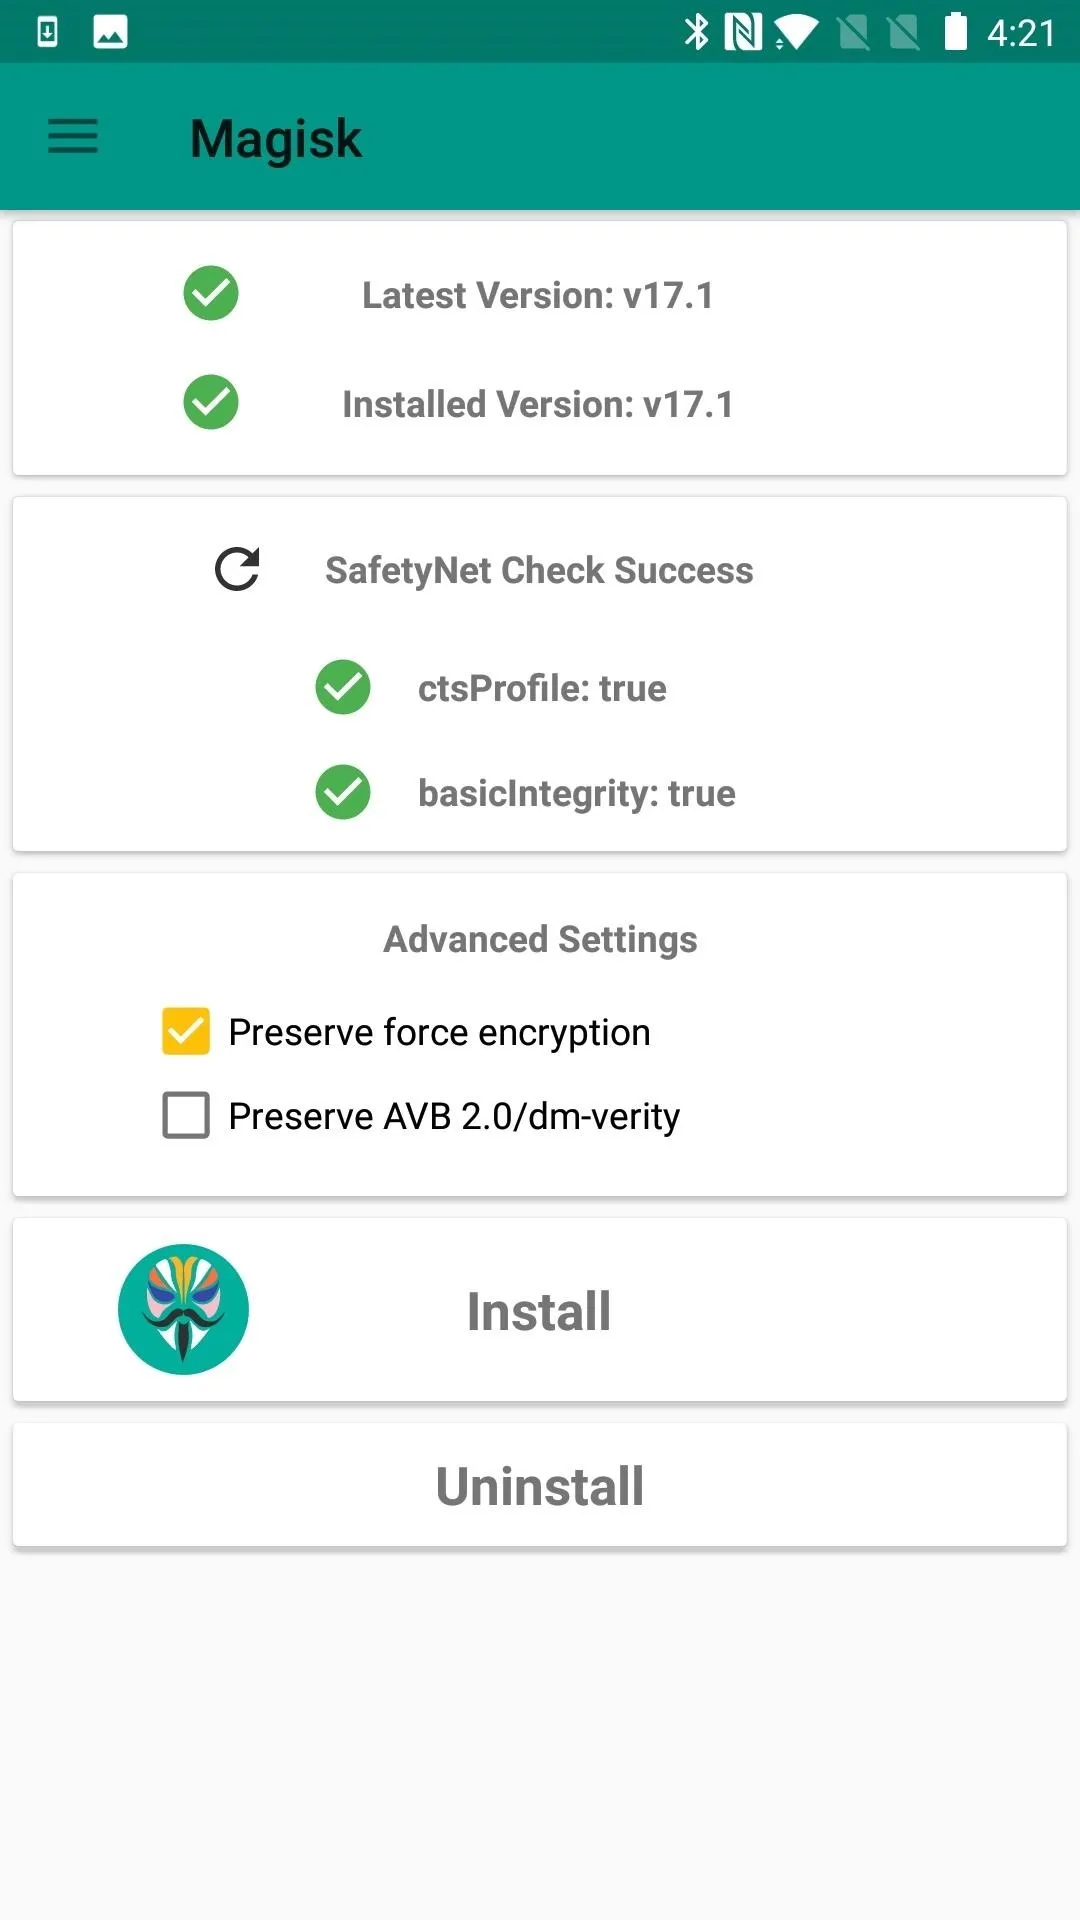
Maybe you've been over this more than once and you're still not passing SafetyNet. If so, we have a guide to help with SafetyNet problems. If you've passed SafetyNet, but you aren't done tinkering, rest assured that Magisk is for you. You've opened the gateway to a lot more customization.
- Follow Gadget Hacks on Pinterest, Twitter, YouTube, and Flipboard
- Sign up for Gadget Hacks' daily newsletter or weekly Android and iOS updates
- Follow WonderHowTo on Facebook, Twitter, Pinterest, and Flipboard
Cover image and screenshots by Delani Clatfelter/Gadget Hacks


Comments
Be the first, drop a comment!