


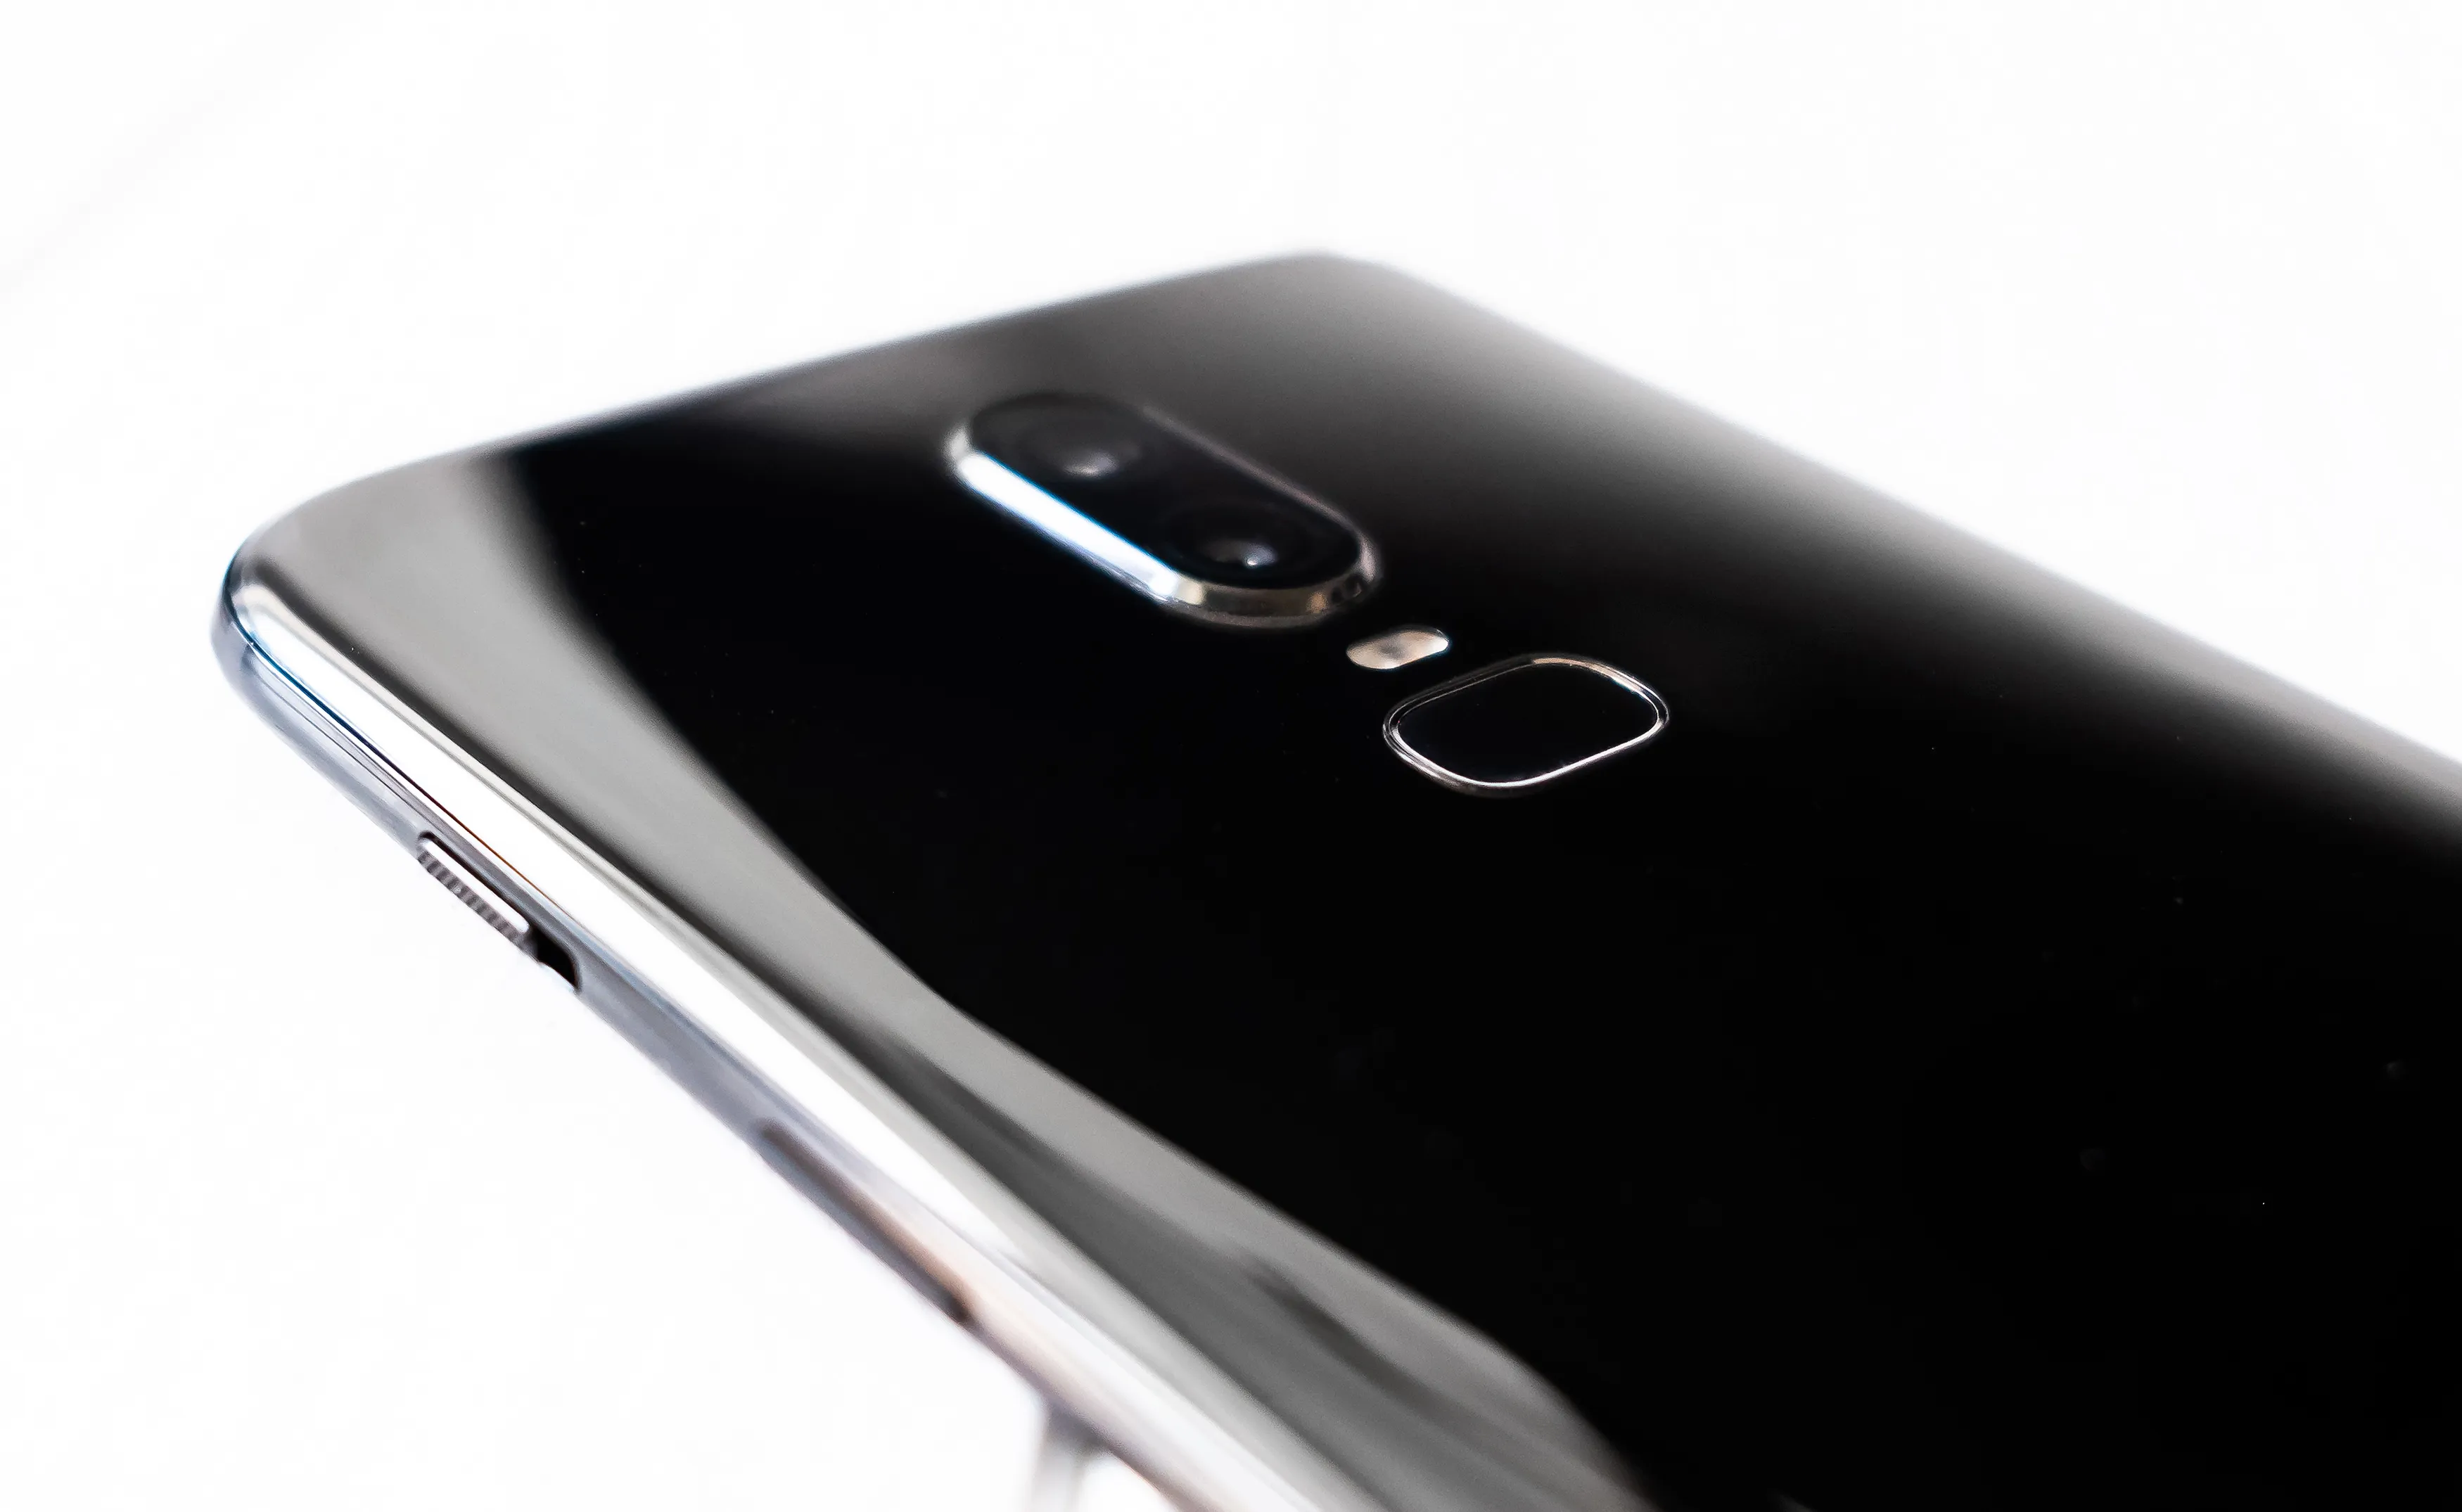
If you ever want to root your OnePlus 6, install TWRP, get Magisk and Xposed, or flash a custom ROM, the first thing you'll need to do is unlock your bootloader.
Your bootloader is a piece of firmware that loads up the operating system on your phone. Normally, it's programmed to only load the official firmware provided by OnePlus — but if you unlock your bootloader, it will let you load any firmware.
So once your bootloader is unlocked, you can make your phone boot into a custom operating system. Most people use this privilege to get the bootloader to load a custom recovery like TWRP. From there, it's just a matter of downloading a few files and tapping a few buttons if you want to root your phone or install a custom ROM.
Disclaimers
- Unlocking the bootloader will wipe your device.
- Your phone will now fail SafetyNet, but Magisk can fix this.
- Unlocking the bootloader does not void your OnePlus 6's warranty.
Back Up Important Data
First, make sure any important files like your MP3 library or family photos are backed up to another device. If you've never done this before, it's simple on Android: Just connect your phone to your computer with a USB data cable, then open a file browser window on your computer. From there, navigate to your phone's internal storage and drag and drop any important files onto your desktop.
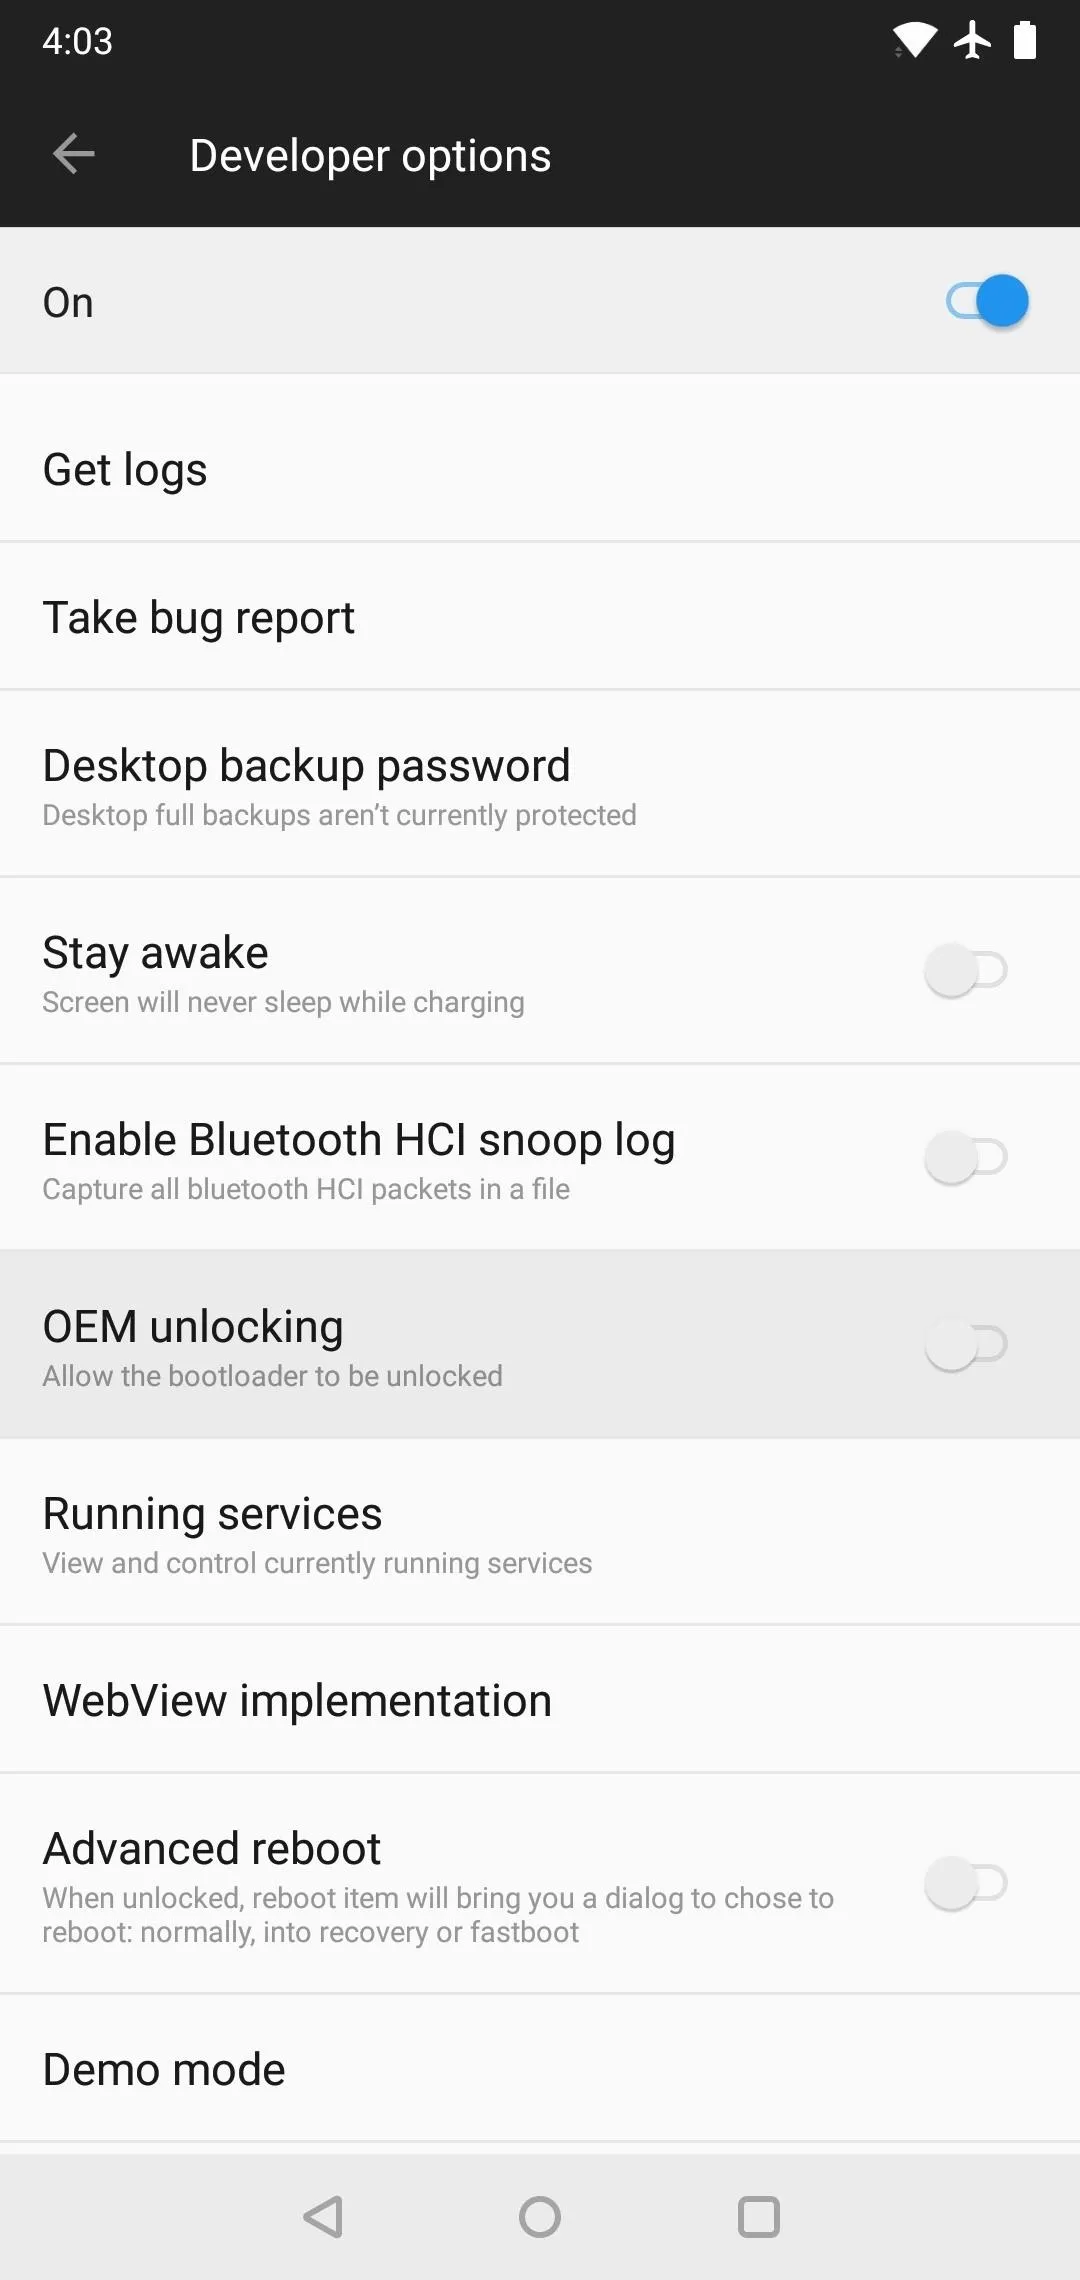
Enable Developer Options
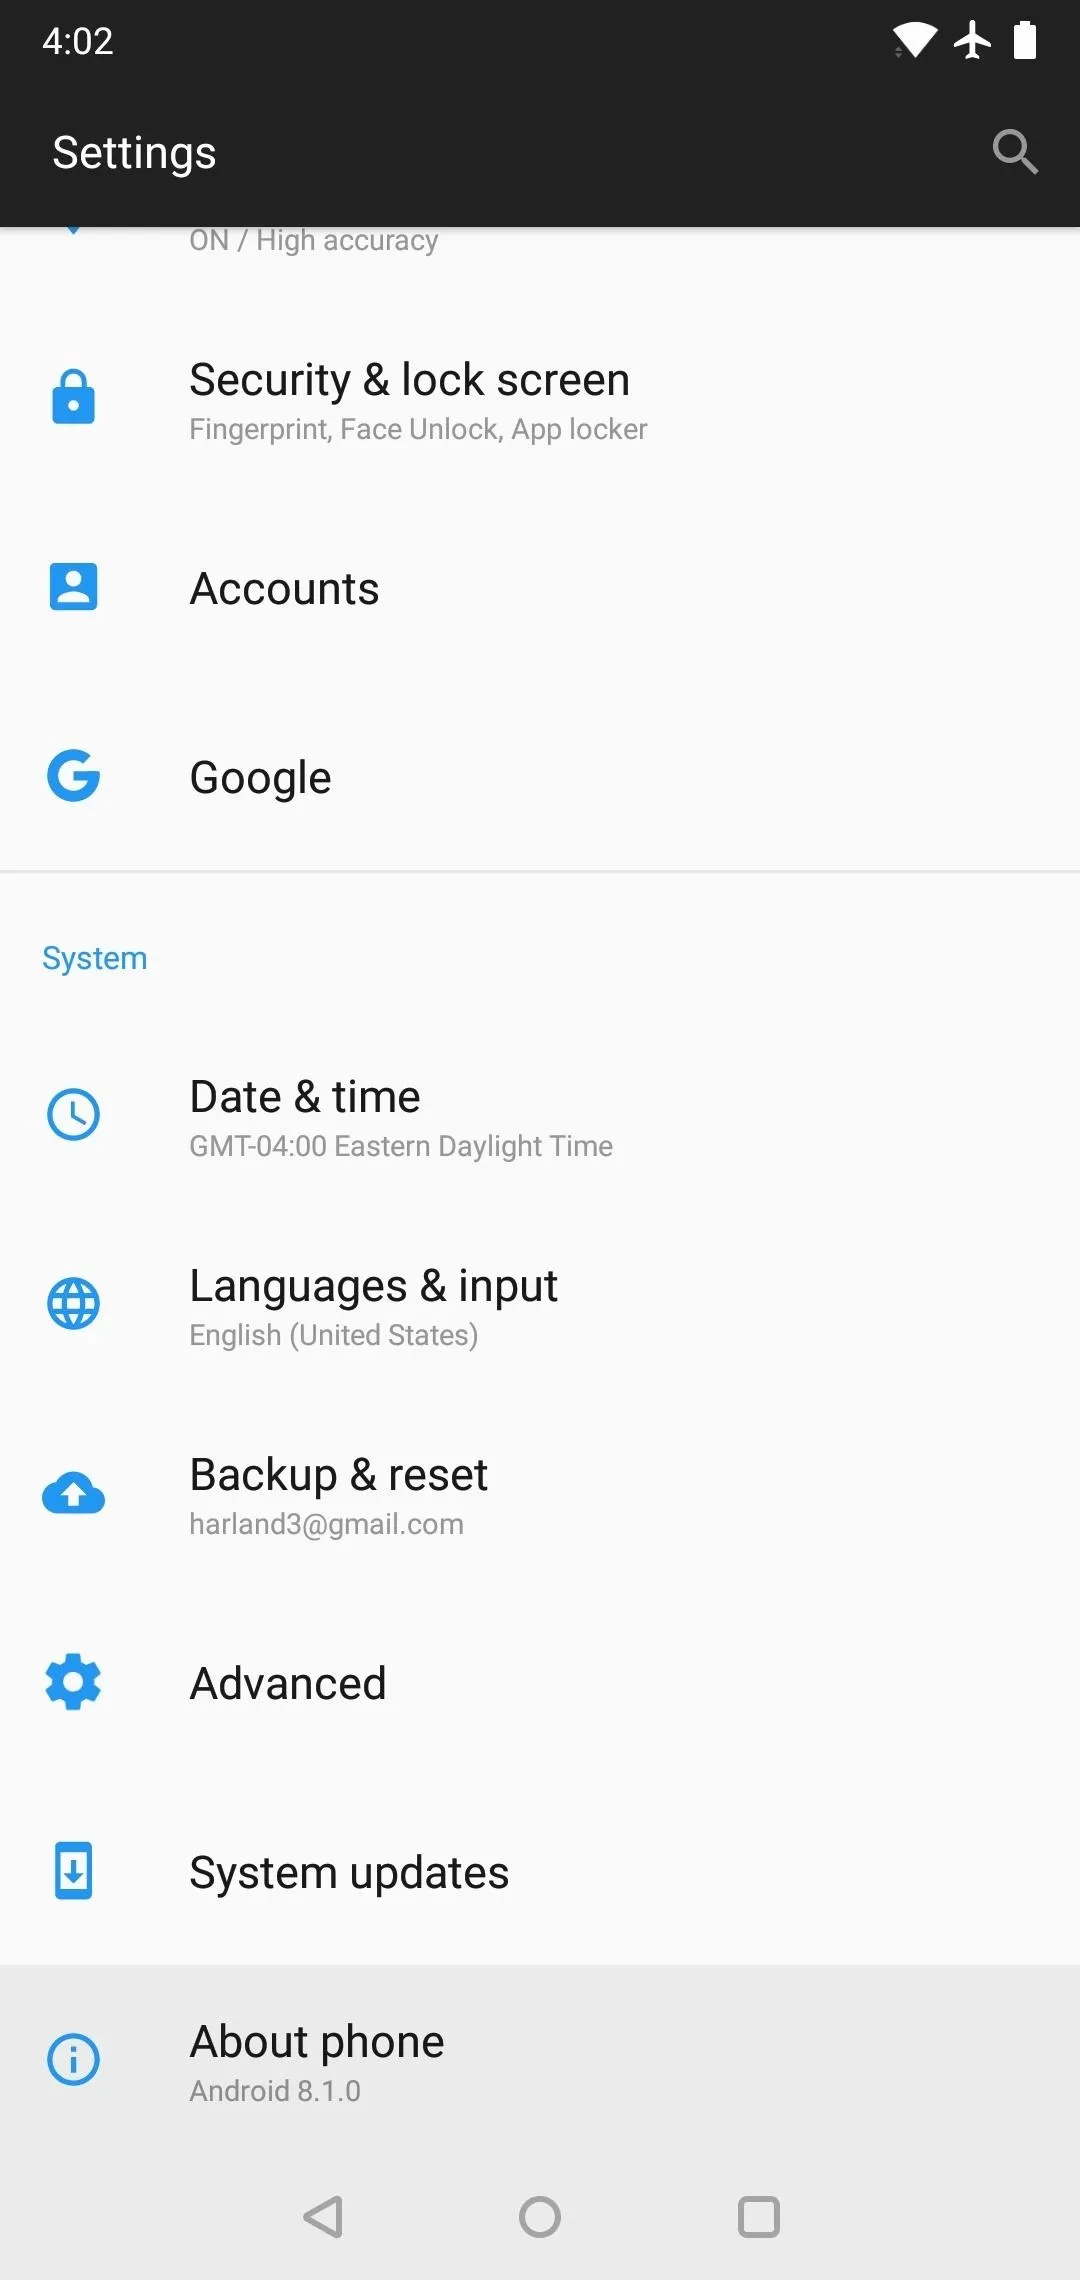
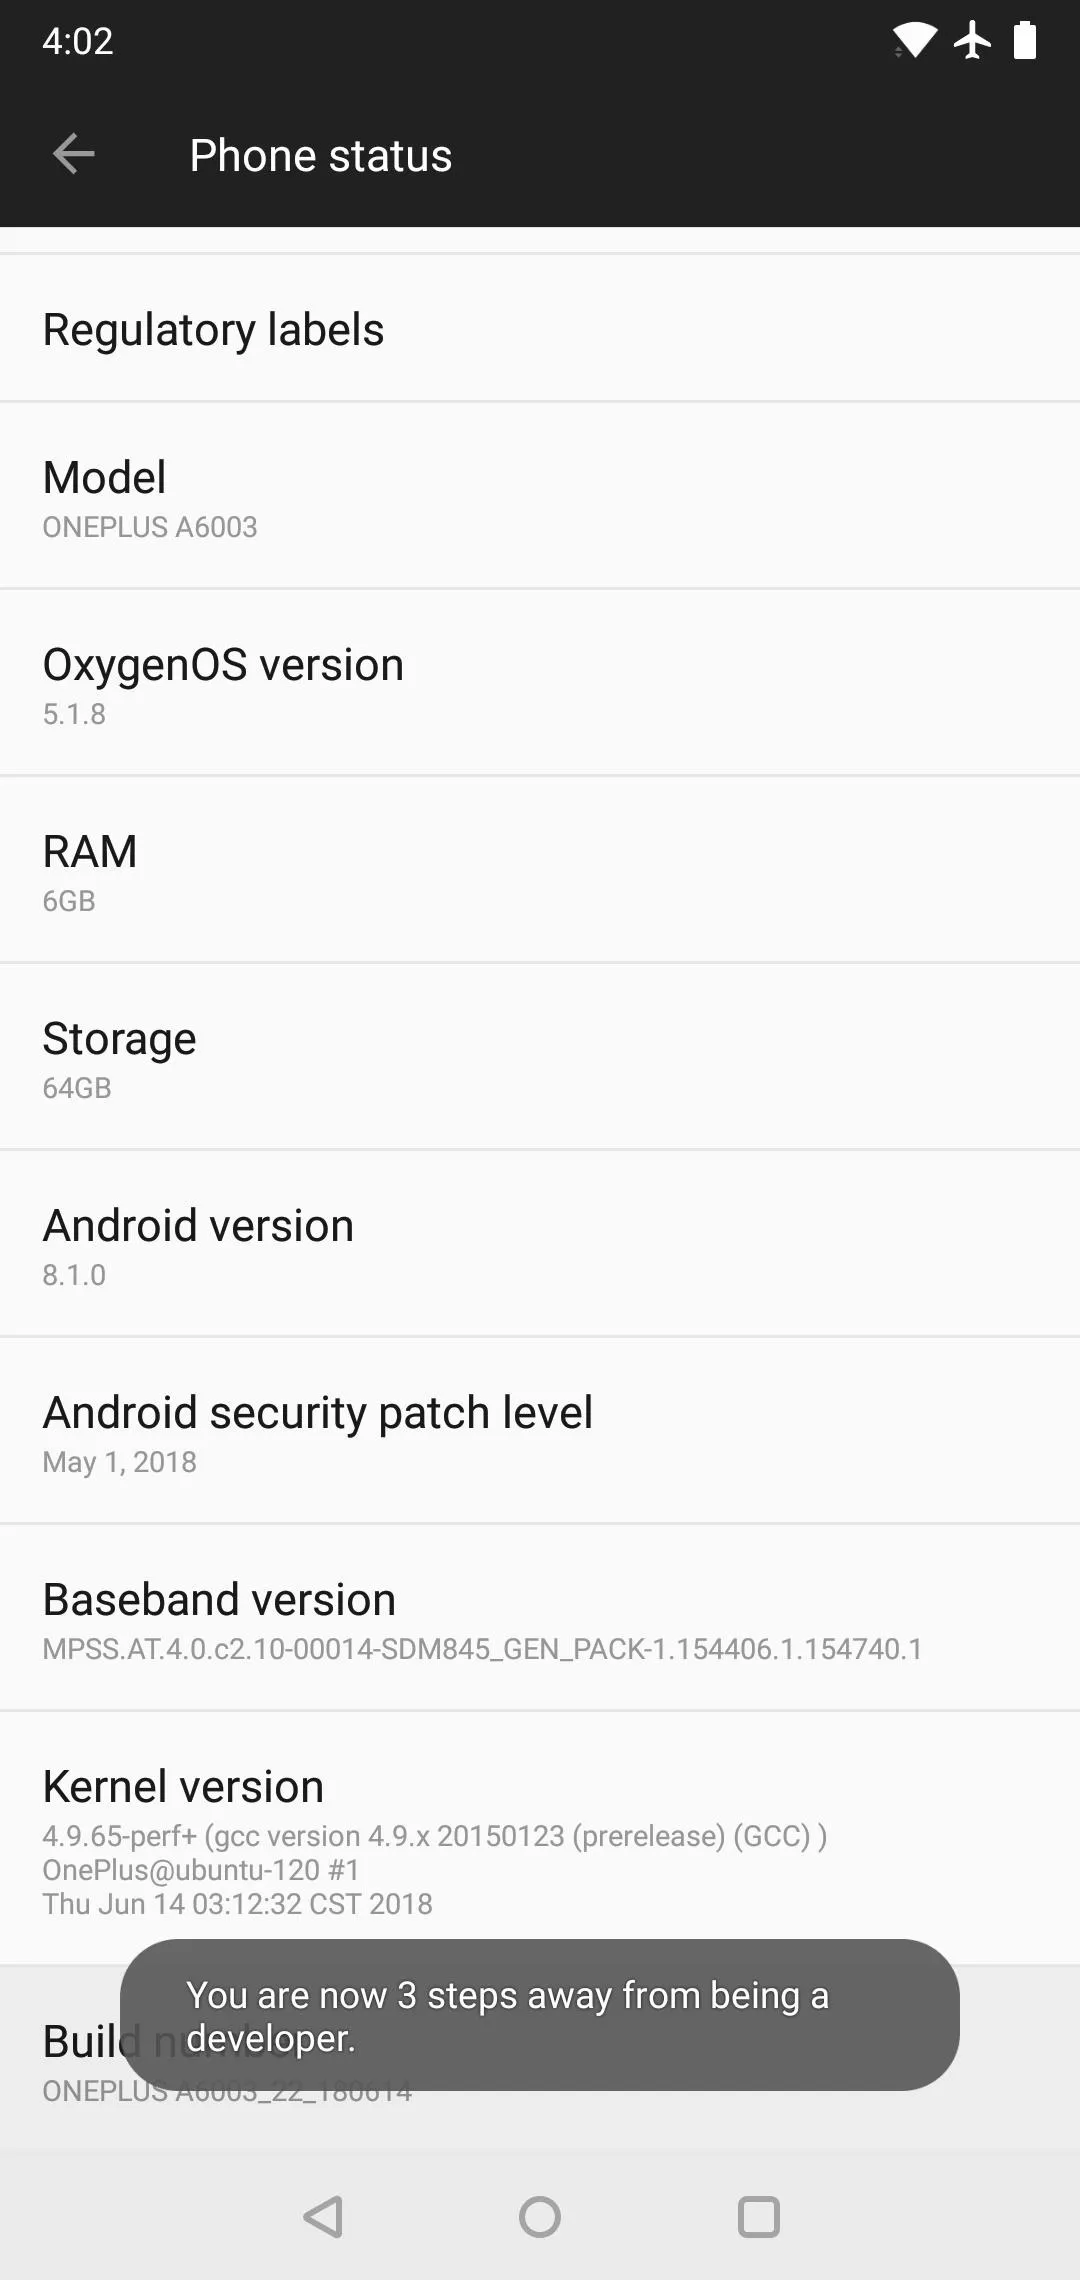
Now you'll need to enable the Developer Options menu on your phone to access a setting that lets you unlock your bootloader. Head to Settings –> About Phone, then scroll down to the bottom and tap "Build Number" seven times in rapid succession. When done right, you'll see a toast message stating "You are now a developer."

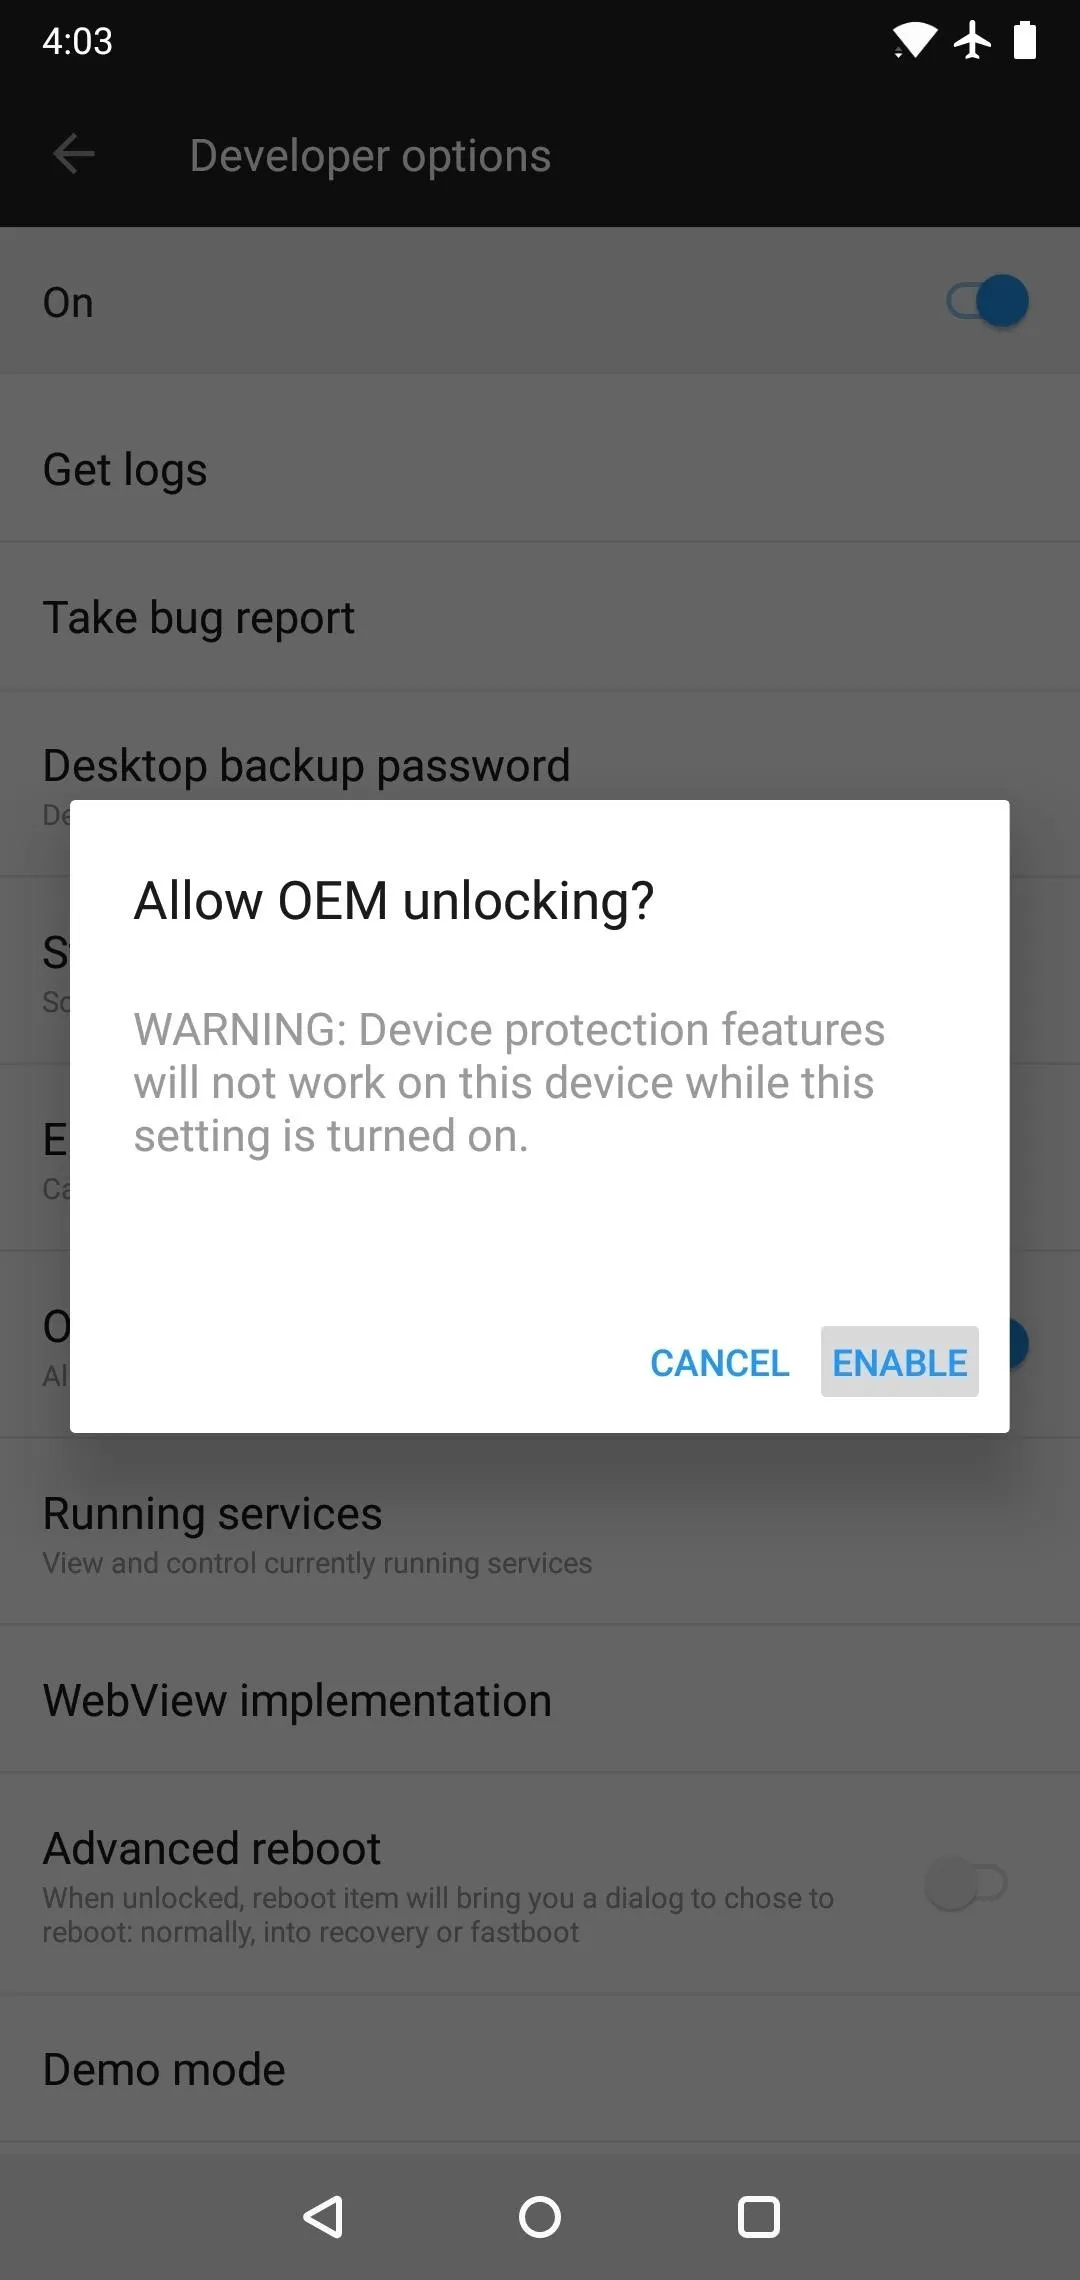
Enable OEM Unlocking
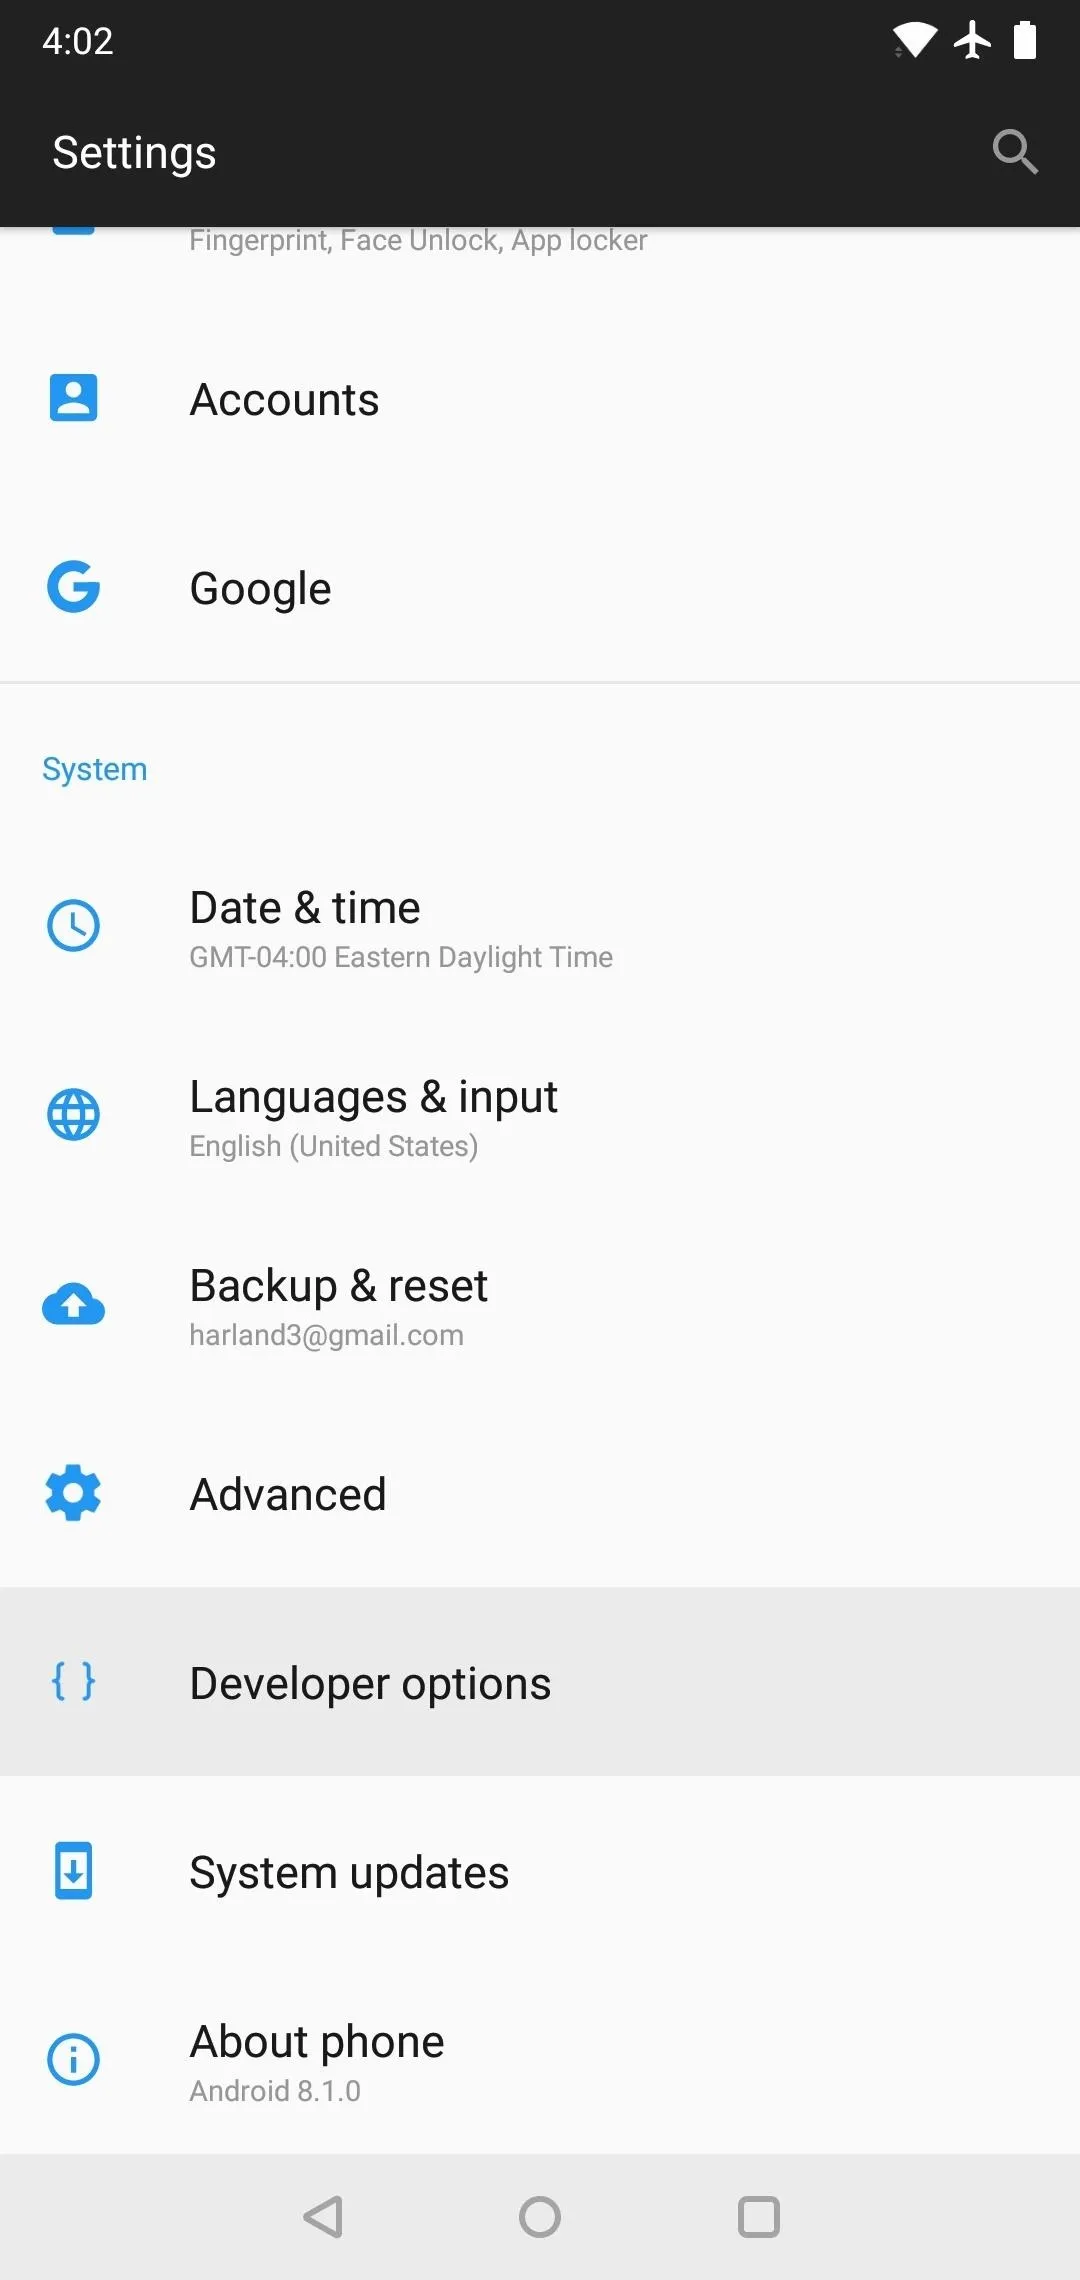
From here, tap your back button once to head back out to the main settings page. Scroll down and you'll find the newly-unlocked Developer Options menu. Select it, then scroll down and enable the switch next to "OEM unlocking" on the following page. Tap "Enable" on the popup and enter your phone's PIN if prompted.
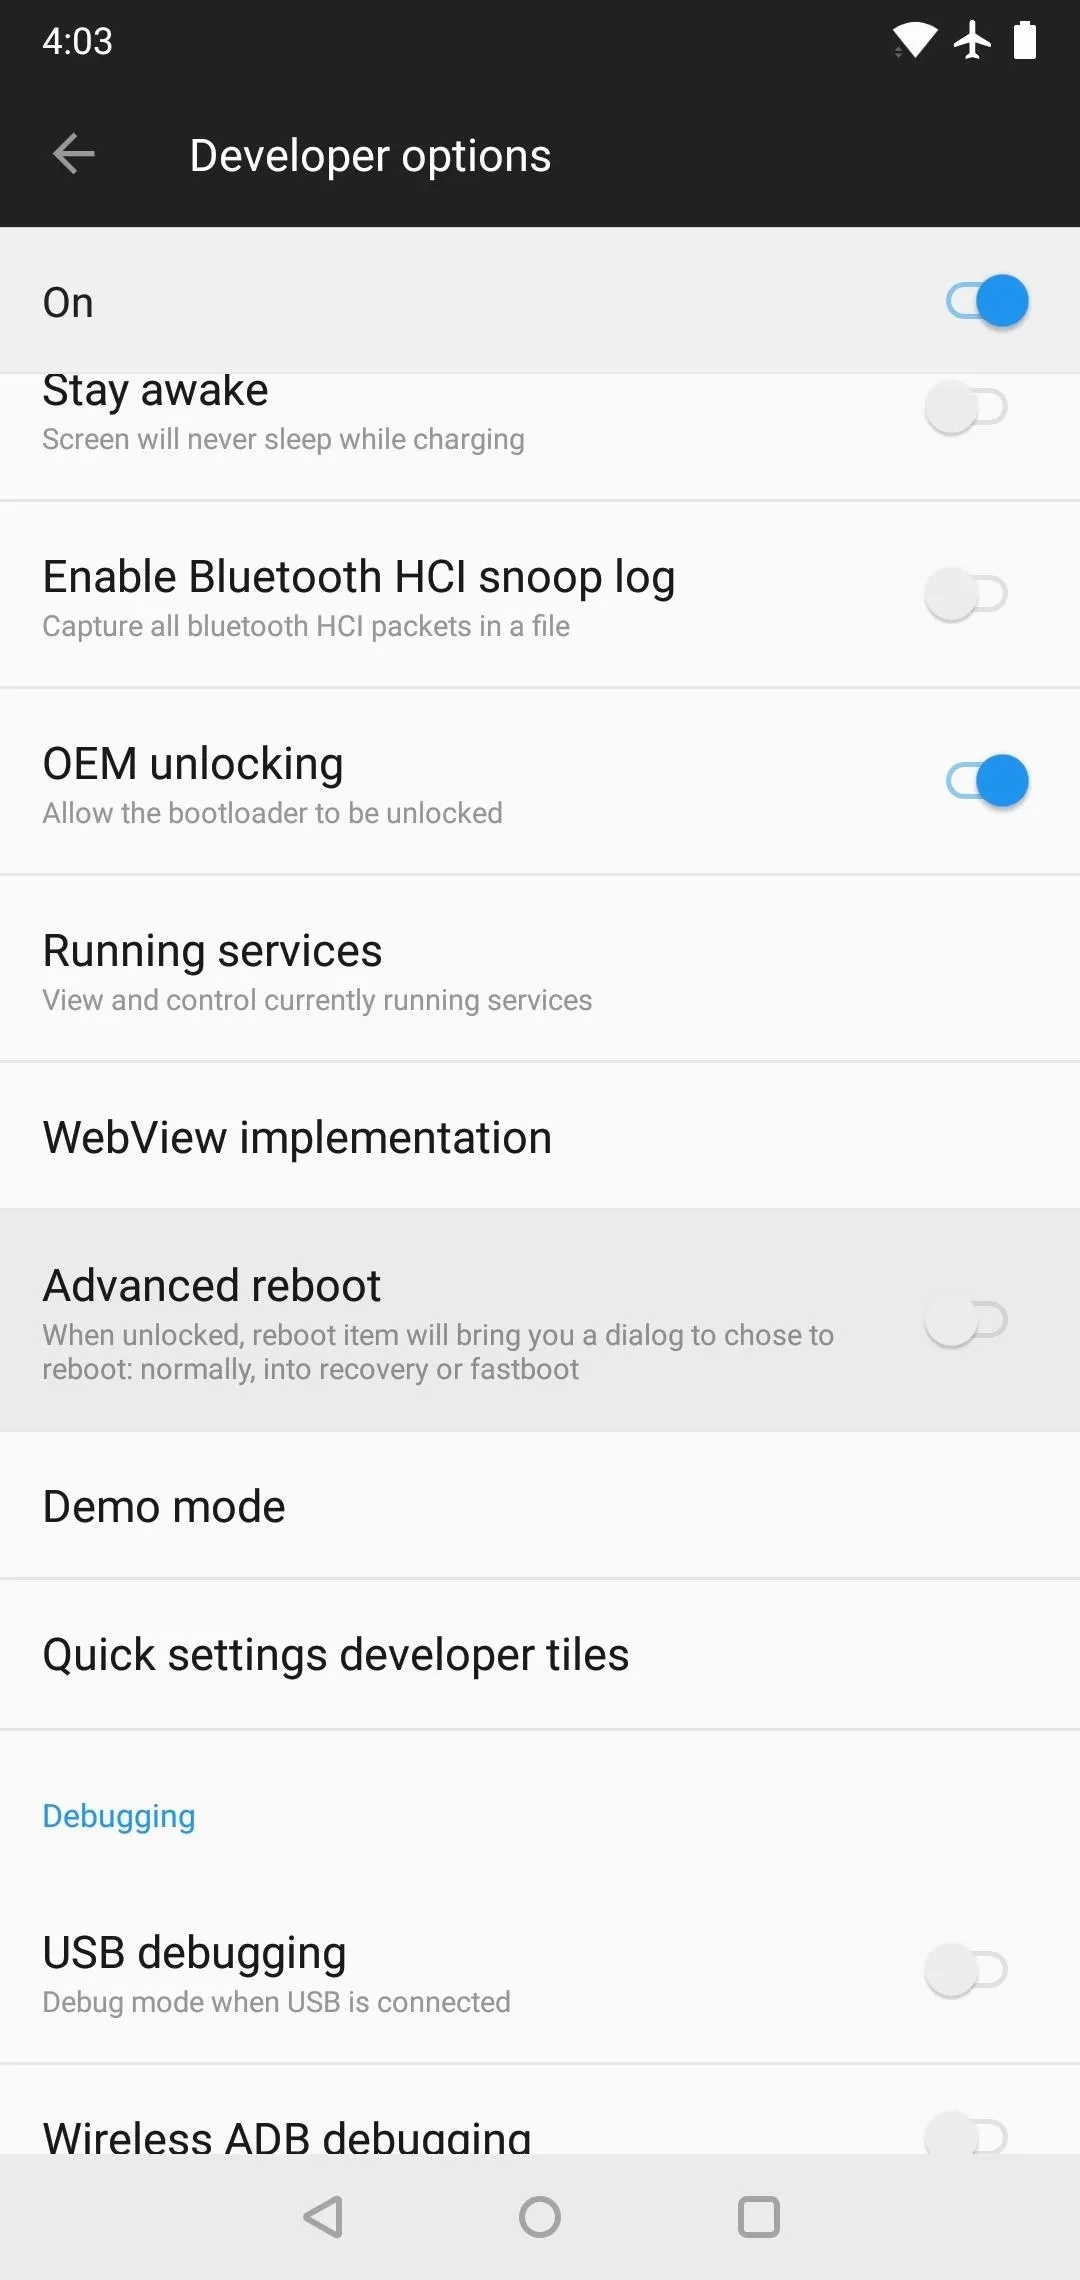
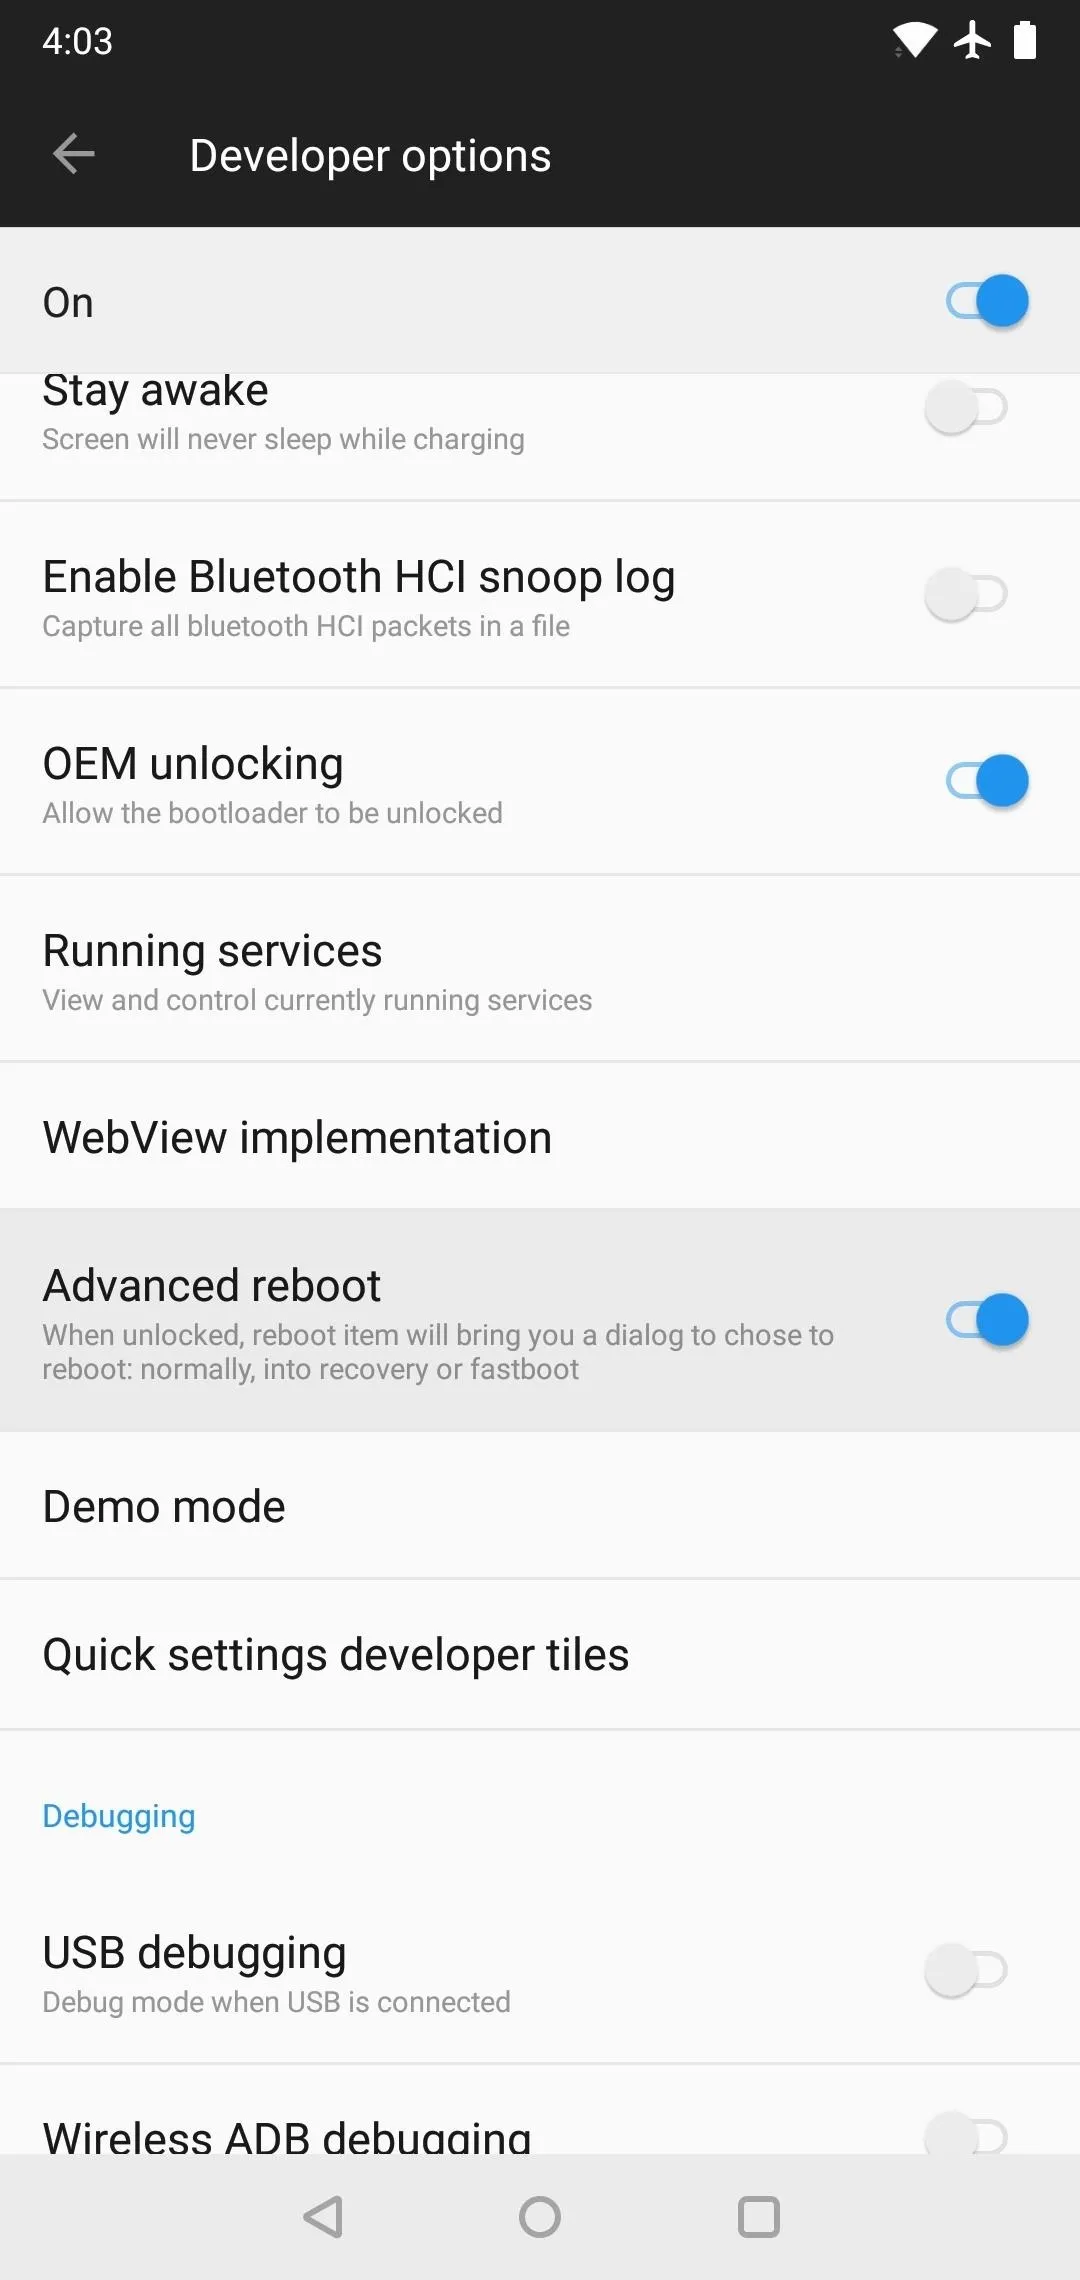
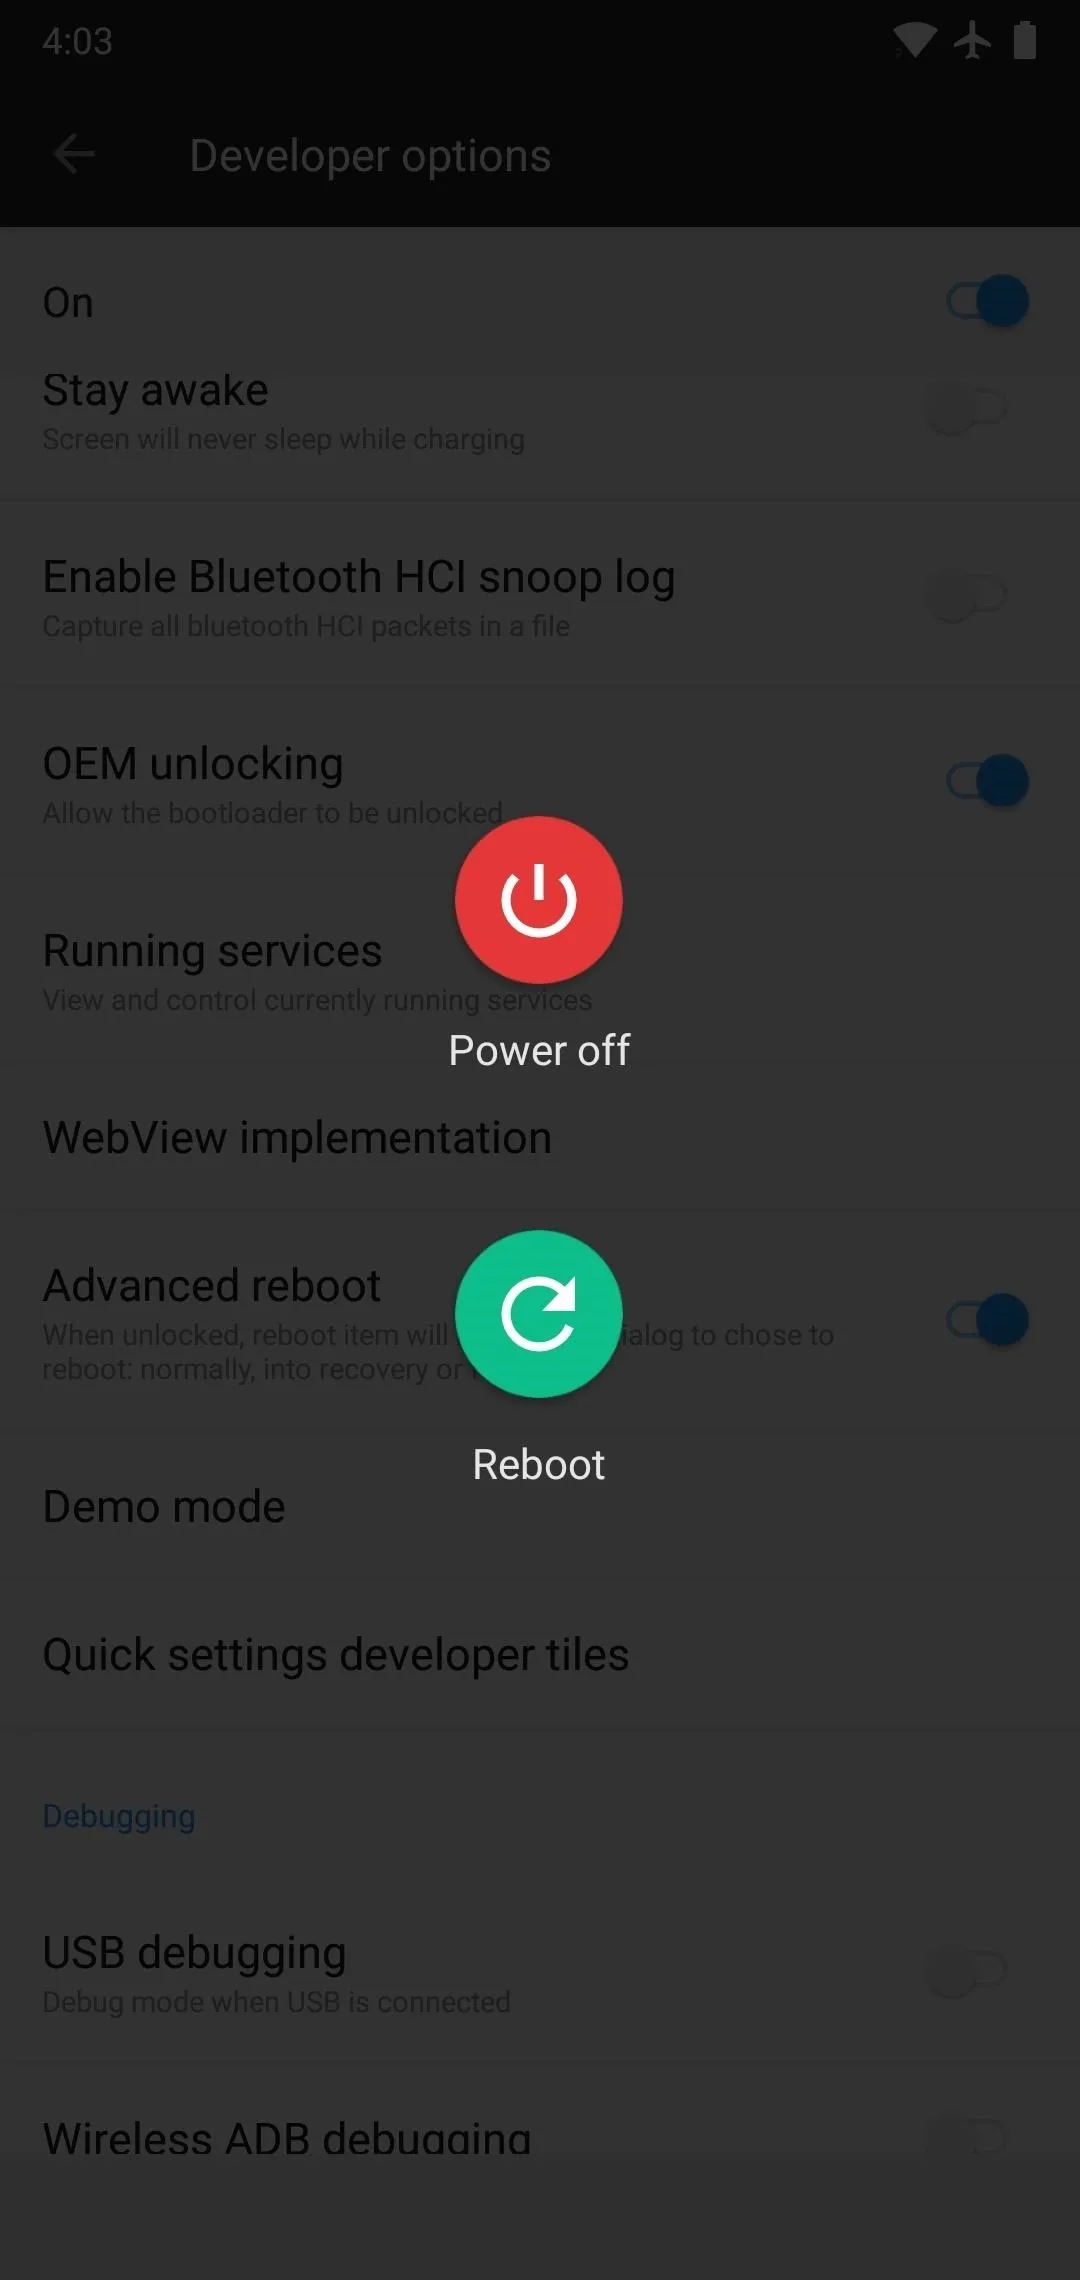
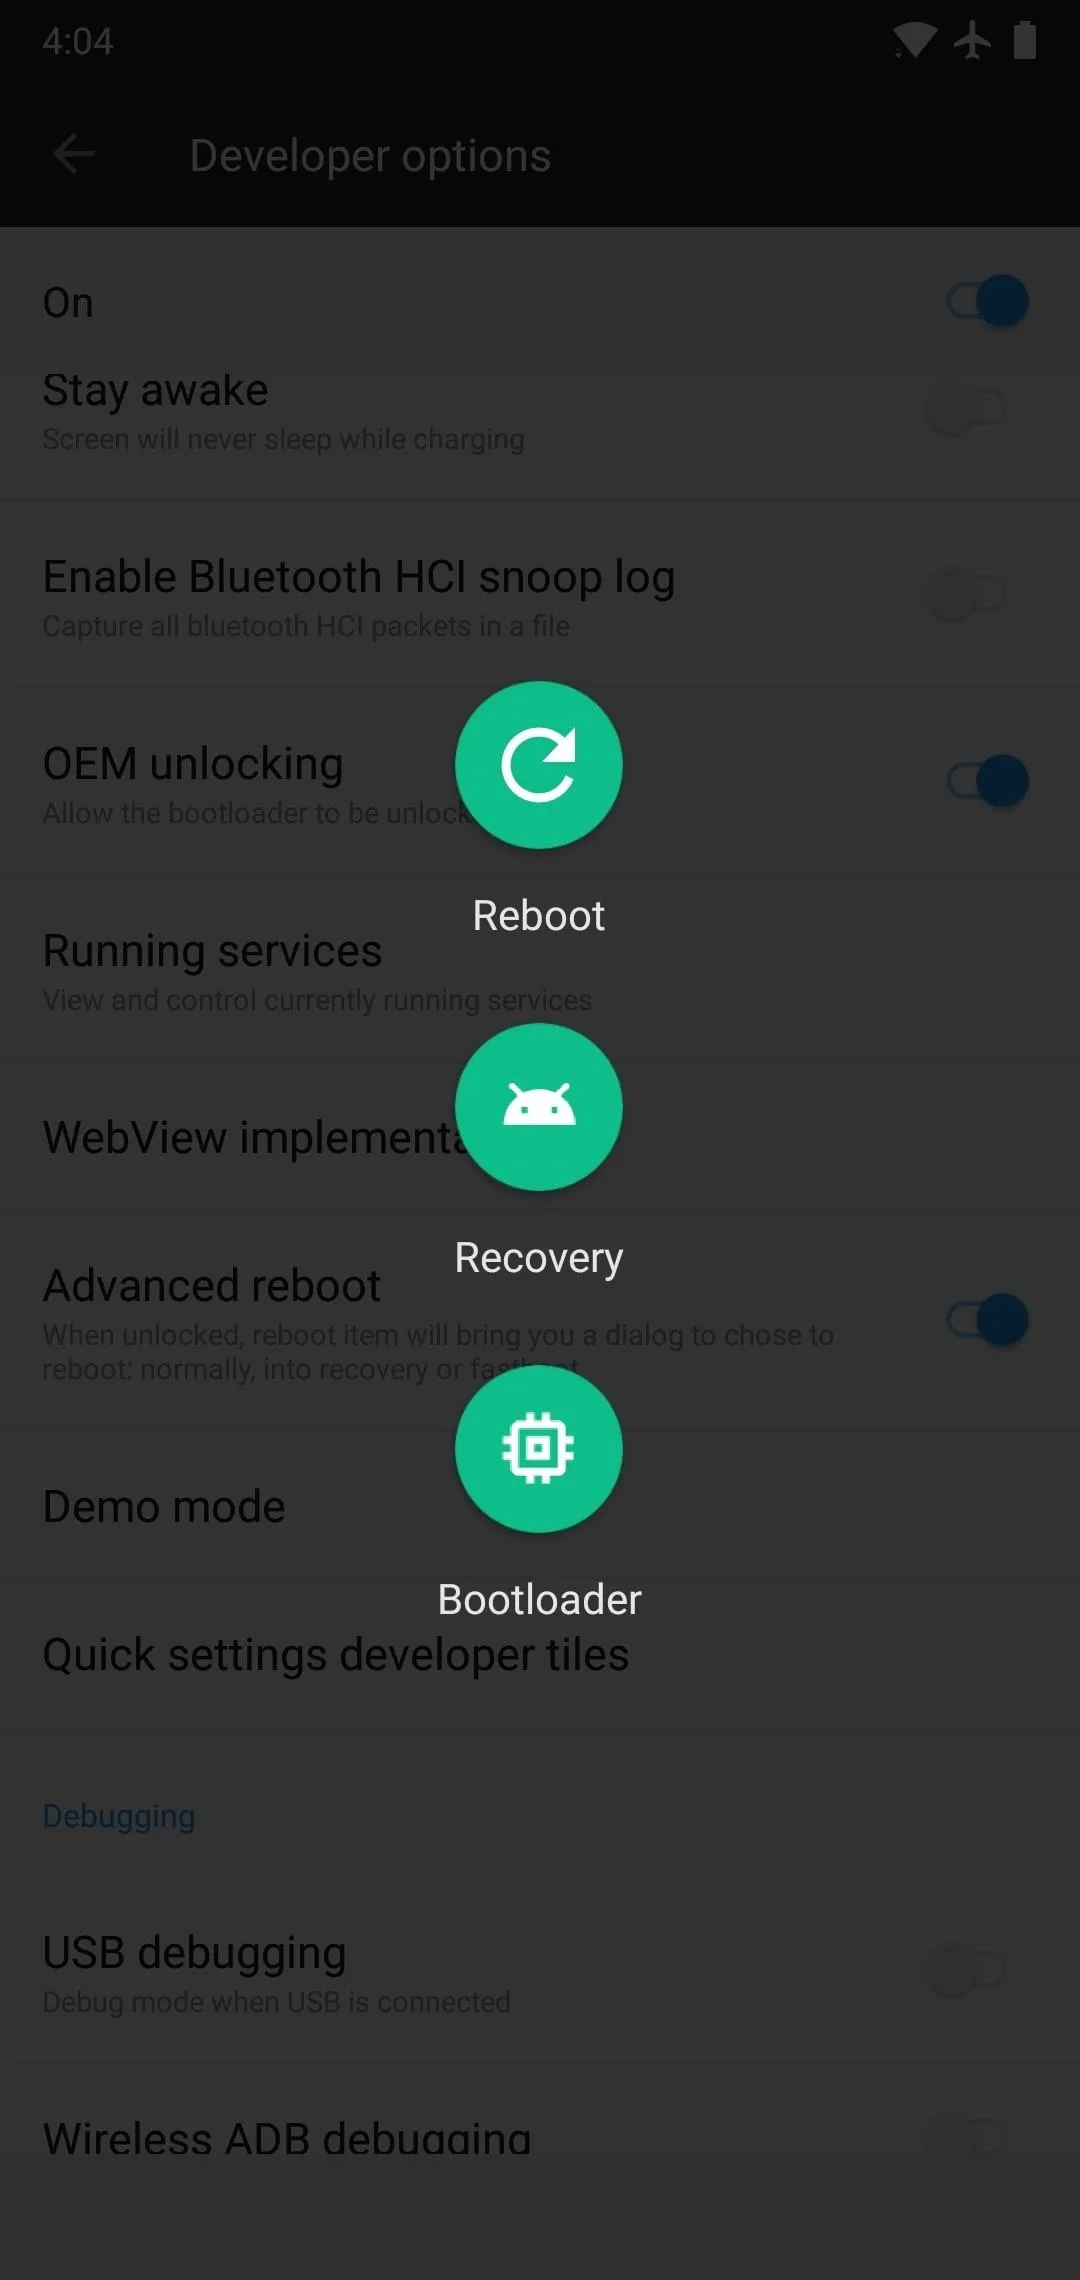
Enable Advanced Reboot
While you're still in the Developer Options menu, scroll down and enable the "Advanced reboot" setting. This will make it a lot easier to get into Fastboot mode.
Boot into Fastboot Mode
With Advanced Reboot enabled, press and hold your power button to bring up the power menu. Select "Reboot" on the first prompt, then hit "Bootloader" on the second and confirm your choice. When your phone boots into Fastboot mode, go ahead and connect it to your computer with a USB data cable, but leave it on the main Fastboot menu.
Install Fastboot on Your Computer
On your computer now, it's time to install ADB and Fastboot. We recommend installing the latest official version from Google, as there's a new command that older tools like Minimal ADB & Fastboot don't have yet. So if you haven't already done so, head to the guide below for full setup instructions.
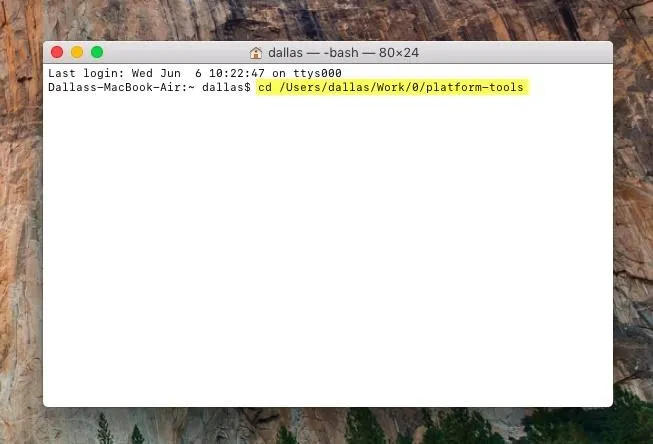
Open a Command Window in the Right Directory
This next part is where most people struggle with tools like ADB and Fastboot: Getting a command window open to the right directory.
The easiest way I've found to do this is to locate the platform-tools folder inside of your Fastboot installation directory. For Windows users, this can usually be found at C:\Program Files (x86)\Android\android-sdk\platform-tools. For Linux and Mac users, the folder's location will vary, so use your computer's search function to find the platform-tools folder.
Once you've found the platform-tools folder, copy the location from the address bar at the top of your file browser (e.g., Windows Explorer). Then, open a command prompt or terminal window. On Windows, press the Windows button on your keyboard, then type in "cmd" and hit enter to do so. On Linux or Mac, open "Terminal" from your Applications folder.
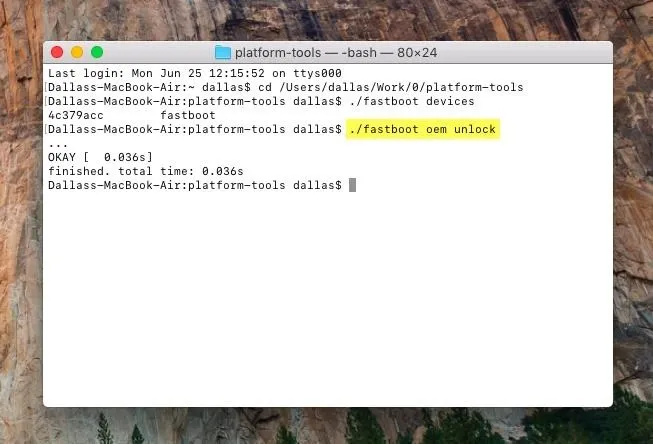
Once you've got the command window open, you'll need to change directories to the platform-tools folder before you can send the Fastboot command to unlock your bootloader. To do that, type "cd" (without the quotes) followed by a space, then paste in the file location for your platform-tools folder:
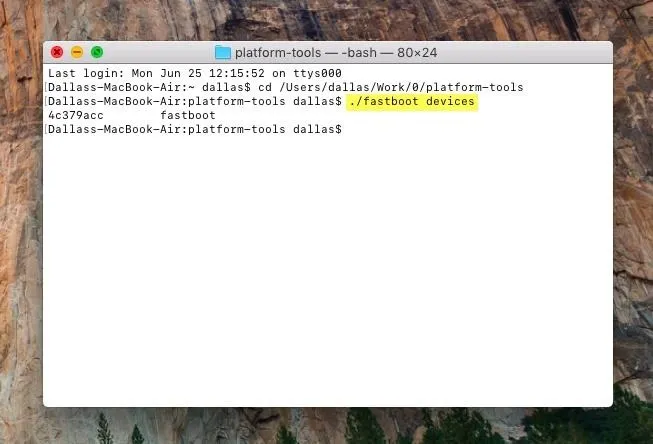
Verify the Connection
Next, make sure everything is connected properly by typing the following command into the prompt, then hitting enter:
fastboot devicesNote: Linux and Mac users will likely have to add a period and a slash at the beginning of all commands listed here (e.g., ./fastboot devices).
If this returns a series of letters and numbers followed by the word "fastboot," you're good to go. Otherwise, make sure your USB cable is properly connected and/or revisit the Fastboot instructions in Step 6 and Step 7.
Unlock Your Bootloader
Now it's time to actually unlock your bootloader. To start, type in the following command, then press enter on your keyboard:
fastboot oem unlockNote: Don't forget the period and slash if you're on Mac or Linux.
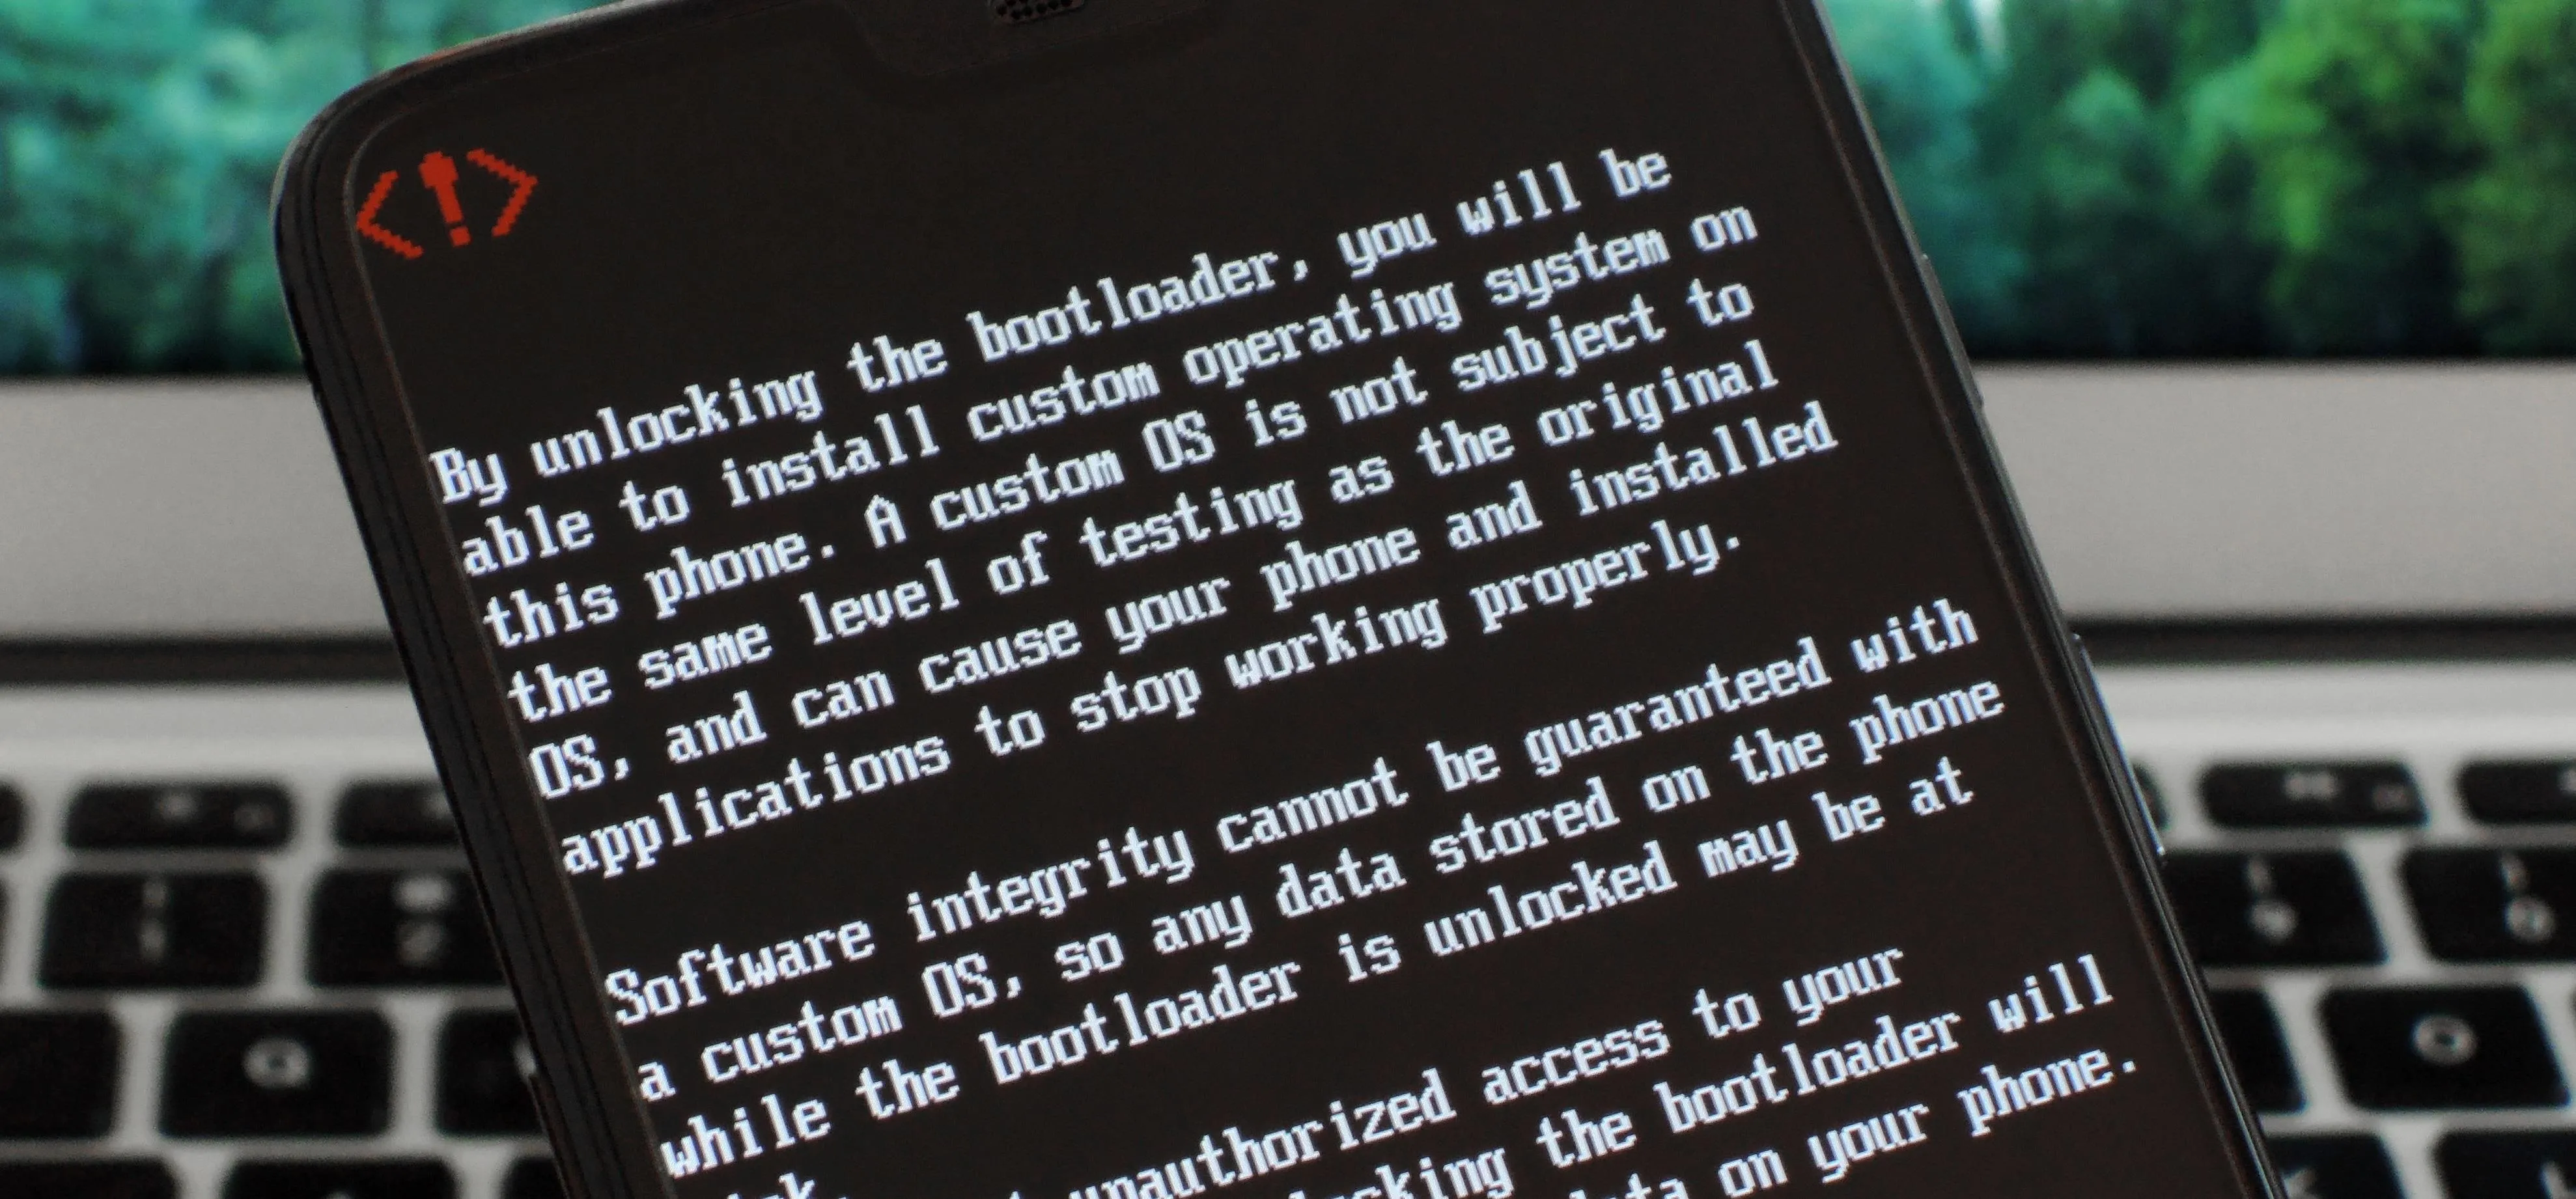
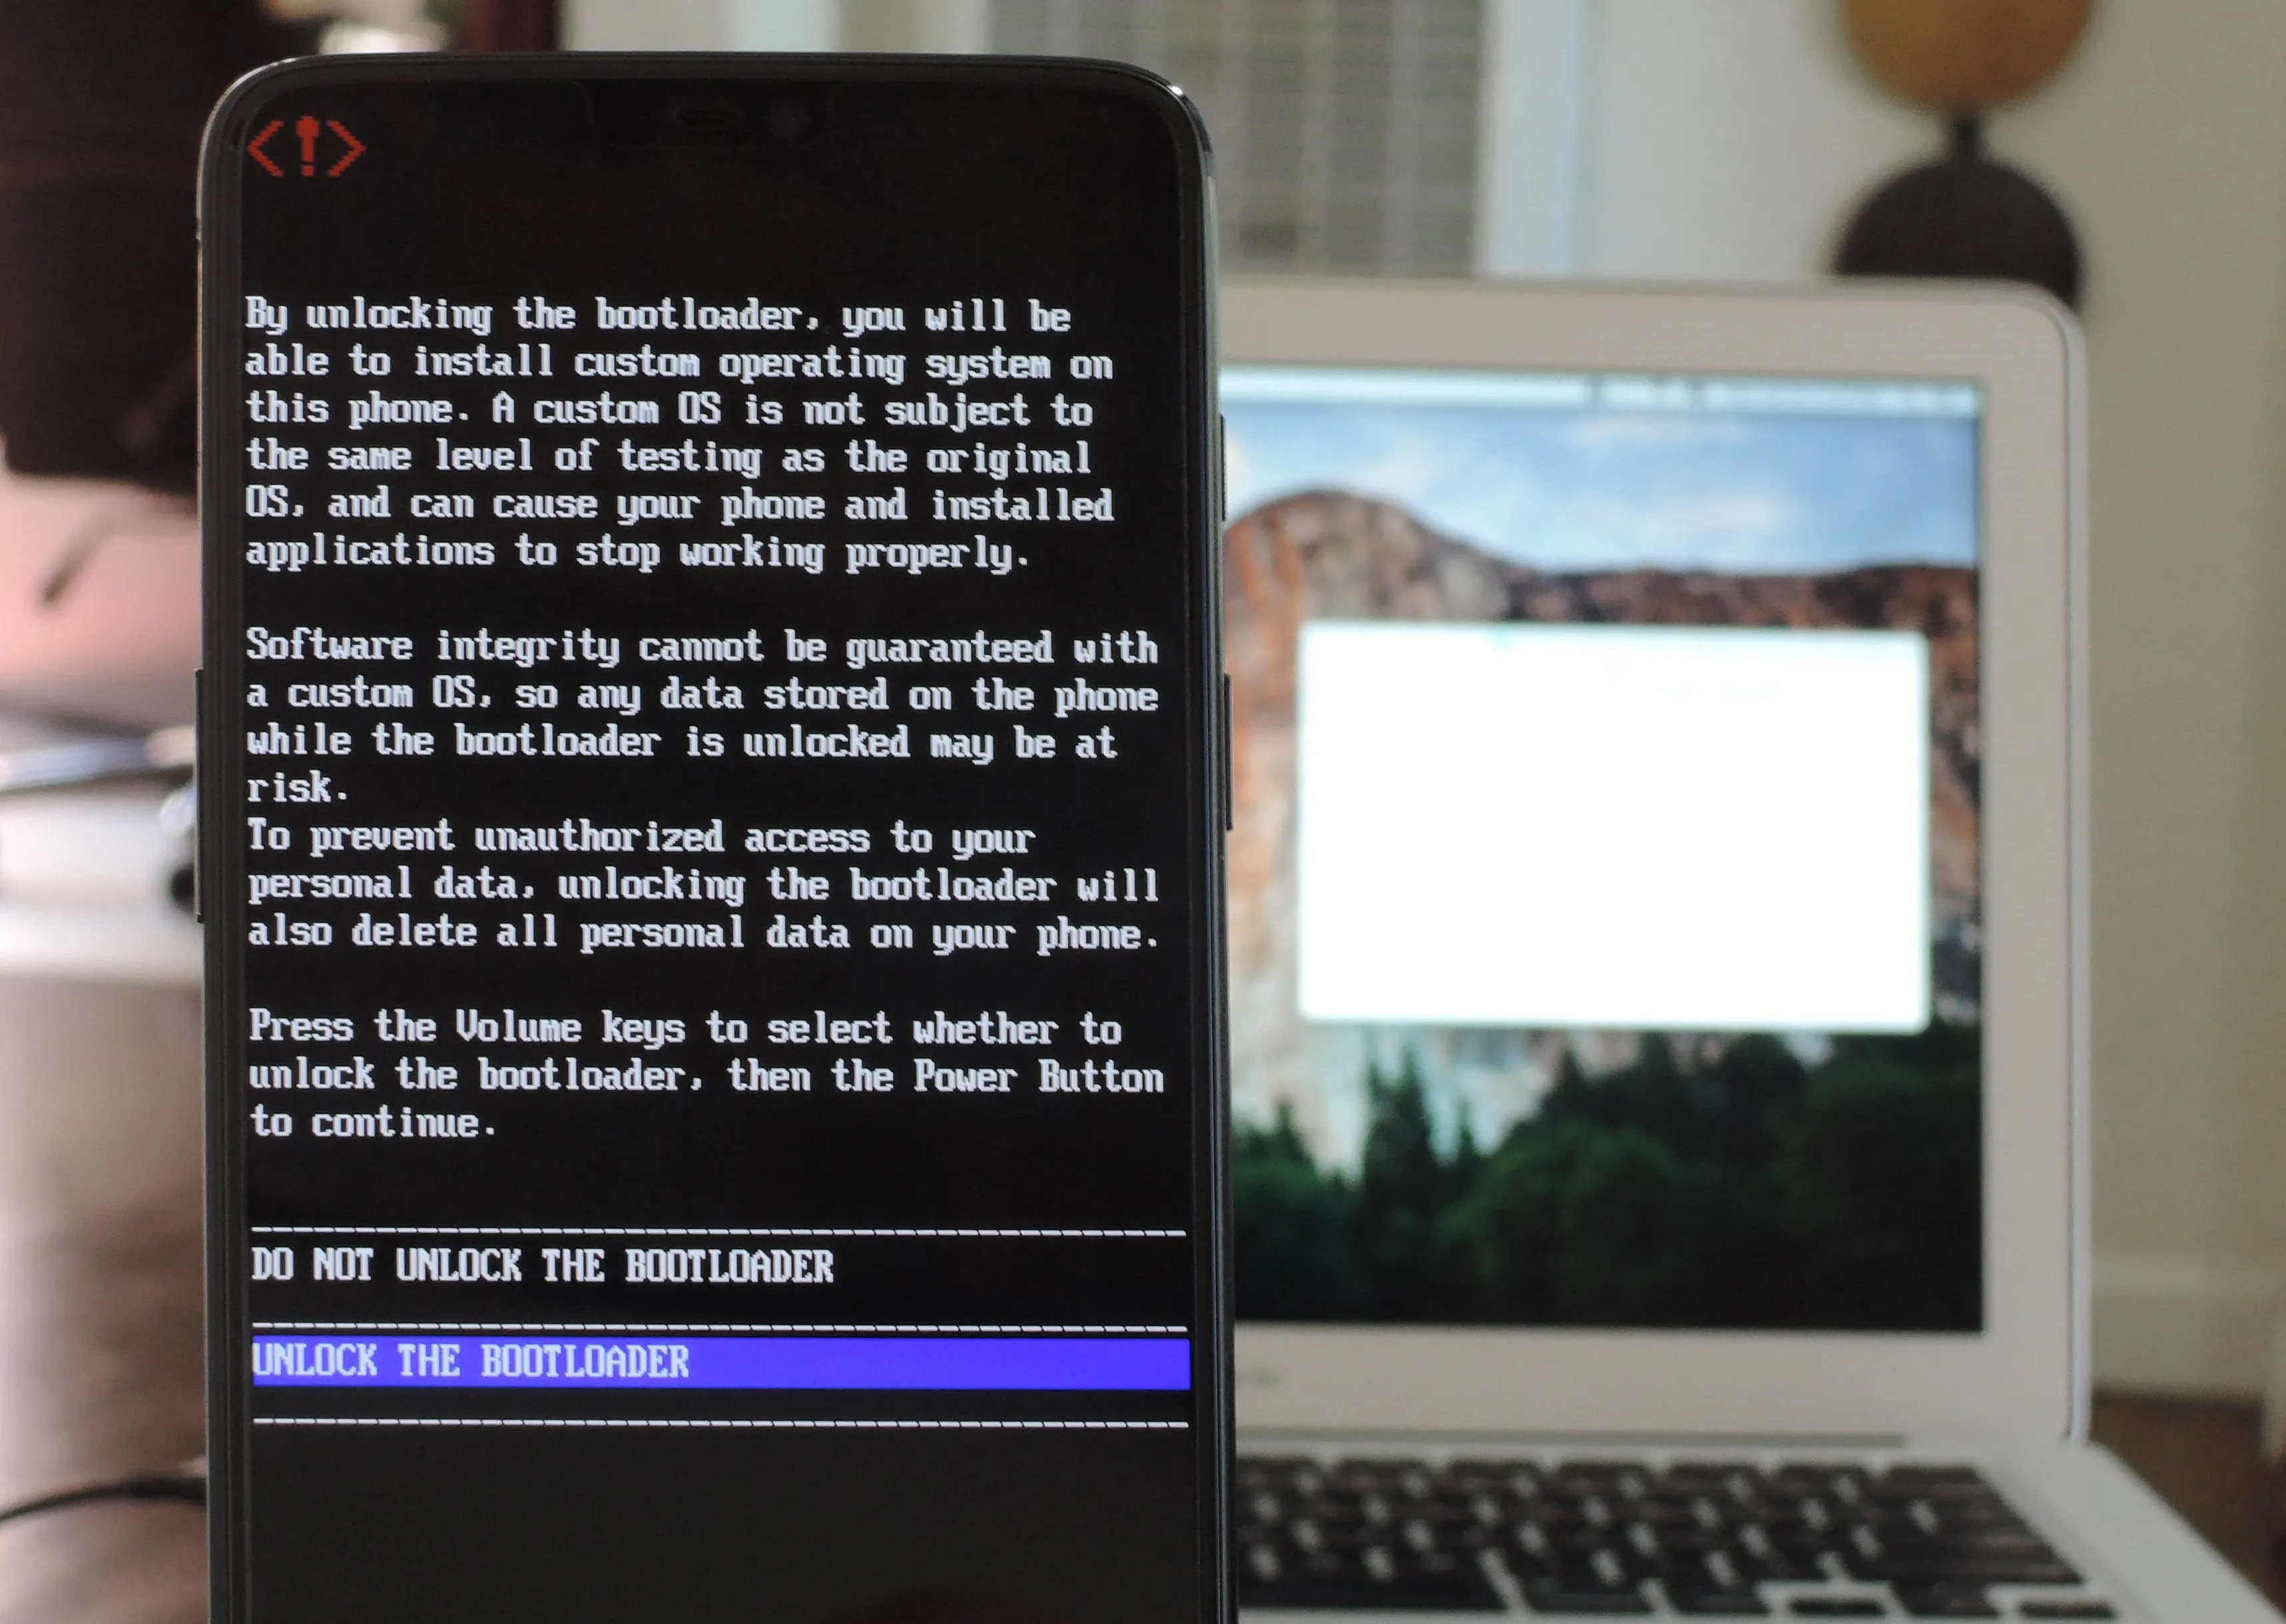
At this point, a new screen should appear on your phone asking you to verify that you want to unlock your bootloader. Use the volume keys to highlight "Unlock the bootloader," then press your power button to select it. At this point, your phone will automatically reboot and wipe itself, then your bootloader will be unlocked.
Dallas Thomas/Gadget Hacks
Give your phone as long as 15 minutes to complete the wiping procedure, then simply run through initial setup again just like you did after you first unboxed your phone. At this point, your bootloader is officially unlocked, so you're ready to start flashing custom firmware files!
Note that on each boot, your phone will display a message saying "The bootloader is unlocked and software integrity cannot be guaranteed." This is completely normal and has no impact on the operation of your phone.
- Follow Gadget Hacks on Facebook, Twitter, YouTube, and Flipboard
- Follow WonderHowTo on Facebook, Twitter, Pinterest, and Flipboard
Cover image and screenshots by Dallas Thomas/Gadget Hacks


Comments
Be the first, drop a comment!