


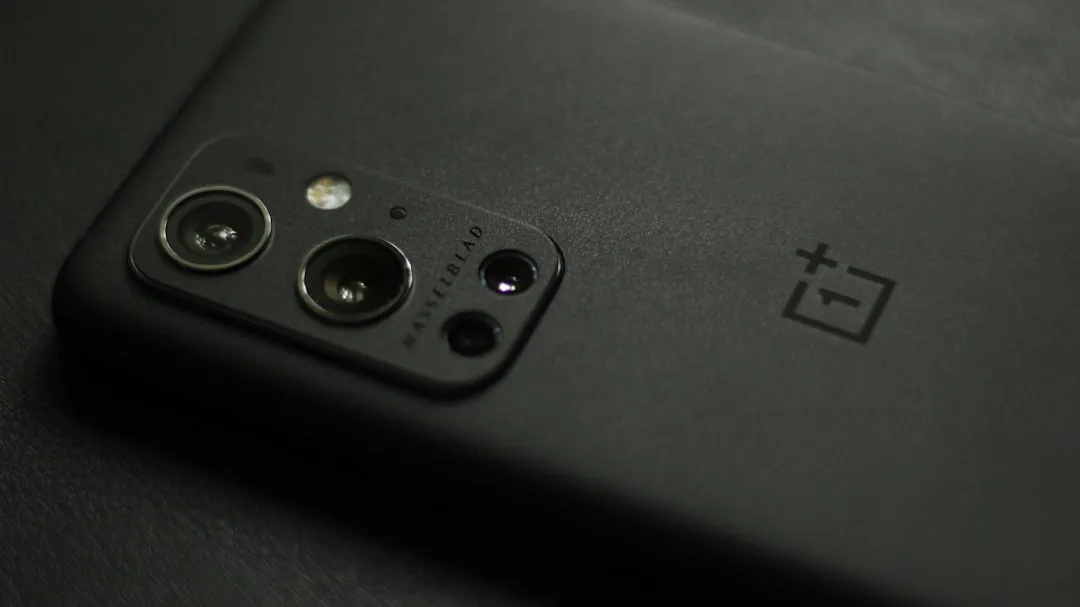
The OnePlus 7 Pro is truly the best phone that the company has ever created to date — it's even one of the hottest phones around regardless of OEM. It offers an awesome display with minimal bezels, a smooth 90-hertz refresh rate, a pop-up selfie camera, and the best triple camera system in a OnePlus phone so far. It can truly compete with other flagship phones while keeping the cost down.
It's a fantastic device hands down, but unlocking the bootloader and customizing this beast is where the rest of the magic occurs. Being able to install TWRP, Magisk, custom ROMs, and the many other mods out there will take this already great device to the next level. Just as Google does for the Pixel phones, OnePlus makes it easy to unlock the bootloader so you can begin your modding adventure.
Disclaimers
- Unlocking the bootloader will factory reset your device.
- Your phone will now fail SafetyNet checks, but Magisk can fix it.
- Unlocking the bootloader will not void your OnePlus warranty.
Enable Developer Options
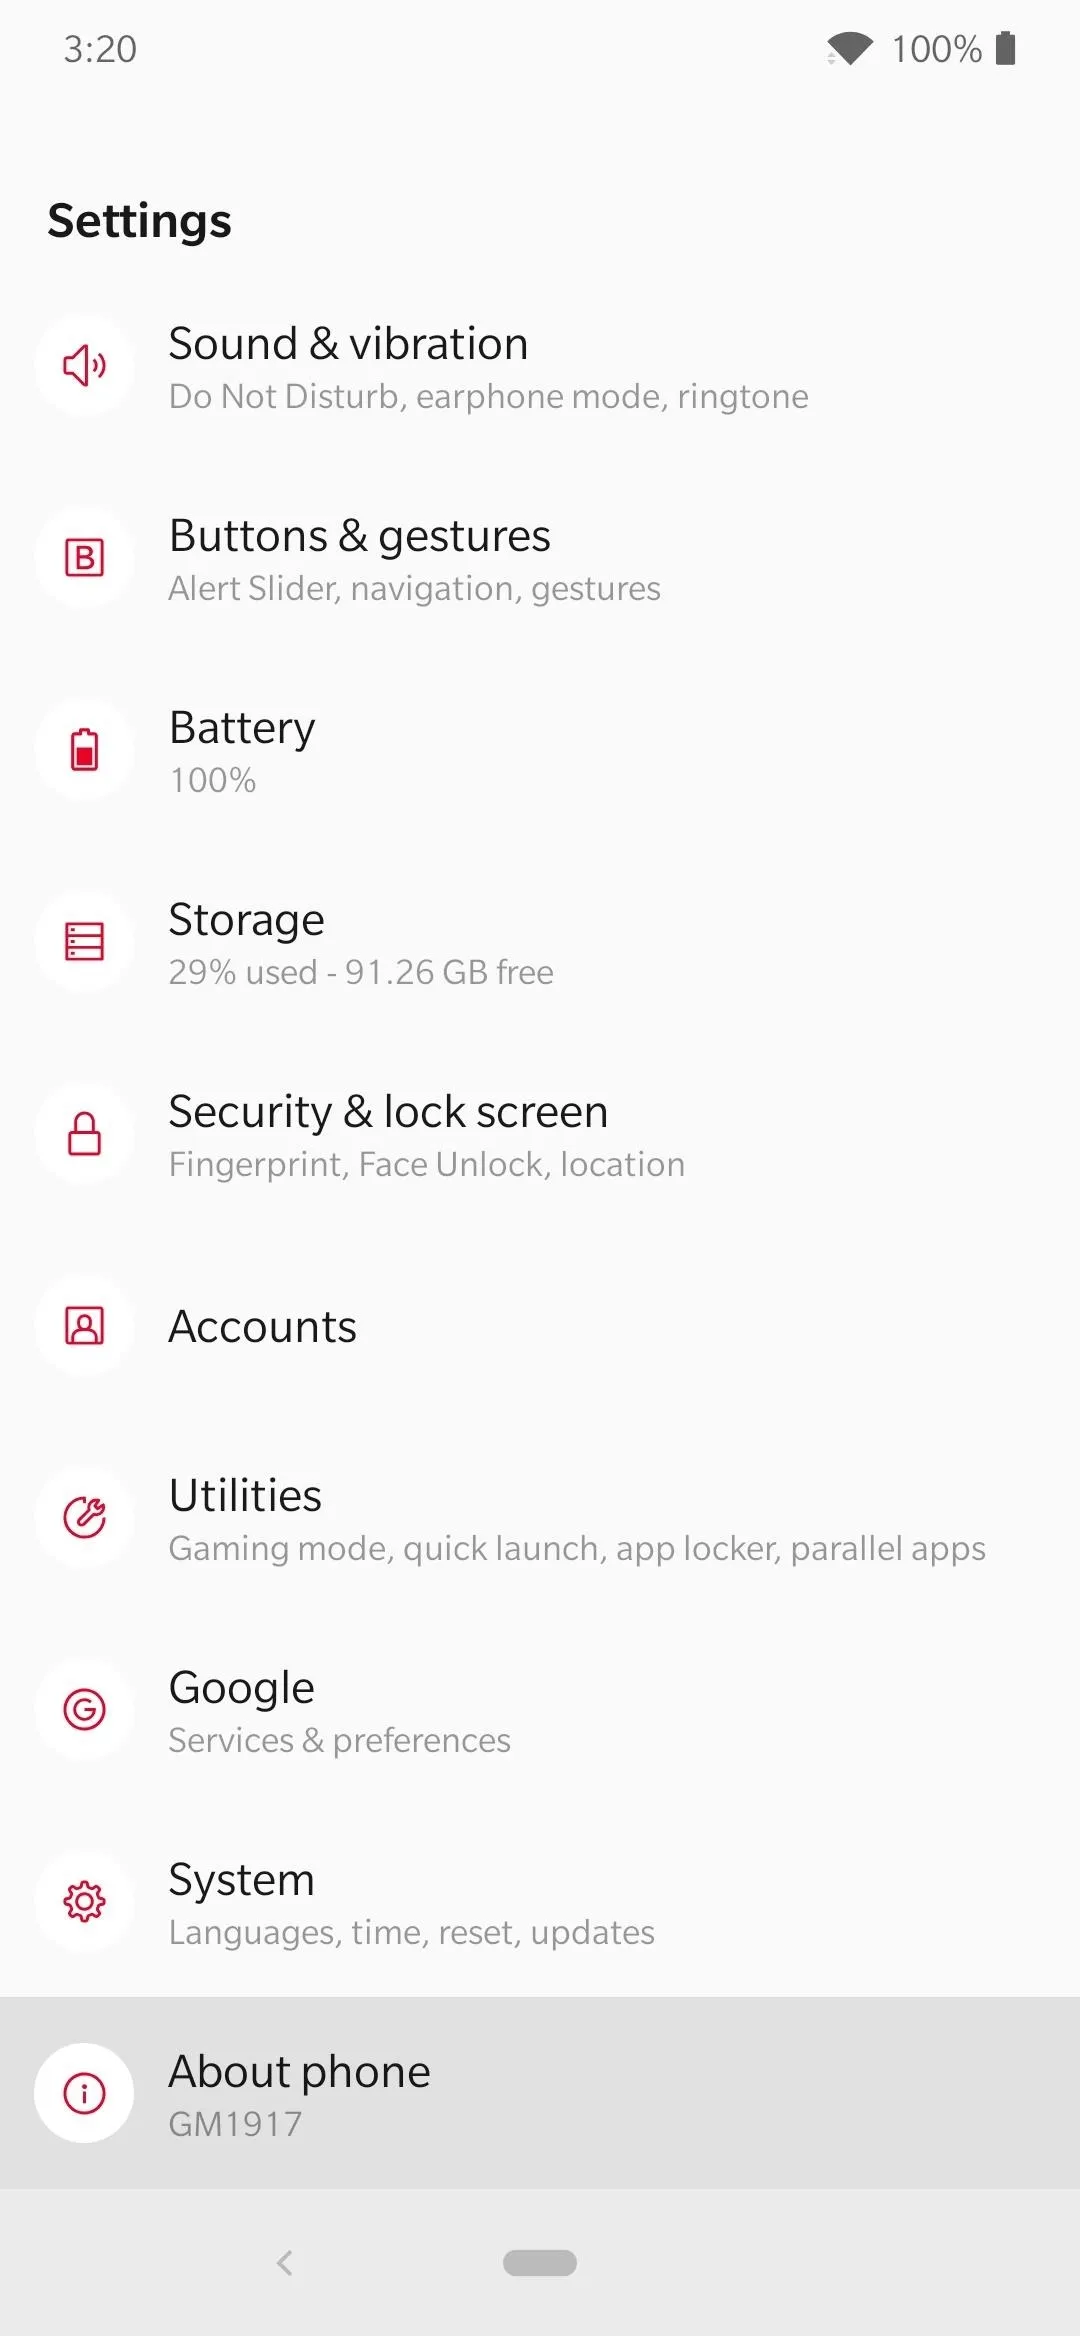
The bootloader is always going to be locked down by default to prevent making any changes to the system for security purposes. To ensure the setting stays hidden from the average consumer, it's tucked away under the Developer Options of your phone meant only for advanced users. To un-hide this menu, head to the location below from your phone's main Settings.
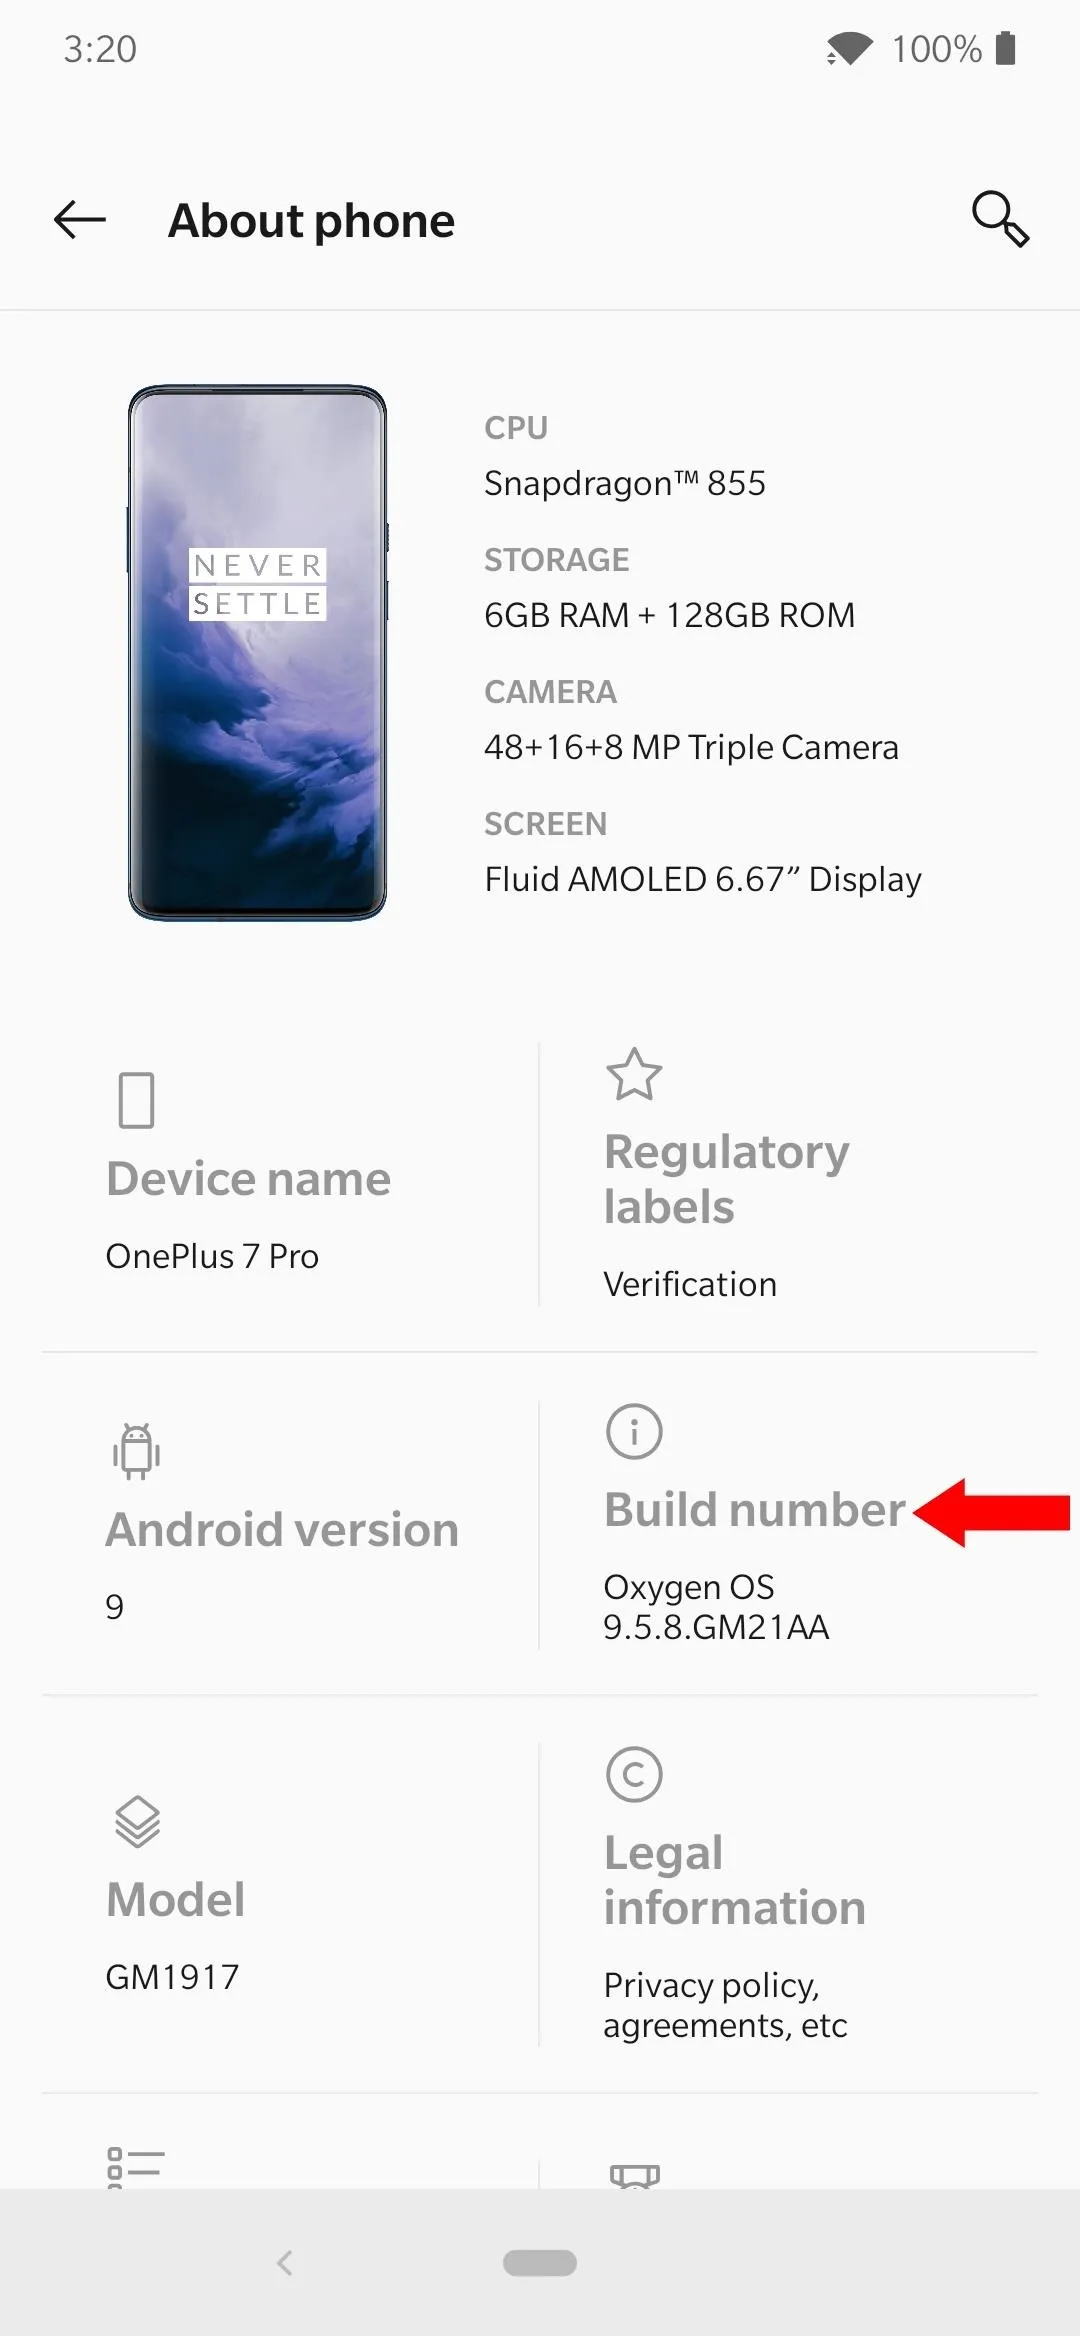
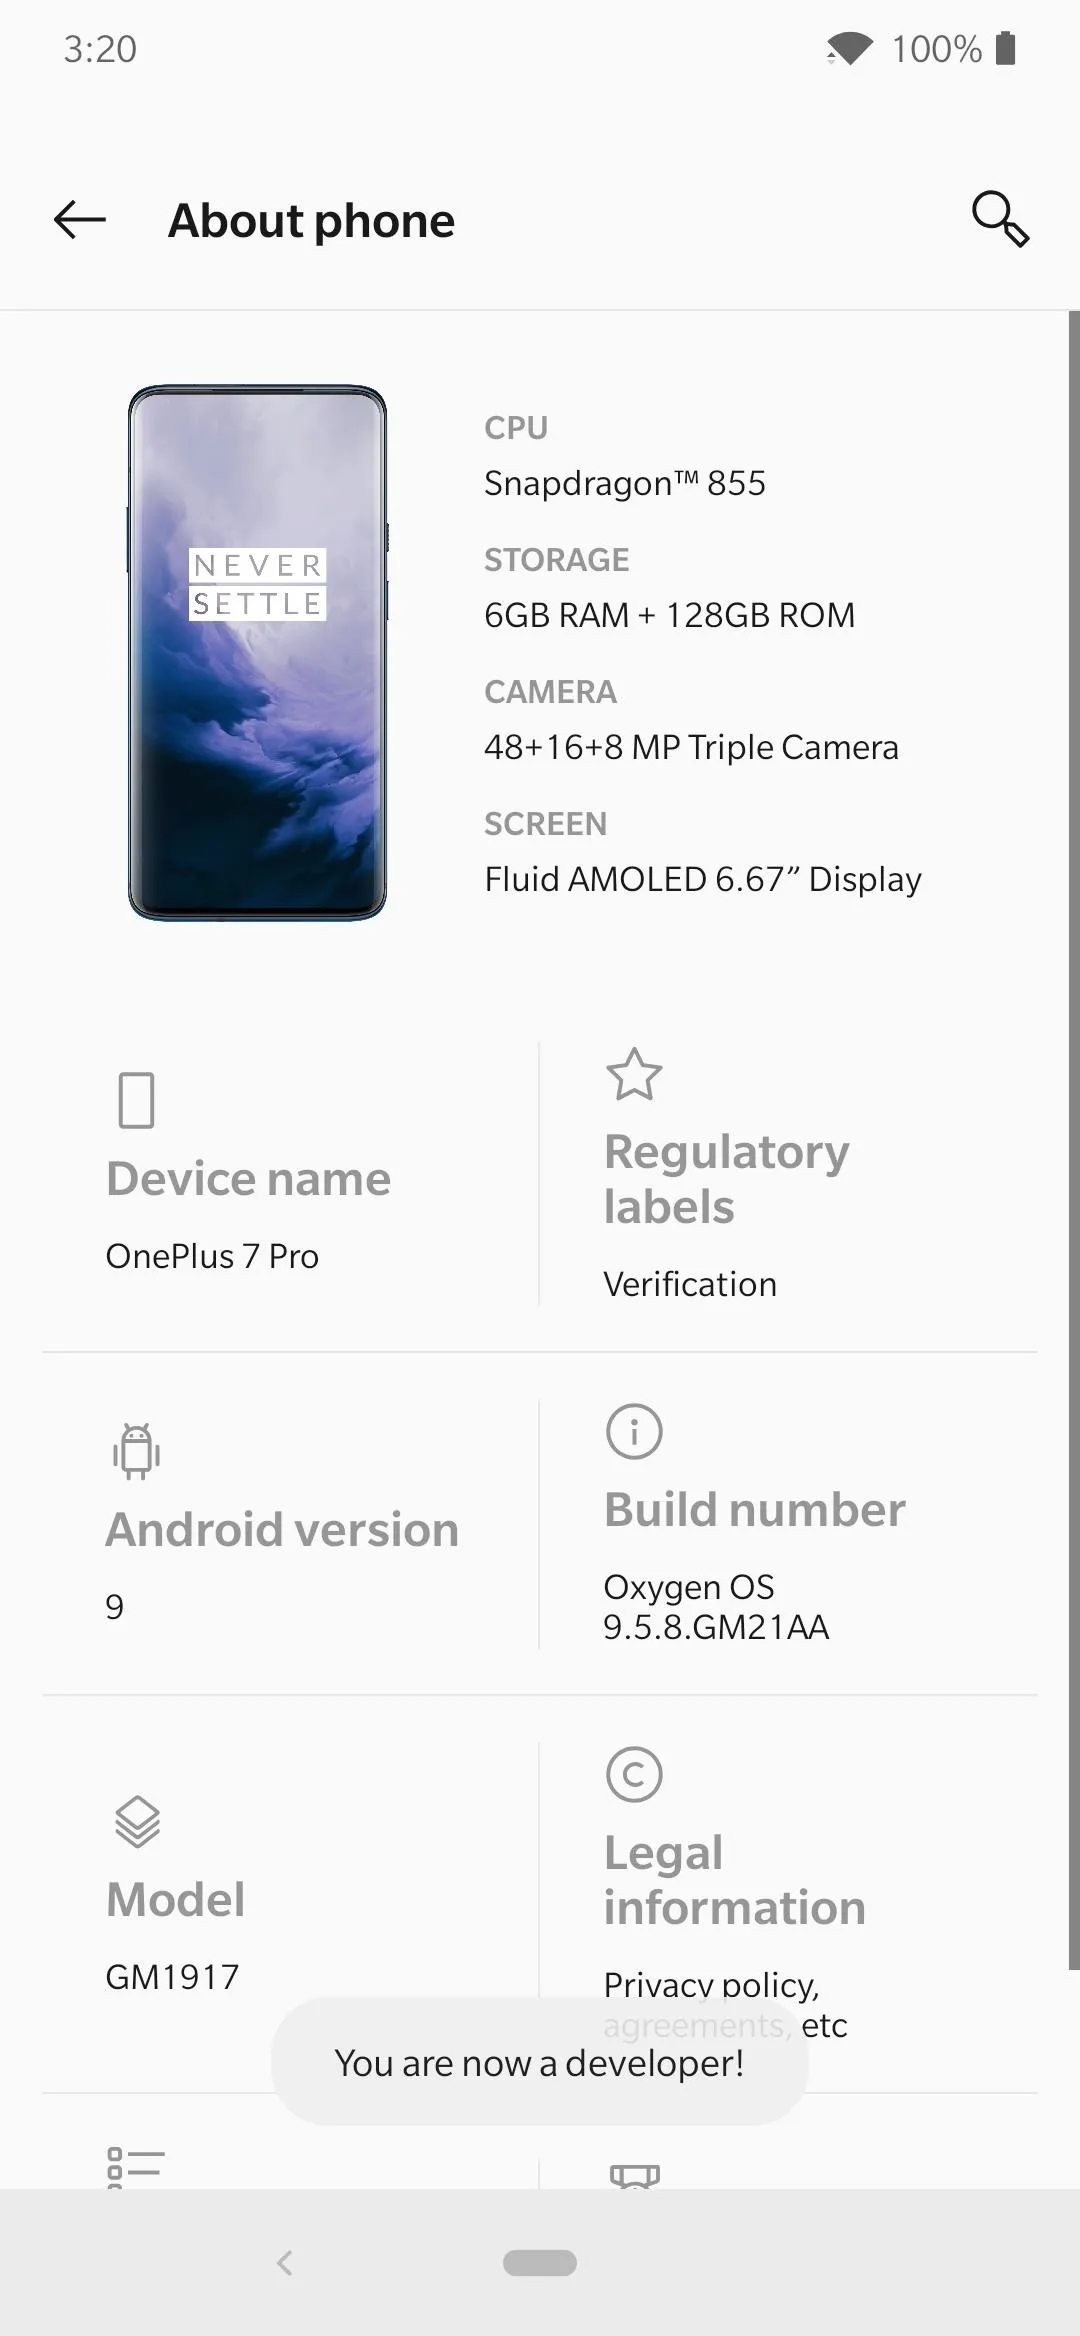
Settings -> About phoneNow that you're sitting in the "About phone" menu, you need to locate the "Build number" entry, then tap it seven times in rapid succession. Once successful, you'll get a toast notification message that states "You are now a developer." You may be prompted to enter your password or PIN beforehand, but after you do that you'll get the toast notification message.
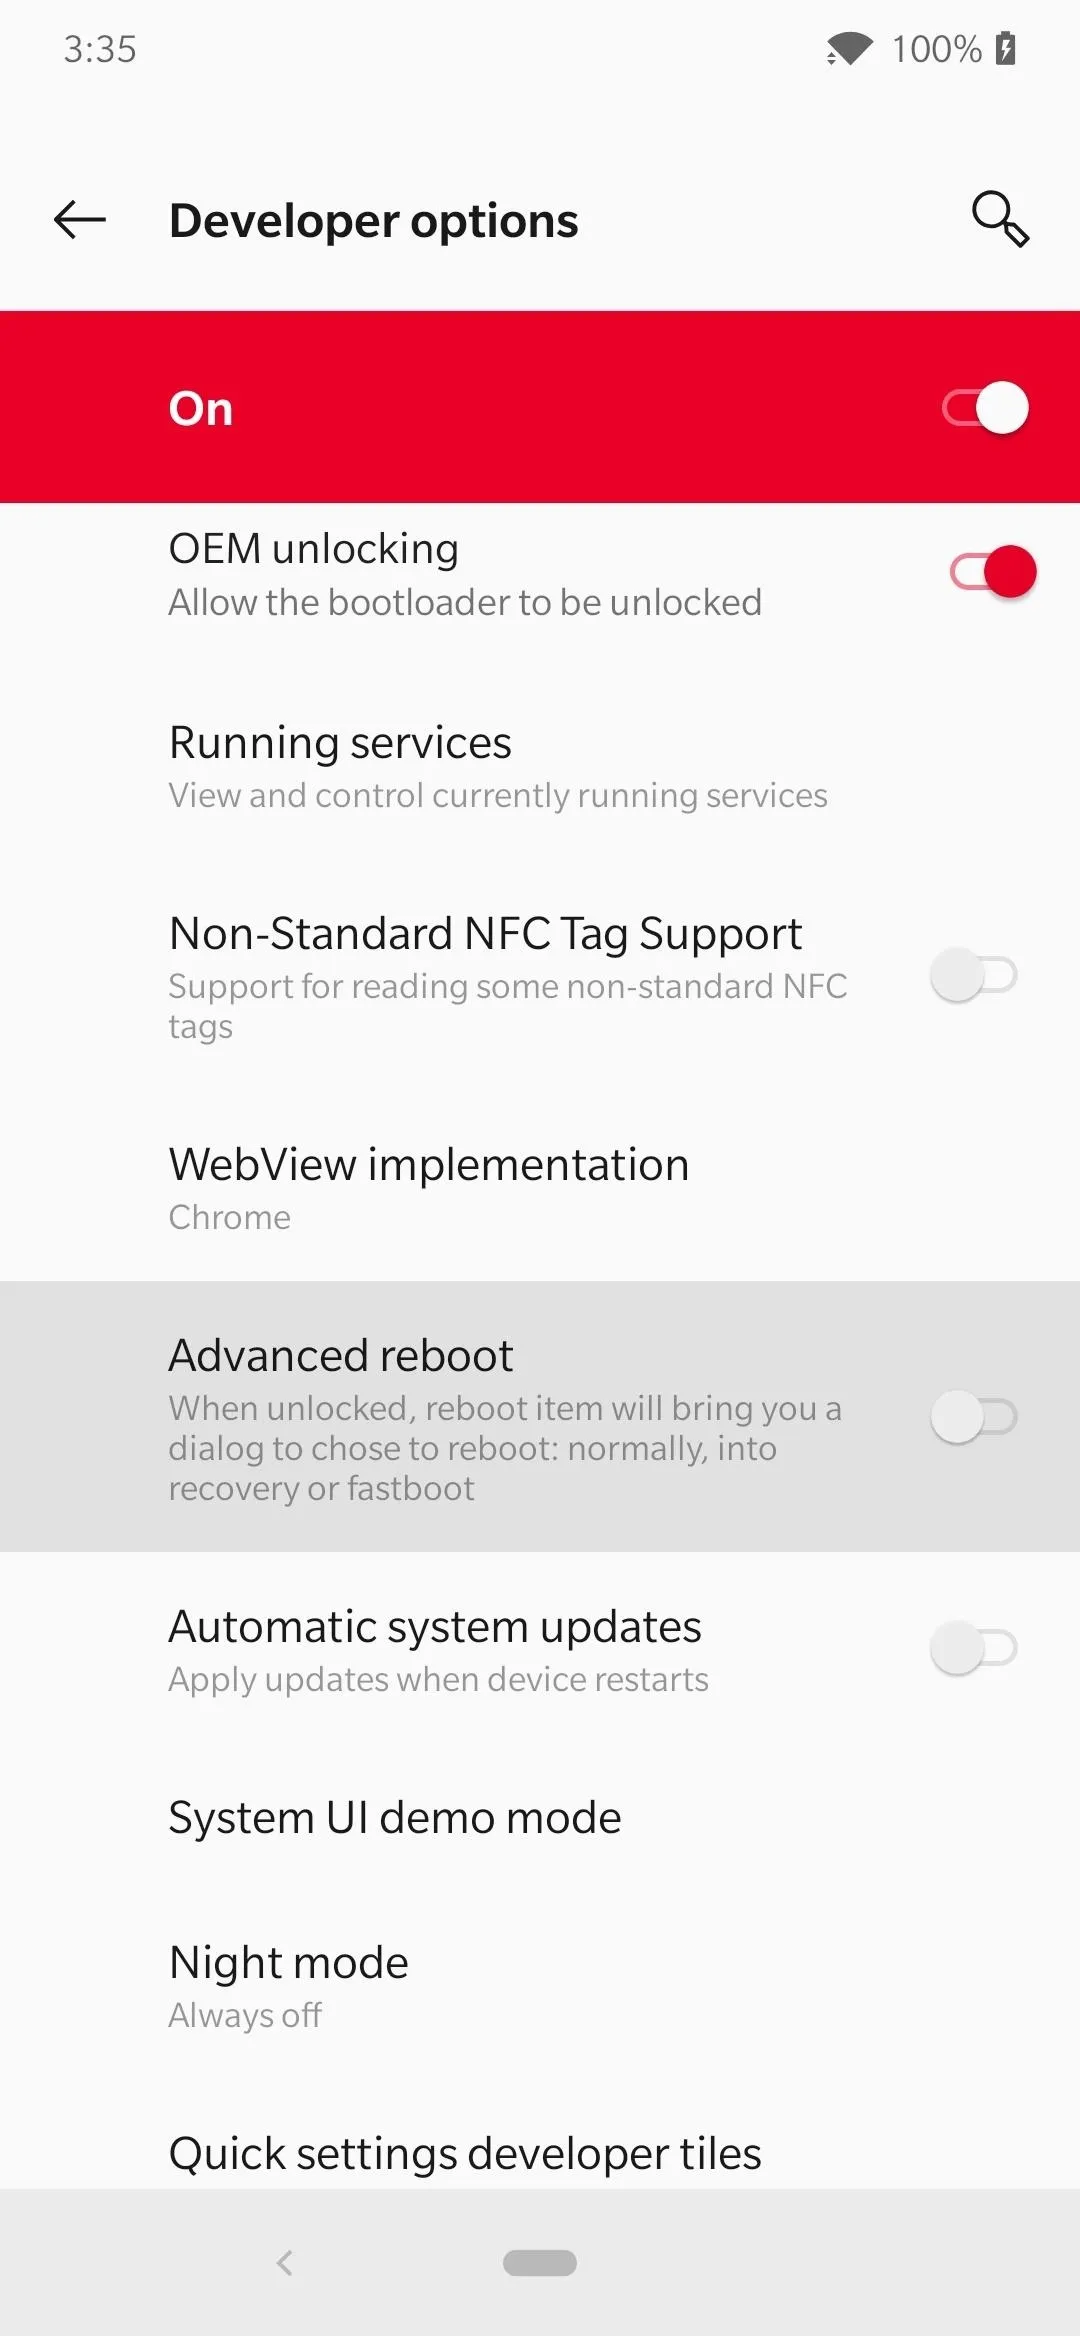
Enable OEM Unlocking
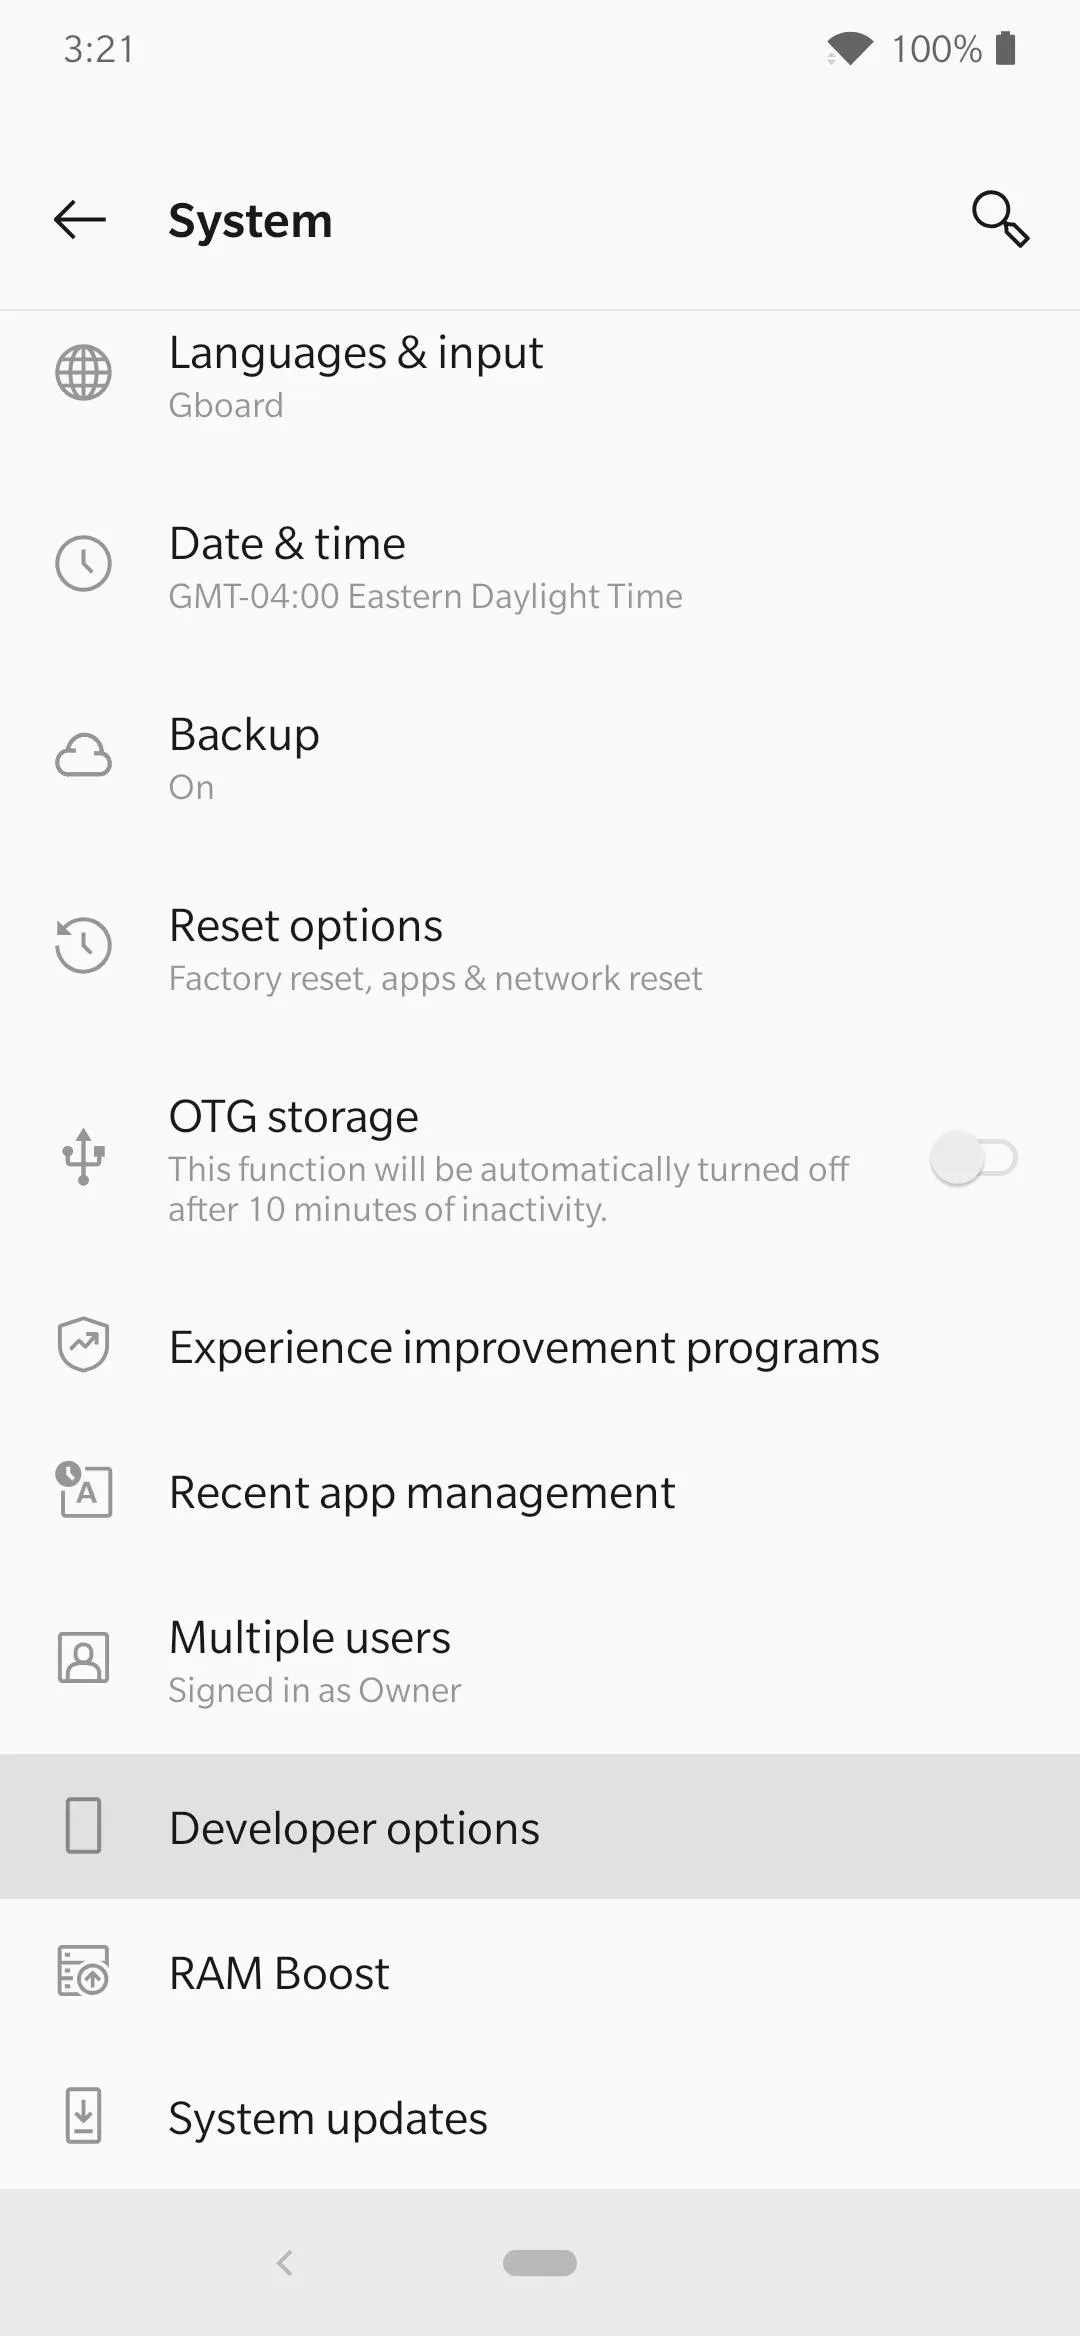
Now that the Developer Options aren't hiding from you anymore, you can get to the bootloader unlock setting. Head back to the main Settings menu and choose "System," then "Developer options." The setting you're looking for is called "OEM unlocking," and once you find it, tap it once to bring up a prompt like before. Enter your password or PIN if needed, then tap "Enable" to confirm your choice.

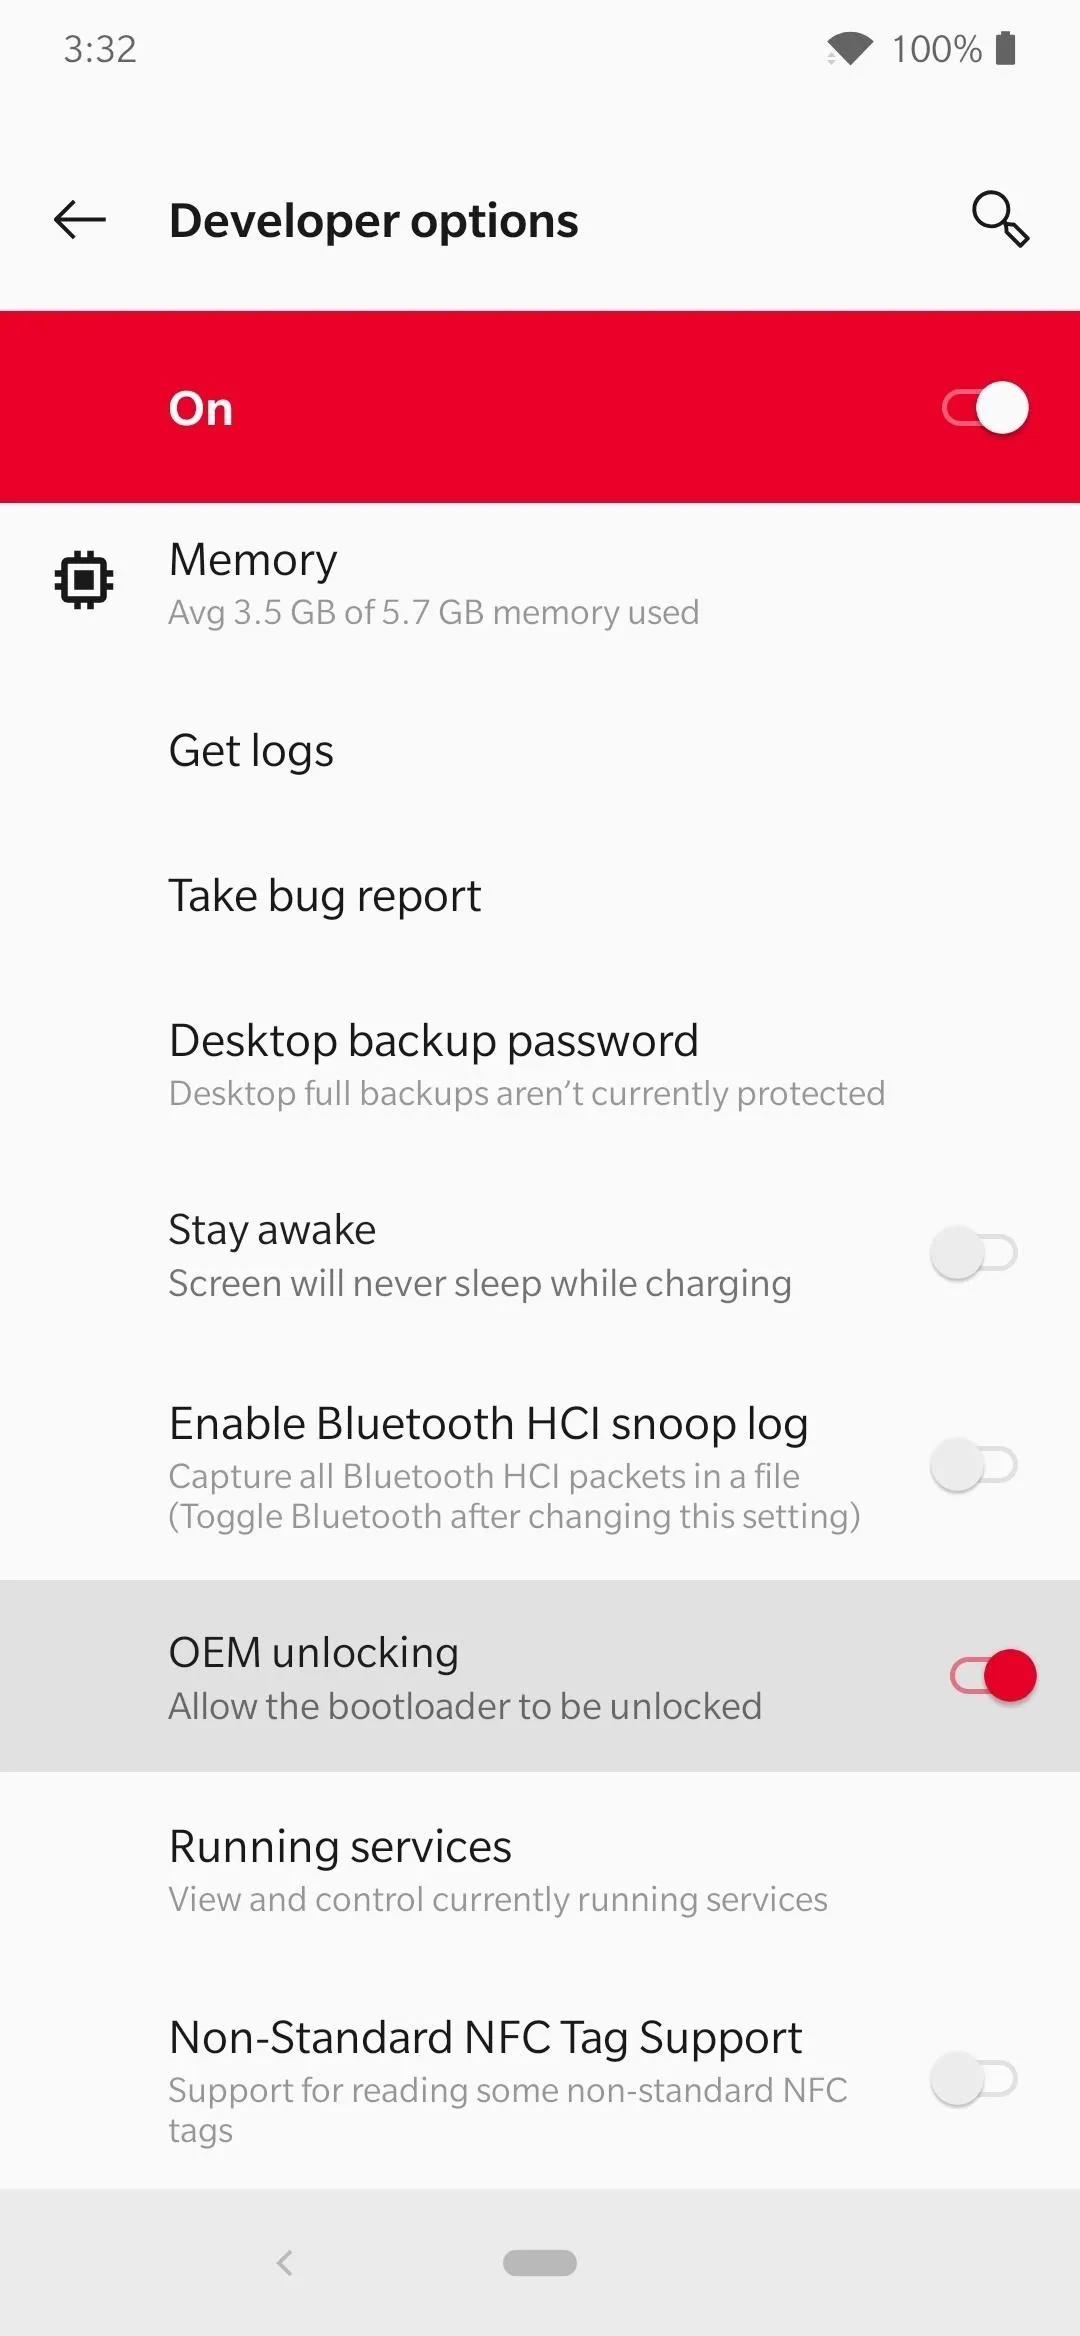
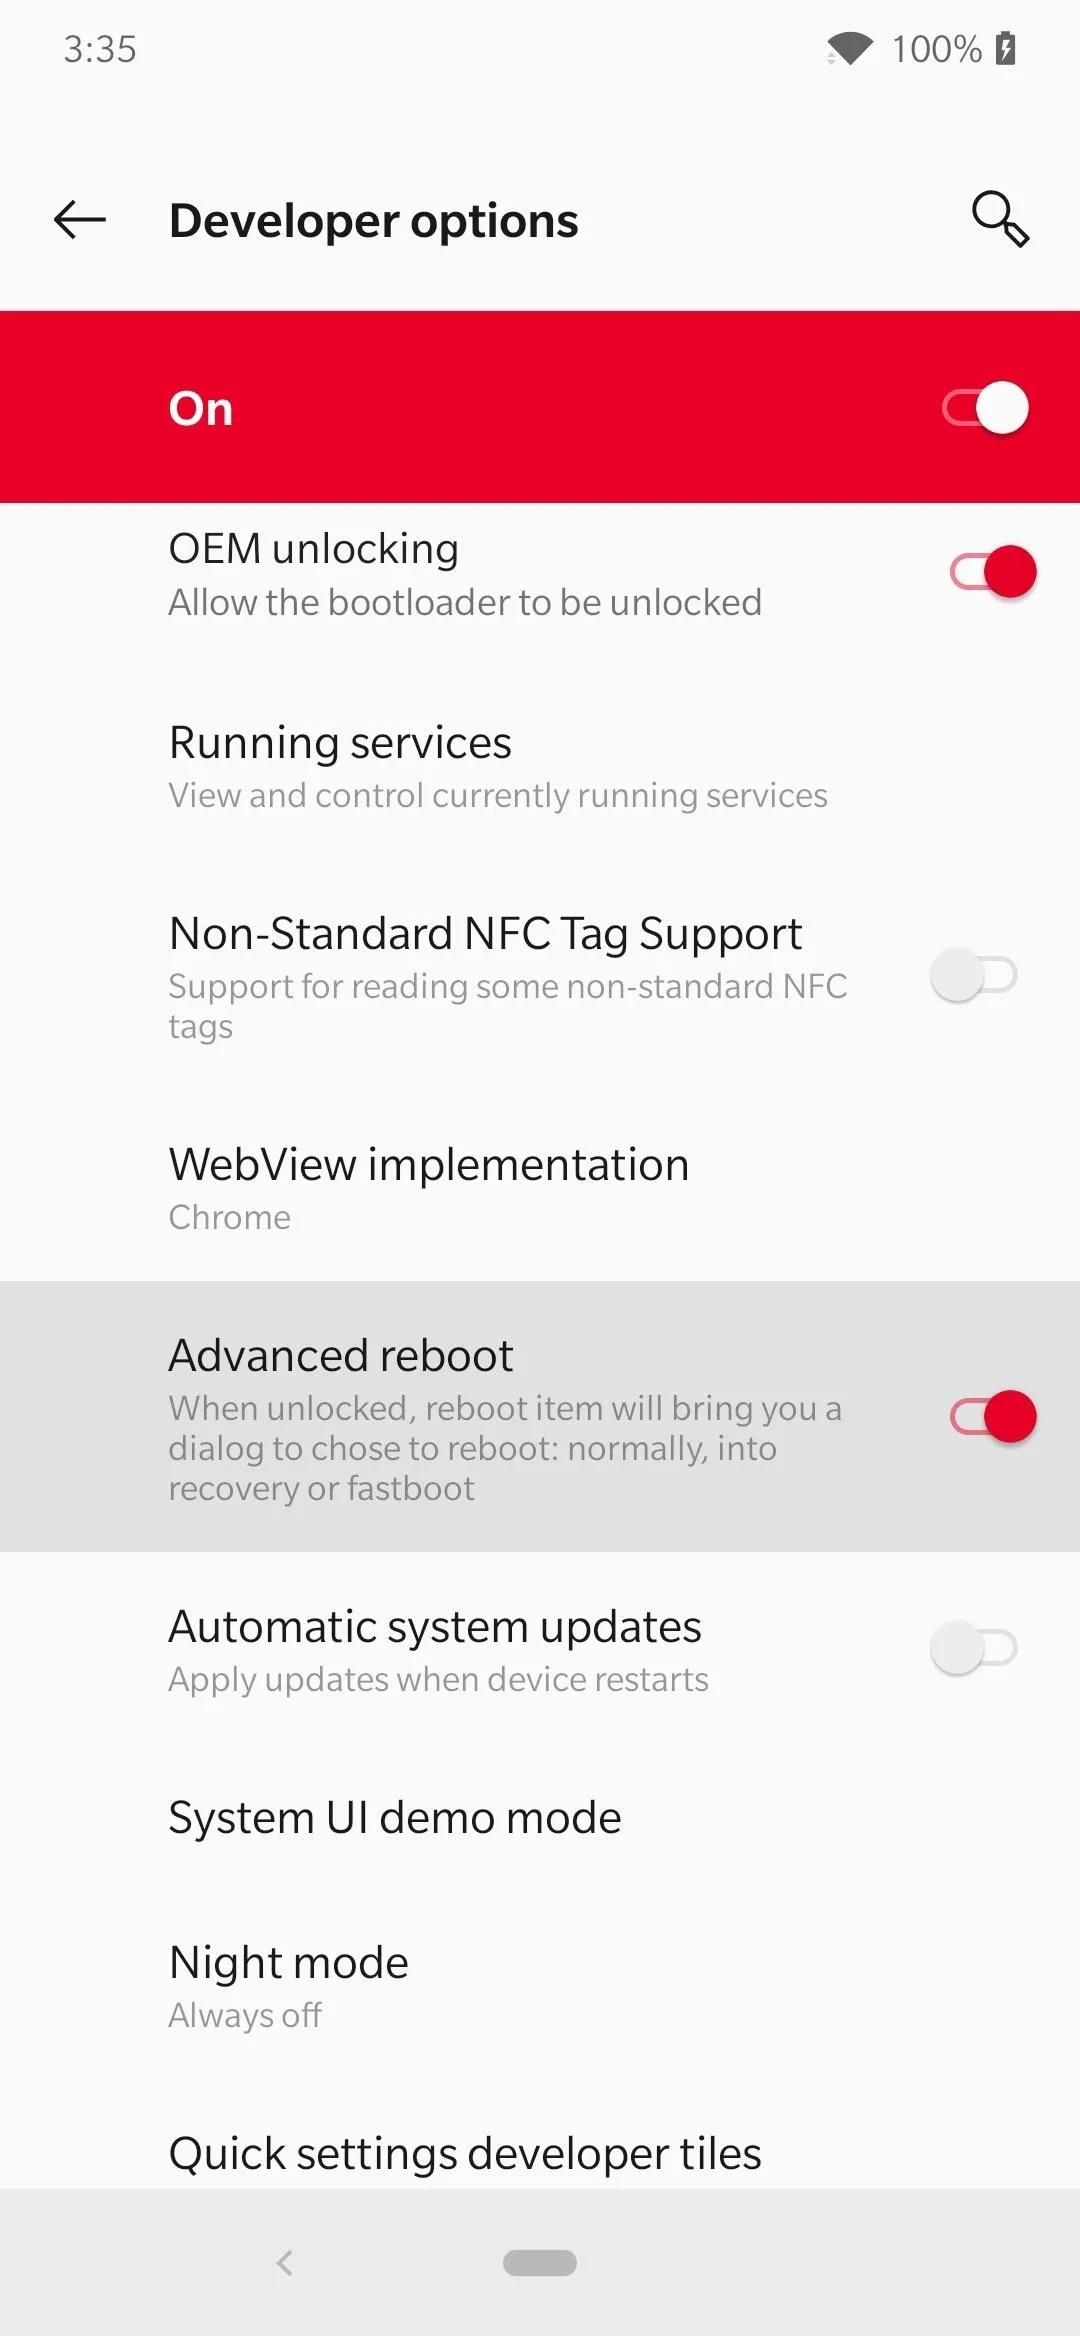
Enable Advanced Reboot
While you're still sitting on the developer options page, scroll down a little if you have to and locate a setting called "Advanced reboot." Tap the button to enable it, which will make things a bit easier for you later on in the guide. It essentially allows you to boot into Fastboot Mode without having access to a computer or using button combinations.
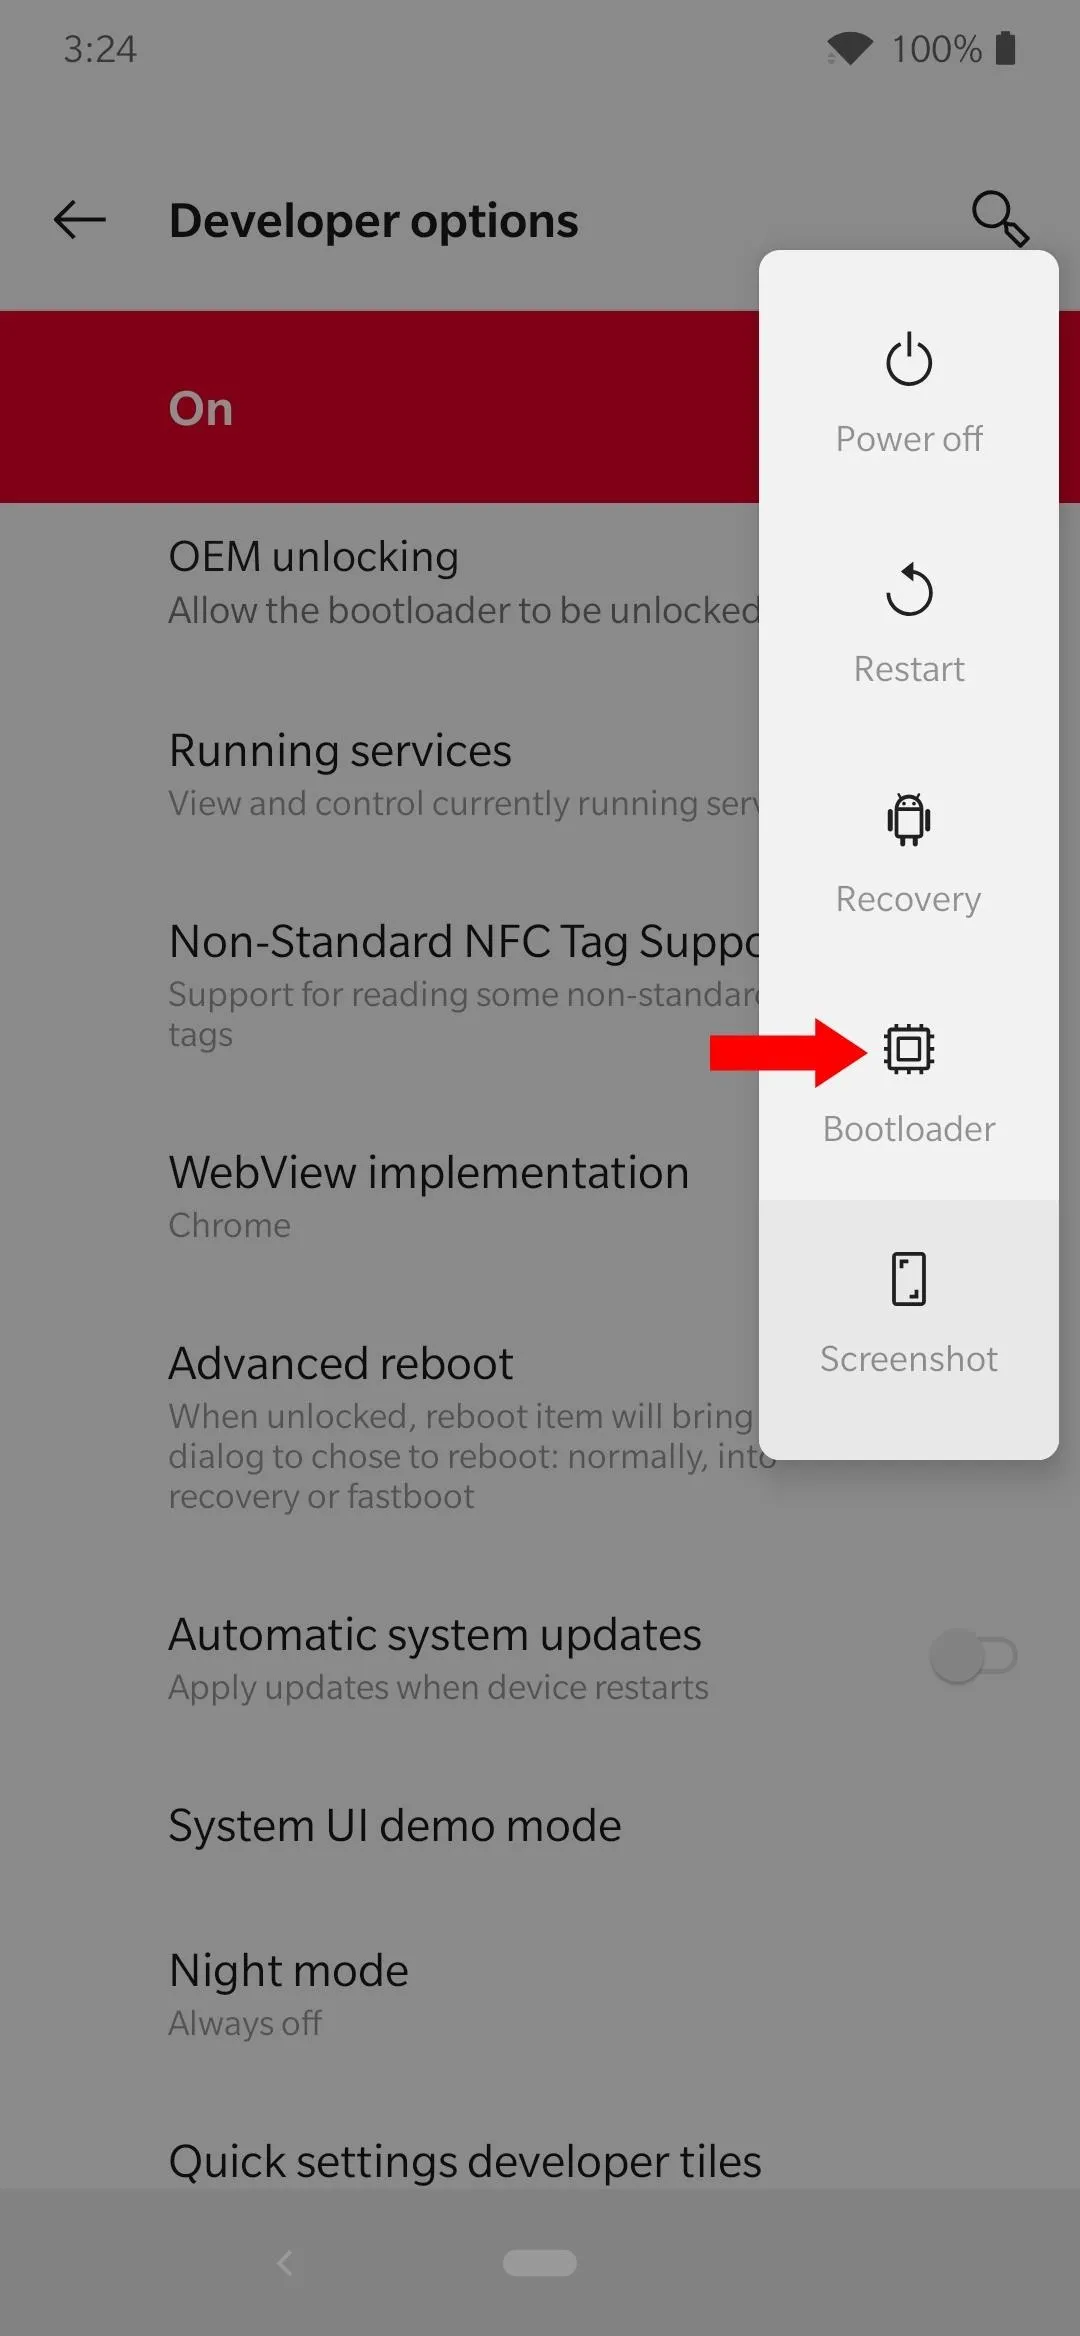
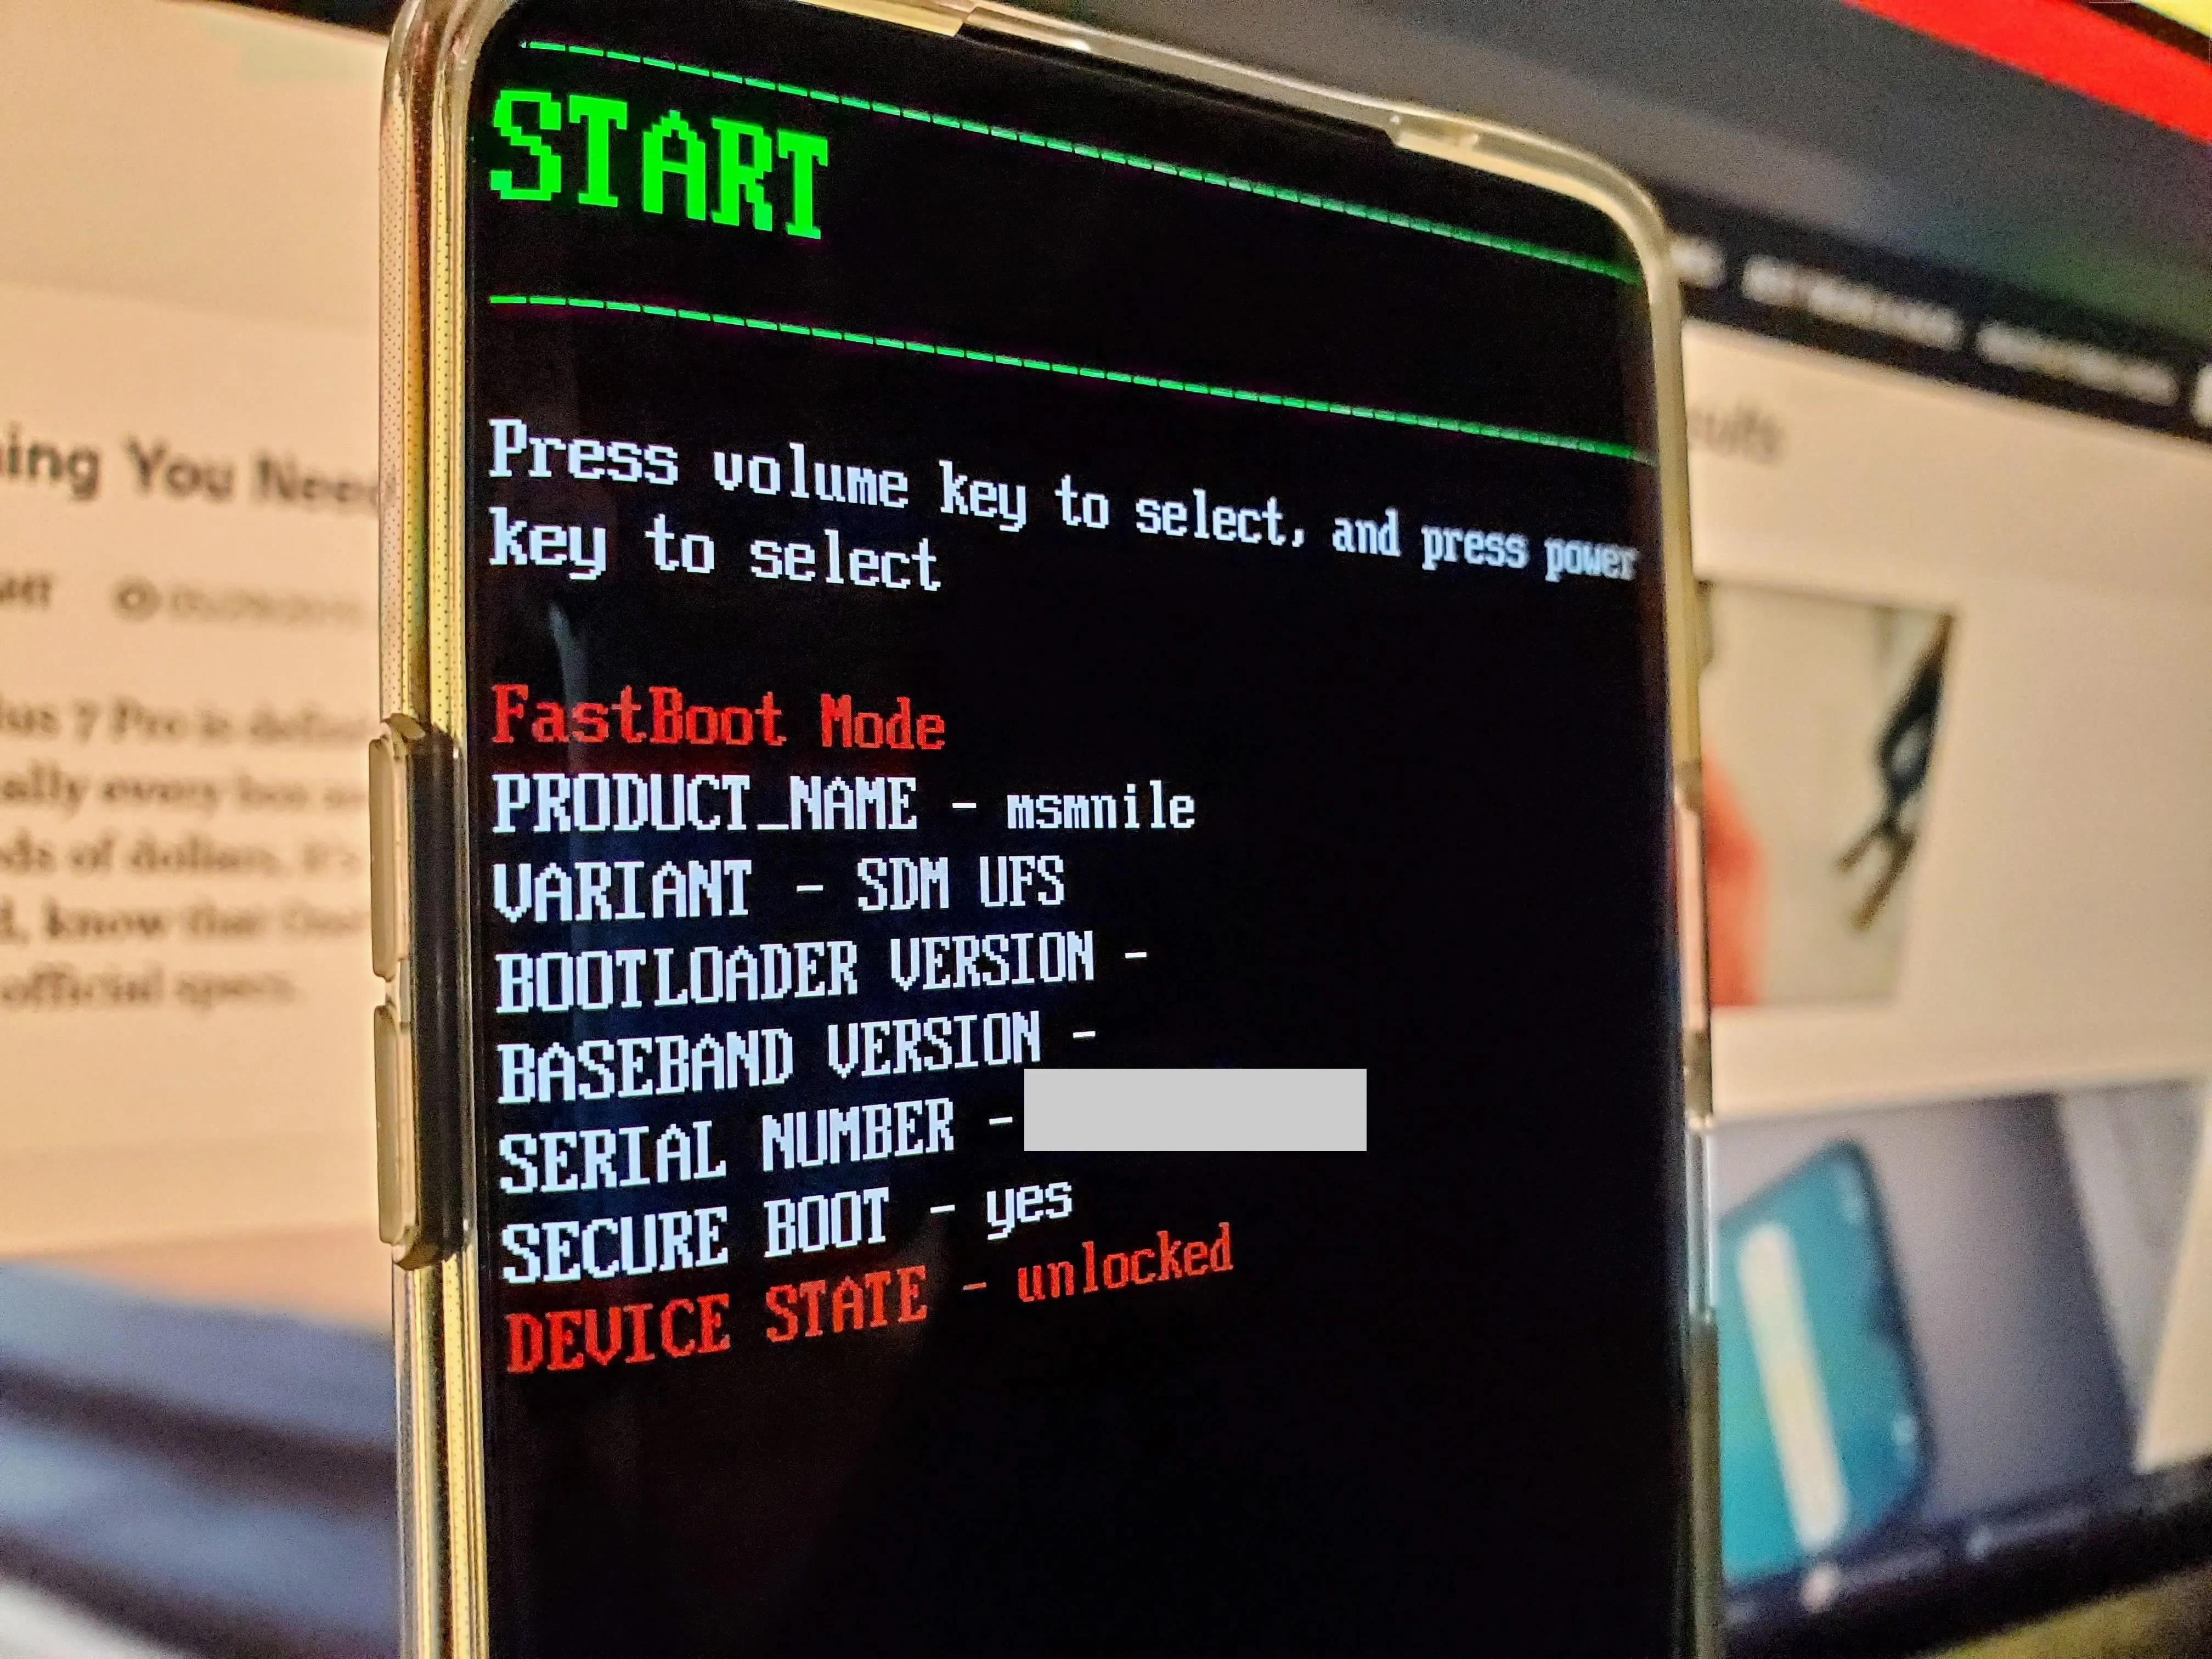
Boot into Fastboot Mode
Now that you have the Advanced reboot option enabled, long-press the power button to bring up the power menu for your device. Tap the "Bootloader" option to make your phone immediately begin booting into Fastboot Mode.

Once your phone reboots, you should be sitting at the Fastboot Mode main menu. Now you need to connect your phone to your computer with a USB data cable. From here, you can leave the phone in Fastboot Mode and proceed with the next step of this guide.
Install ADB & Fastboot on Your Computer
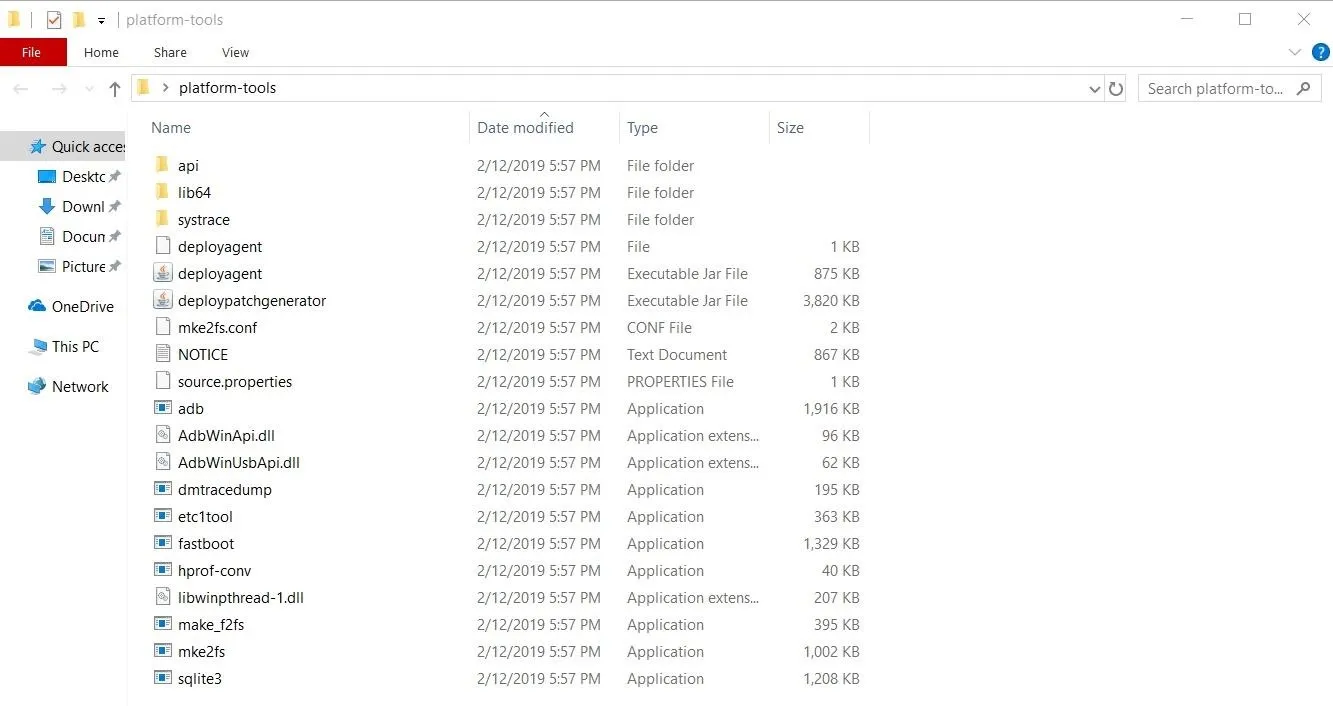
To unlock the bootloader, you'll need the ADB and Fastboot files on your computer so you can send the commands required over to your phone. You can download Google's SDK Platform Tools package that already has everything you need within one folder — it doesn't get much easier than that! Follow the link below to get that all squared away then you can move on with the next step of this guide.
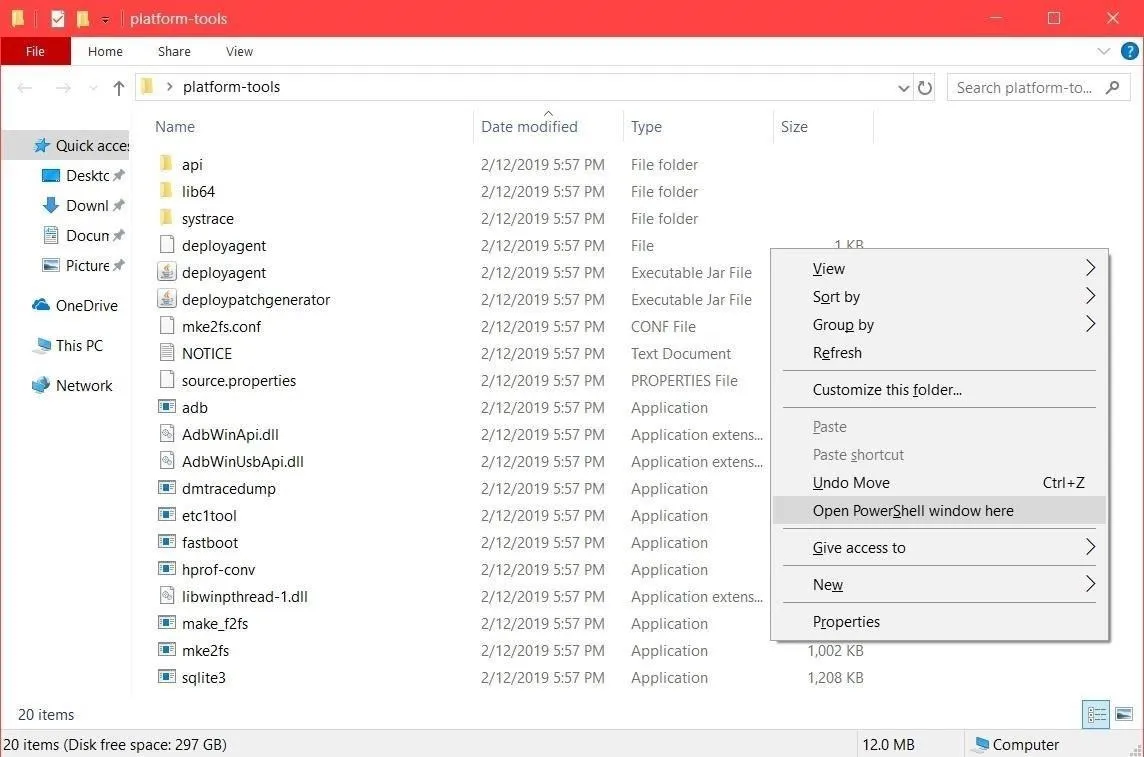
Open a Command Window in Platform-Tools
Opening a command window in the platform-tools folder is the next thing you'll have to do in your quest to get your bootloader unlocked. The command window needs to be opened directly in the platform-tools folder to ensure proper communication. Follow the link below to get that taken care of before moving onto the final step of this guide.
Unlock Your Bootloader
Before starting the process of unlocking your bootloader, make sure to back up any data before proceeding with this step — your phone will take a mandatory factory reset.
Once your data is safe, make sure you have a command window opened up in the platform-tools folder. From within that command window, type the following command, then press enter.
fastboot oem unlockNote: Mac, Linux, and Windows PowerShell users will likely have to add a period and a slash before entering any ADB or Fastboot commands (e.g., ./fastboot oem unlock).
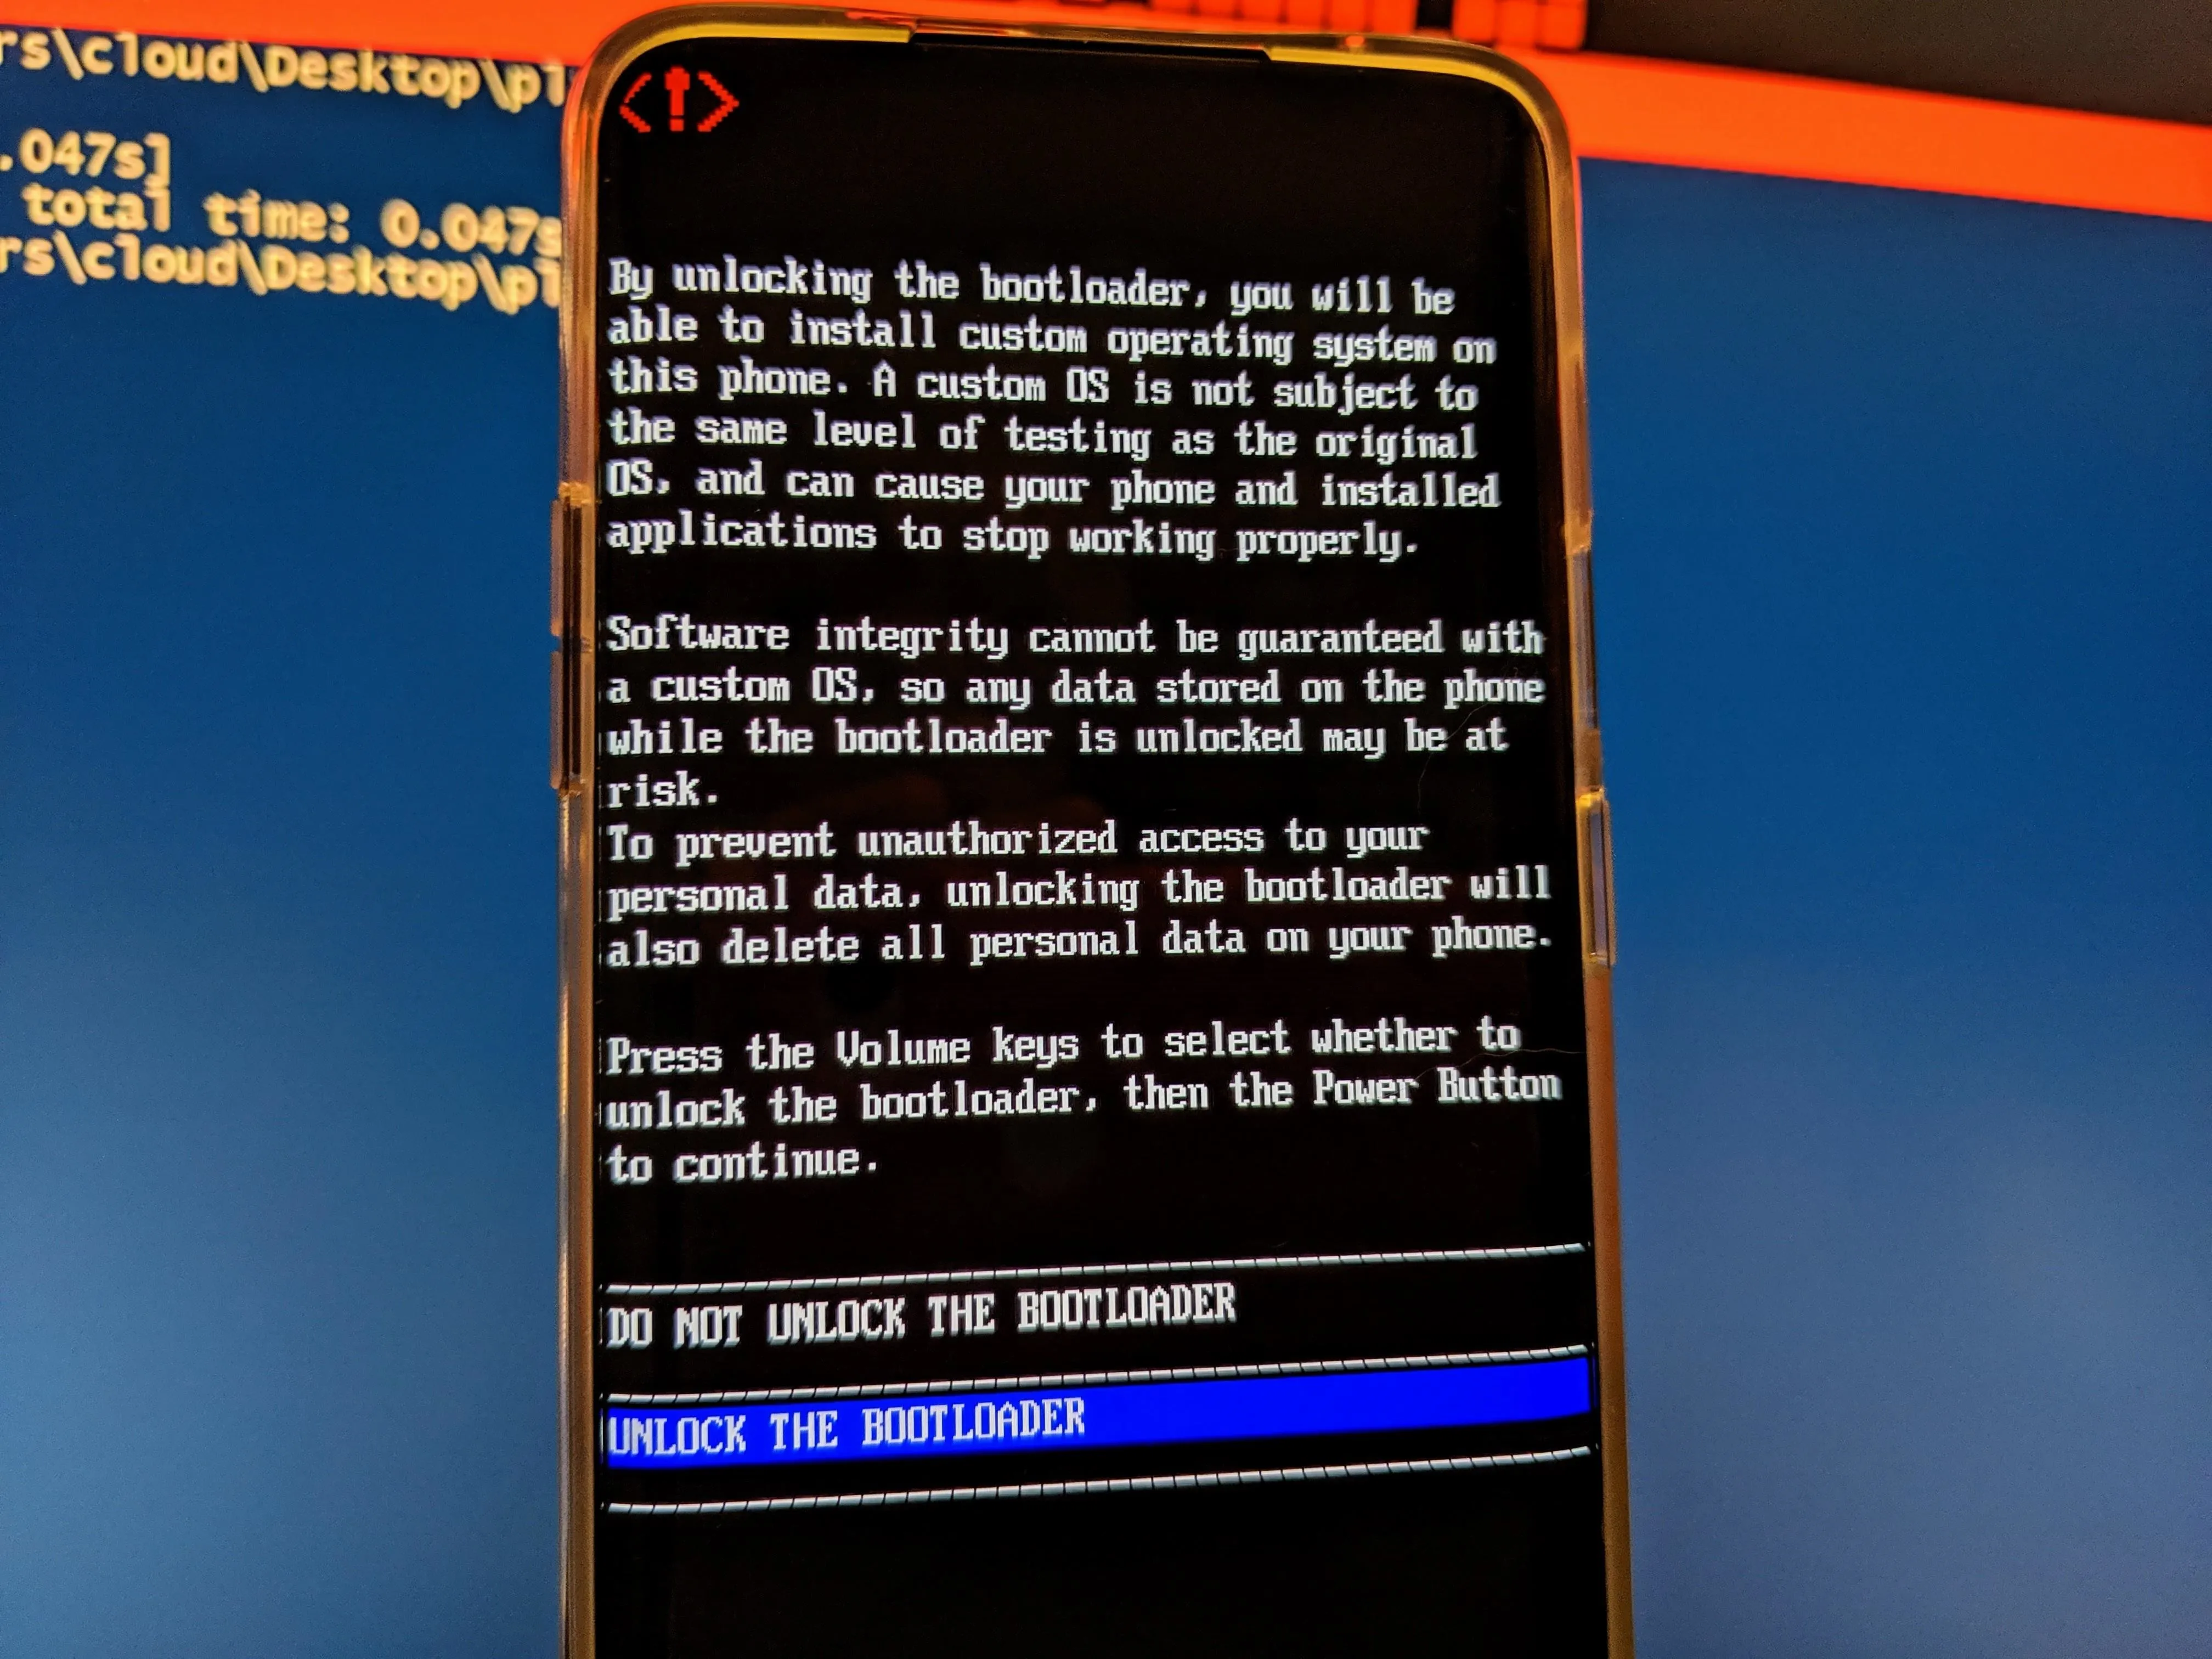
Once the above command gets pushed from your computer to your phone, it should be sitting on the bootloader unlocking screen. Use the volume keys to highlight the "Unlock the Bootloader" option, then you can press the power button to confirm your choice.
Your phone should now automatically start the factory reset and wipe out your data. If not, you'll have to navigate through the Fastboot menu using the volume keys to select the "Start" option. Press the power button to confirm your choice like before, then you can go about rebooting into your phone once again. Once you see the "Hi there" screen, you have made it to the end of the guide — your bootloader is now unlocked. The real fun can now begin!
Go through the initial setup just like you were using a brand new phone so you can get things back up and running. Upon every reboot, you'll notice a message that states something like "The bootloader is unlocked, and software integrity cannot be guaranteed." Don't worry, this is the standard default message to let you know the bootloader is unlocked — nothing to fret about.
Cover image and screenshots by Stephen Perkins/Gadget Hacks


Comments
Be the first, drop a comment!