


OnePlus has purposefully made their devices easy to root so that you can spend less time waiting and more time doing. These phones are a solid choice for anyone looking to dive into the rooting and modding scene. Using the same principles that Google has with the Pixel line, you can always be sure your OnePlus 7 Pro will get first-class treatment from launch day and beyond.
Rooting with Magisk will allow you to use all of your apps like normal without worrying about tripping Google's SafetyNet checks. You can continue to use Netflix, all your financial apps, and most games without feeling like you've been targeted simply because you wanted to root your device.
It can seem frustrating that more apps and games are trying to lock out root users using sneaky methods; however, Magisk is continuing to advance. In most cases, it's almost bulletproof now in avoiding detection altogether. Let's get your OnePlus 7 Pro rooted and passing SafetyNet checks so that you can unlock its true potential as one of the coolest phones for 2019 so far.
Unlock Your Bootloader
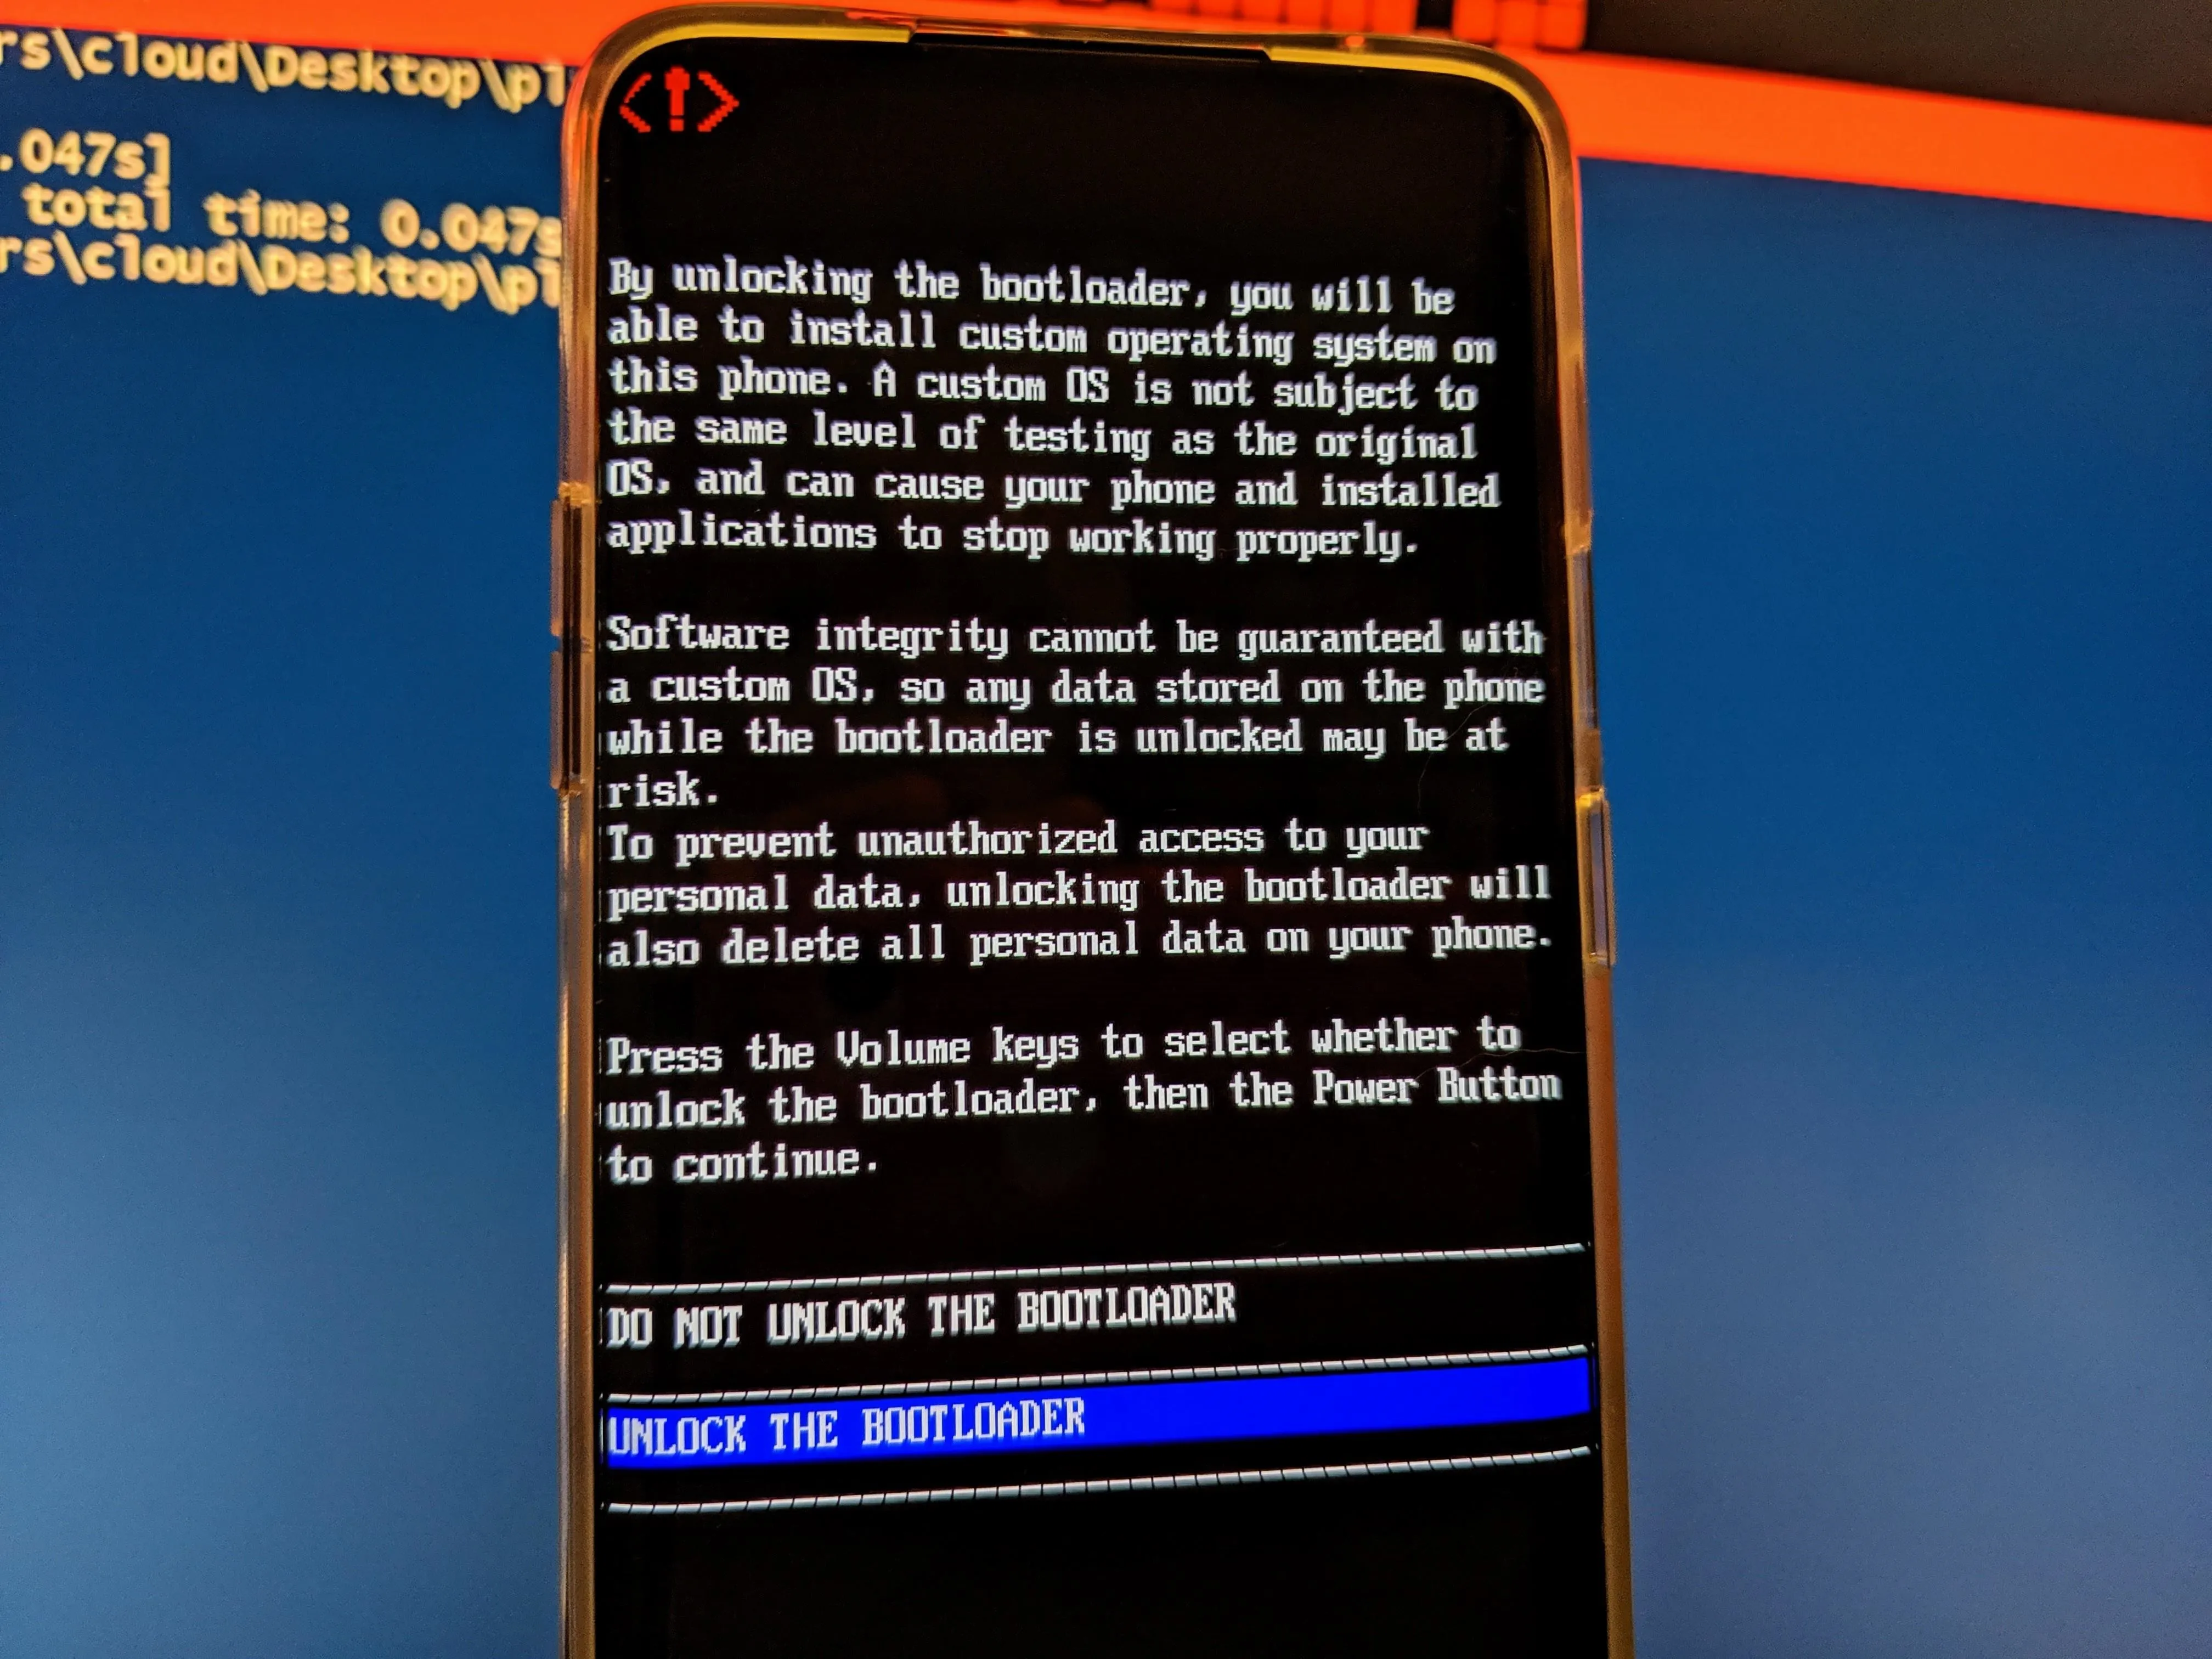
The bootloader unlocking step is always going to be your starting point whenever you want to alter your system files for modding purposes. You simply can't make changes on a system level without unlocking your bootloader. If you need to, check out the guide on how you can unlock the bootloader on your OnePlus 7 Pro before moving on.
Install TWRP
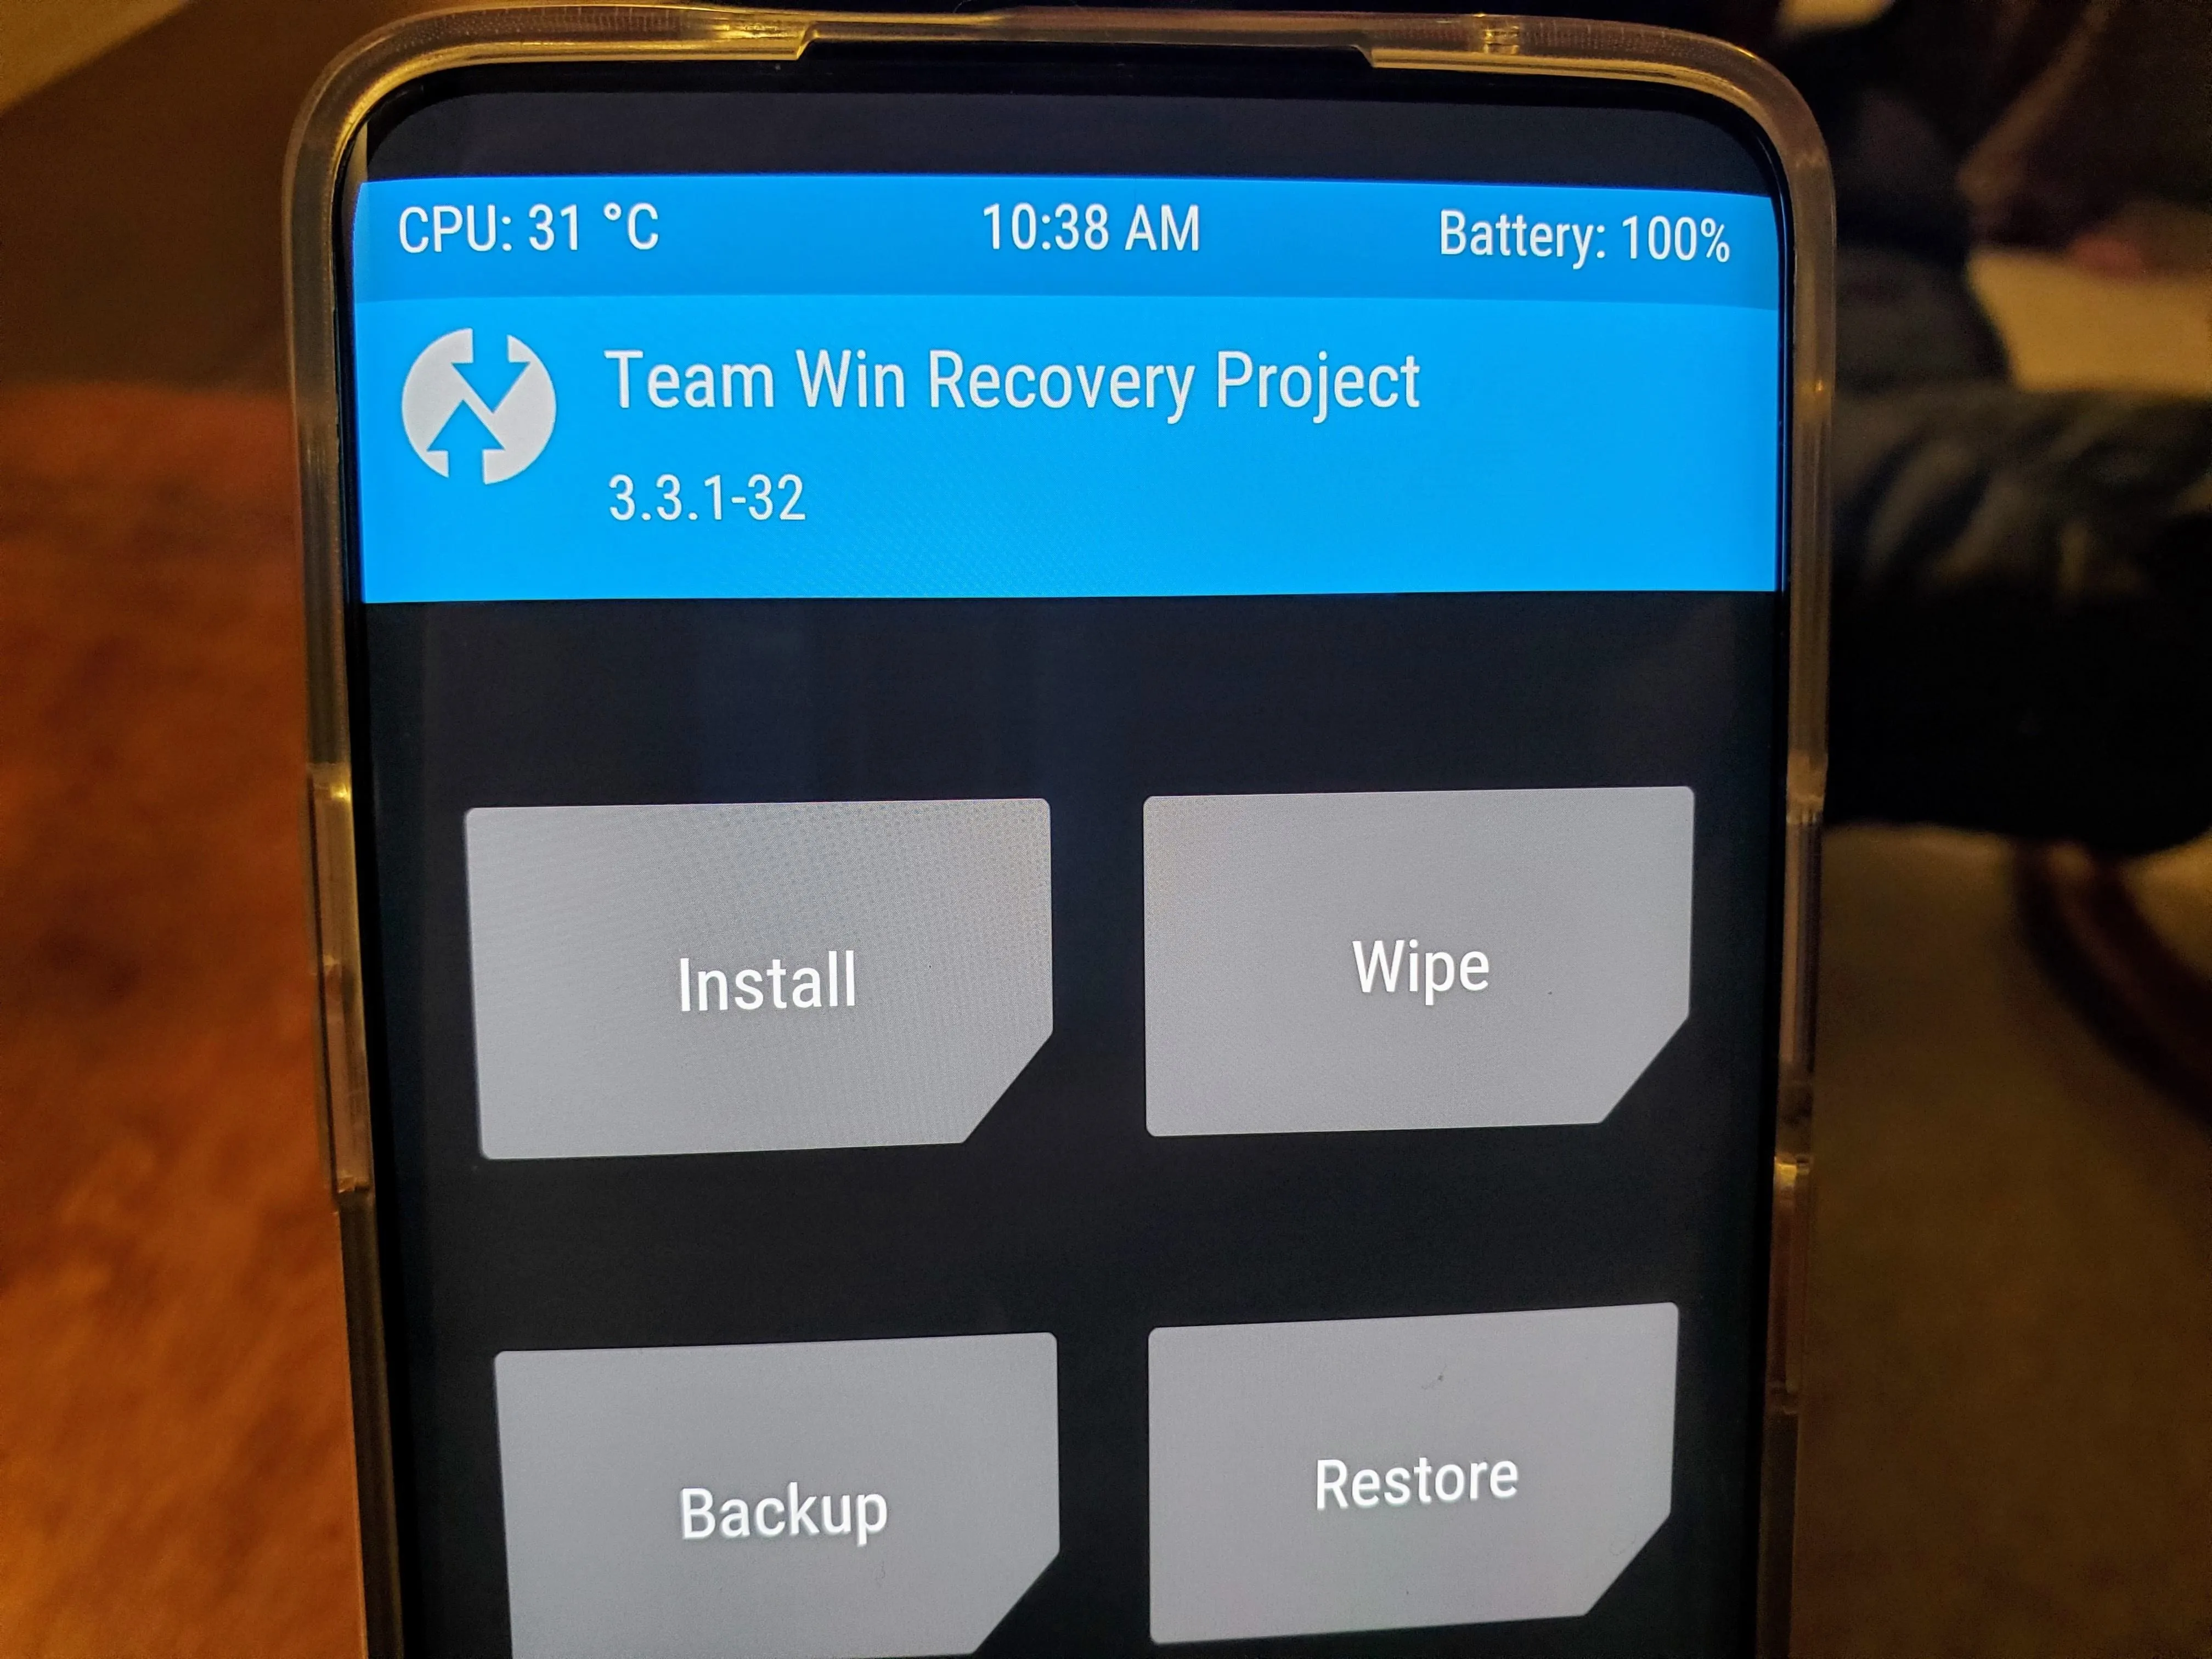
Once you've taken care of unlocking the bootloader, you can then move onto installing TWRP. This is the primary tool you'll be relying on to install all of your mods, such as Magisk. Having a custom recovery allows you to flash ZIP files without needing to rely on a computer, which is useful for quick mod installs. The guide below will help you take care of that.
Download Magisk
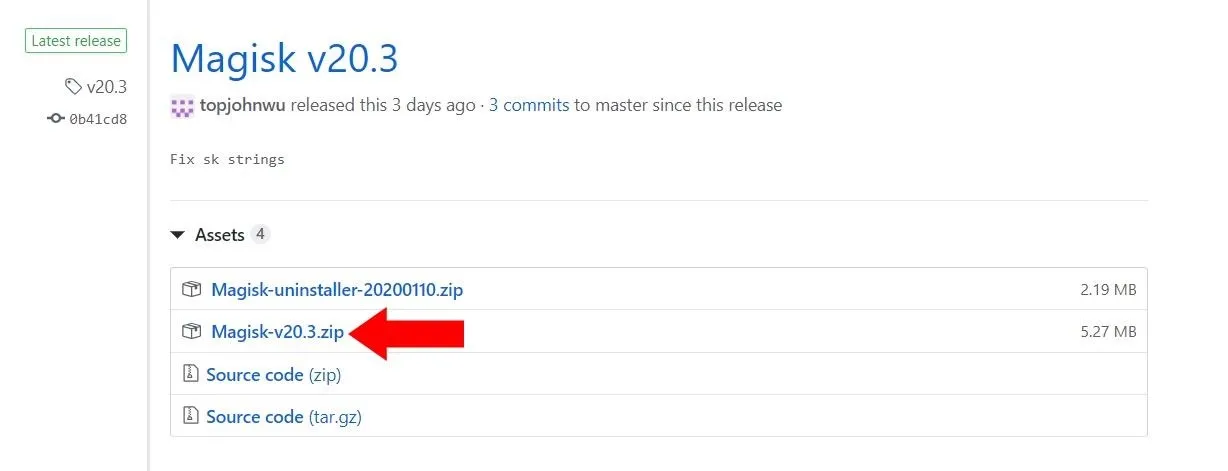
The file you're about to download for this step gives you the required Magisk framework and the Magisk Manager app in one convenient ZIP file. You'll get to take this file and flash it from within TWRP very soon, which will patch your system for root access so you can also pass SafetyNet checks as well.
Download the latest Magisk ZIP installer file from the link below, then save it to the "Download" folder on your phone for easy access. You'll always want the newest version of Magisk installed to ensure system compatibility with future Android updates.
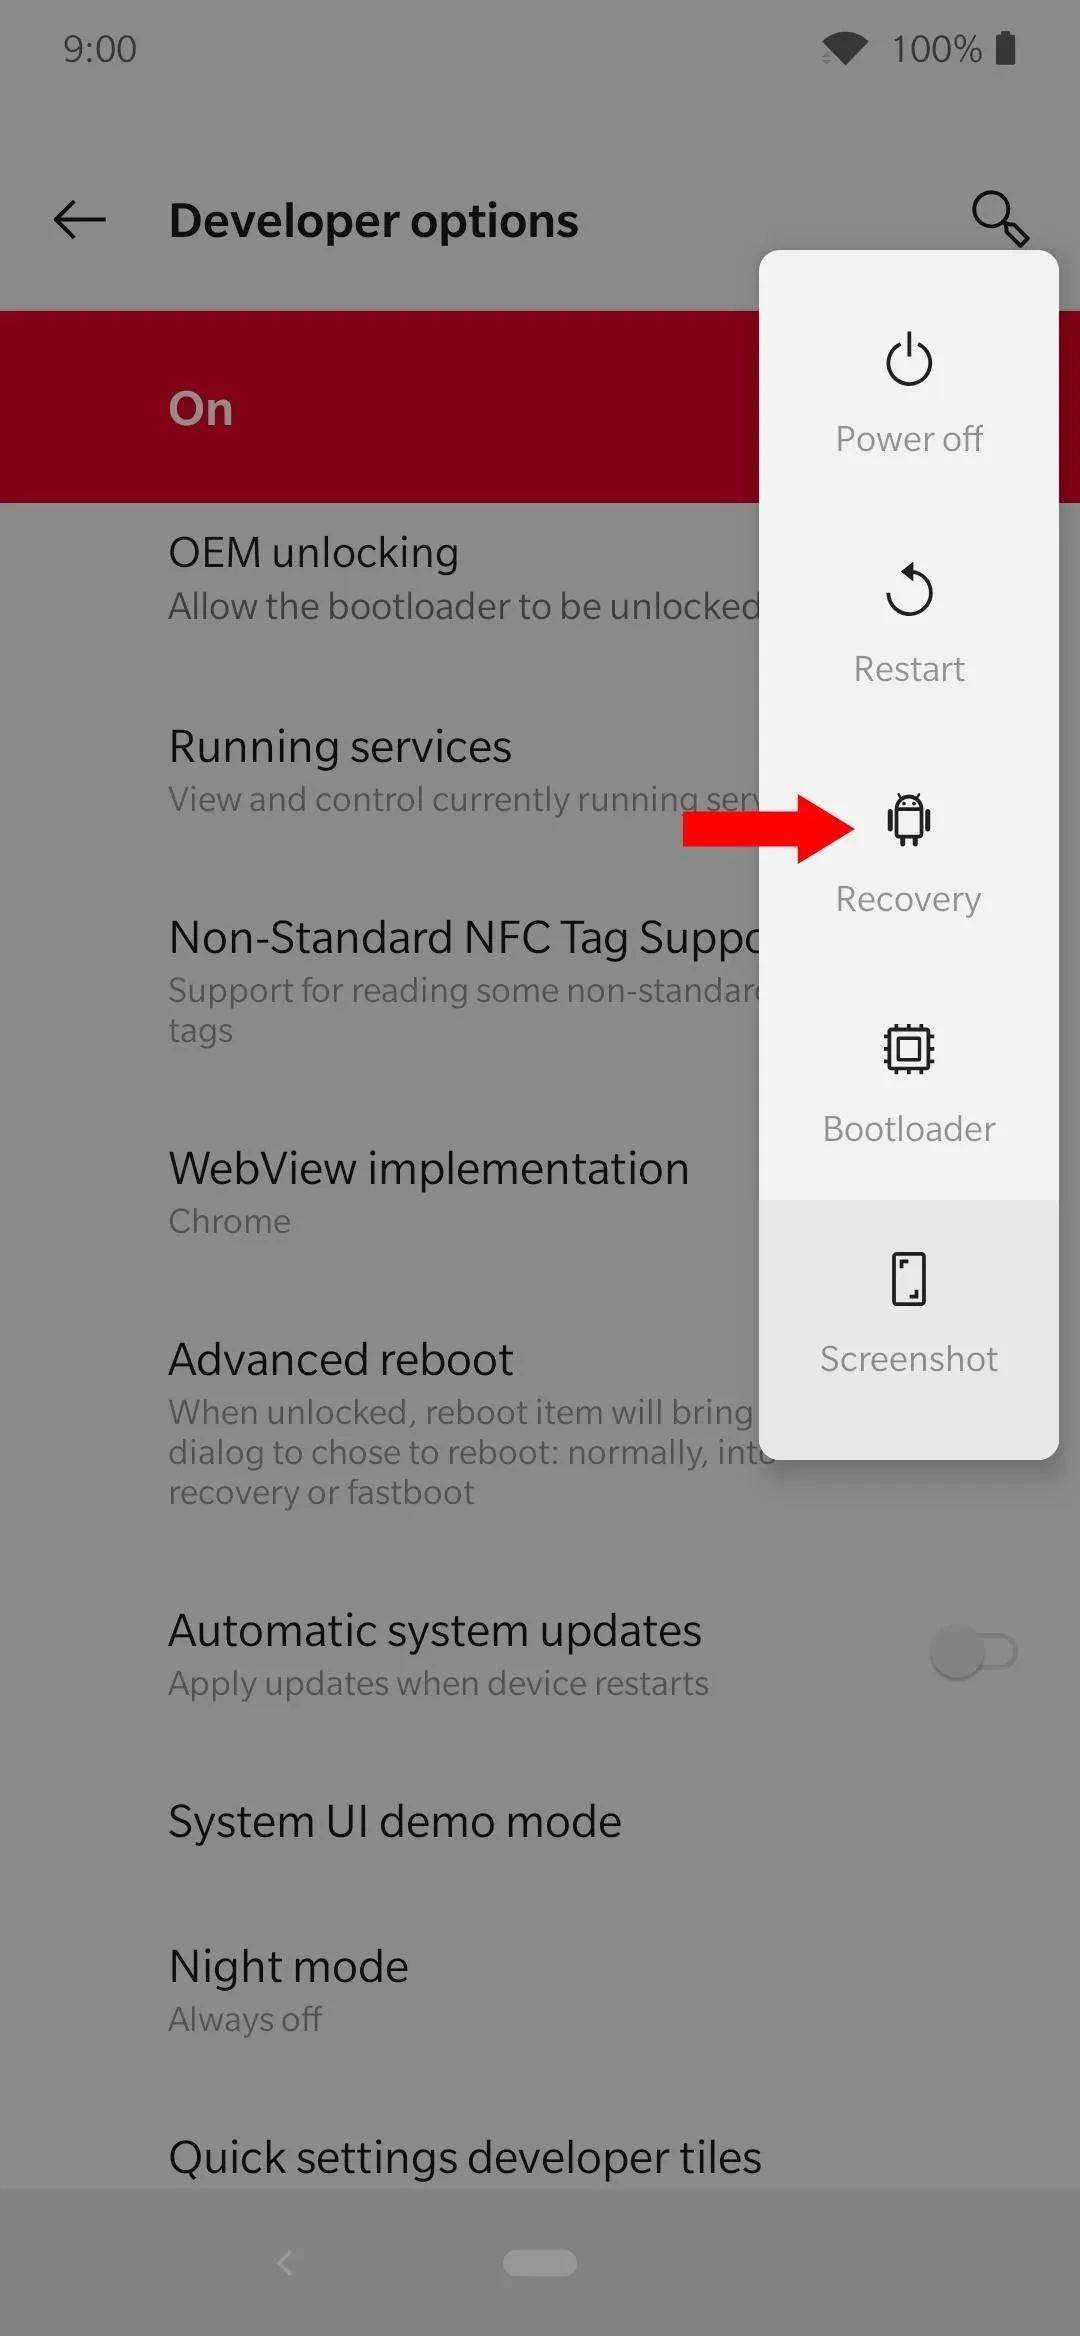
Boot into TWRP
Once you've got the Magisk file needed for gaining root access on your system, you'll need to boot into TWRP so you can begin the install process. Long-press the power button, locate the "Recovery" option, then tap it once to start booting into the TWRP main menu. If you don't see the option on your power menu, make sure you have the Advanced reboot setting turned on in the developer options.

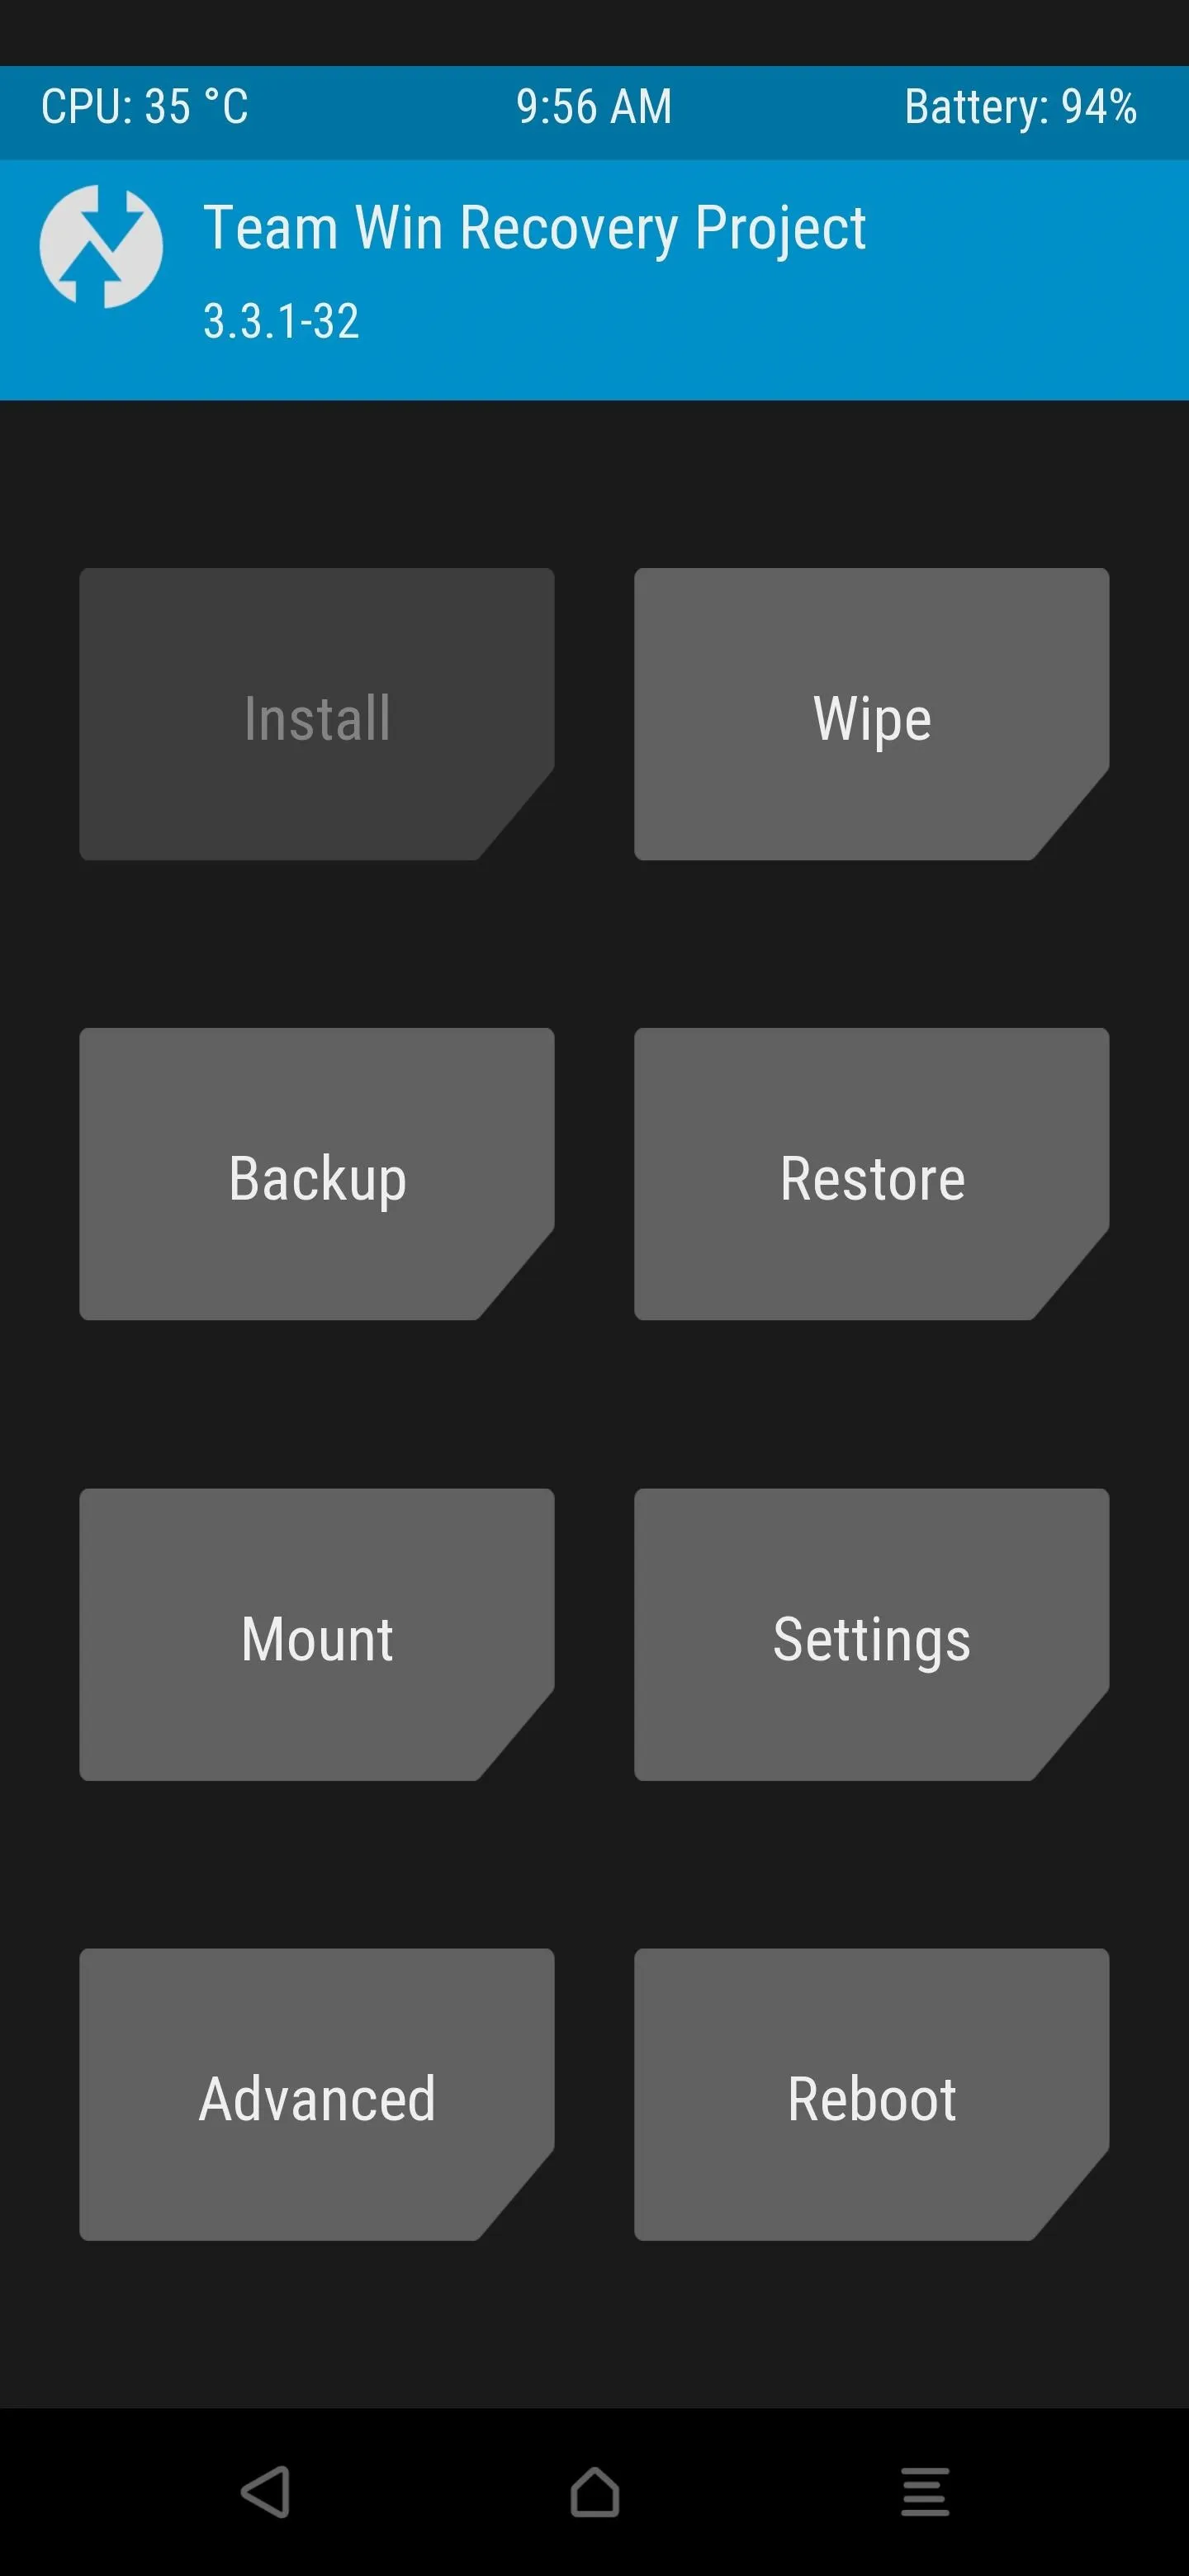
Flash Magisk
Once your phone boots into TWRP, you should be greeted with a prompt that asks you to enter your PIN or password if you have security measures set up. After doing so successfully, TWRP will then decrypt your internal storage so that you can access your files in the recovery environment. From the main menu, tap "Install," then navigate to the "Download" folder where you stored the Magisk file.
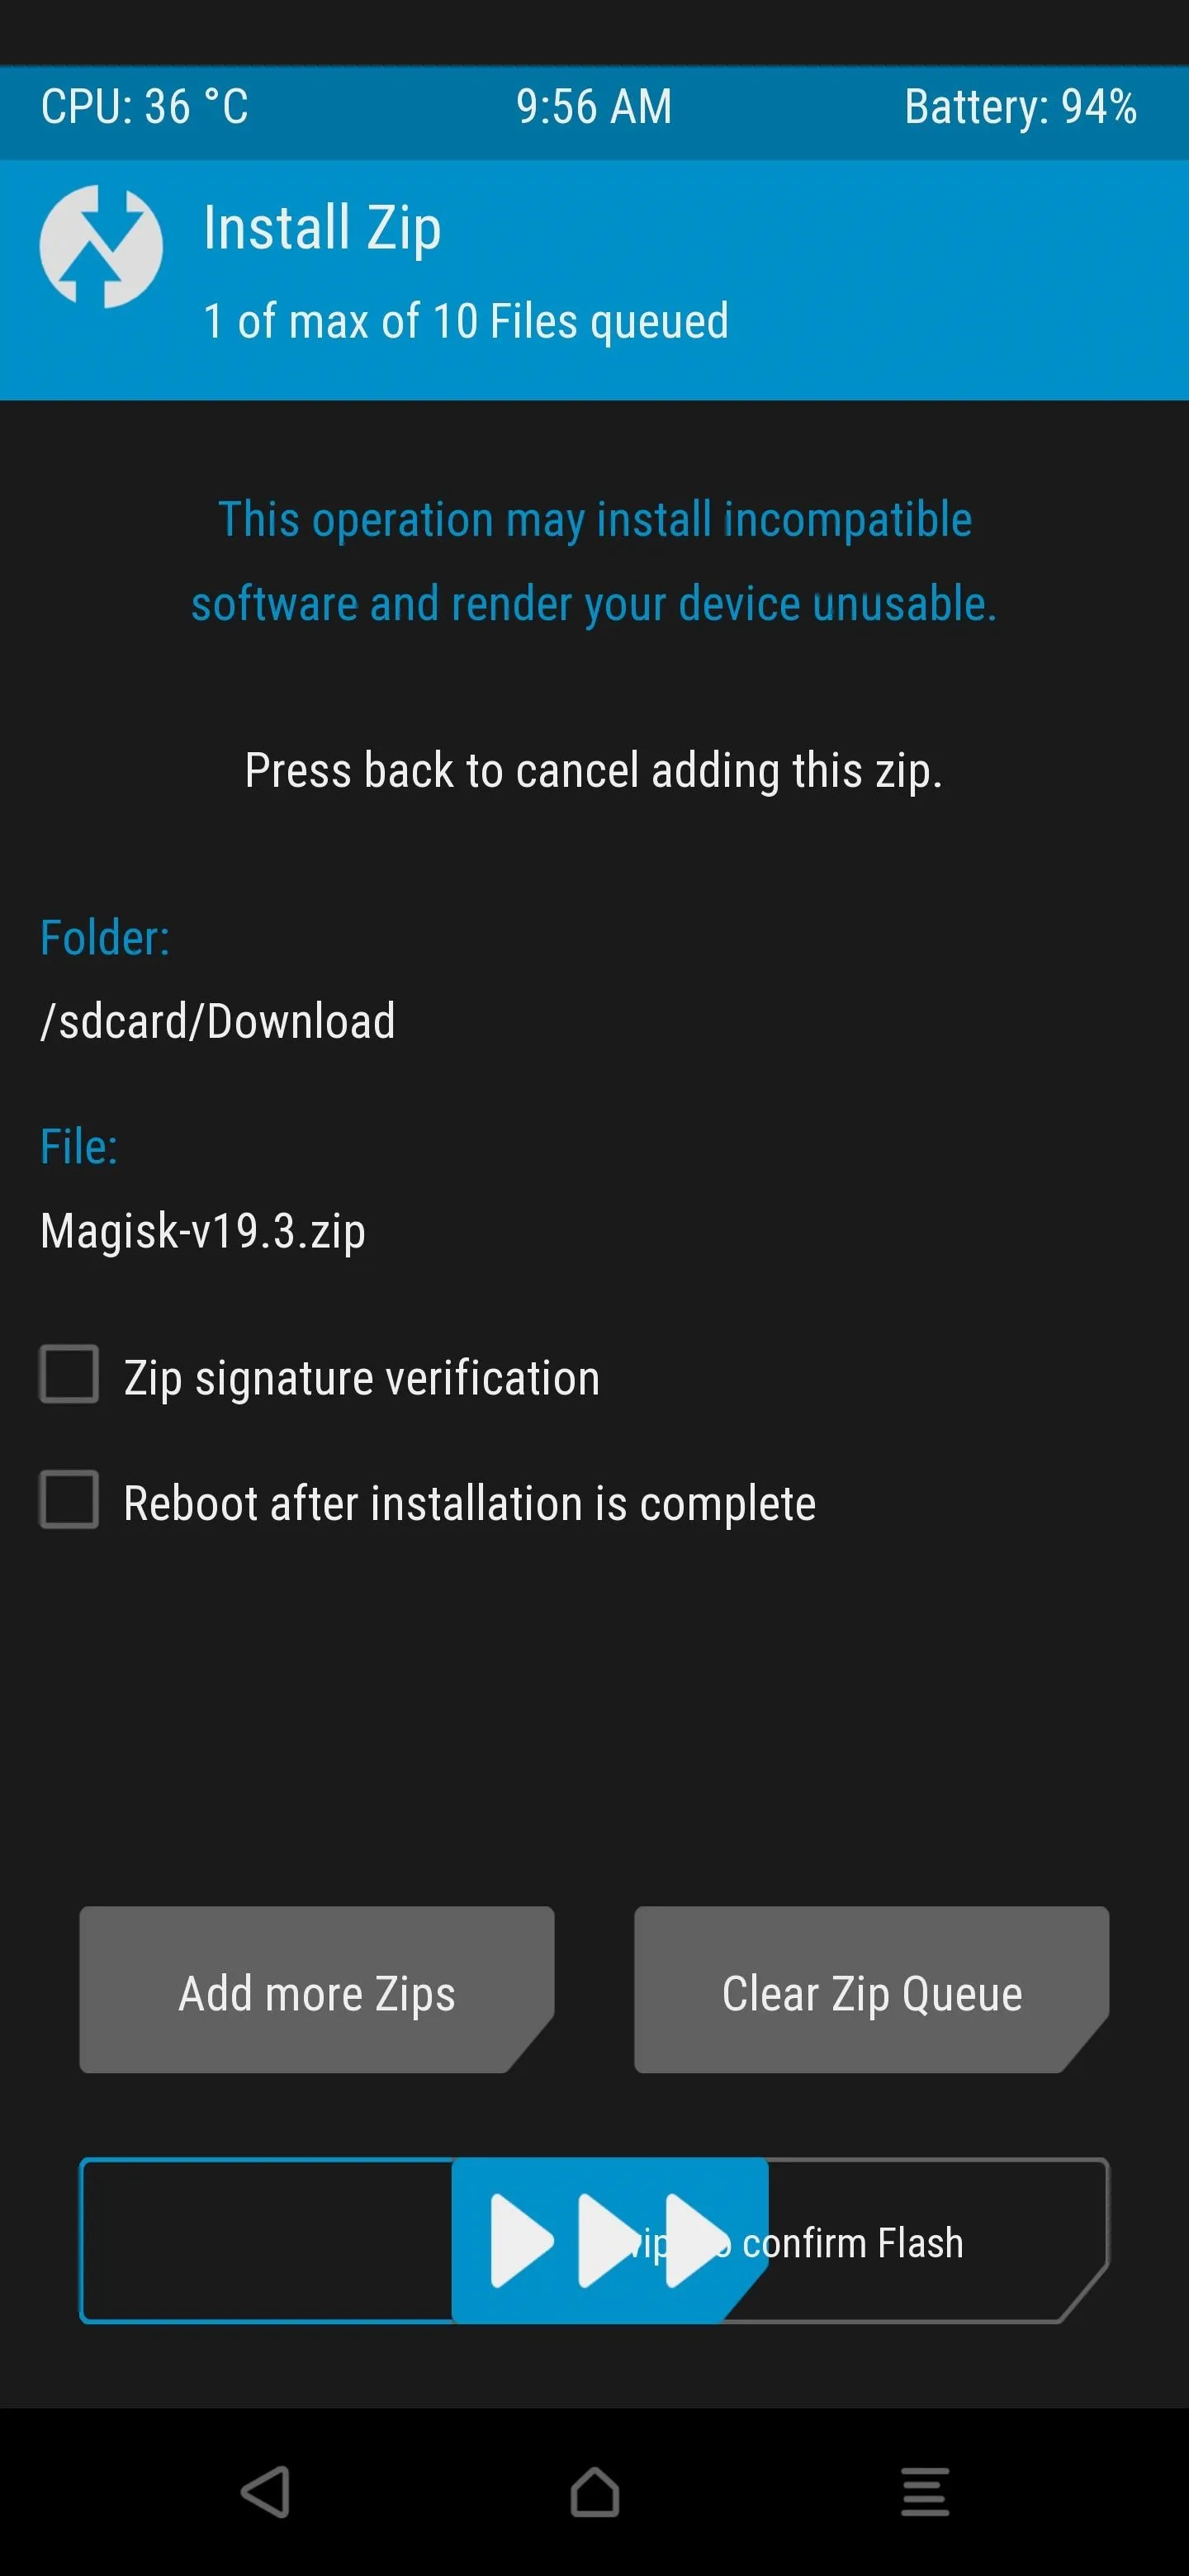
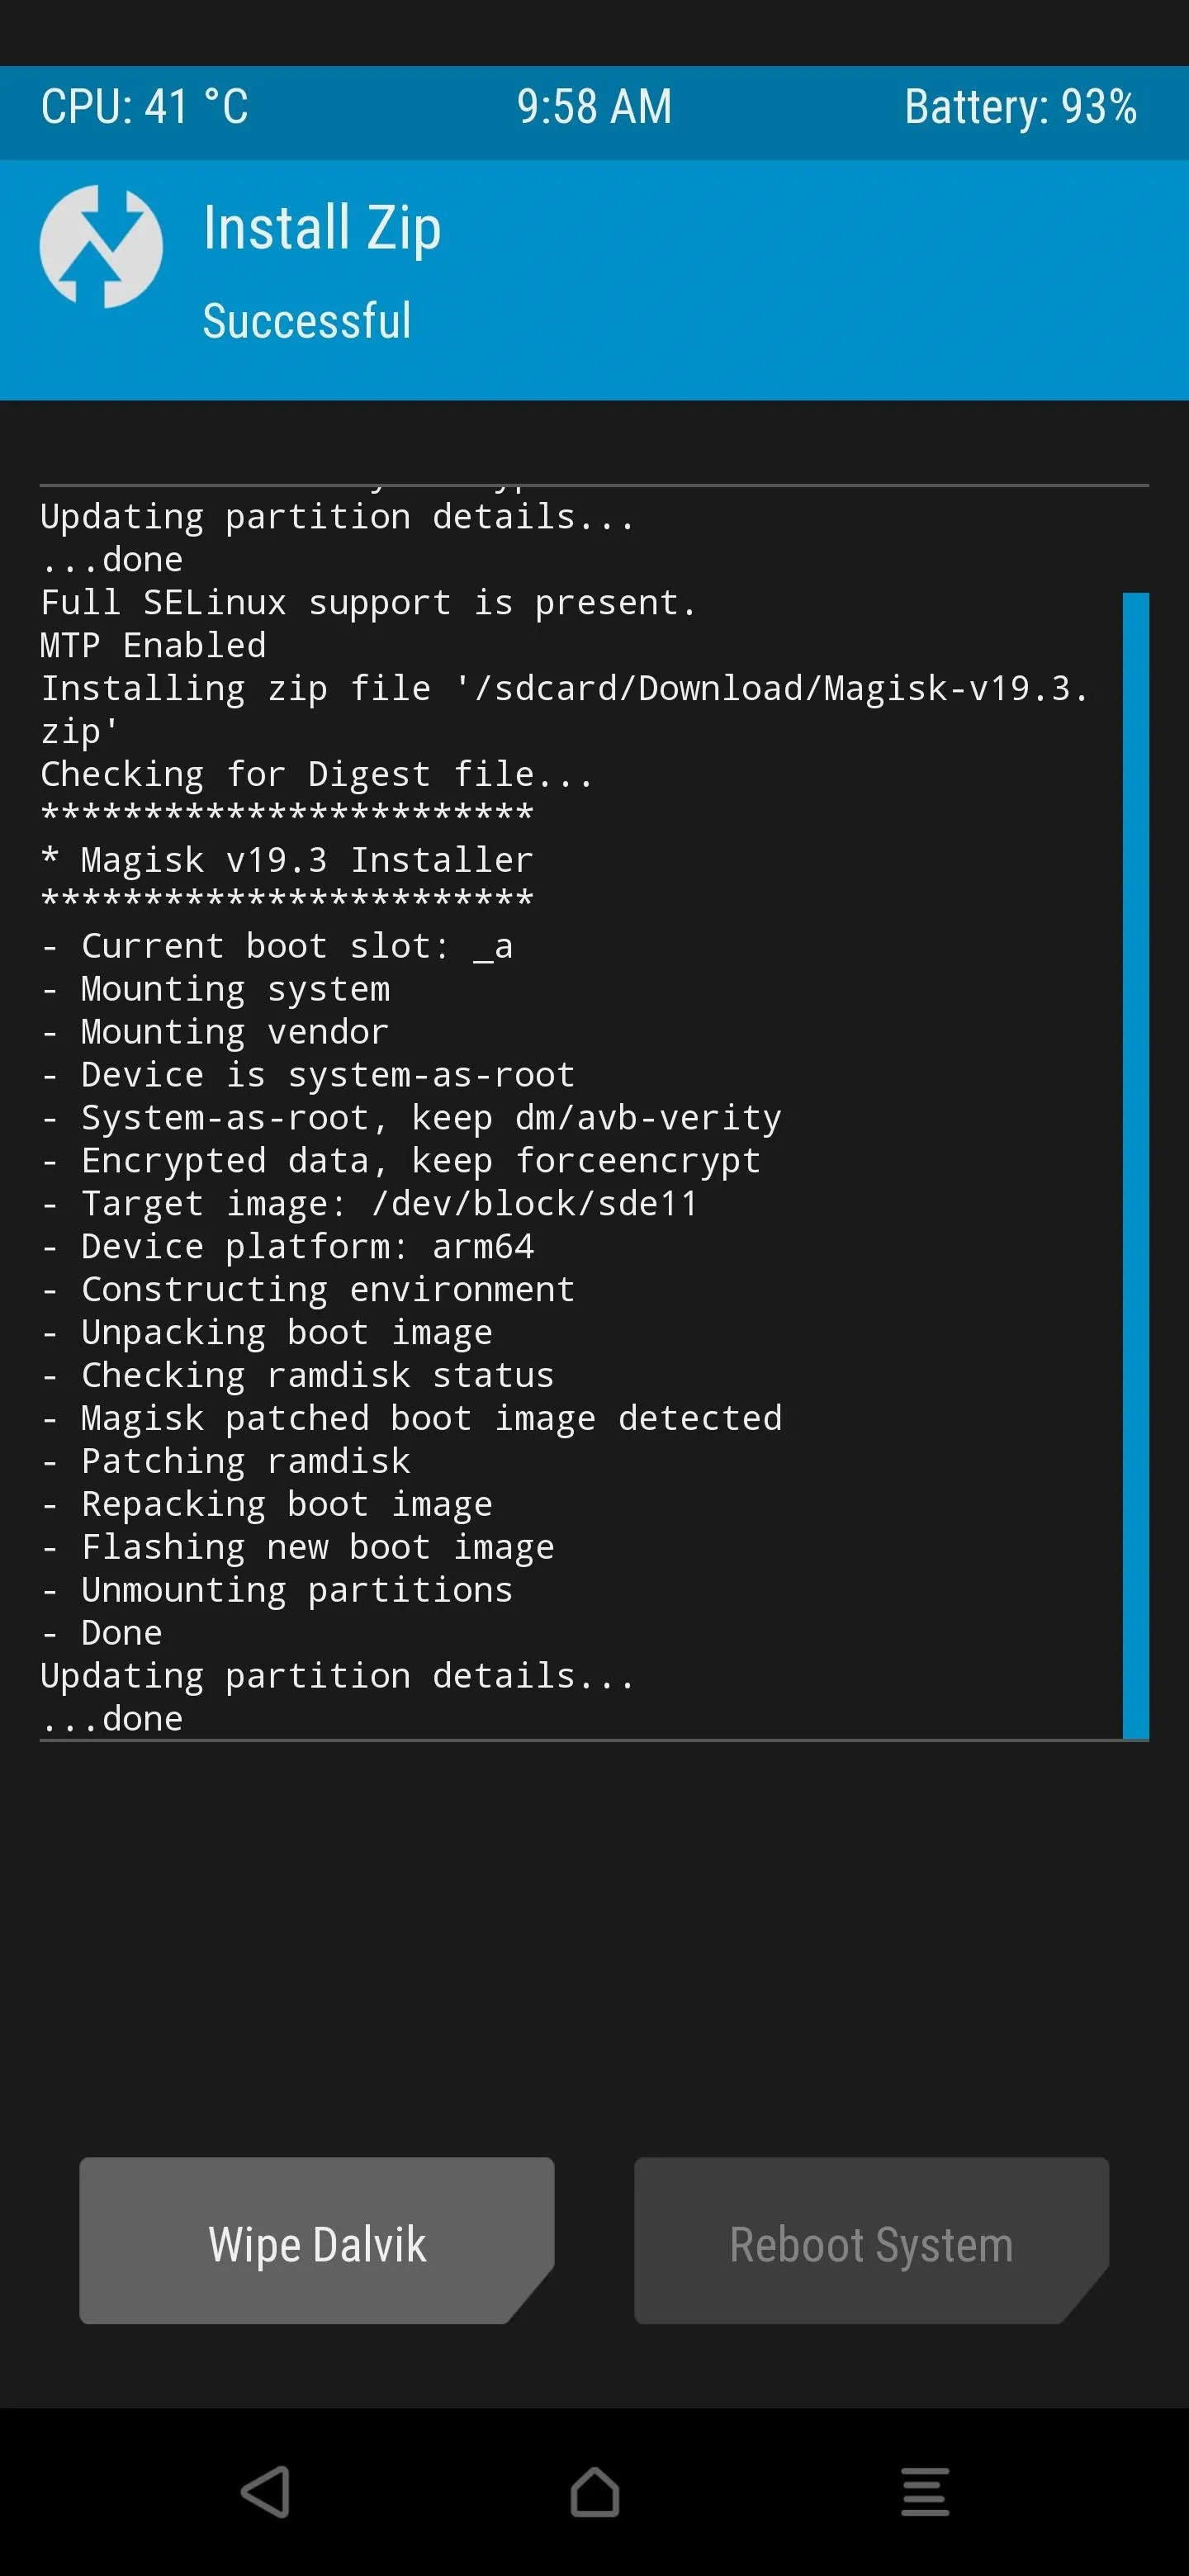
Now that you've found the Magisk file, tap it once, then initiate the "Swipe to confirm Flash" slider to start the install process. It will automatically begin installing the Magisk framework while also patching the boot image file on your system partition so you can gain root access. After Magisk is finished doing its thing, tap the "Reboot System" option to boot back into Android like normal.
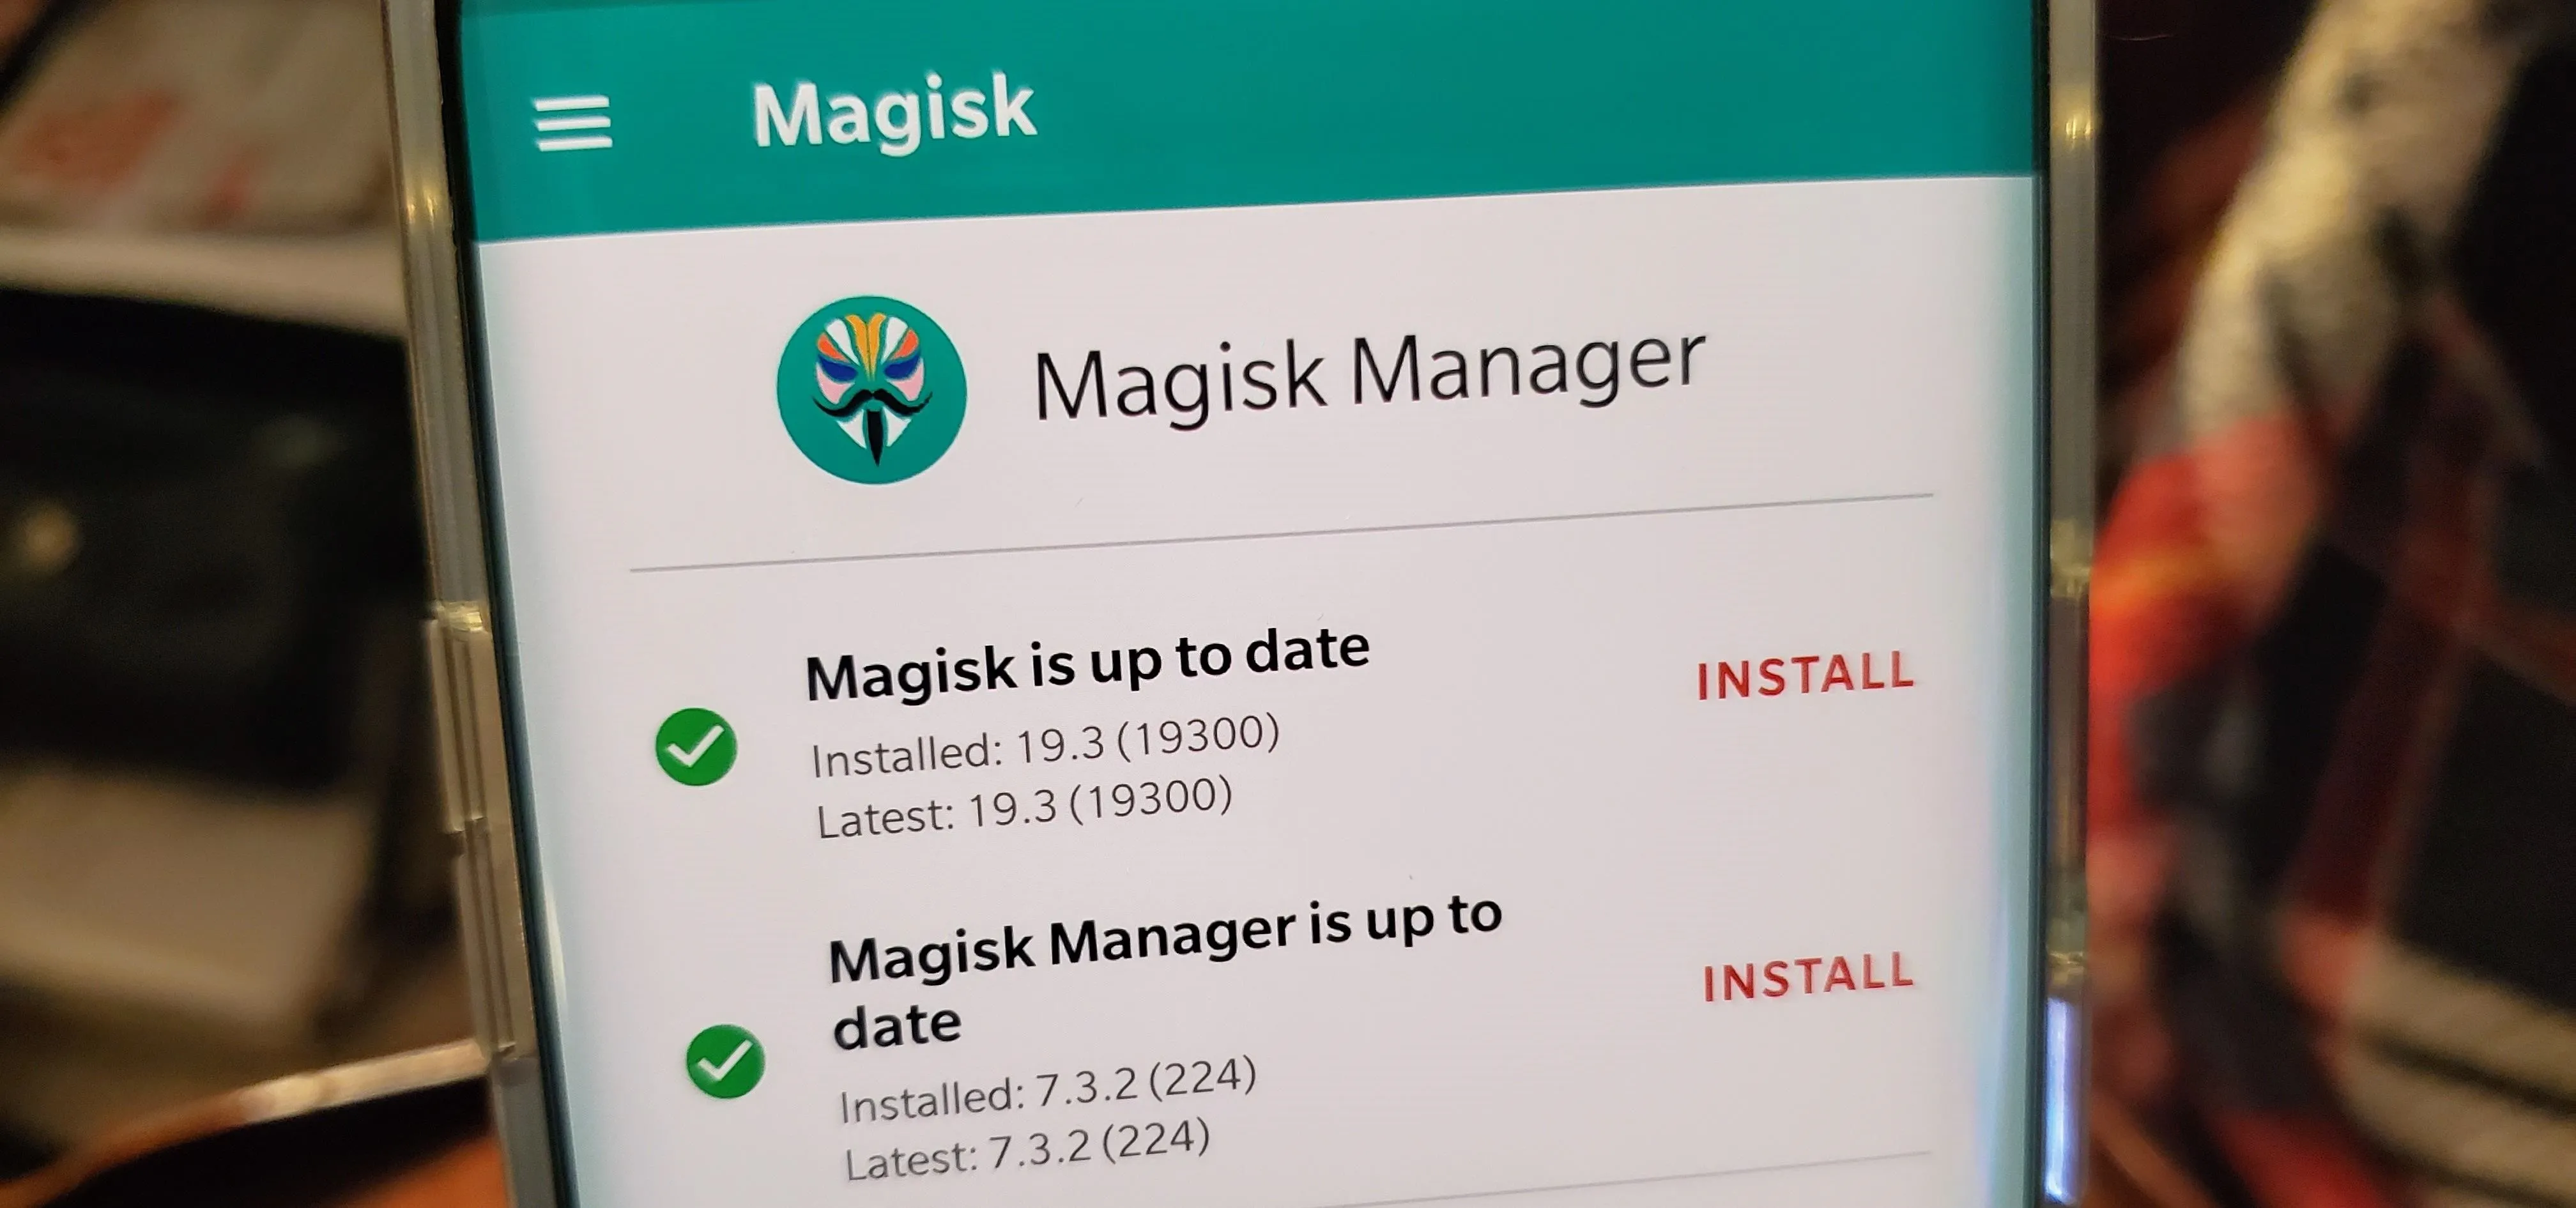
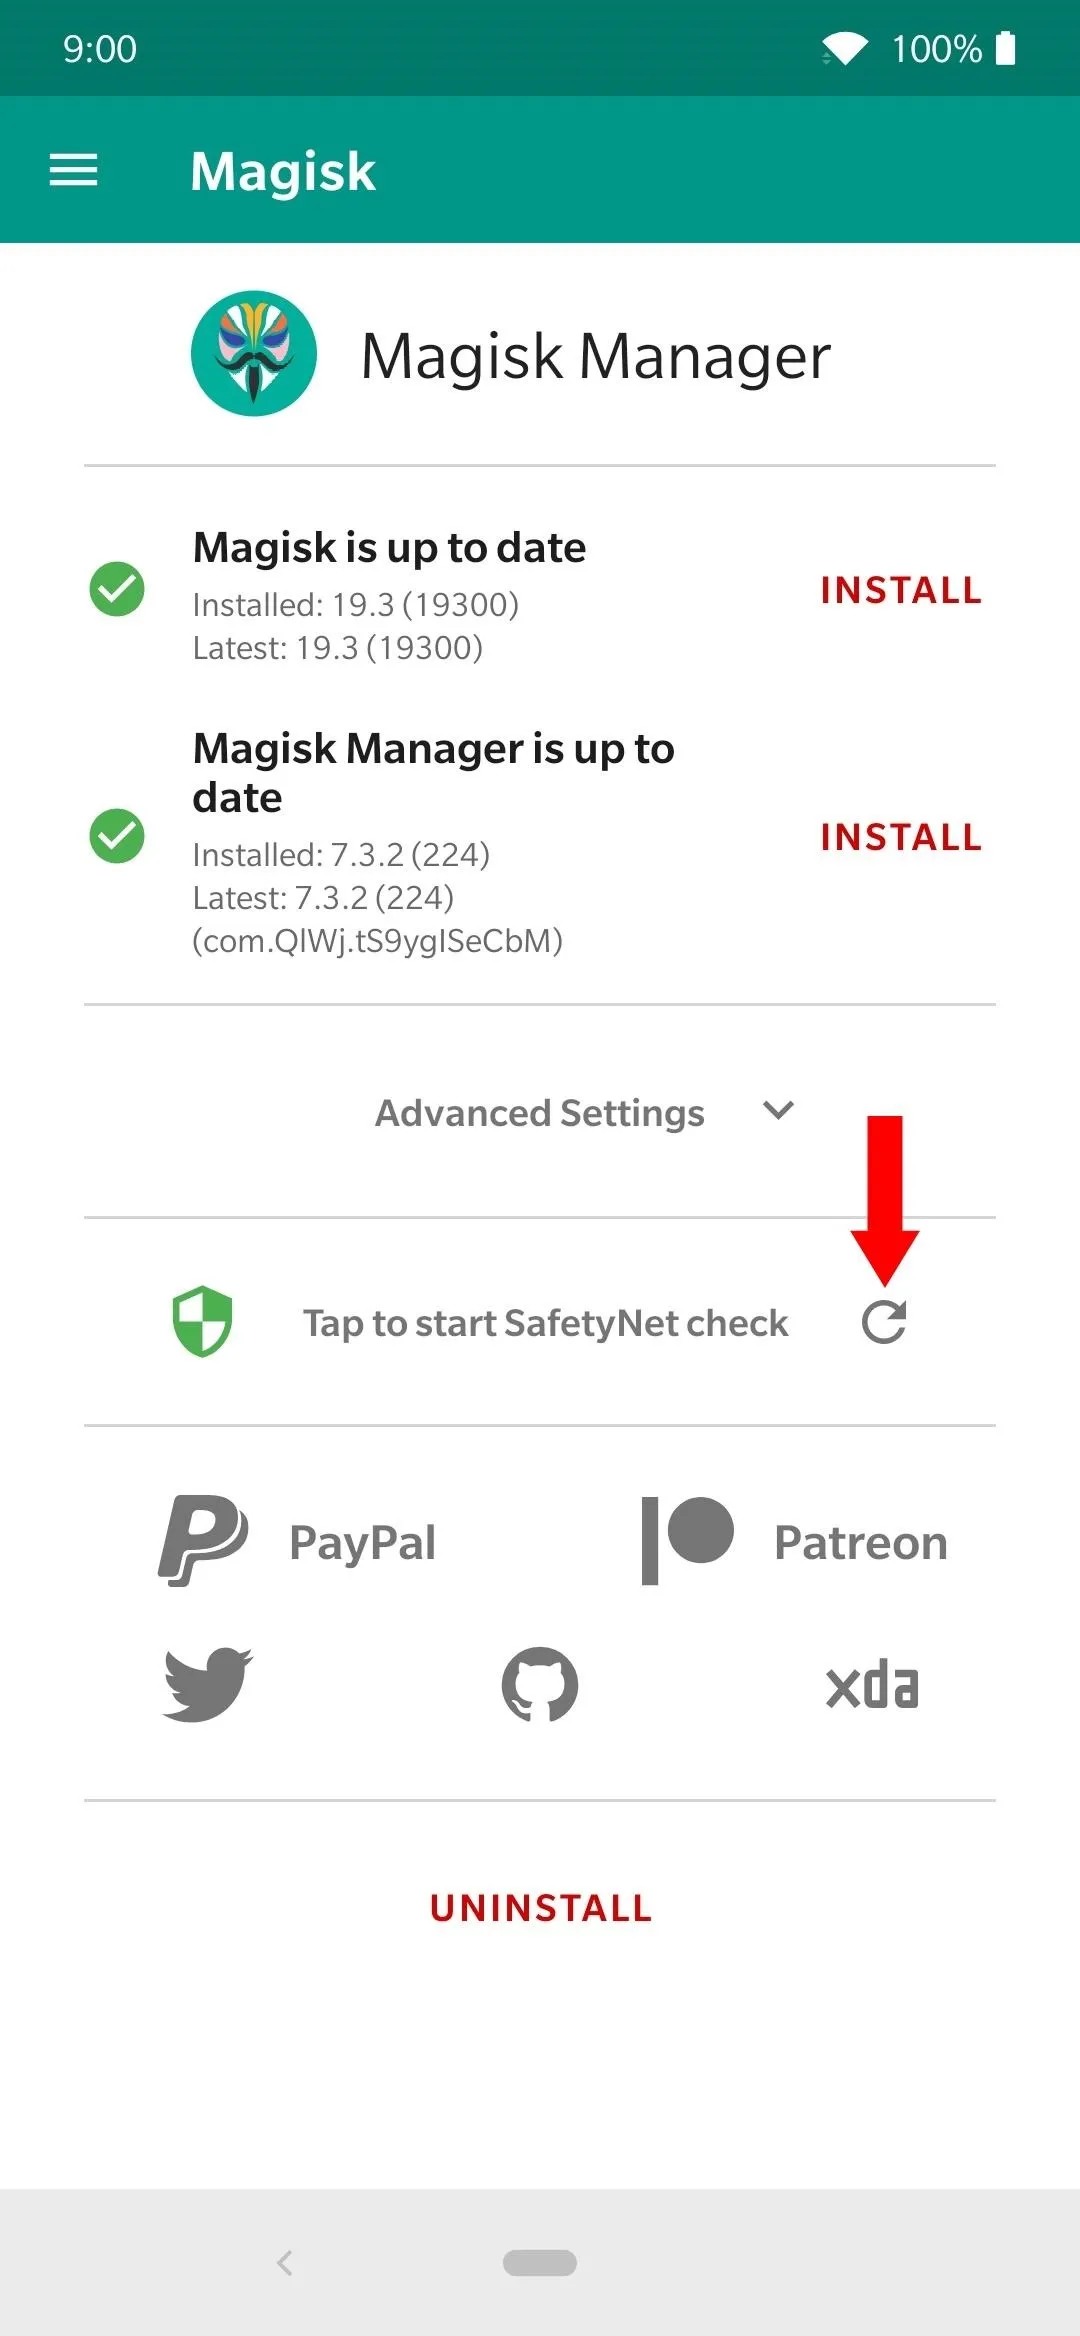
Verify Root & SafetyNet Status
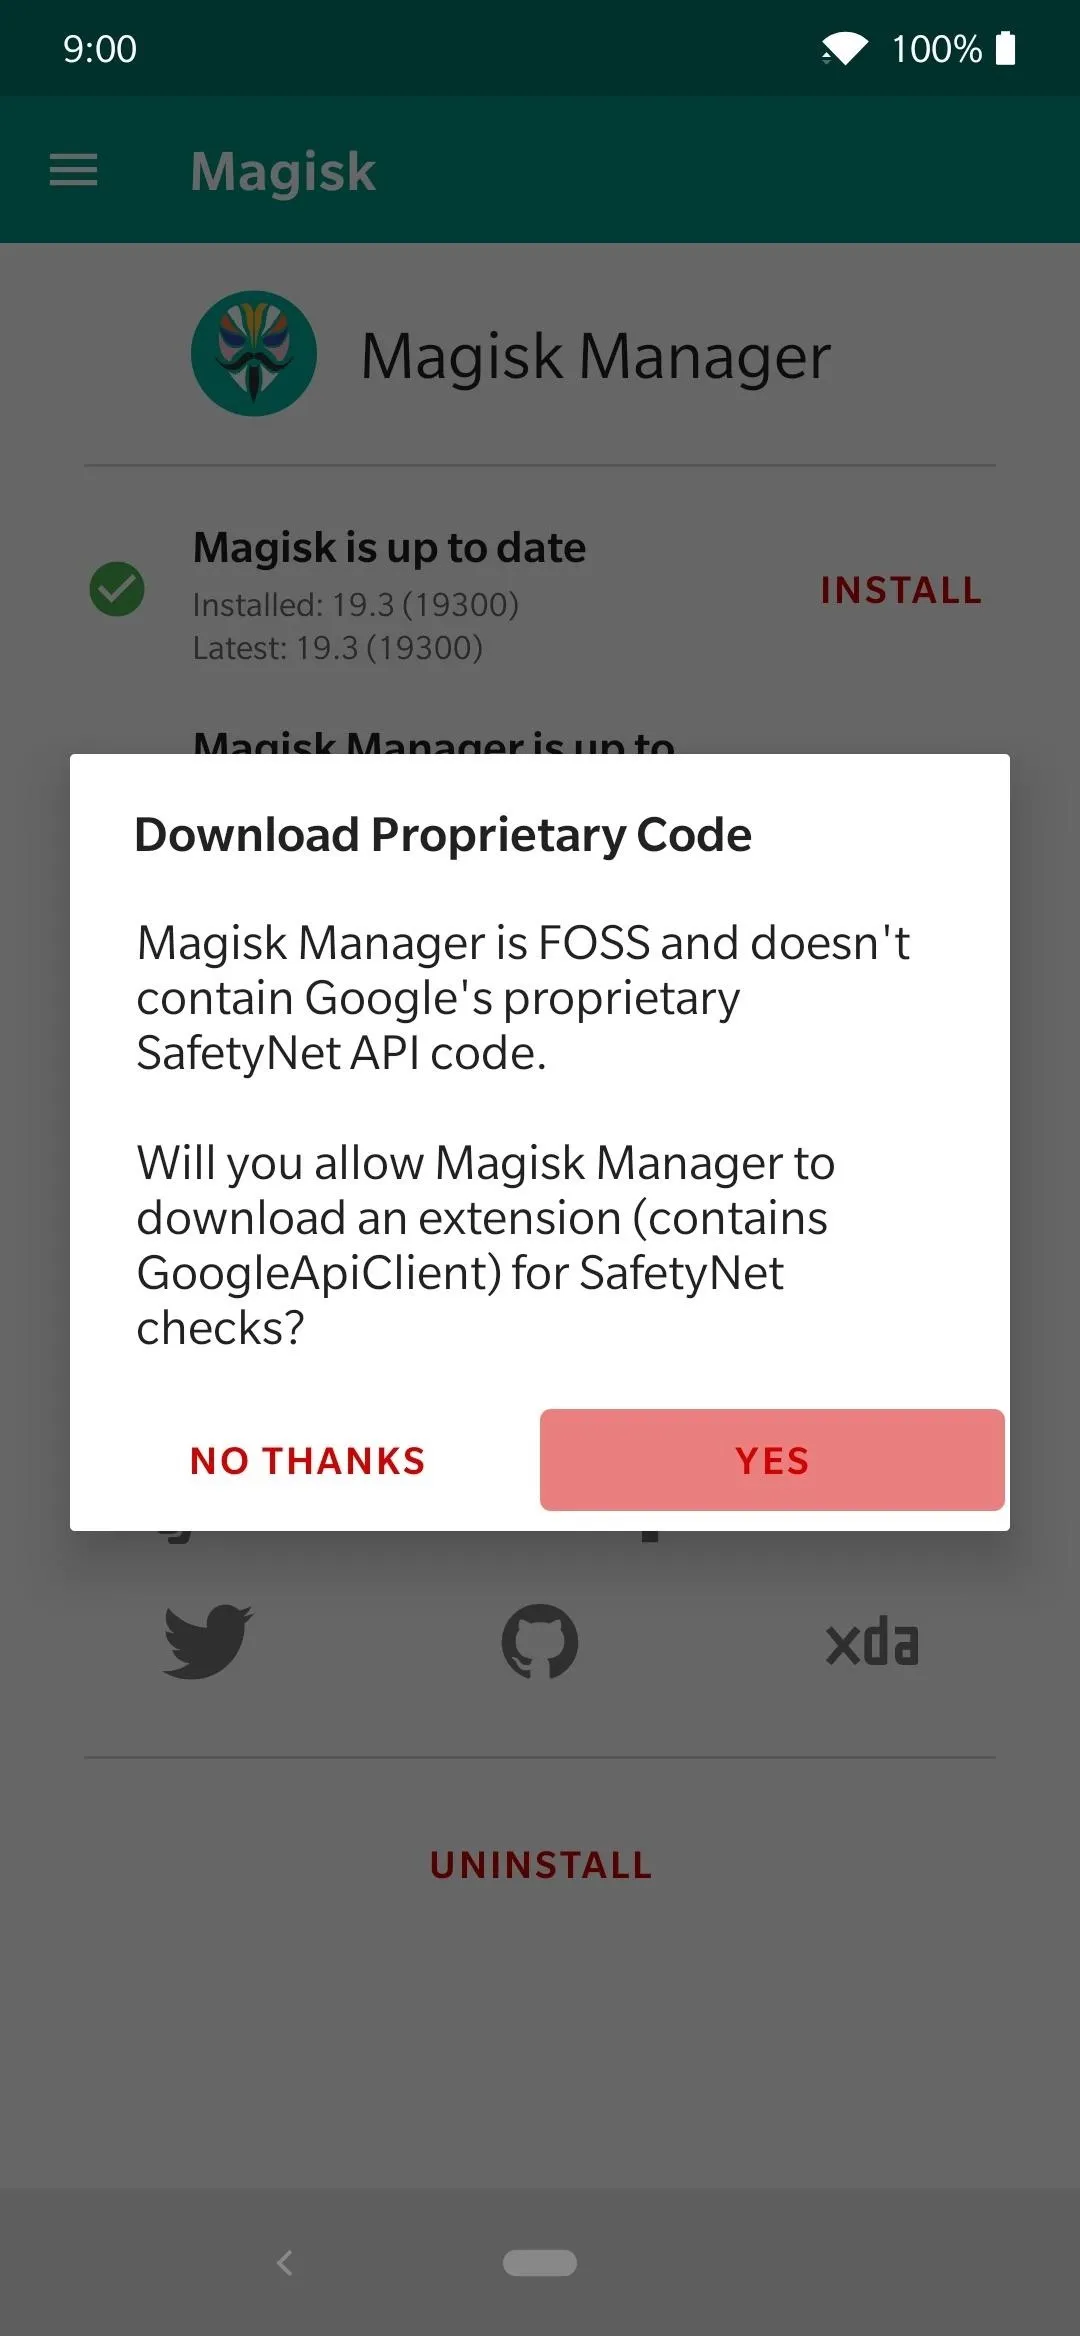
The final thing you should do is head into your app drawer on your home launcher, look for an app named "Magisk Manager," then open it to the main screen. Now tap the arrow next to the "Tap to start SafetyNet check" section, then hit "Yes" when prompted to download an extension for the check. It'll then do a quick check, and if all is well, you'll see the "SafetyNet Check Success" message. Done!
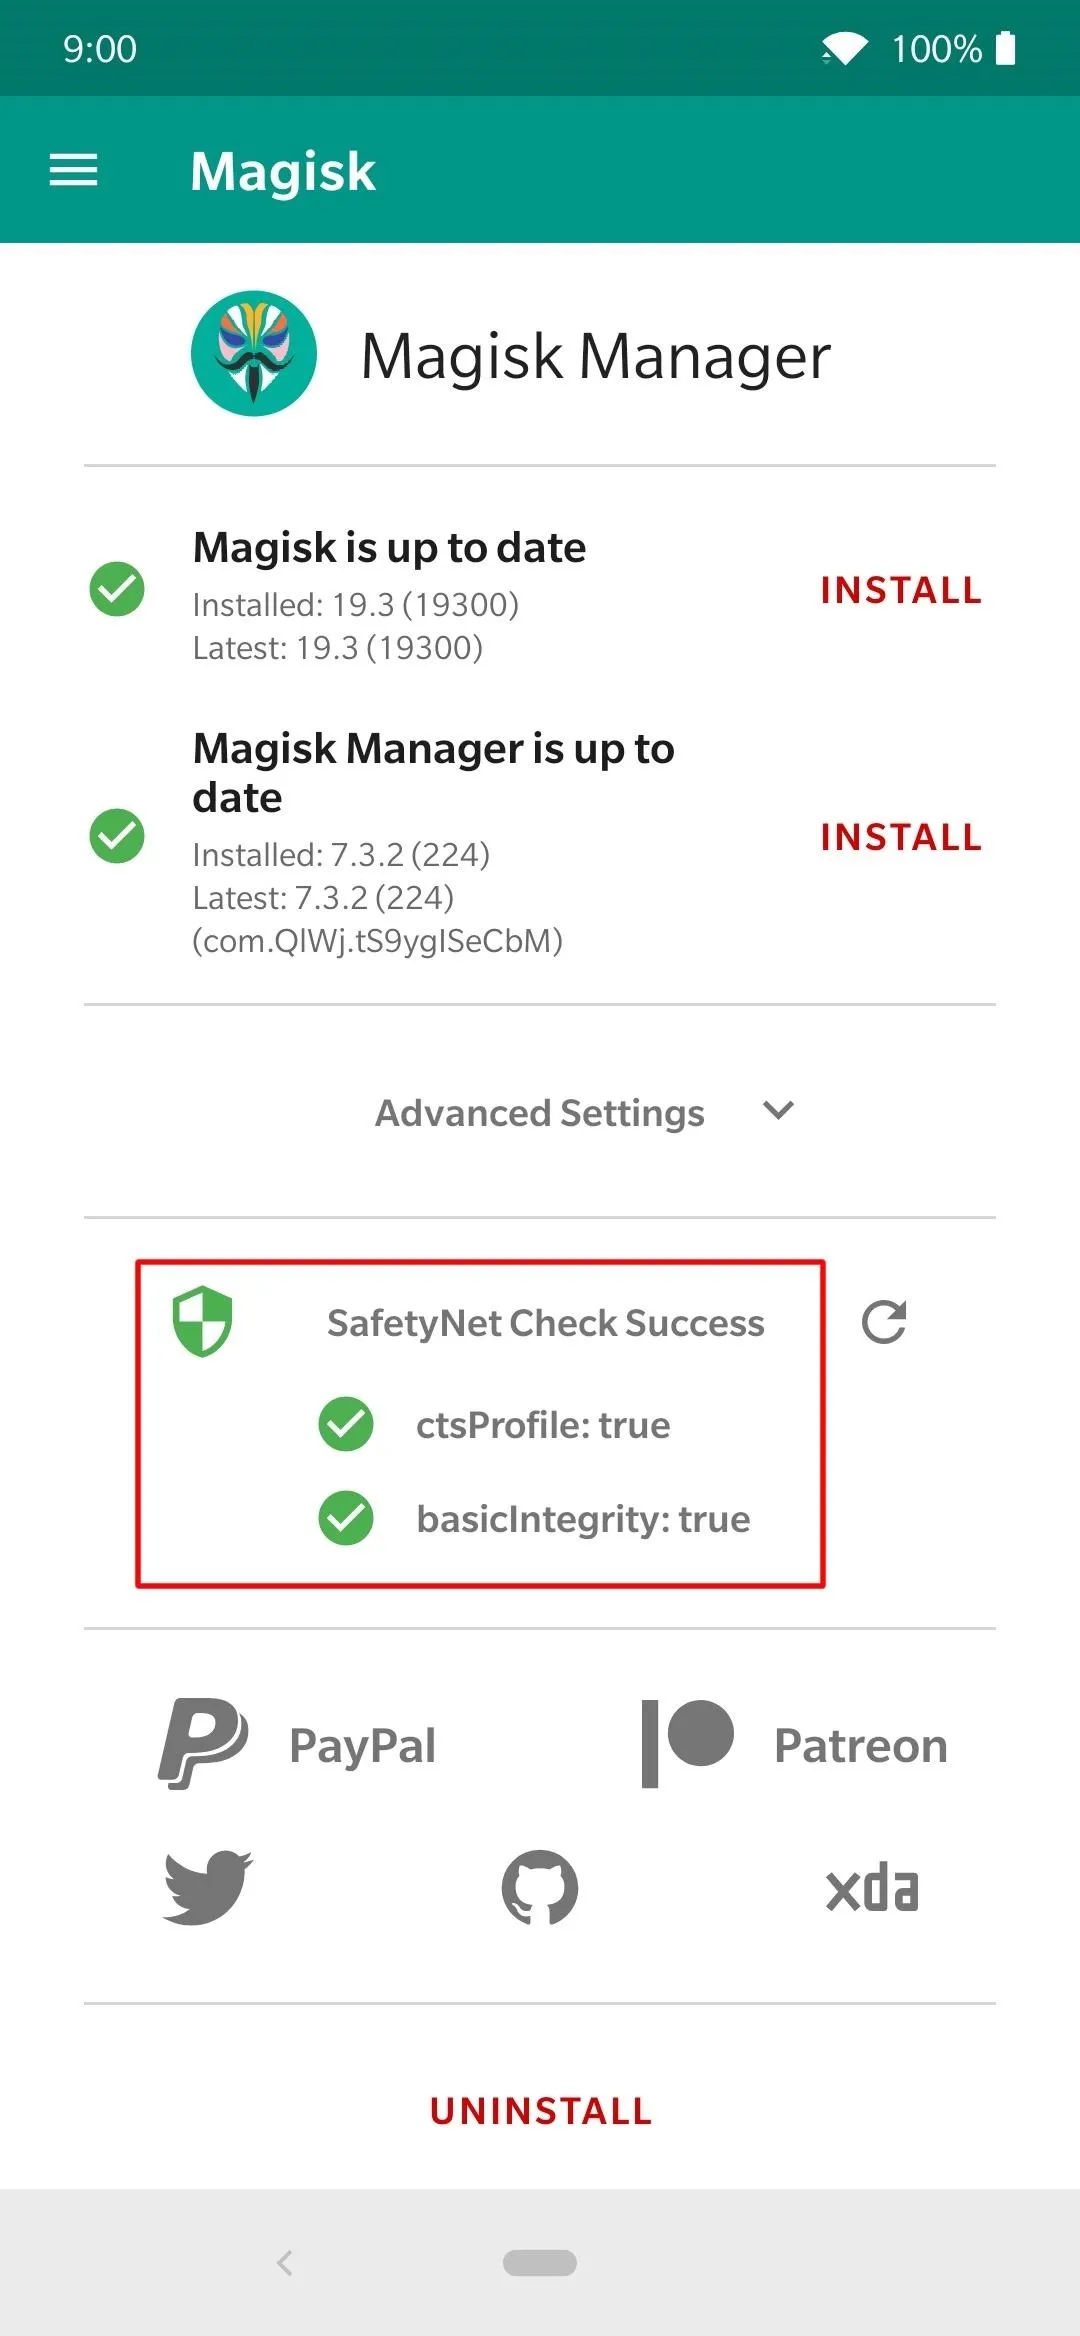
Now your OnePlus 7 Pro has full root access and passes the SafetyNet check all the same. From here, you can begin your modding adventure and start experimenting with Magisk modules and other mod files to make your phone even cooler than before. The phone is still relatively new, and there aren't too many device-specific mods just yet, but it's extremely popular with developers. Expect more soon!
Cover image and screenshots by Stephen Perkins/Gadget Hacks


Comments
Be the first, drop a comment!