


Since we wouldn't have Android without Google, everyone has come to realize that the Pixel smartphones are a prime example of what an Android smartphone should be. With so many unique software related features, no wonder people want that Pixel experience.
OnePlus offers its OxygenOS by default, which is one of the cleanest versions of Android out there. If you're looking for something different than what you're currently using (or maybe you just want those exclusive Pixel features on your phone), there's an easy way to achieve this using a custom ROM. Follow along with this guide to get that authentic Pixel user experience right on your OnePlus 6T.
Requirements
- OnePlus 6T
- unlocked bootloader
- TWRP installed
Back Up Any Important Data
The first thing you should always do before installing a custom ROM is to make sure all personal data on the phone is backed up. You can make a NANDroid backup in TWRP or use another tool like Titanium Backup to back up all of your installed apps and system settings.
Also, don't forget to mount your phone to your computer and save any local files you might want to keep onto the computer, such as music, photos, or videos. Installing this ROM will mean a factory reset on your device, which could end up deleting your backups. Once you're satisfied with your data backup efforts and are positive everything's all safe and sound, you can move onto the next step.
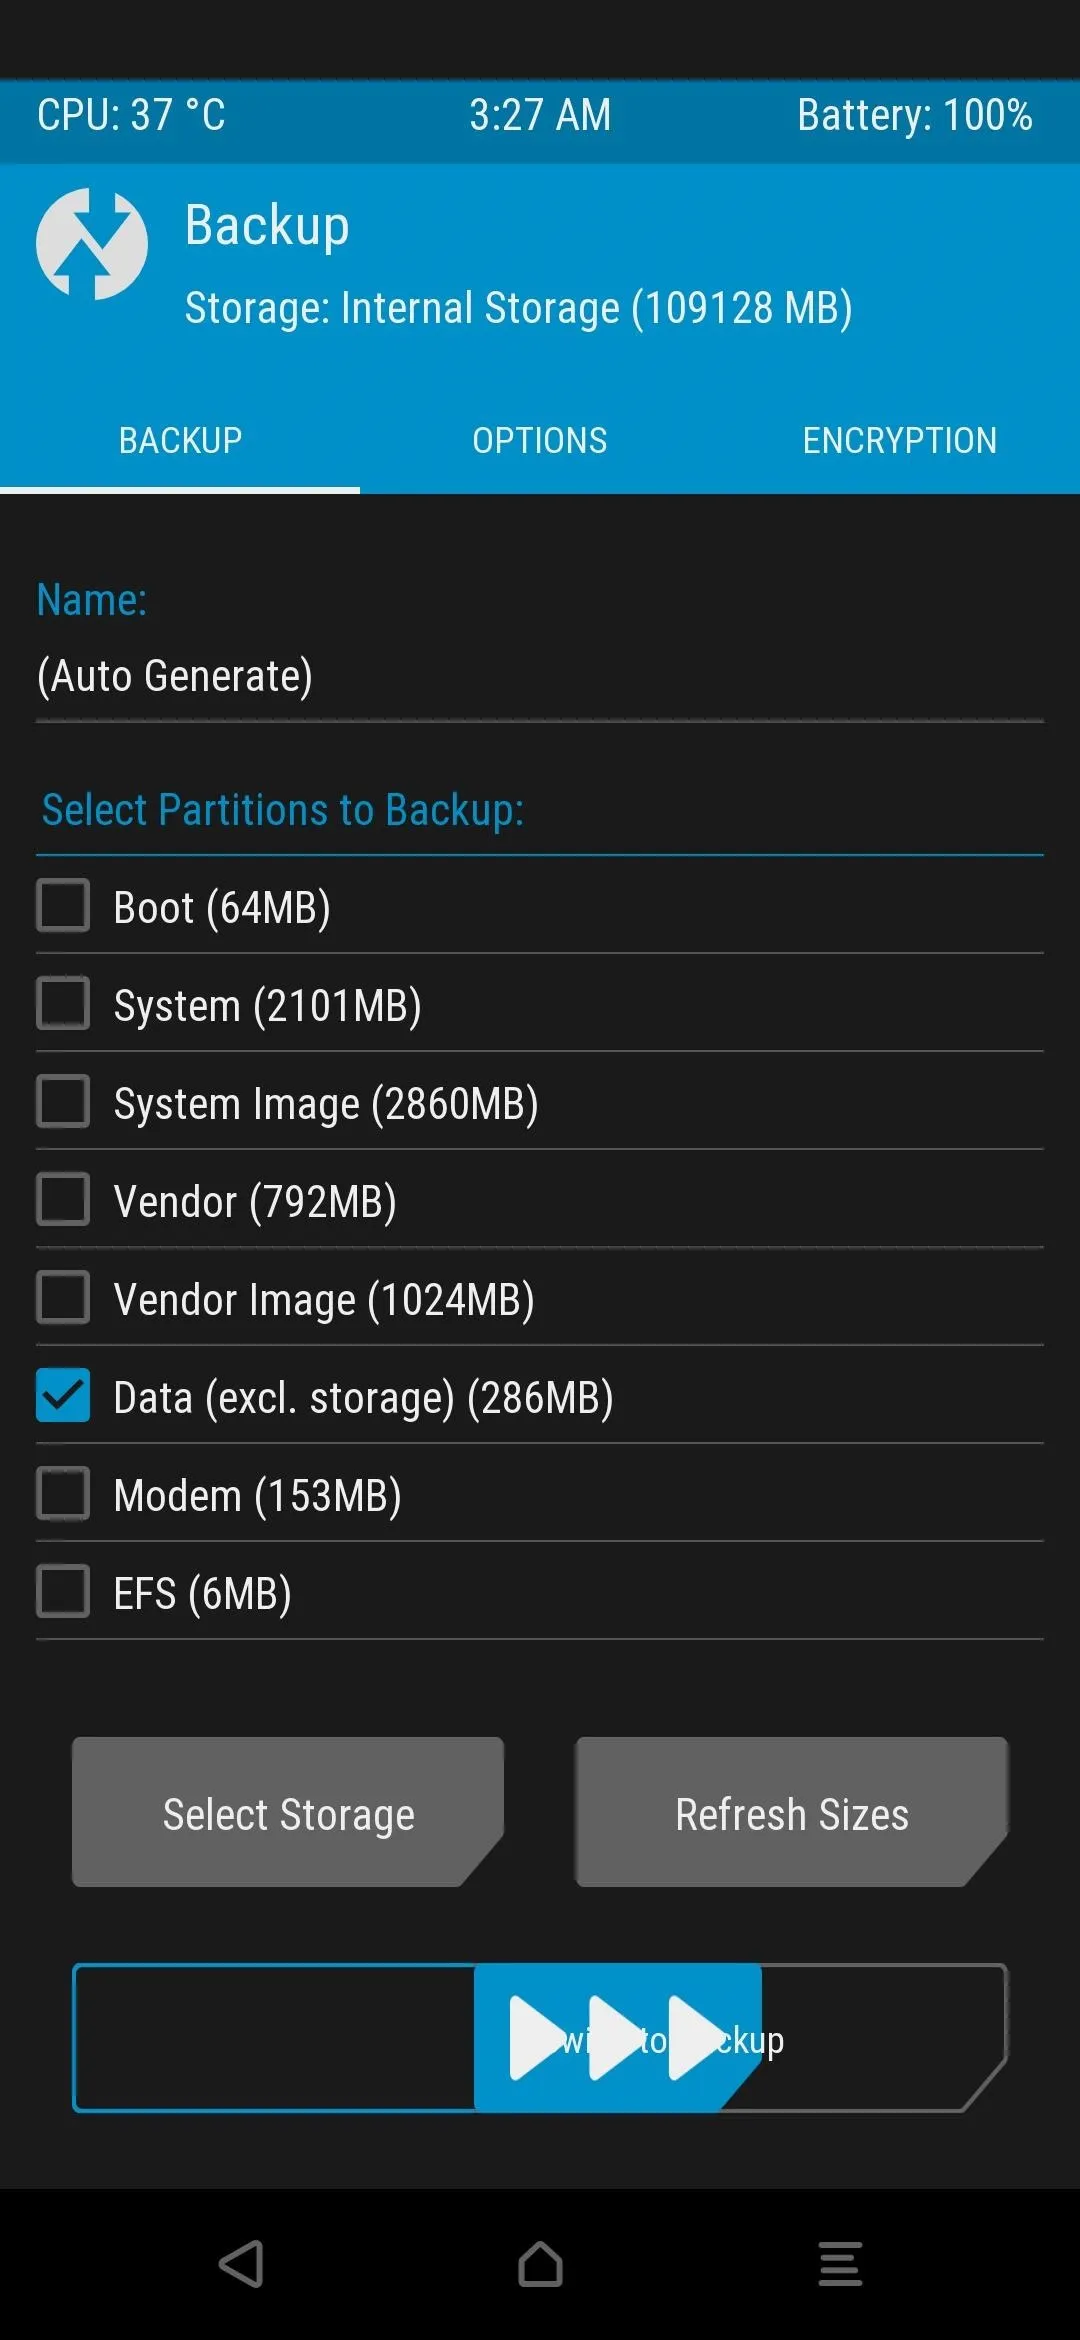
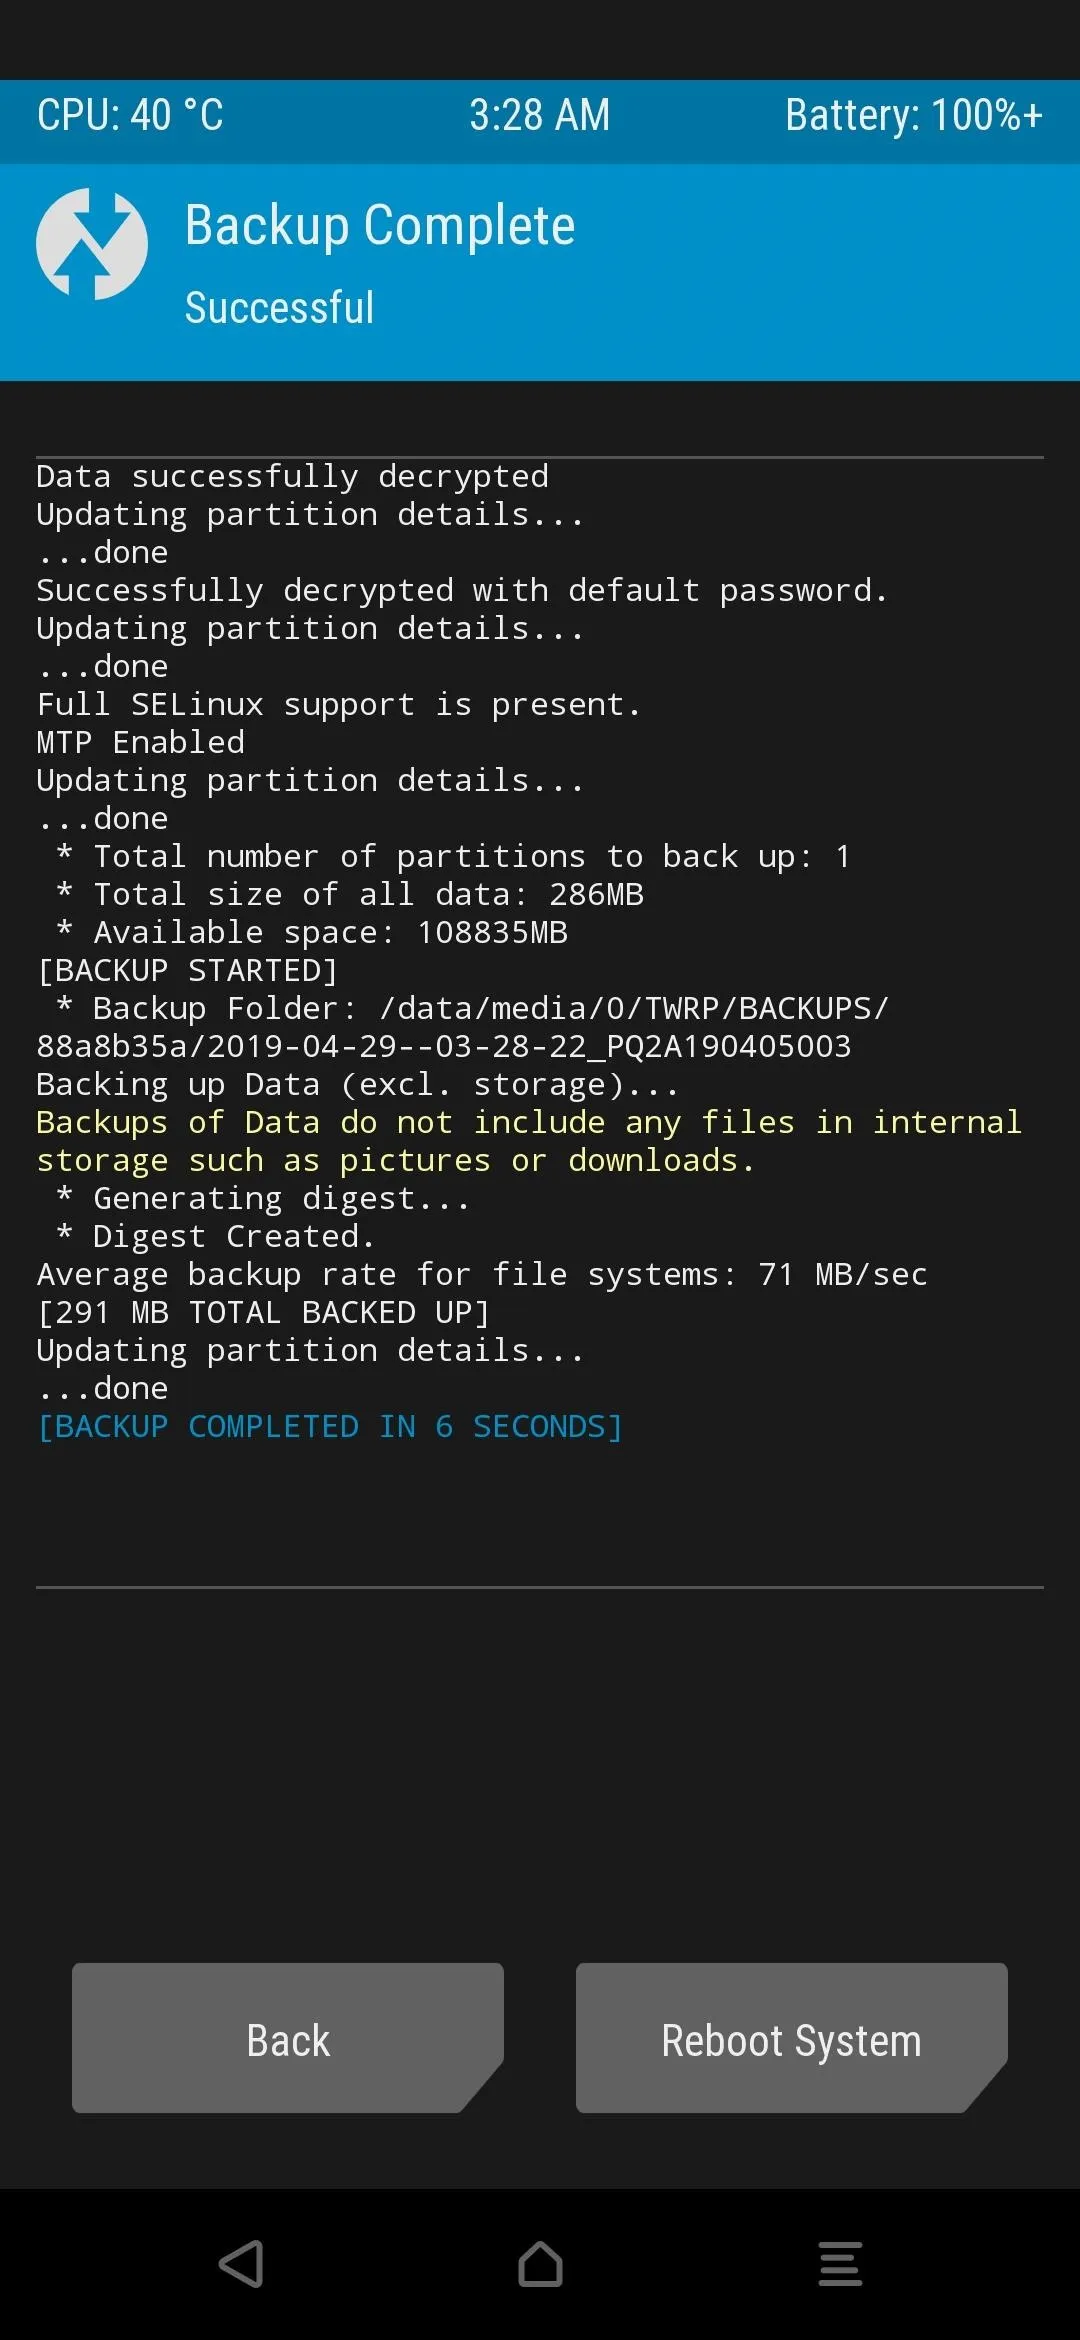
Note: When making a NANDroid backup, it's crucial that you only backup and restore the "Data" partition when coming from OxygenOS to the Pixel OS. You only want your personal data and apps to transfer over, not system-specific things from another version of Android. If you try to restore the System partition when coming from a completely different ROM, for example, you will be stuck in a permanent bootloop since OxygenOS is not the same as the Pixel OS.
Download the Pixel Experience ROM
Once your data is backed up and safe, you'll have to download the Pixel Experience custom ROM and save it to your phone's internal storage later so that you can install it in the TWRP recovery environment. This ROM is by developer saksham__033, and it's going to offer you a near-native Pixel-like experience. This is because it's based on a real Pixel 3 system image, so that means it'll be the real deal rather than something simple like replacing your home launcher to mimic a Pixel.

You get a lot of perks you'd expect from a Pixel ROM, such as the Pixel camera built right into the system by default, which makes a world of difference on just about any phone's camera. The developer now has the in-display fingerprint sensor working on the 6T, so there are no longer any issues to be aware of. Everything has been reported as stable and safe to use as a daily driver.
You can also expect to be on the latest monthly security patches well into the future, so that's always a plus. Also, the fingerprint scanner works perfectly with the Pixel Experience ROM, so that'll be your best bet for securing your device from this point on.
Download the Latest TWRP Flasher
This one's important because you'll want to use the custom recovery environment without needing a computer in the future. Not to mention, if something were to go wrong, you could almost always fix it as long as you can reboot your device into TWRP. When coming from OxygenOS to the Pixel OS, it's essential that you take all the precautions you can since you want things to go as smoothly as possible.
Download Magisk (Optional)
If you plan on using more advanced mods and tweaks that require the use of root access, you're definitely going to want to install Magisk. However, you can run this Pixel ROM without being rooted, so it just depends on what your needs are for this particular device.
If you're new to rooting, you can check out the guide below for everything you need to know about Magisk and your OnePlus 6T.
- Don't Miss: How to Root Your OnePlus 6T with Magisk
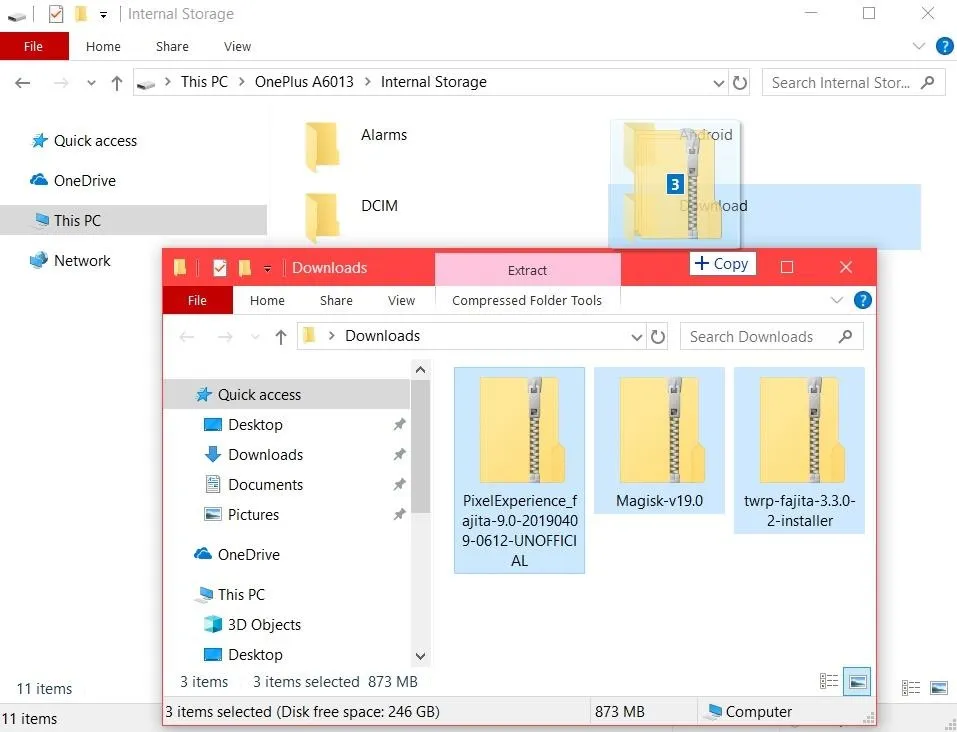
Transfer the Files
You need to mount your phone's internal storage to your computer to transfer the files you downloaded from the previous steps to the phone. In other words, plug your phone into your computer with a USB cable, then open an Explorer window (or launch Android File Transfer if you're using a Mac). Put the files somewhere easy to remember, such as the "Download" folder at the root of your phone's storage.
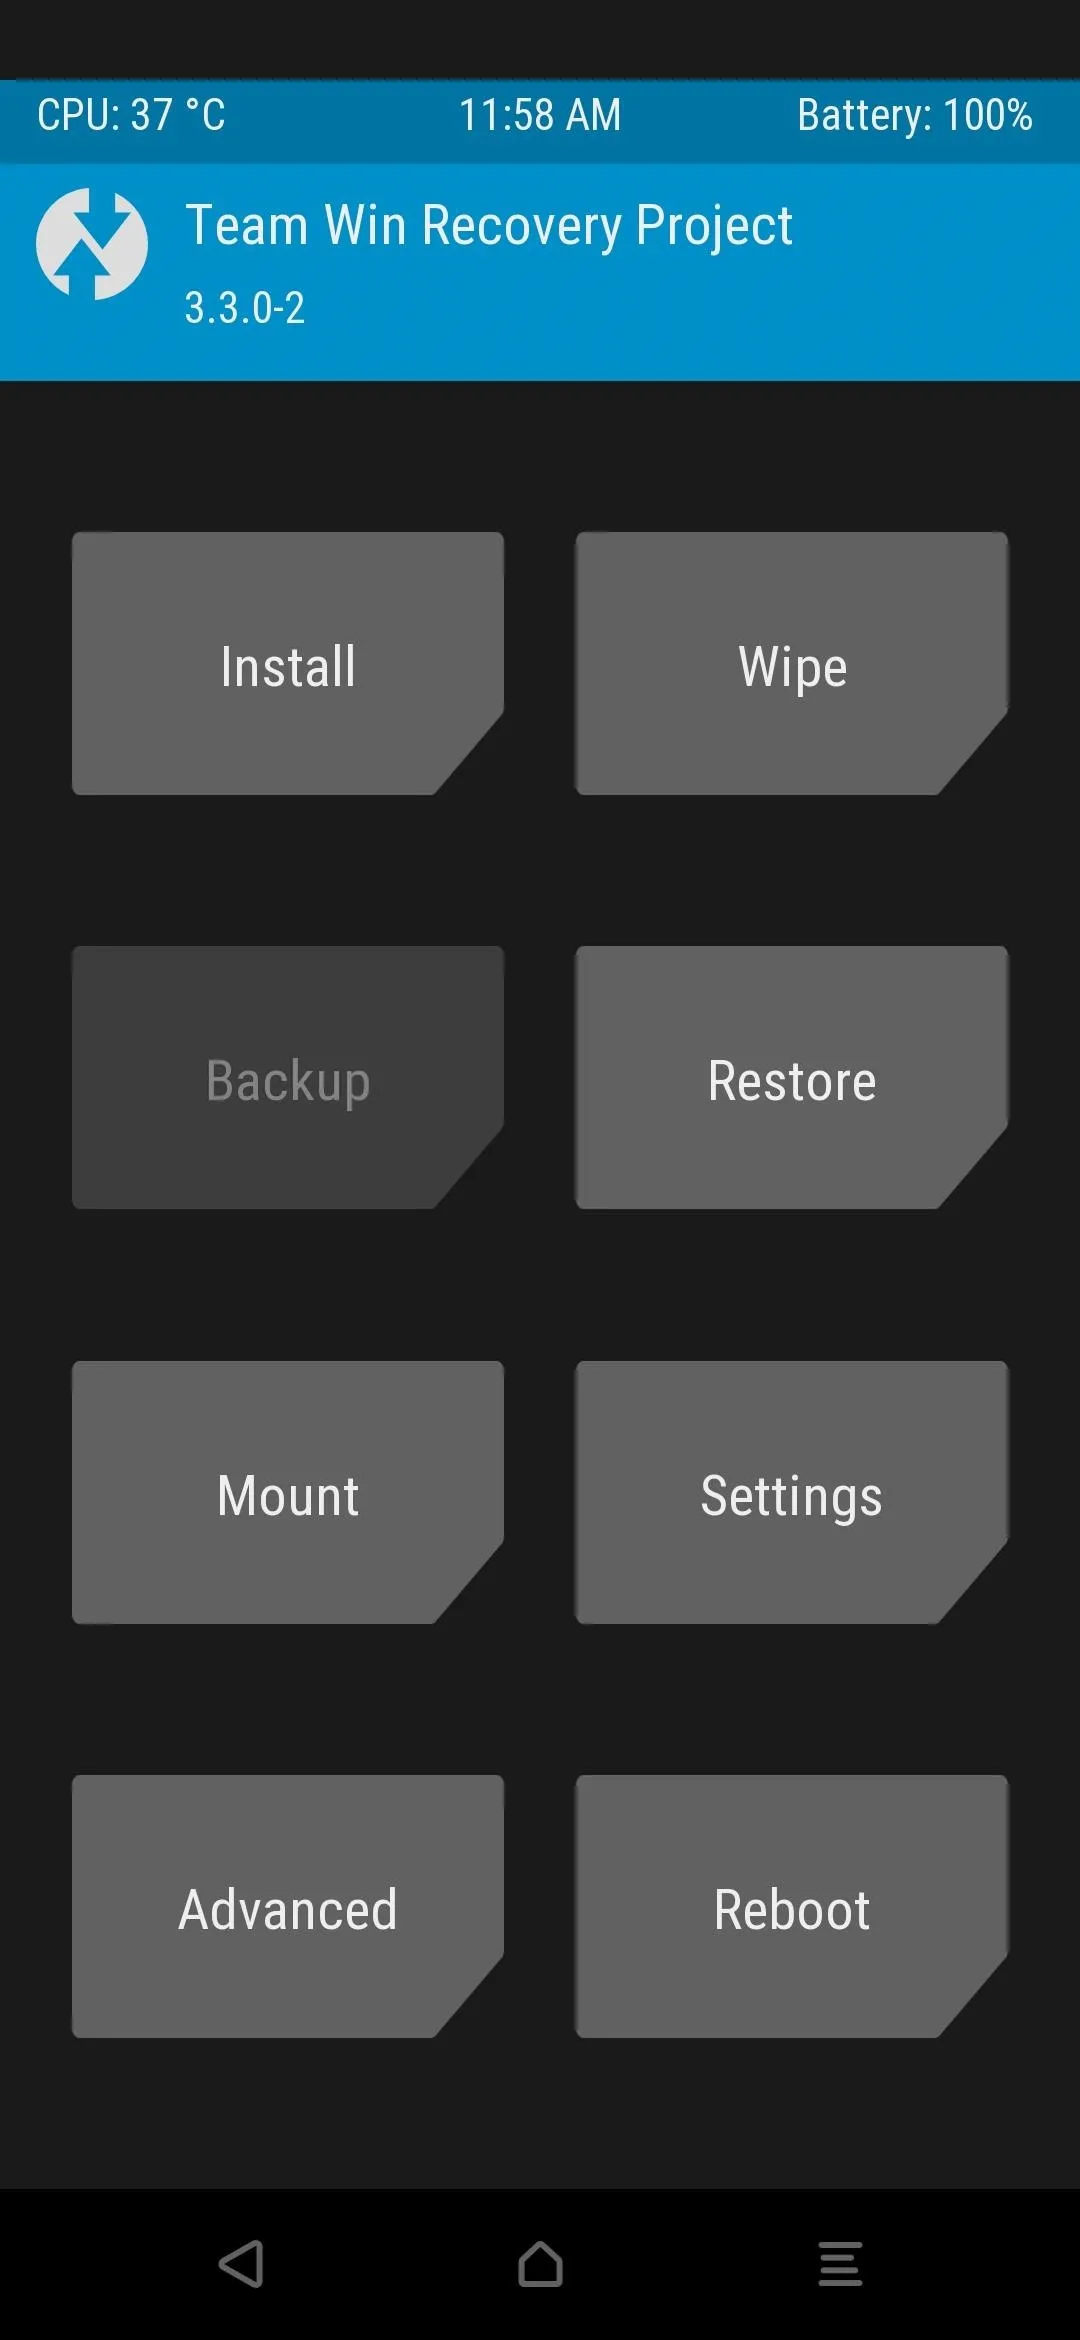
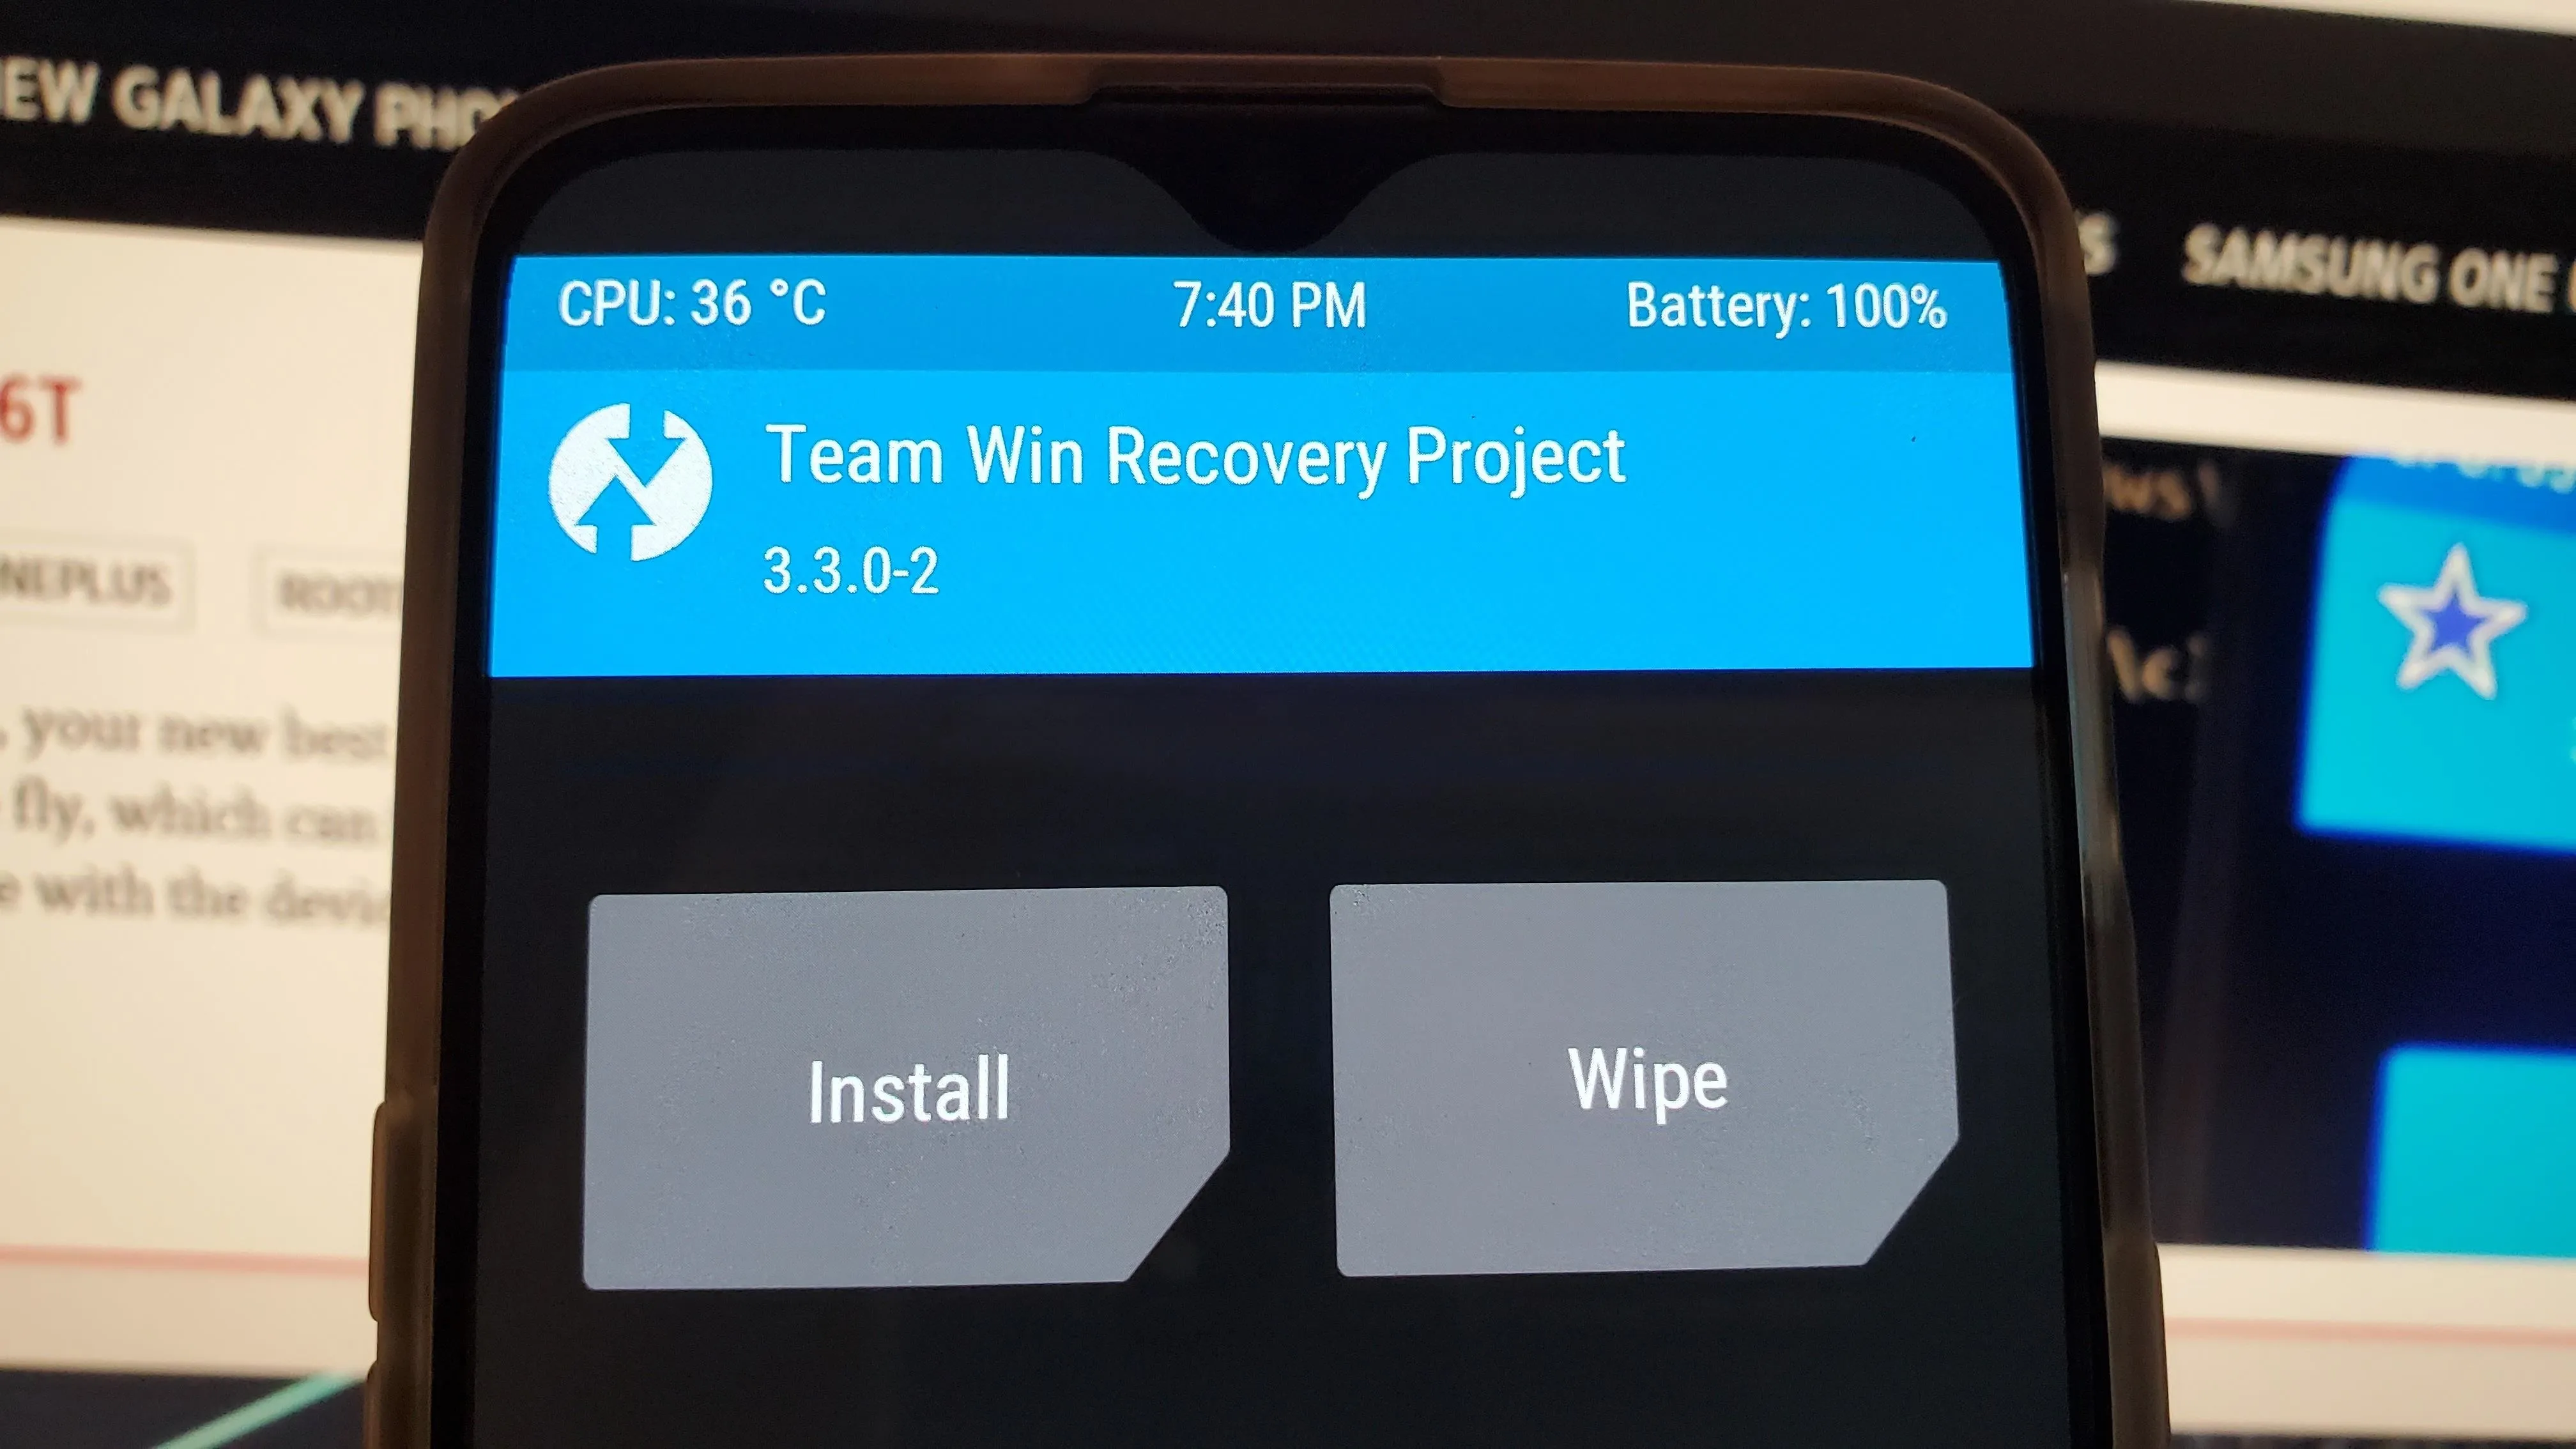
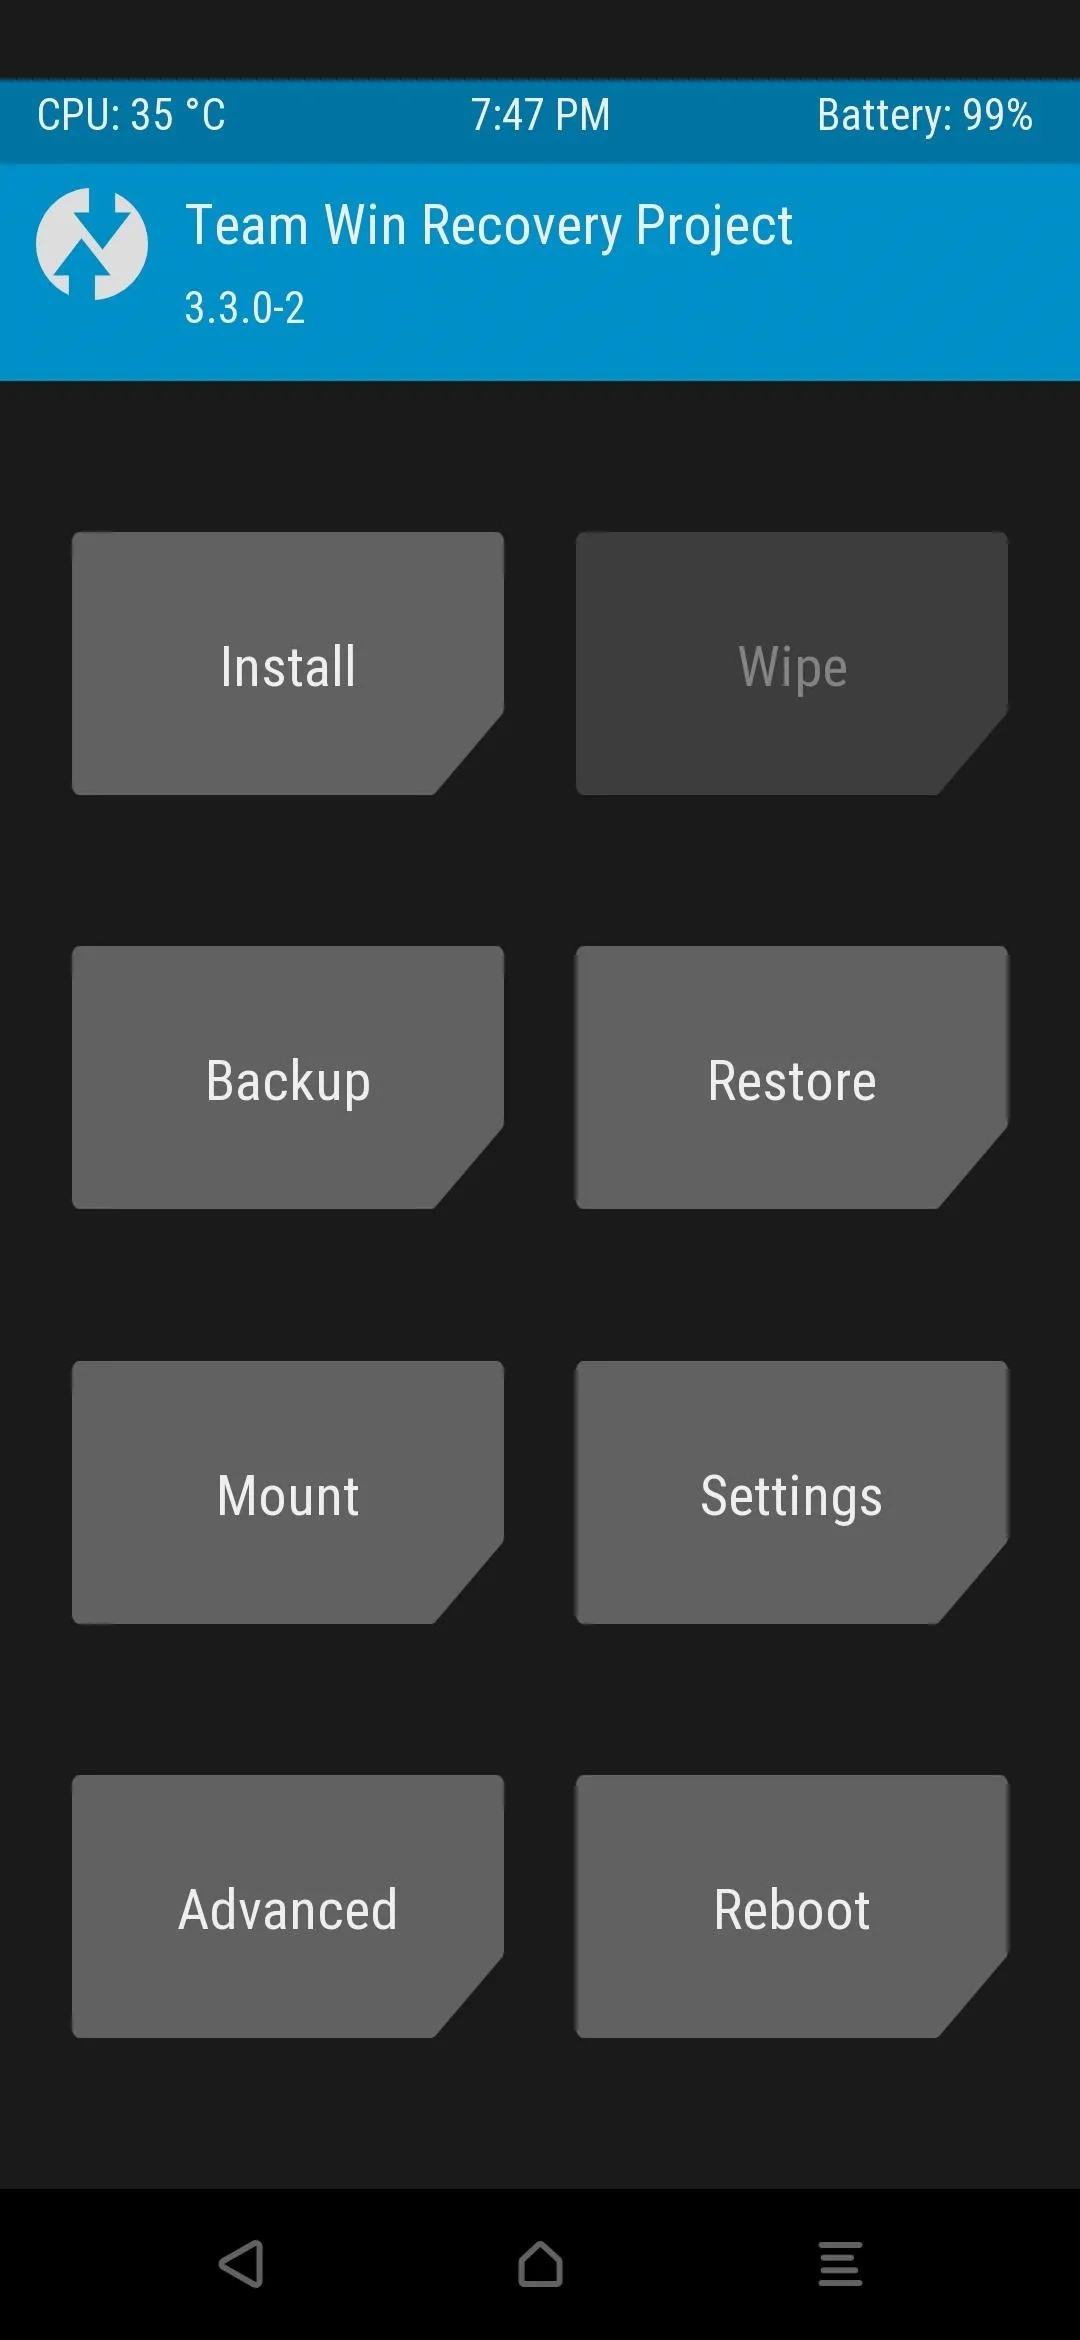
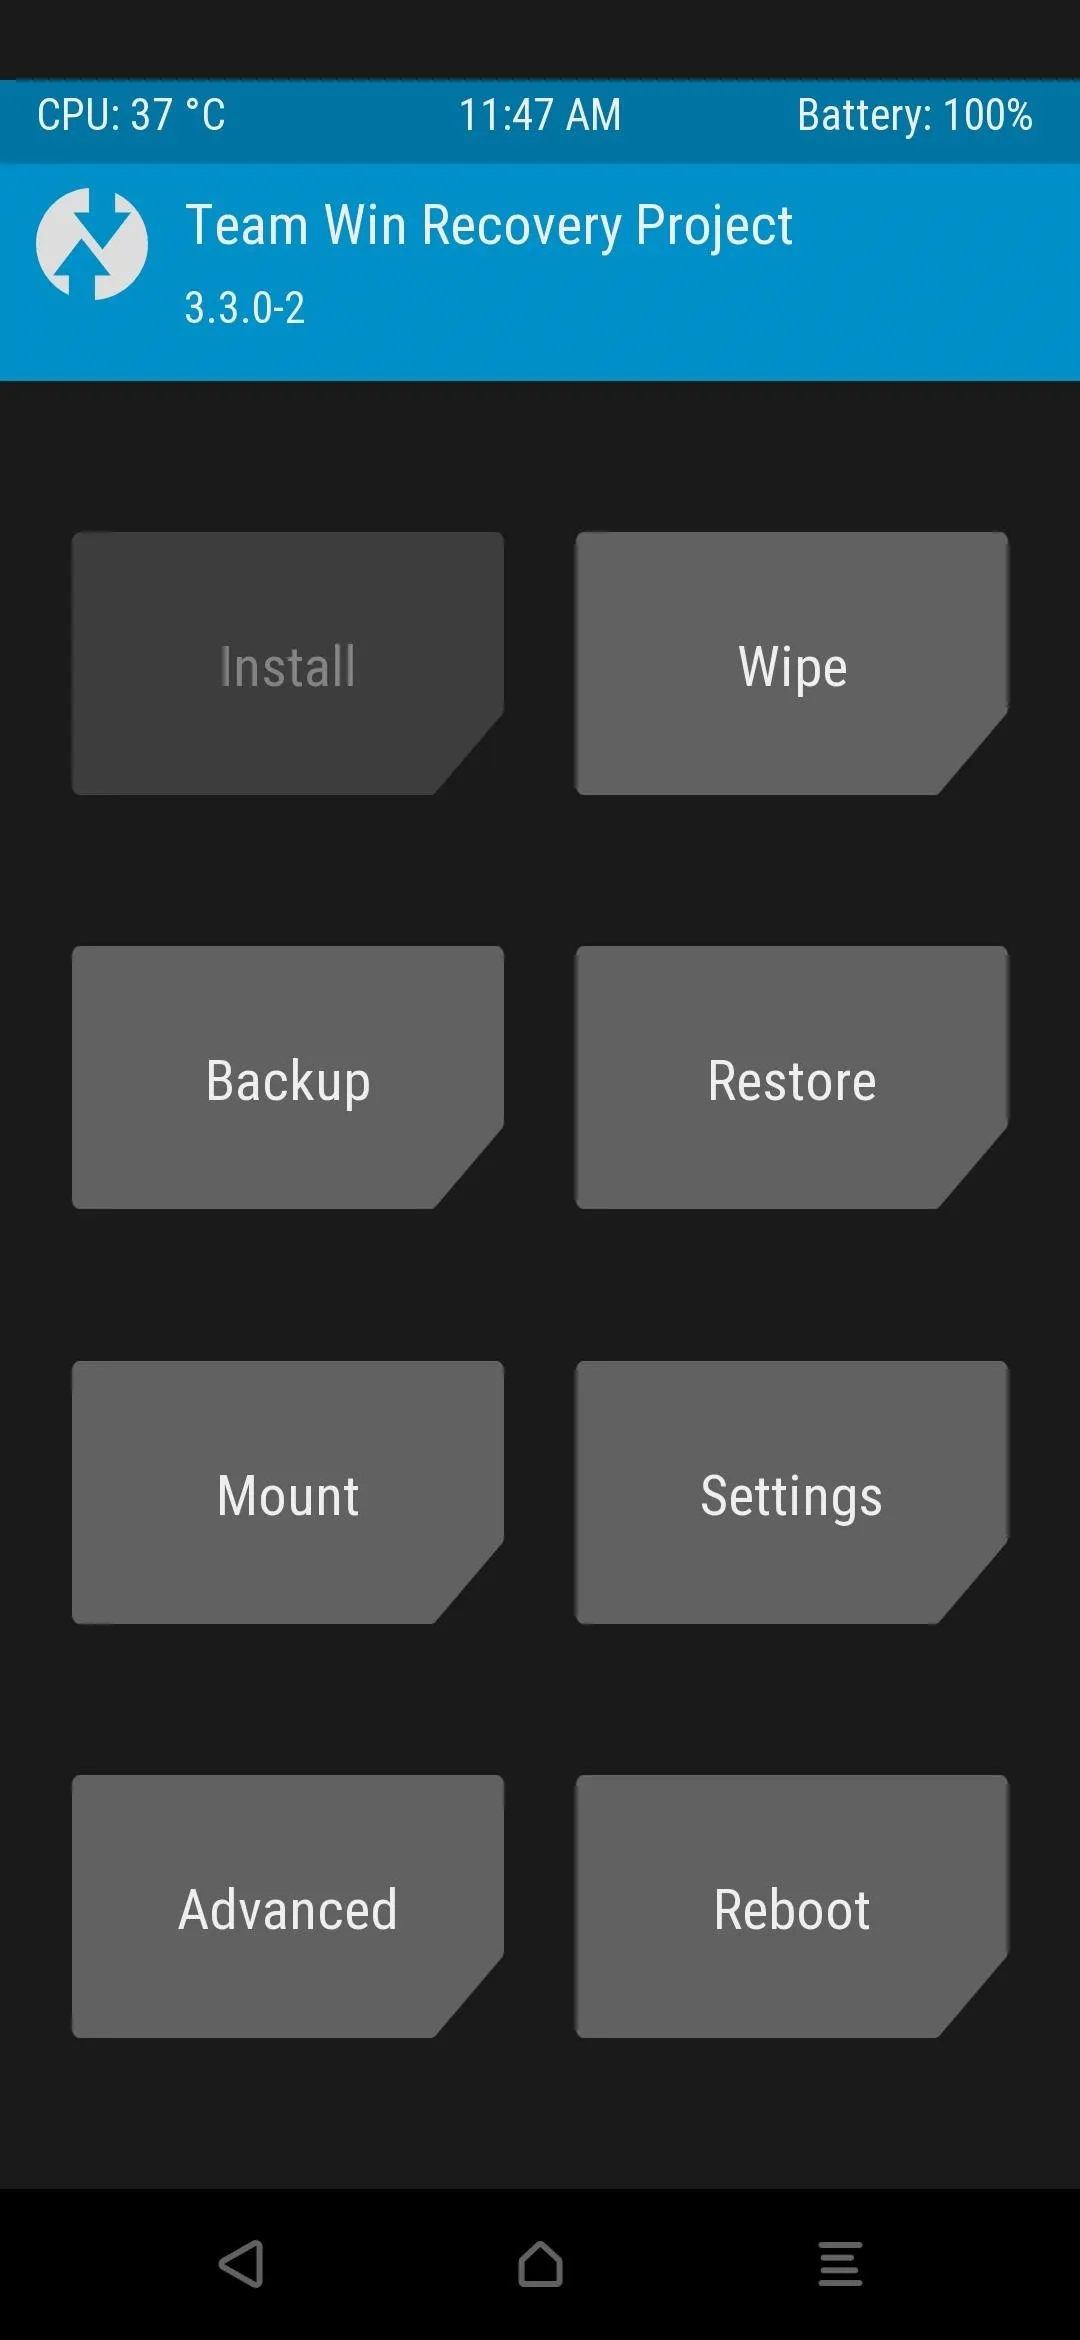
Boot into TWRP
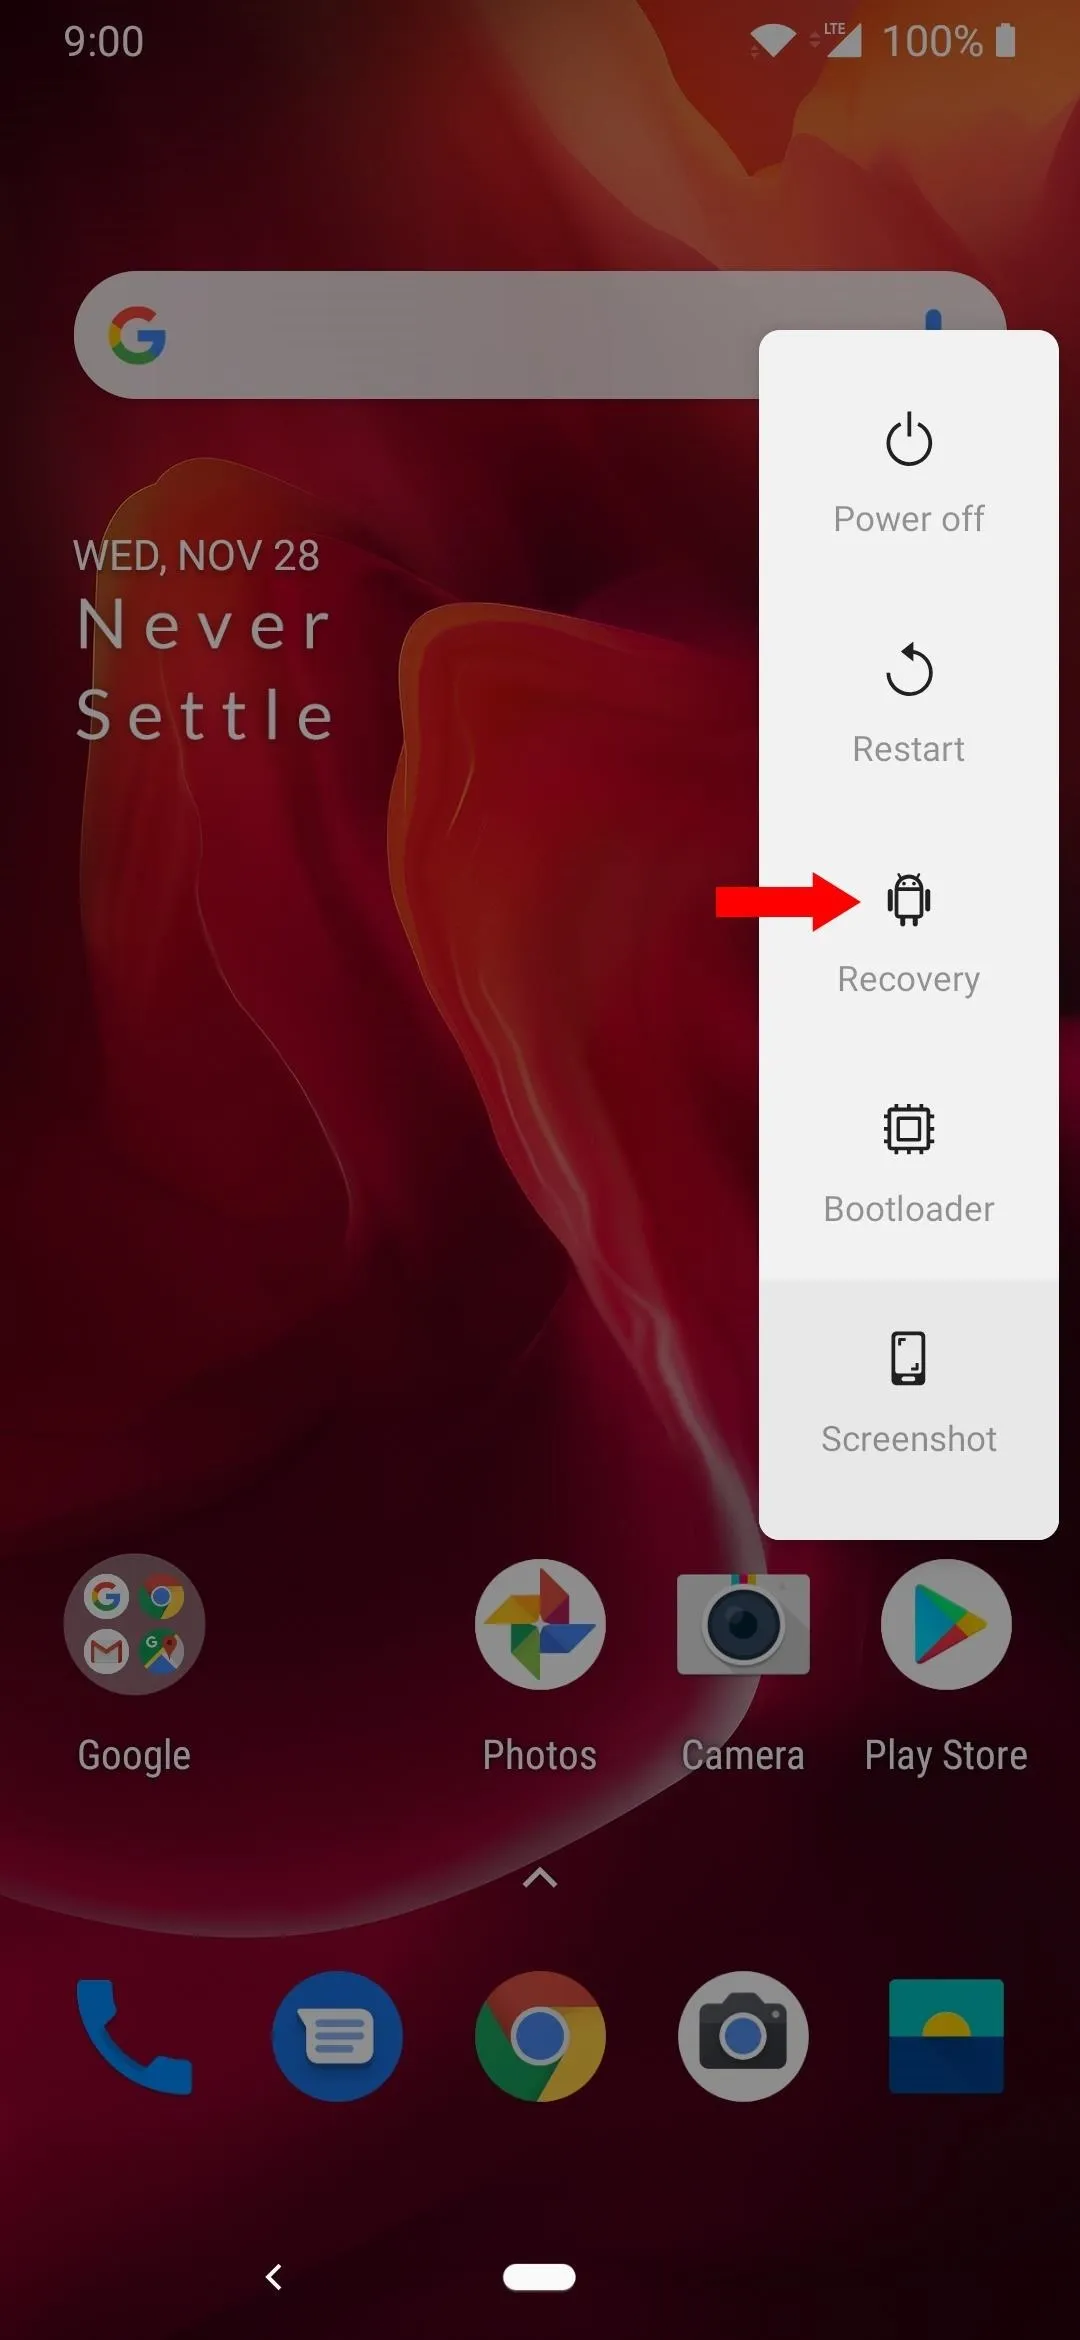
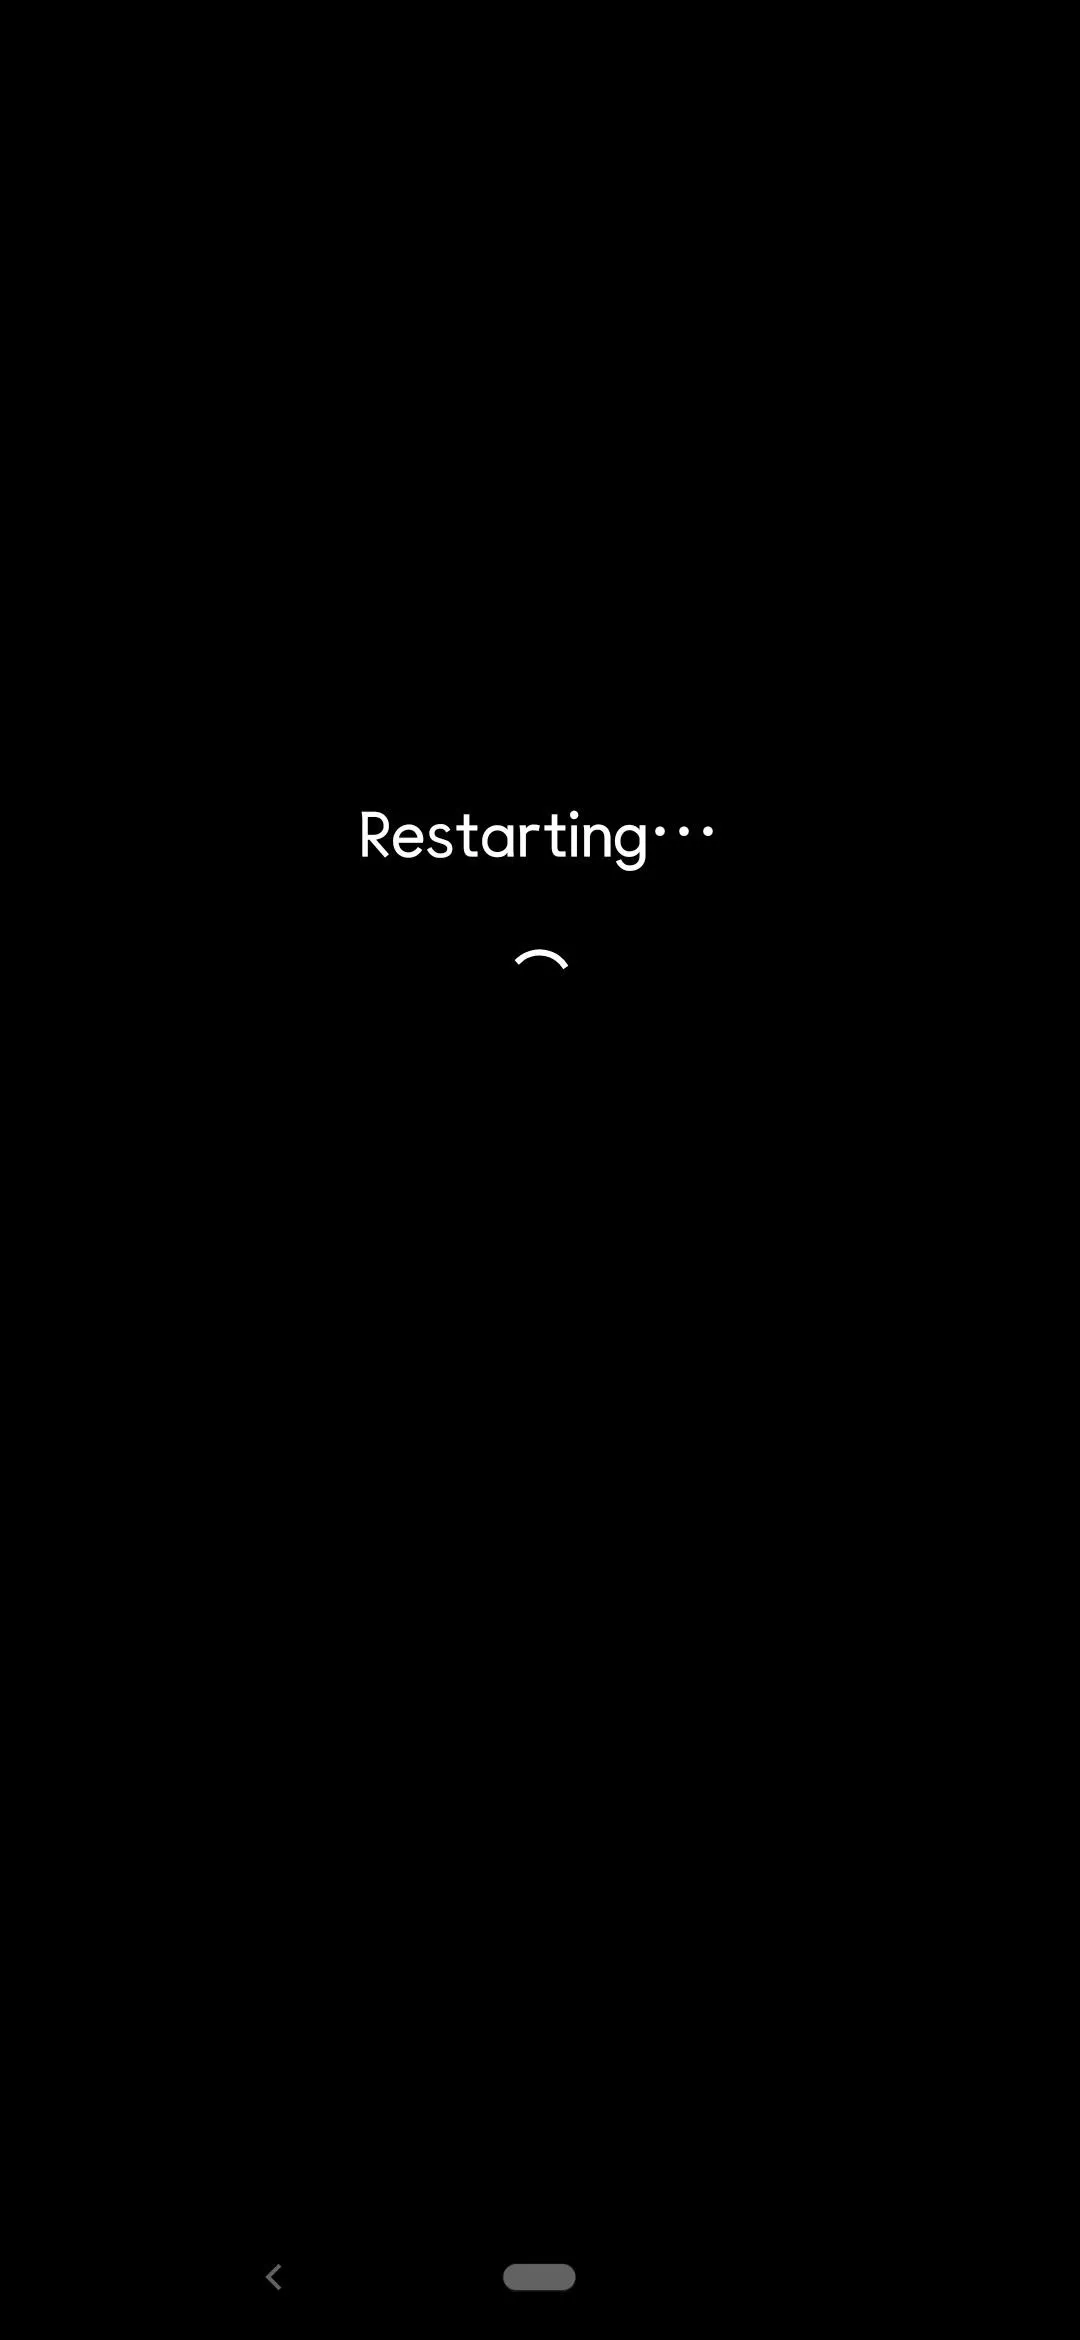
Now that you have the required files for the Pixel Experience installation process, you'll need to reboot your phone to the TWRP main screen. If you have not done so already, enable Advanced reboot, then you can long-press the power button to select the "Recovery" option. Once you do that, your phone should immediately restart and begin booting to the TWRP main menu.
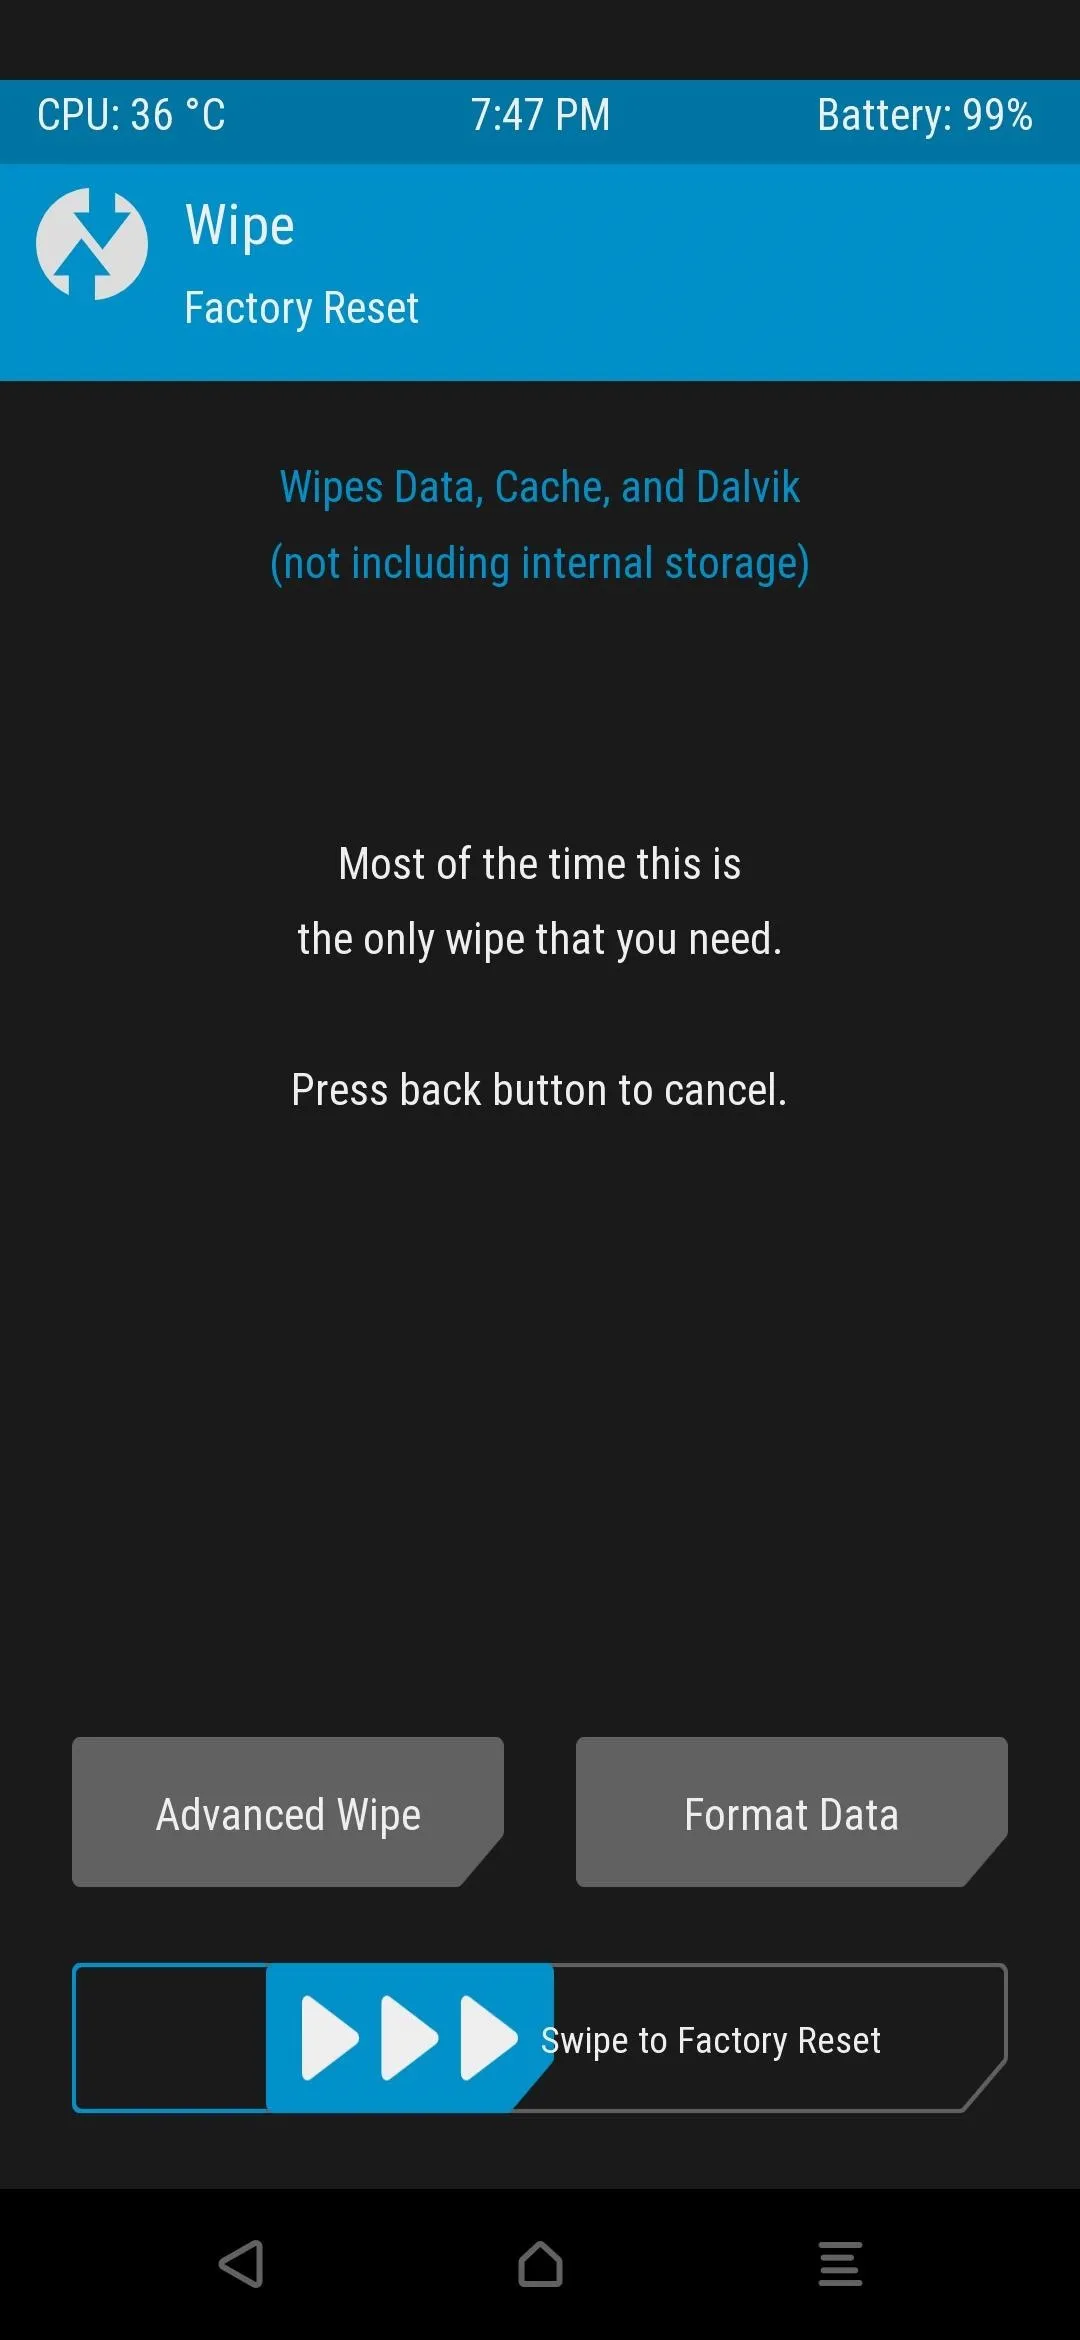
Wipe System Data
Once again, be sure your data is safe and sound on your computer before continuing with the guide. From the main screen on TWRP, you'll want to tap "Wipe" then "Swipe to Factory Reset" before you go about installing a brand new custom ROM. Once it finishes, tap the home button at the bottom and continue to the next step.
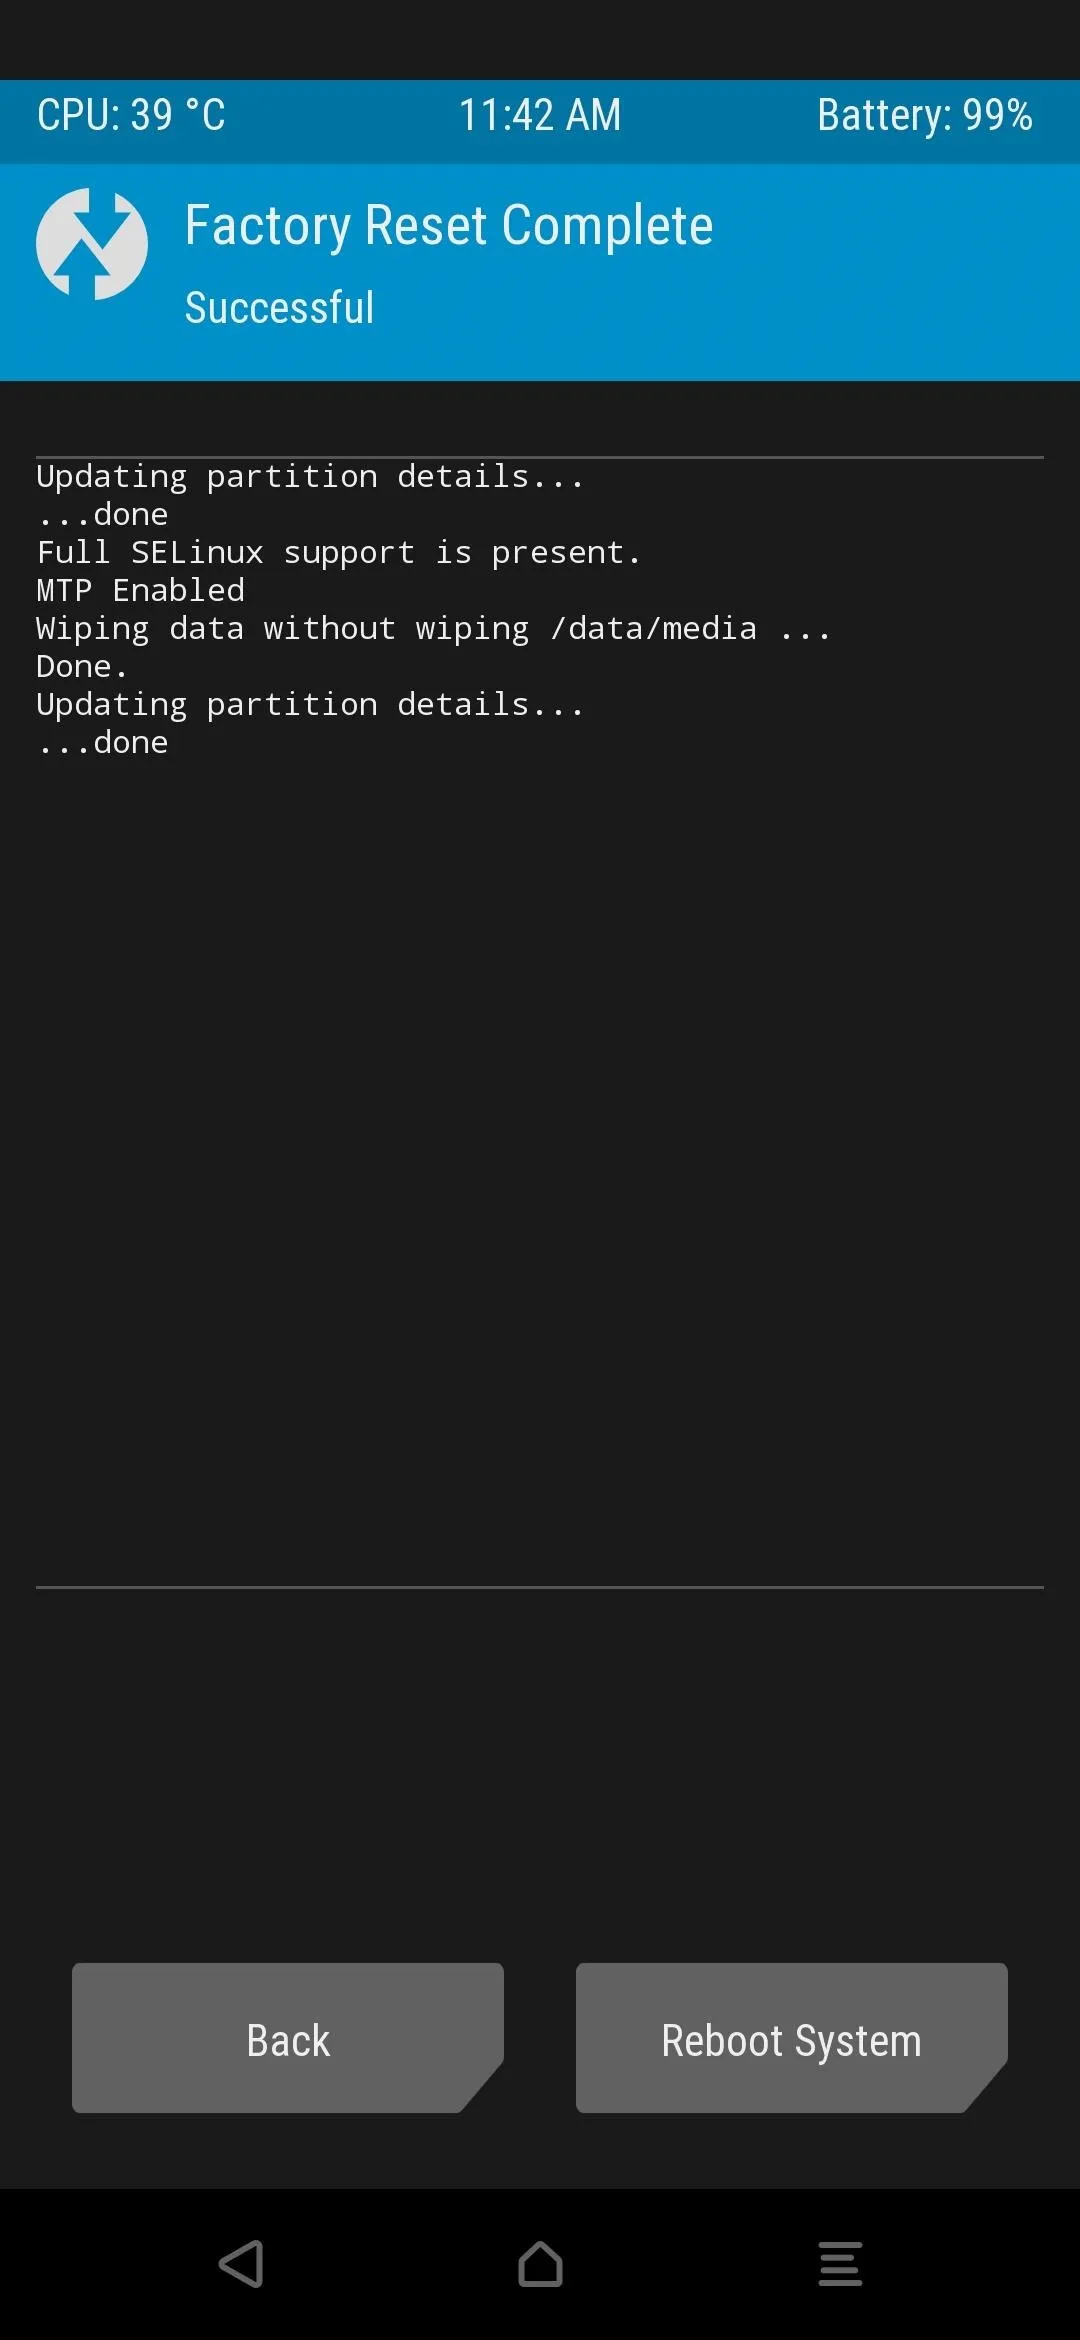
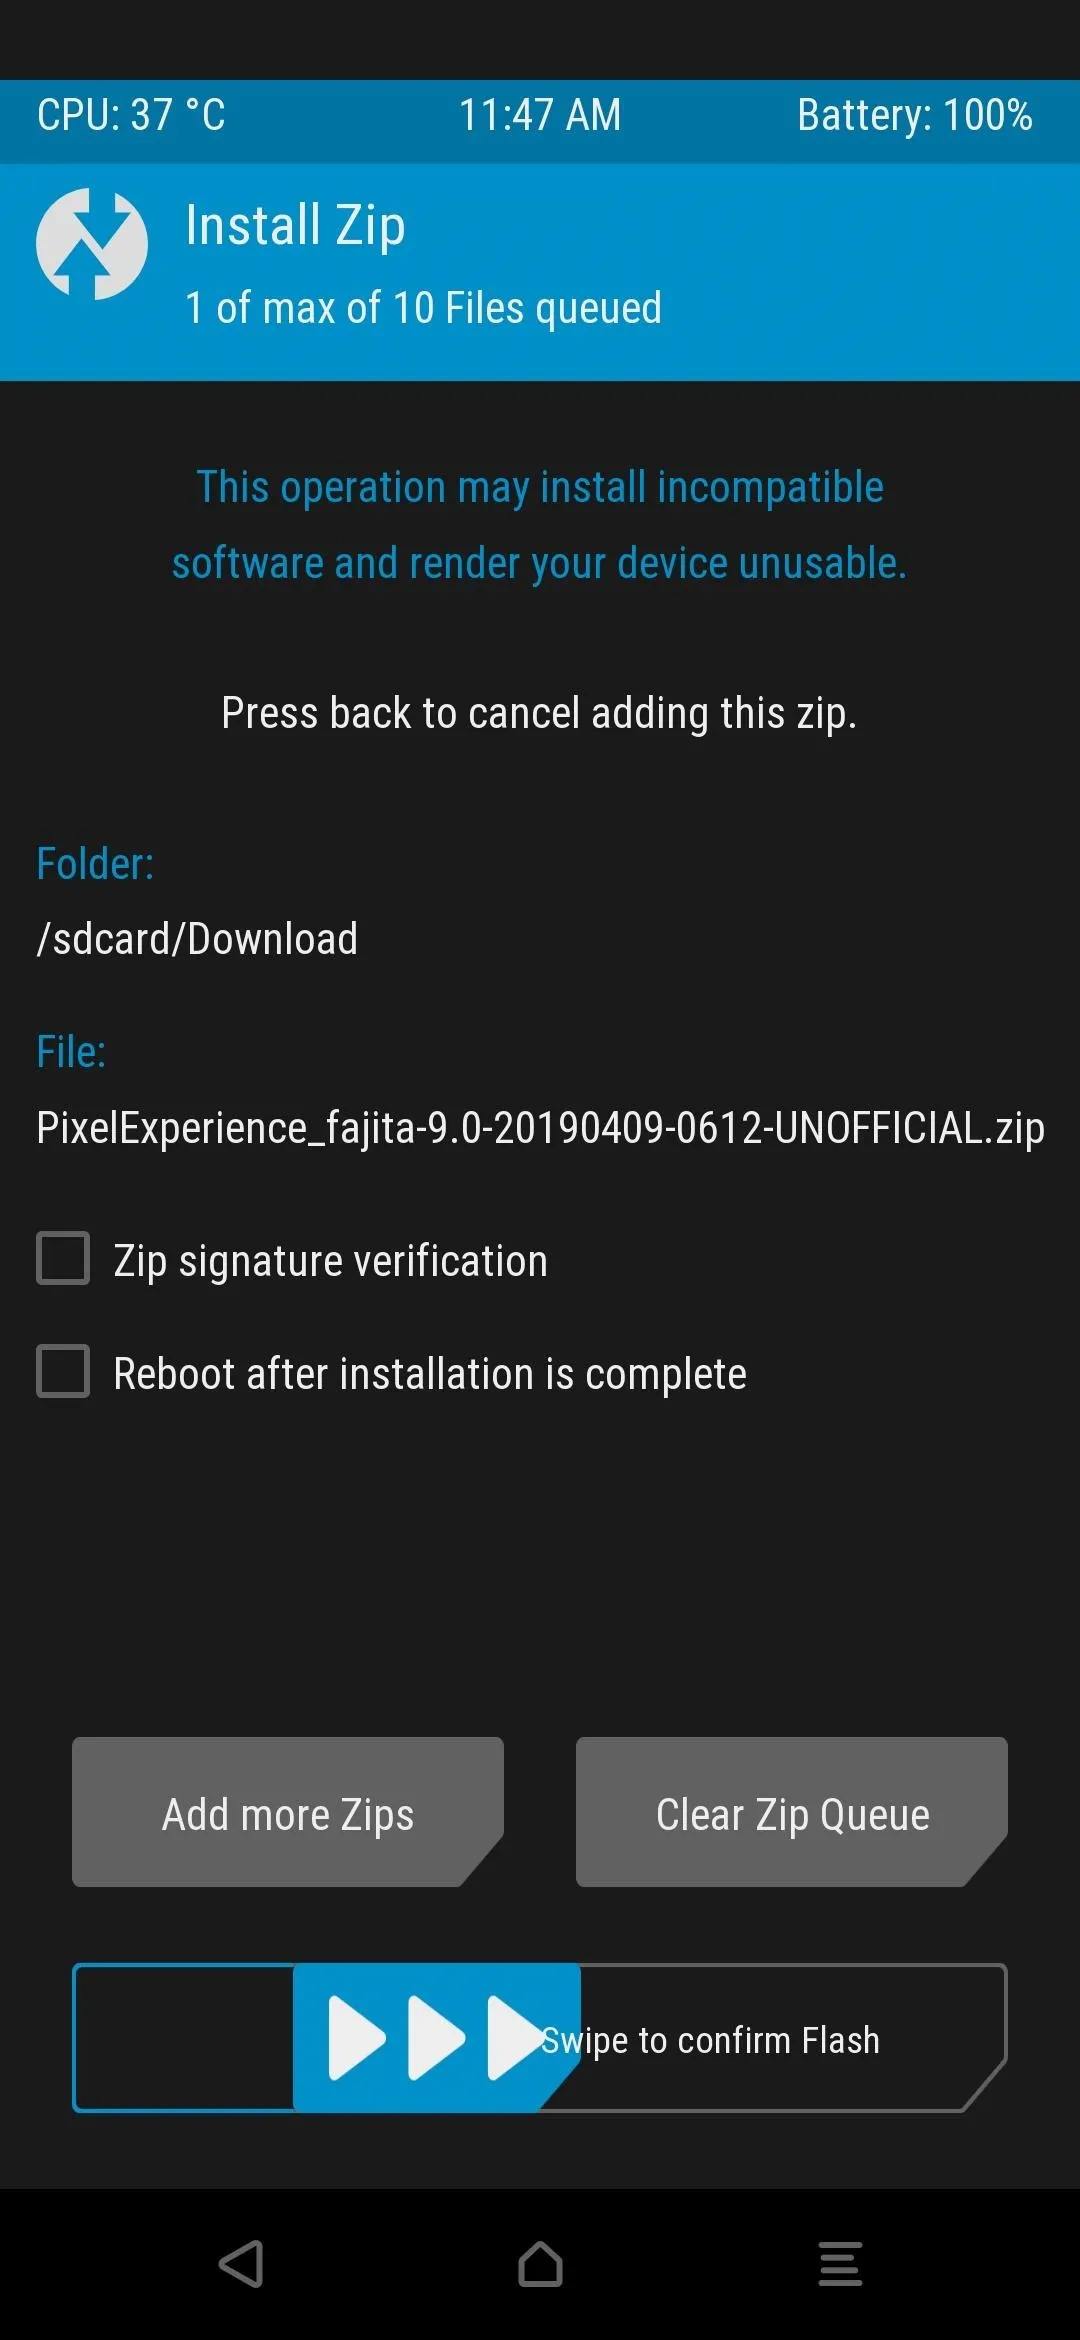
Install the Pixel Experience ROM
Again from the main screen in TWRP, tap "Install," locate the Pixel Experience ROM installer you transferred from your computer, tap the file, then "Swipe to confirm Flash" to begin the install process. Once that finishes, tap the back button at the bottom and return to the main file selection screen.
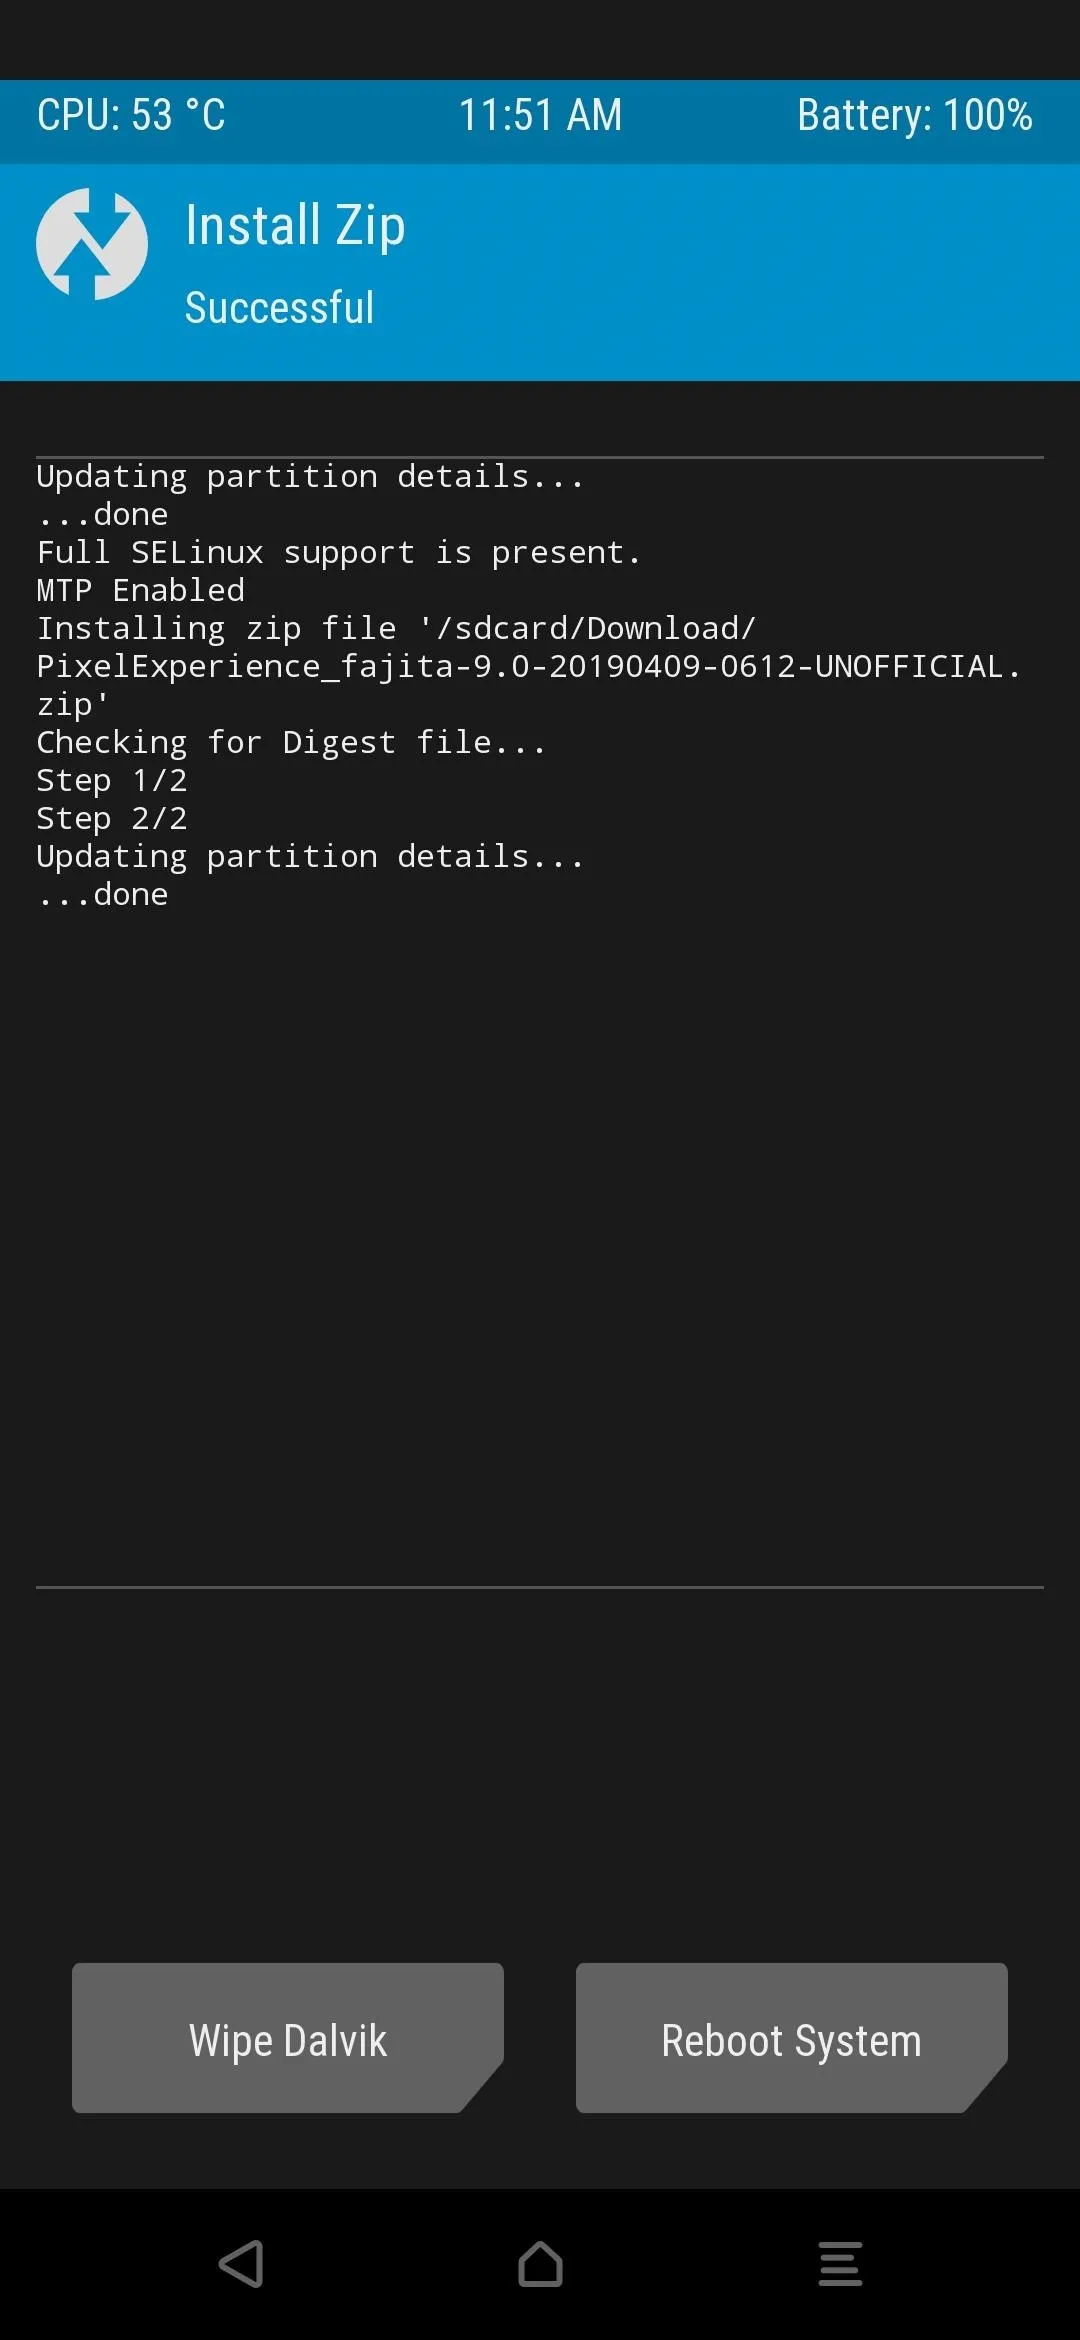
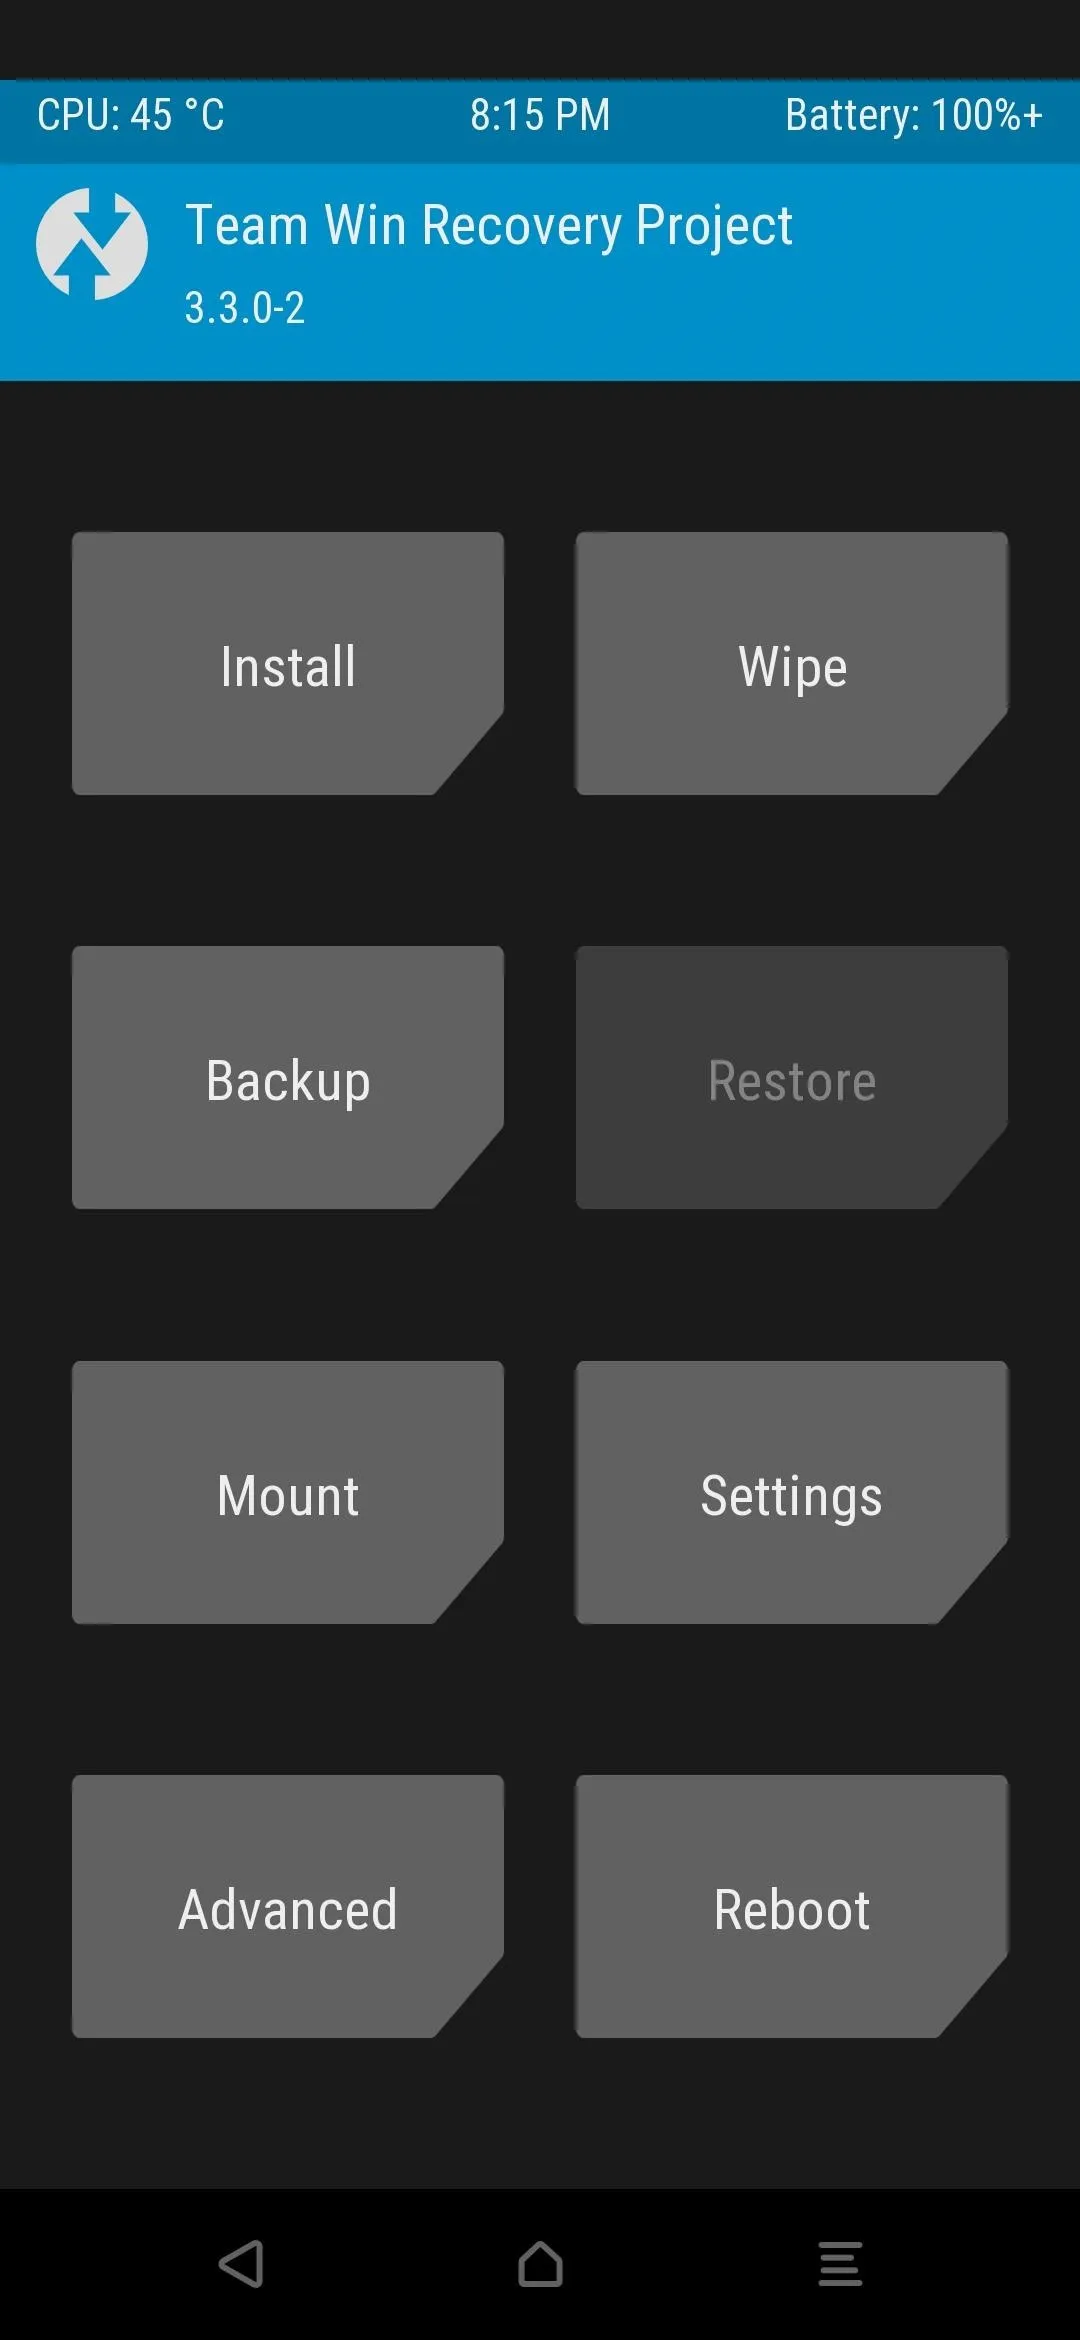
Repeat the same process you just did for the Pixel ROM, but installing the TWRP flasher this time around. Once that's done, tap the home button, go to "Reboot," then "Recovery." This part is crucial because TWRP will now be rebooted to your newly installed Pixel OS system partition, which is essential for the installation process.
Note: If you want root access with this ROM, go through the same process you did for the first two files, but flash the Magisk installer this time.
Reboot Your Phone
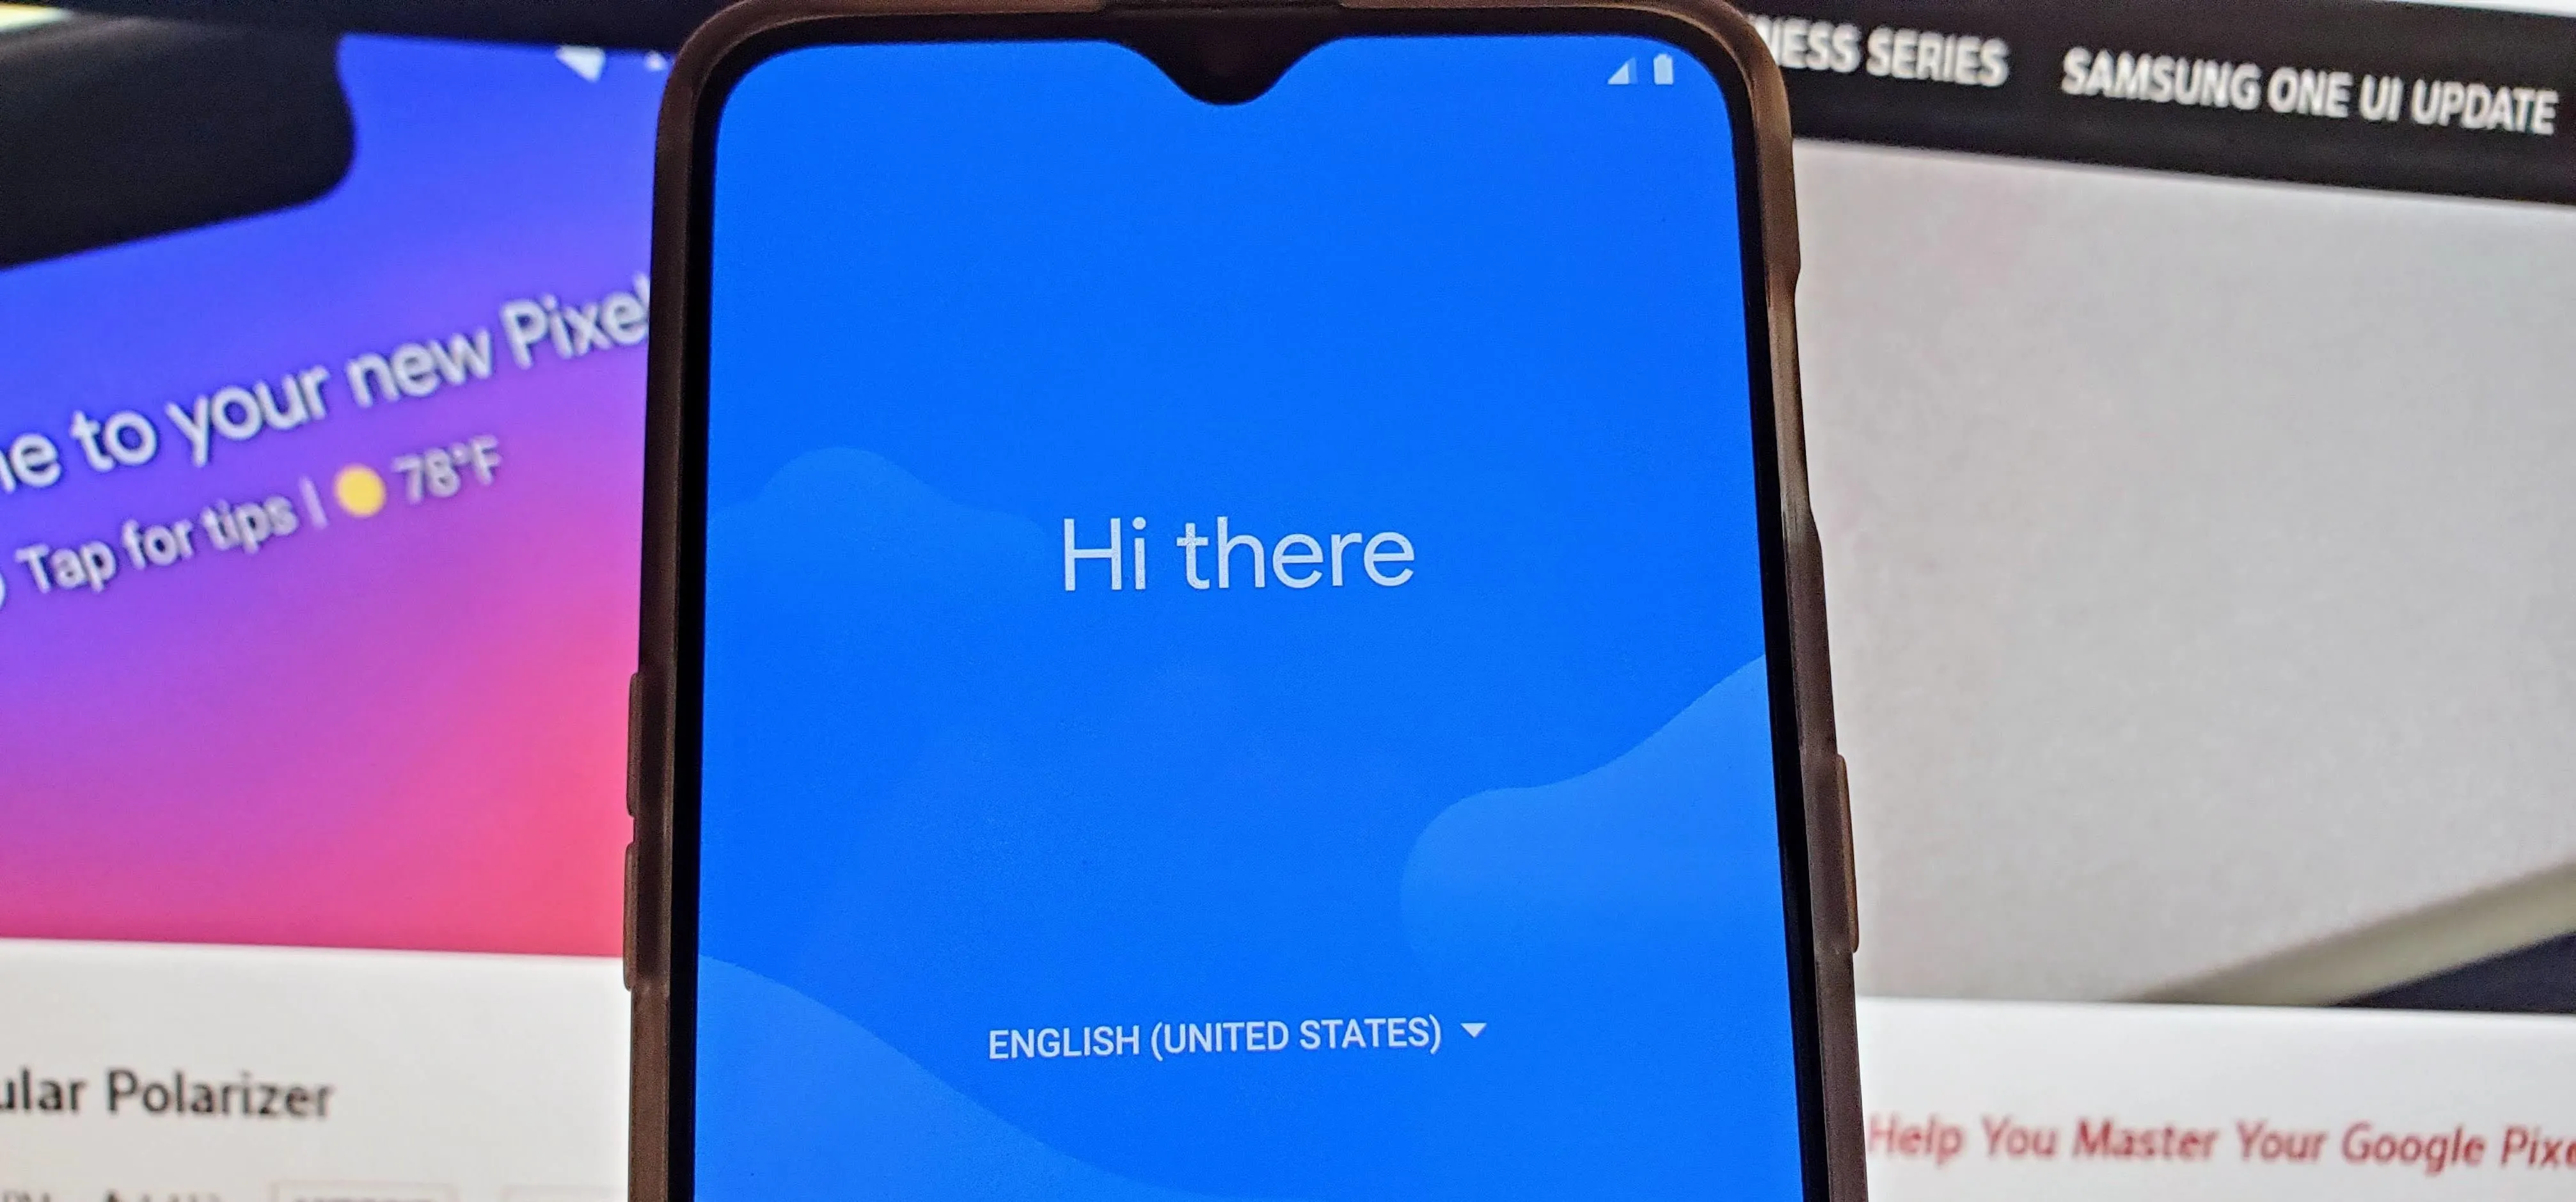
Before you even attempt to restore your data, you want to reboot your phone and make sure you can successfully boot into your new Pixel ROM. Upon the initial boot-up of your device, you'll be greeted by the ever so colorful and familiar Google logo instead of the OnePlus logo. Once you get to the "Hi there" welcome screen, you're good to reboot back into TWRP and restore your data from a NANDroid if needed.
If you find yourself bootlooping back to the bootloader screen, head into TWRP and repeat Step 7 and Step 8 to install the Pixel Experience ROM again. Doing so should make the ROM stick to the system partition this time around, and then you'll be able to boot correctly. The boot issue here is related to the way the A/B system partition handles custom ROM installs, so now you know why it does that.
Alternatively, if you're using Magisk with this ROM, flashing Magisk a second time will usually resolve any issues with not being able to boot correctly. I would try this before wiping data and installing the ROM again. It's a handy piece of information to know to get you out of that bootloop!
Restore Your Data
If you made a NANDroid backup from Step 1, mount your phone's internal storage to your computer and transfer the necessary files, including any other data you saved. Once the files are transferred to your phone's internal storage, head back to the TWRP main menu, tap "Restore," then select the NANDroid backup file you wish to restore.
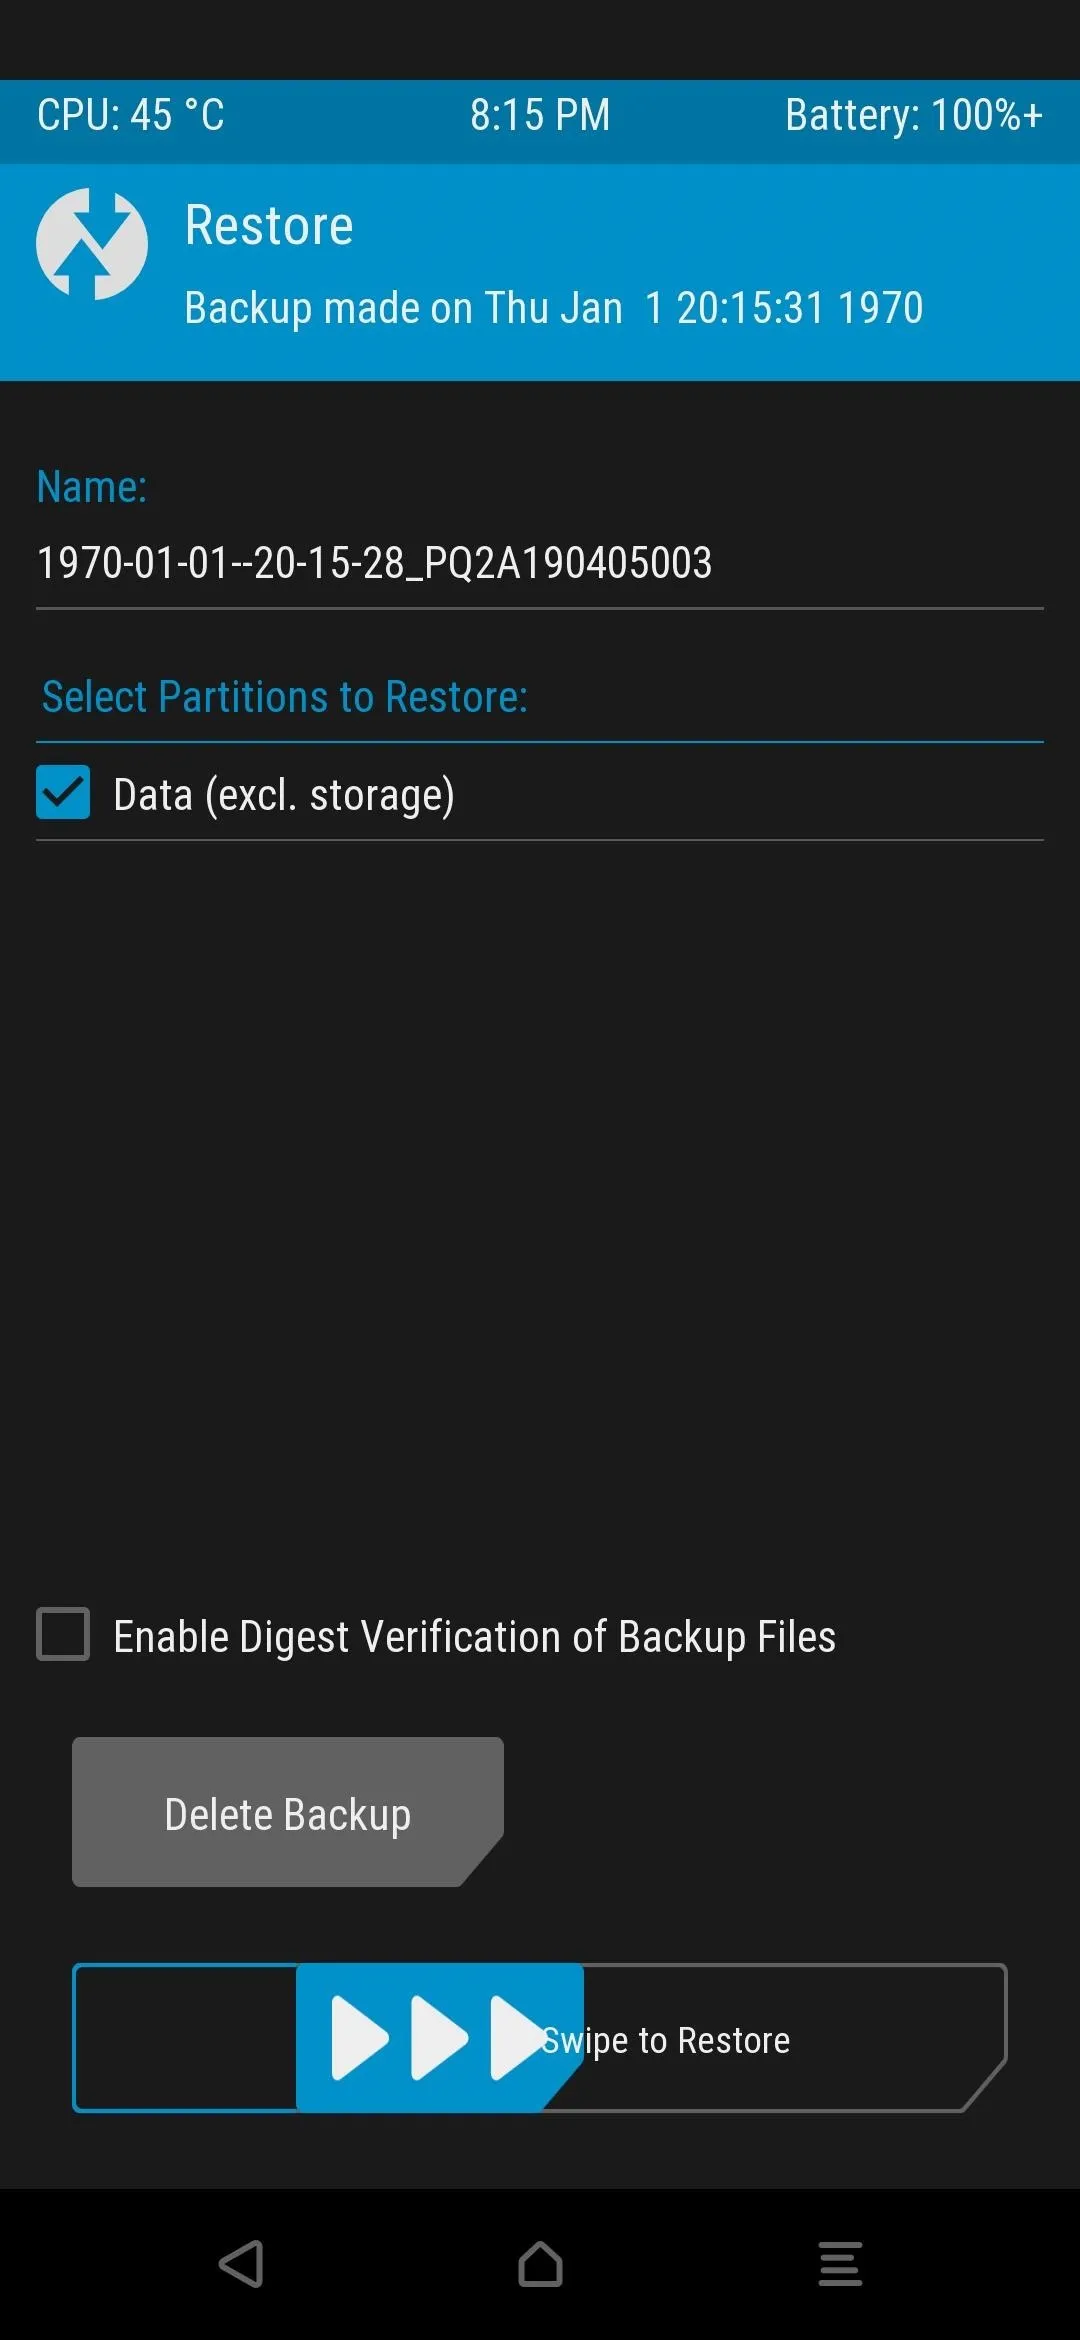
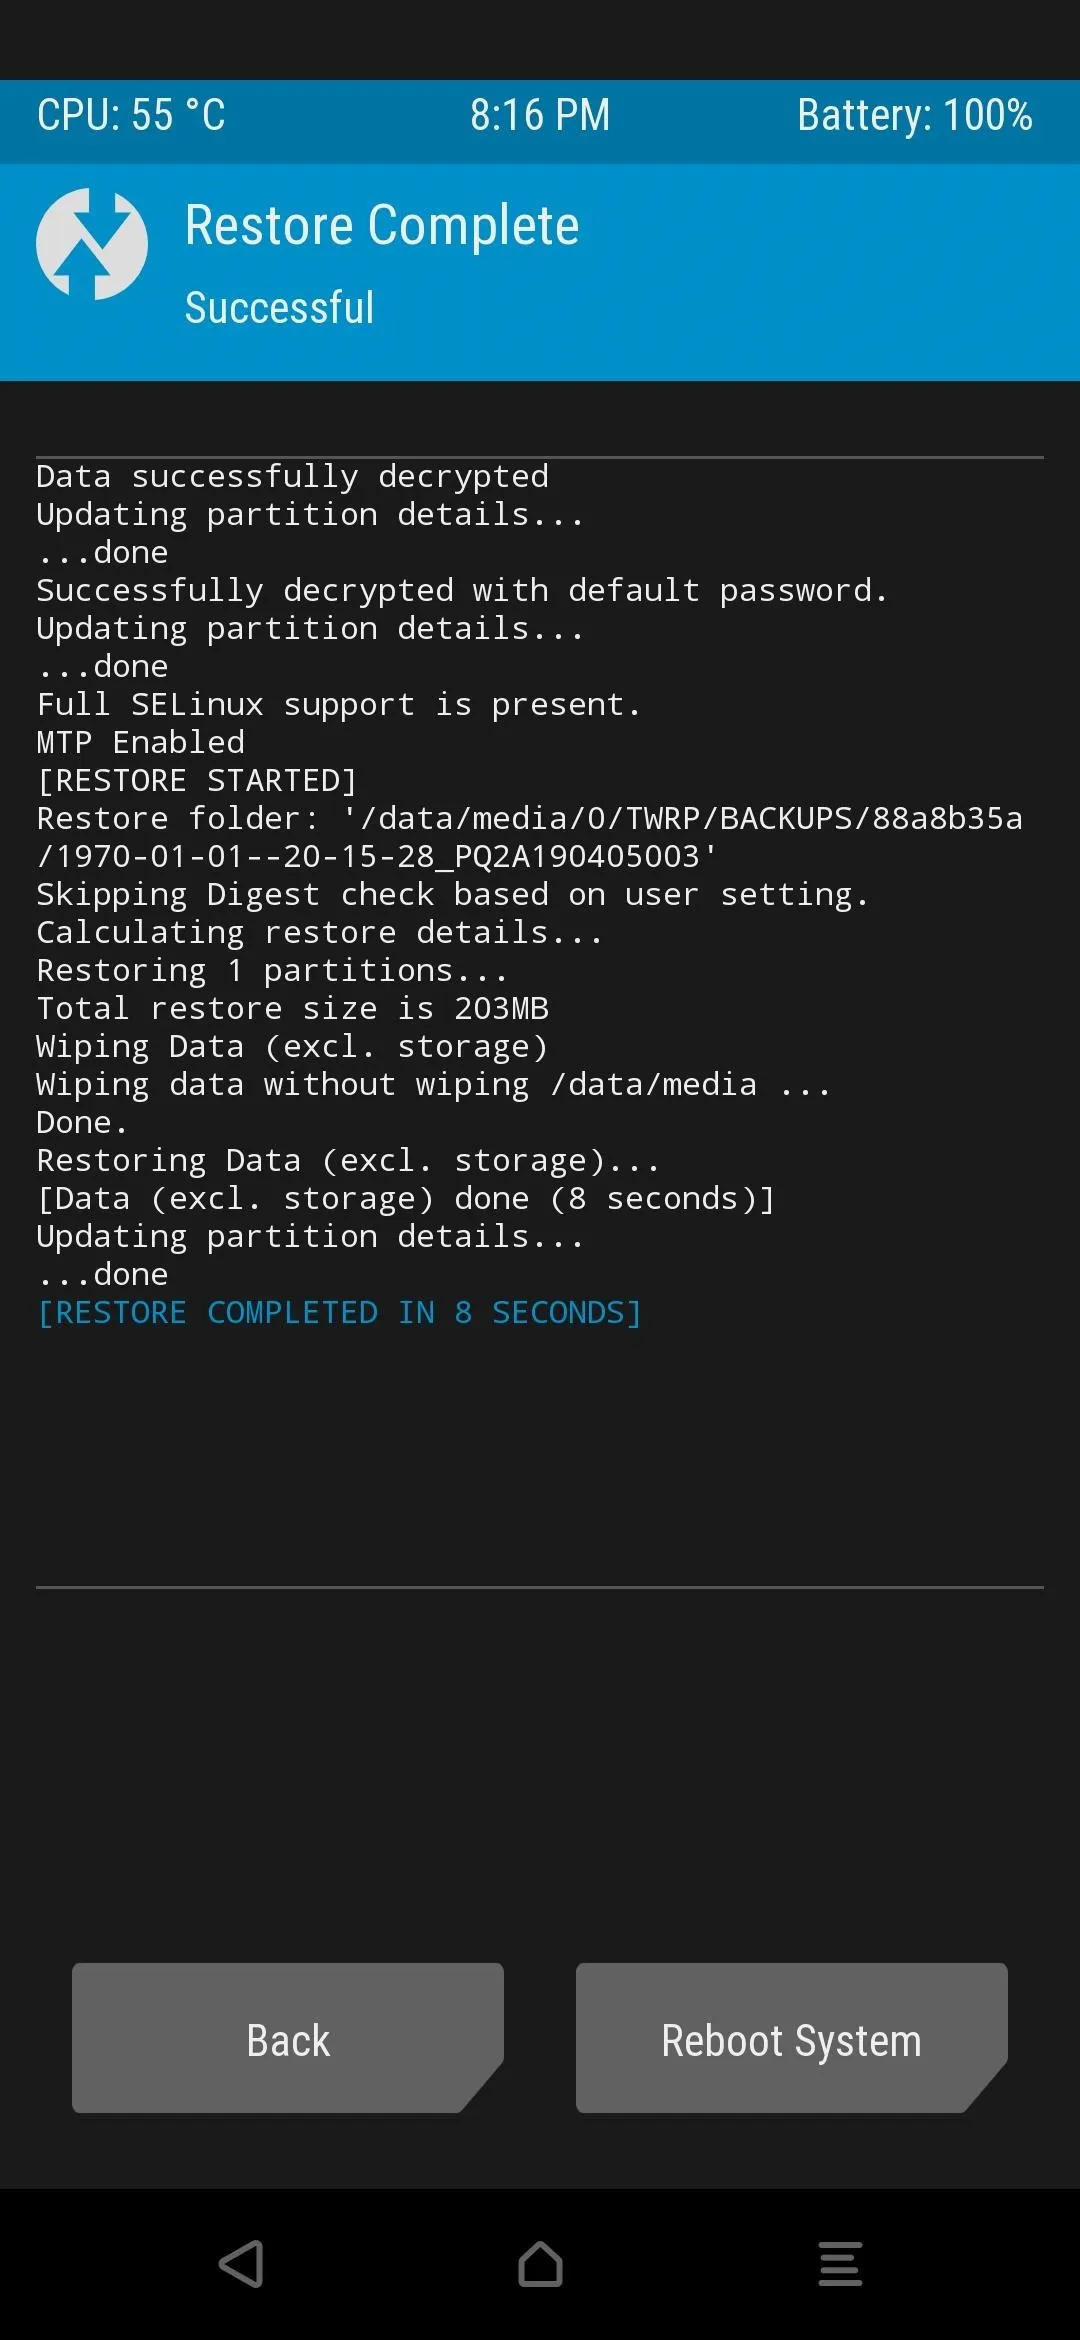
As mentioned previously, you only want to restore the Data partition, which stores all of your user apps and their saved data. Once the NANDroid has fully restored your data, as long as nothing went wrong with the restore process, everything should be golden from here on out. Now you can reboot your phone as usual and enjoy the new Pixel features along with the buttery smooth system experience.
Custom Kernel Warning
As of right now, don't install a custom kernel of your choosing with this Pixel Experience ROM because it will mess everything up. The custom kernel that comes with the ROM has all the features other kernels have, plus it allows for the fingerprint scanner to work correctly.
If you try to flash another kernel with this ROM, it'll probably break your Wi-Fi and the fingerprint scanner as well, to name a few things. This information will save you from having to flash the stock kernel back if you usually like to install a custom kernel with a new ROM.
Some Google Pixel Features to Highlight
Now that you have an authentic Google Pixel experience on your OnePlus 6T, you'll get complete access to many exclusive Pixel features. The only real downside aside from losing some core OxygenOS features is that you'll have to sacrifice the Face Unlock feature for right now, but that's about it. I'll highlight a few of the Pixel features you might be interested in since you can use them without any other mods or effort on your part.
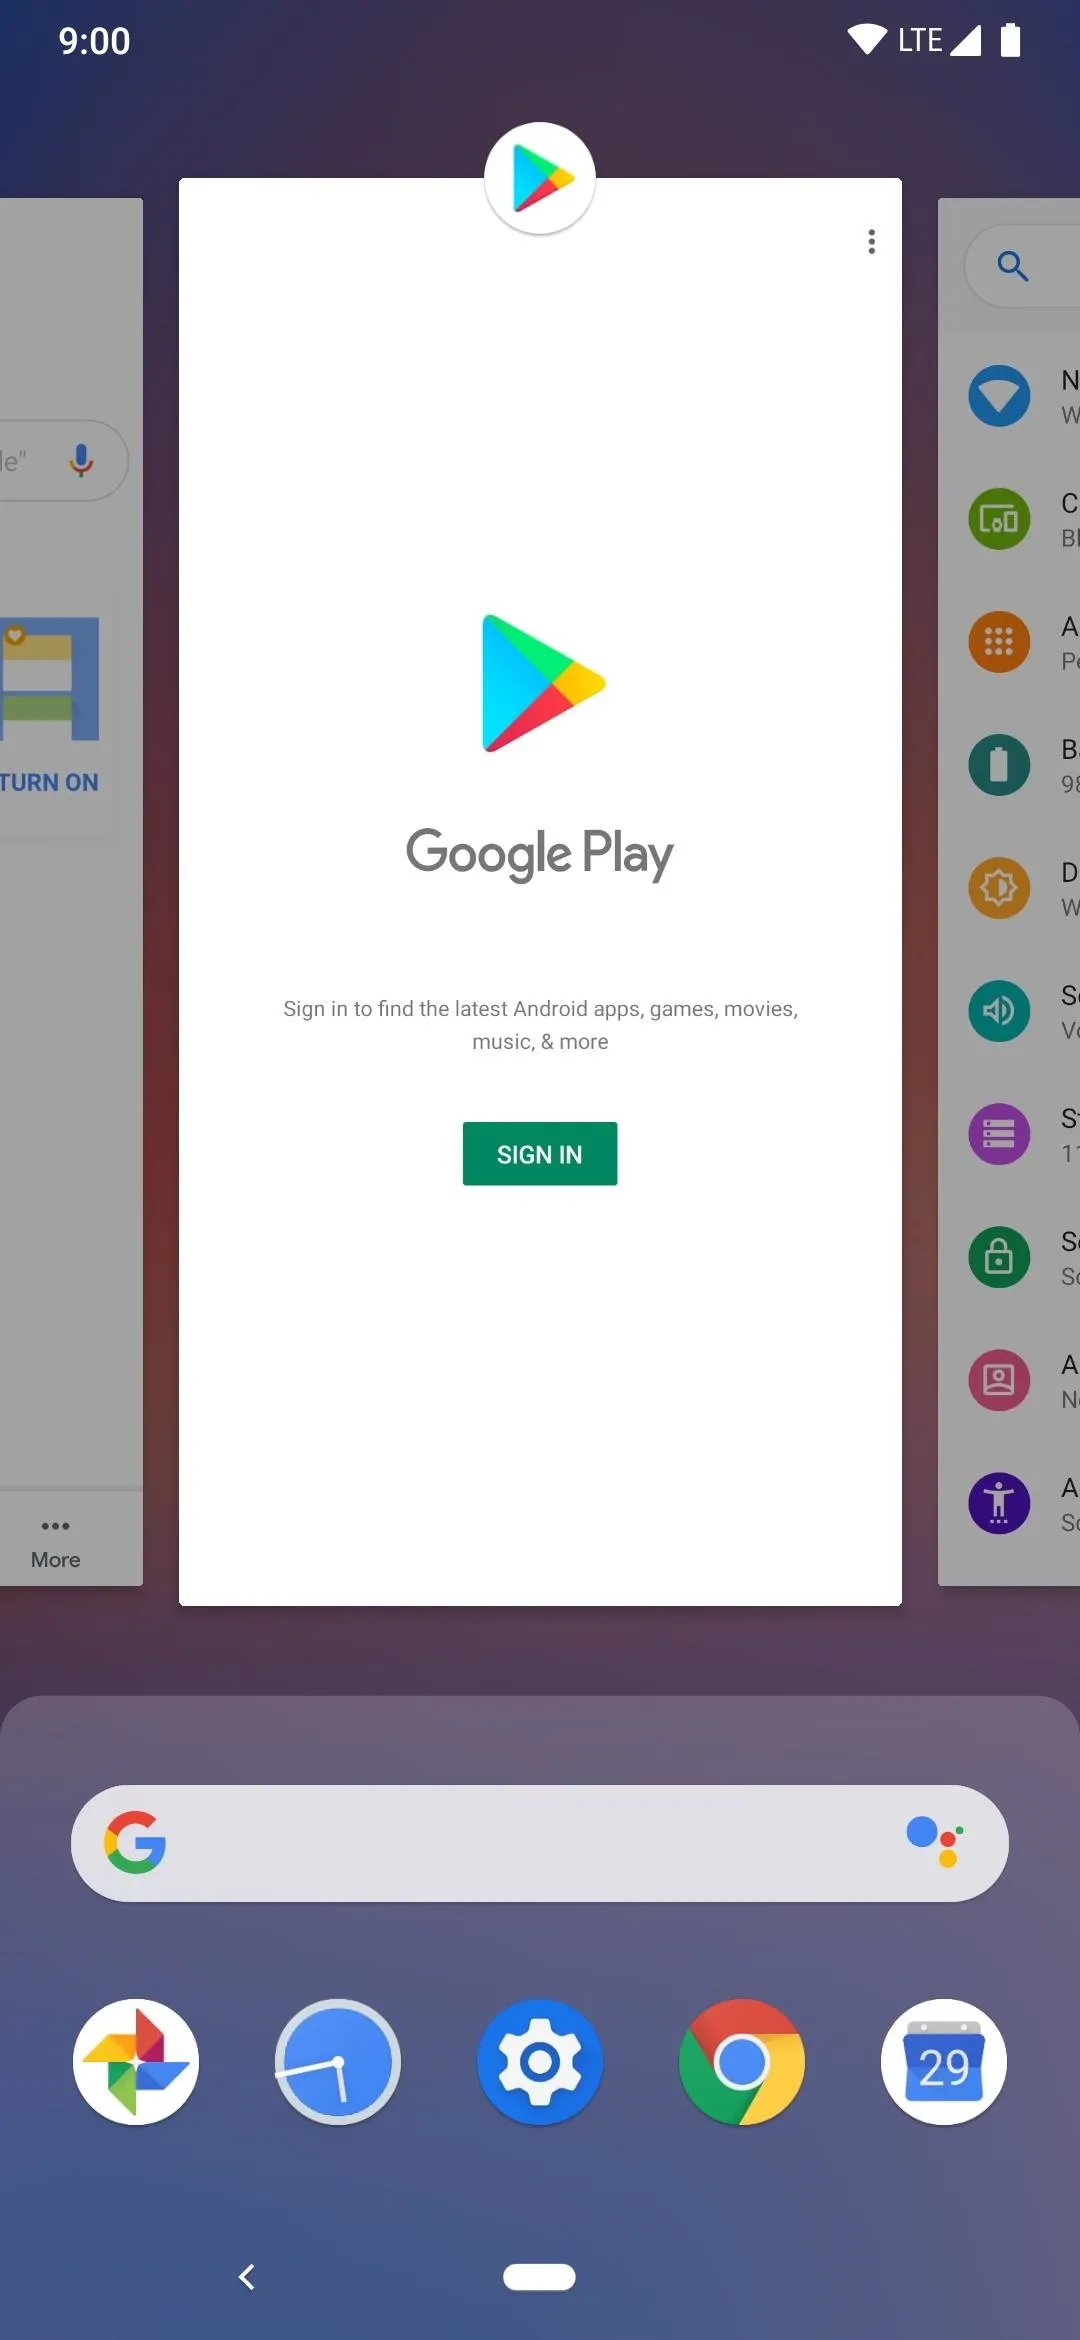
The best part about all this? You get quite a few of the core exclusive Pixel apps and features, plus you can even receive updates from the Play Store just like any other apps you've downloaded before. As a heads up, this ROM only provides a minimal amount of Google apps, so you'll need to download the rest from the Play Store, such as YouTube or Gmail.
Pixel Launcher
The launcher is fast, clean, and offers a solid experience right out of the box. The Oxygen Launcher shares some similarities with the Pixel Launcher, so it should feel pretty familiar overall if you're used to the default OnePlus home screen.

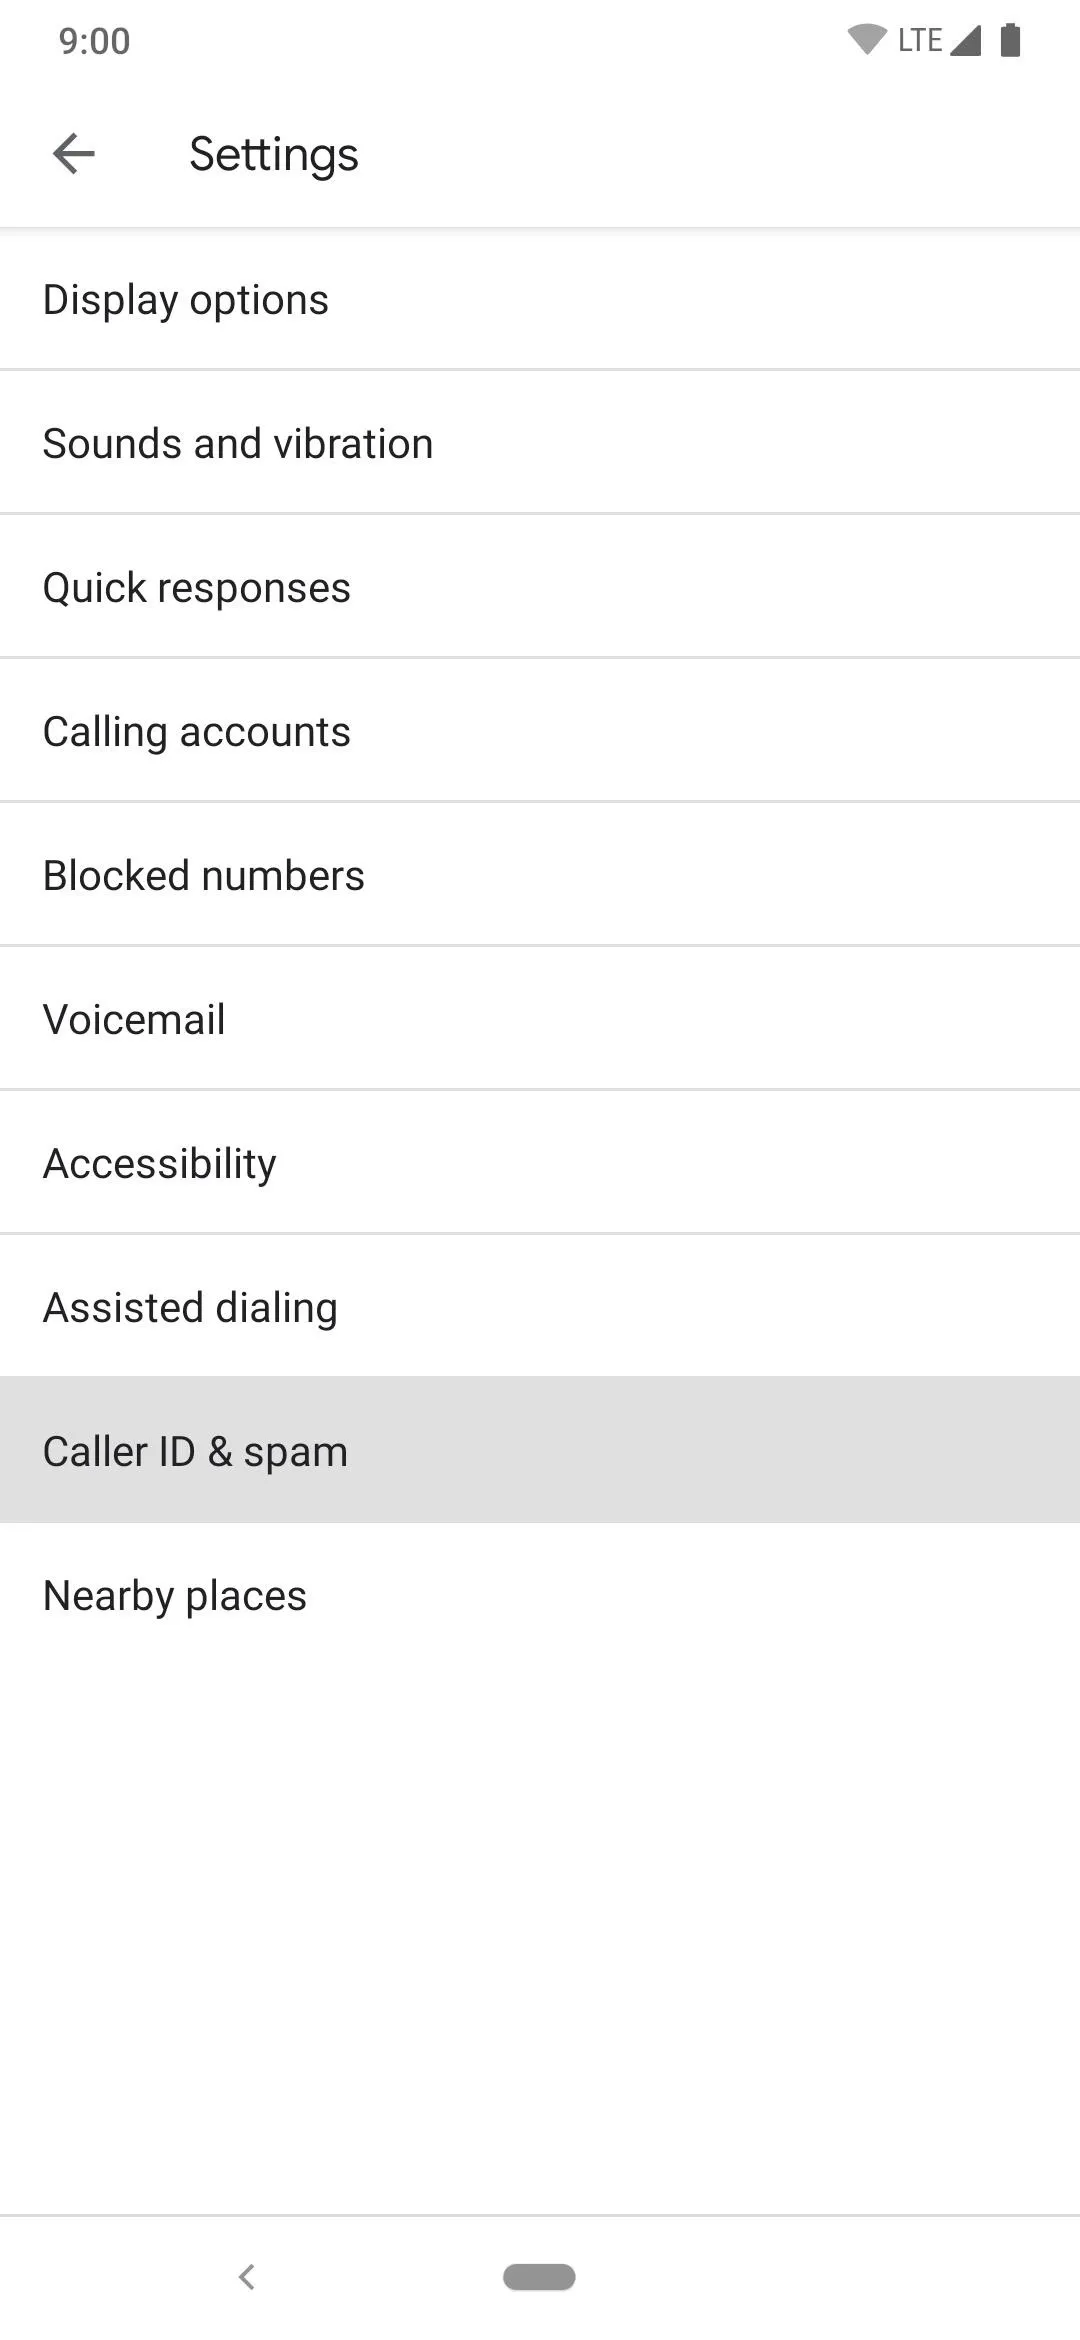
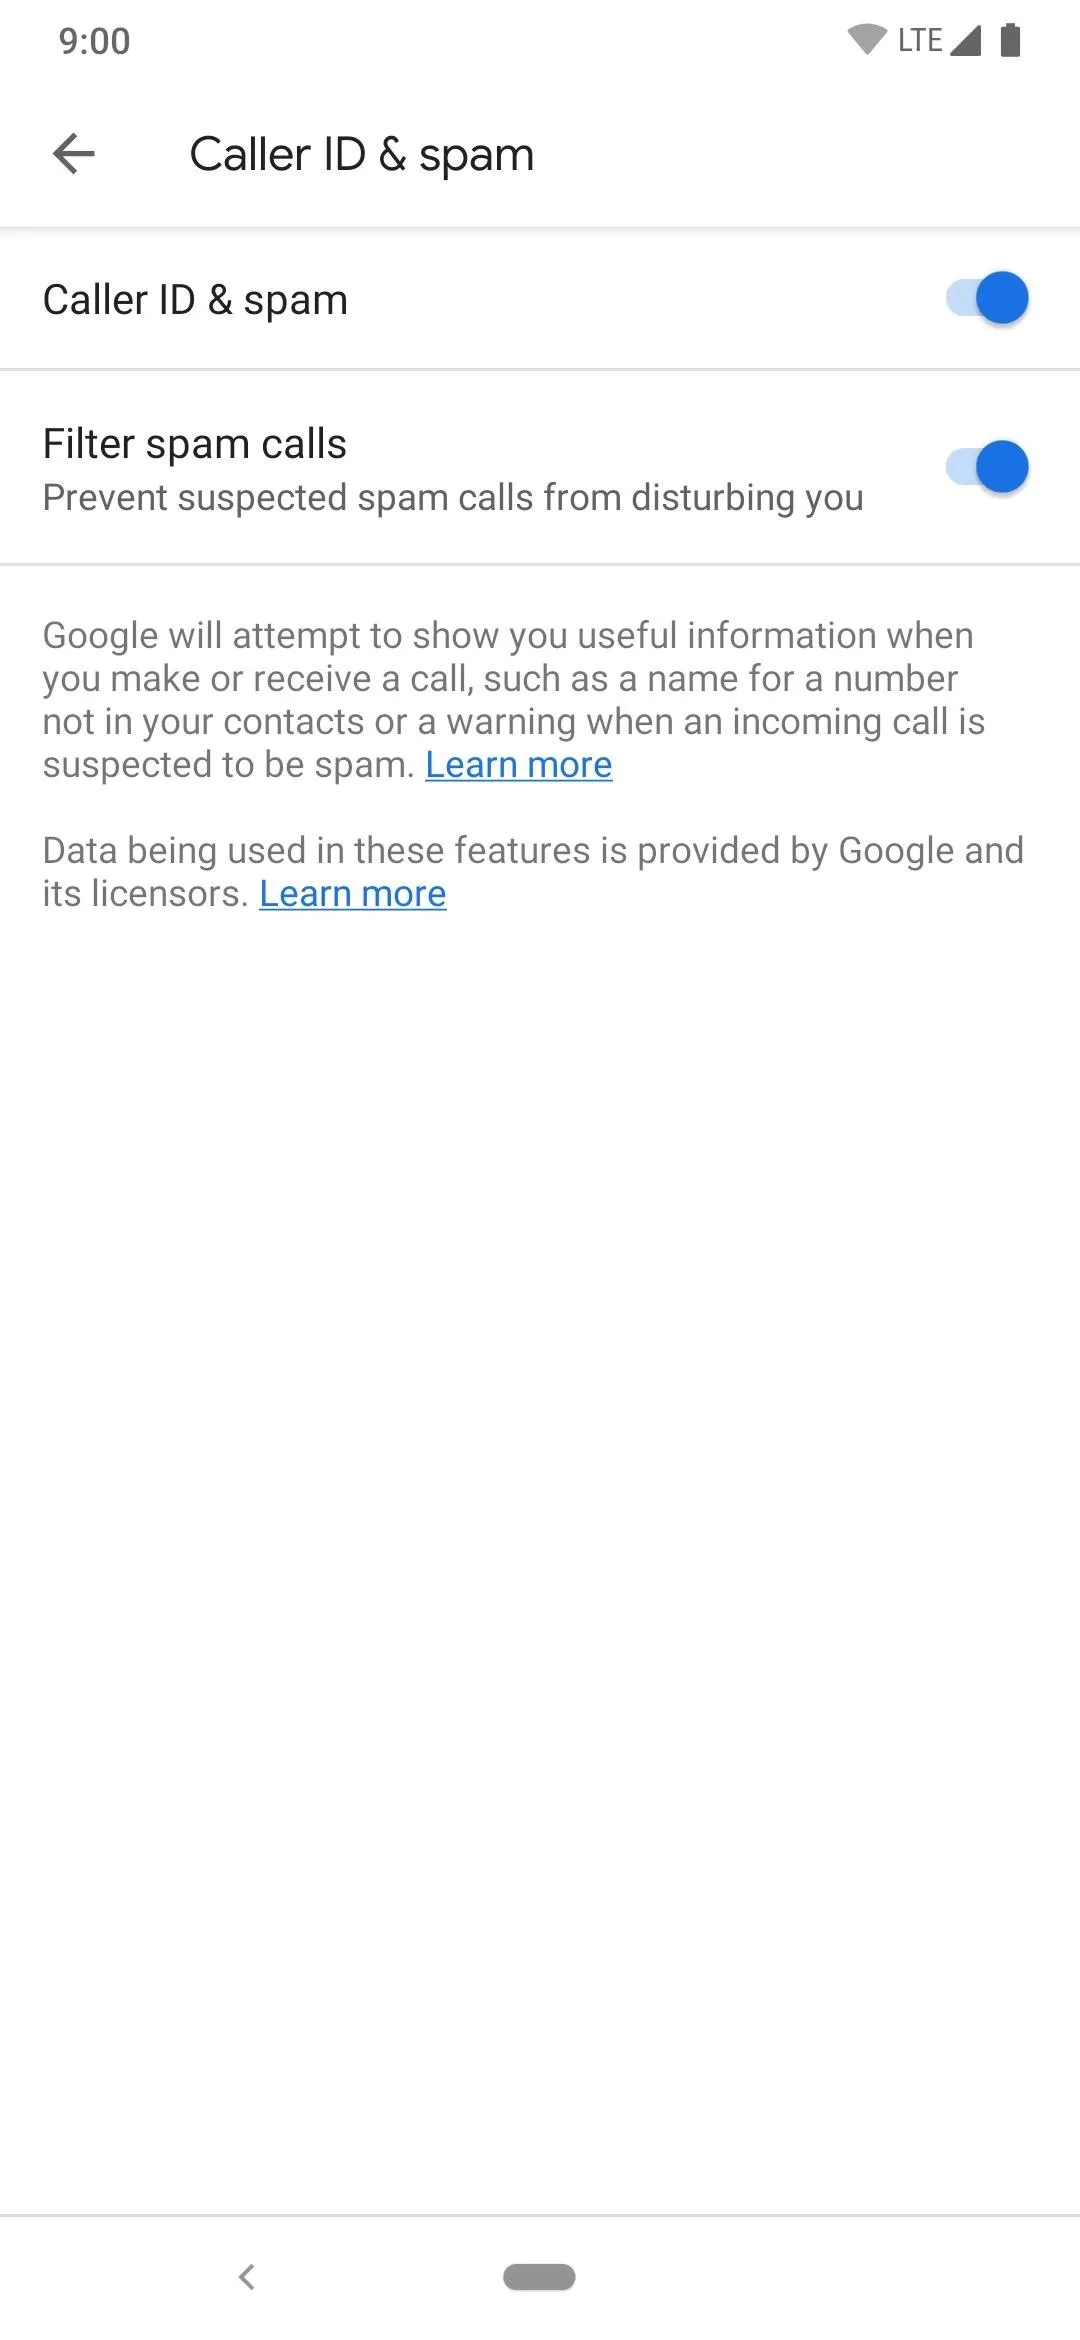
Phone App with Caller ID & Spam Protection
The Phone app is one of the few Google apps locked down as an exclusive to the Pixel smartphones, but you can use it without any issues now. Having those extra features to help deal with spam is always a welcomed thing in this era of scammer phone calls.
Digital Wellbeing
This was introduced around a year ago and is still locked down to Pixel smartphones and a few others, but the list is small right now. Now you can use Digital Wellbeing to keep track of your smartphone habits and screen time.
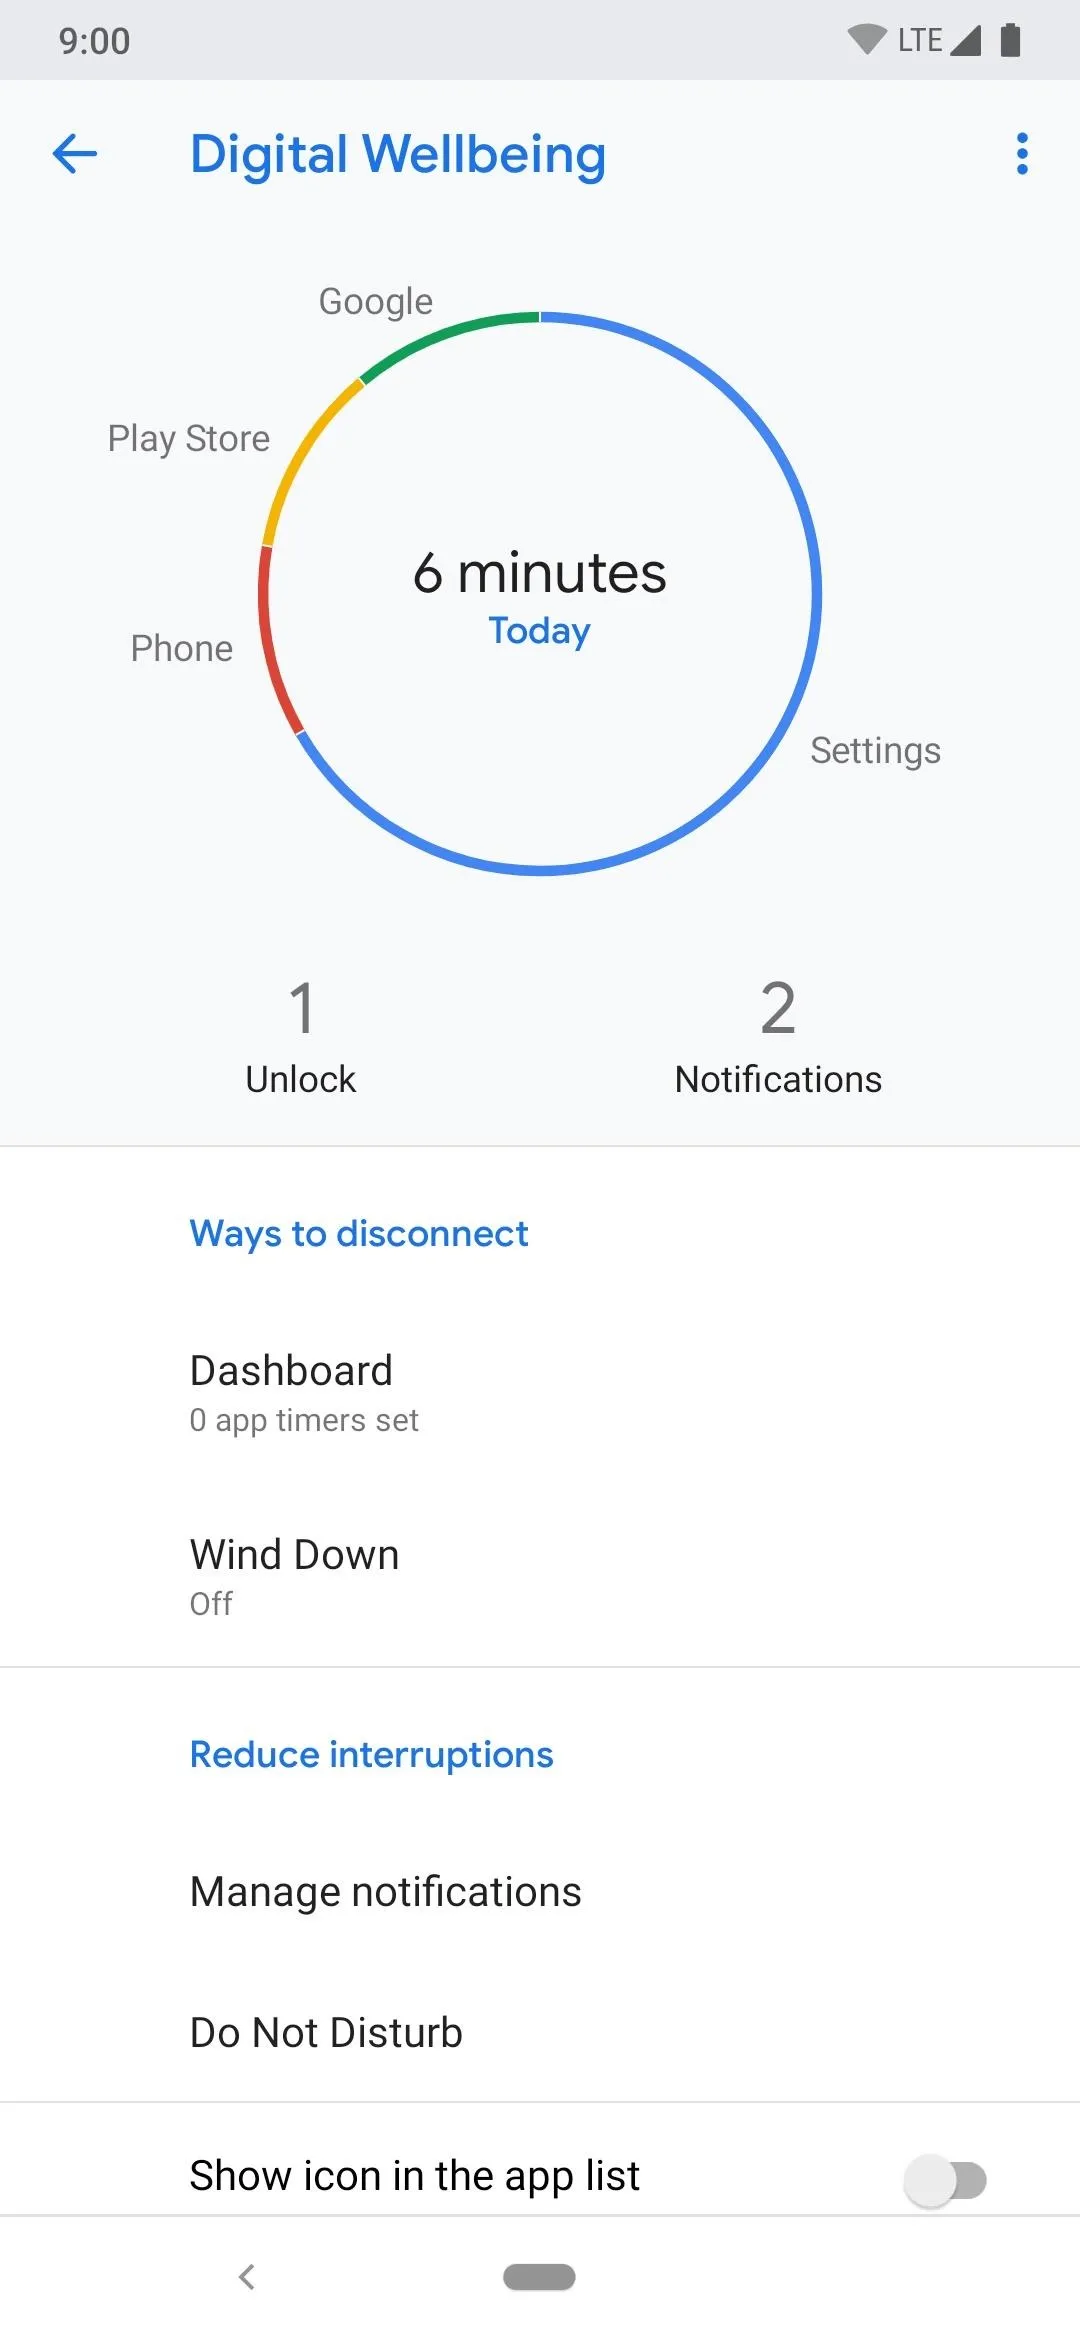
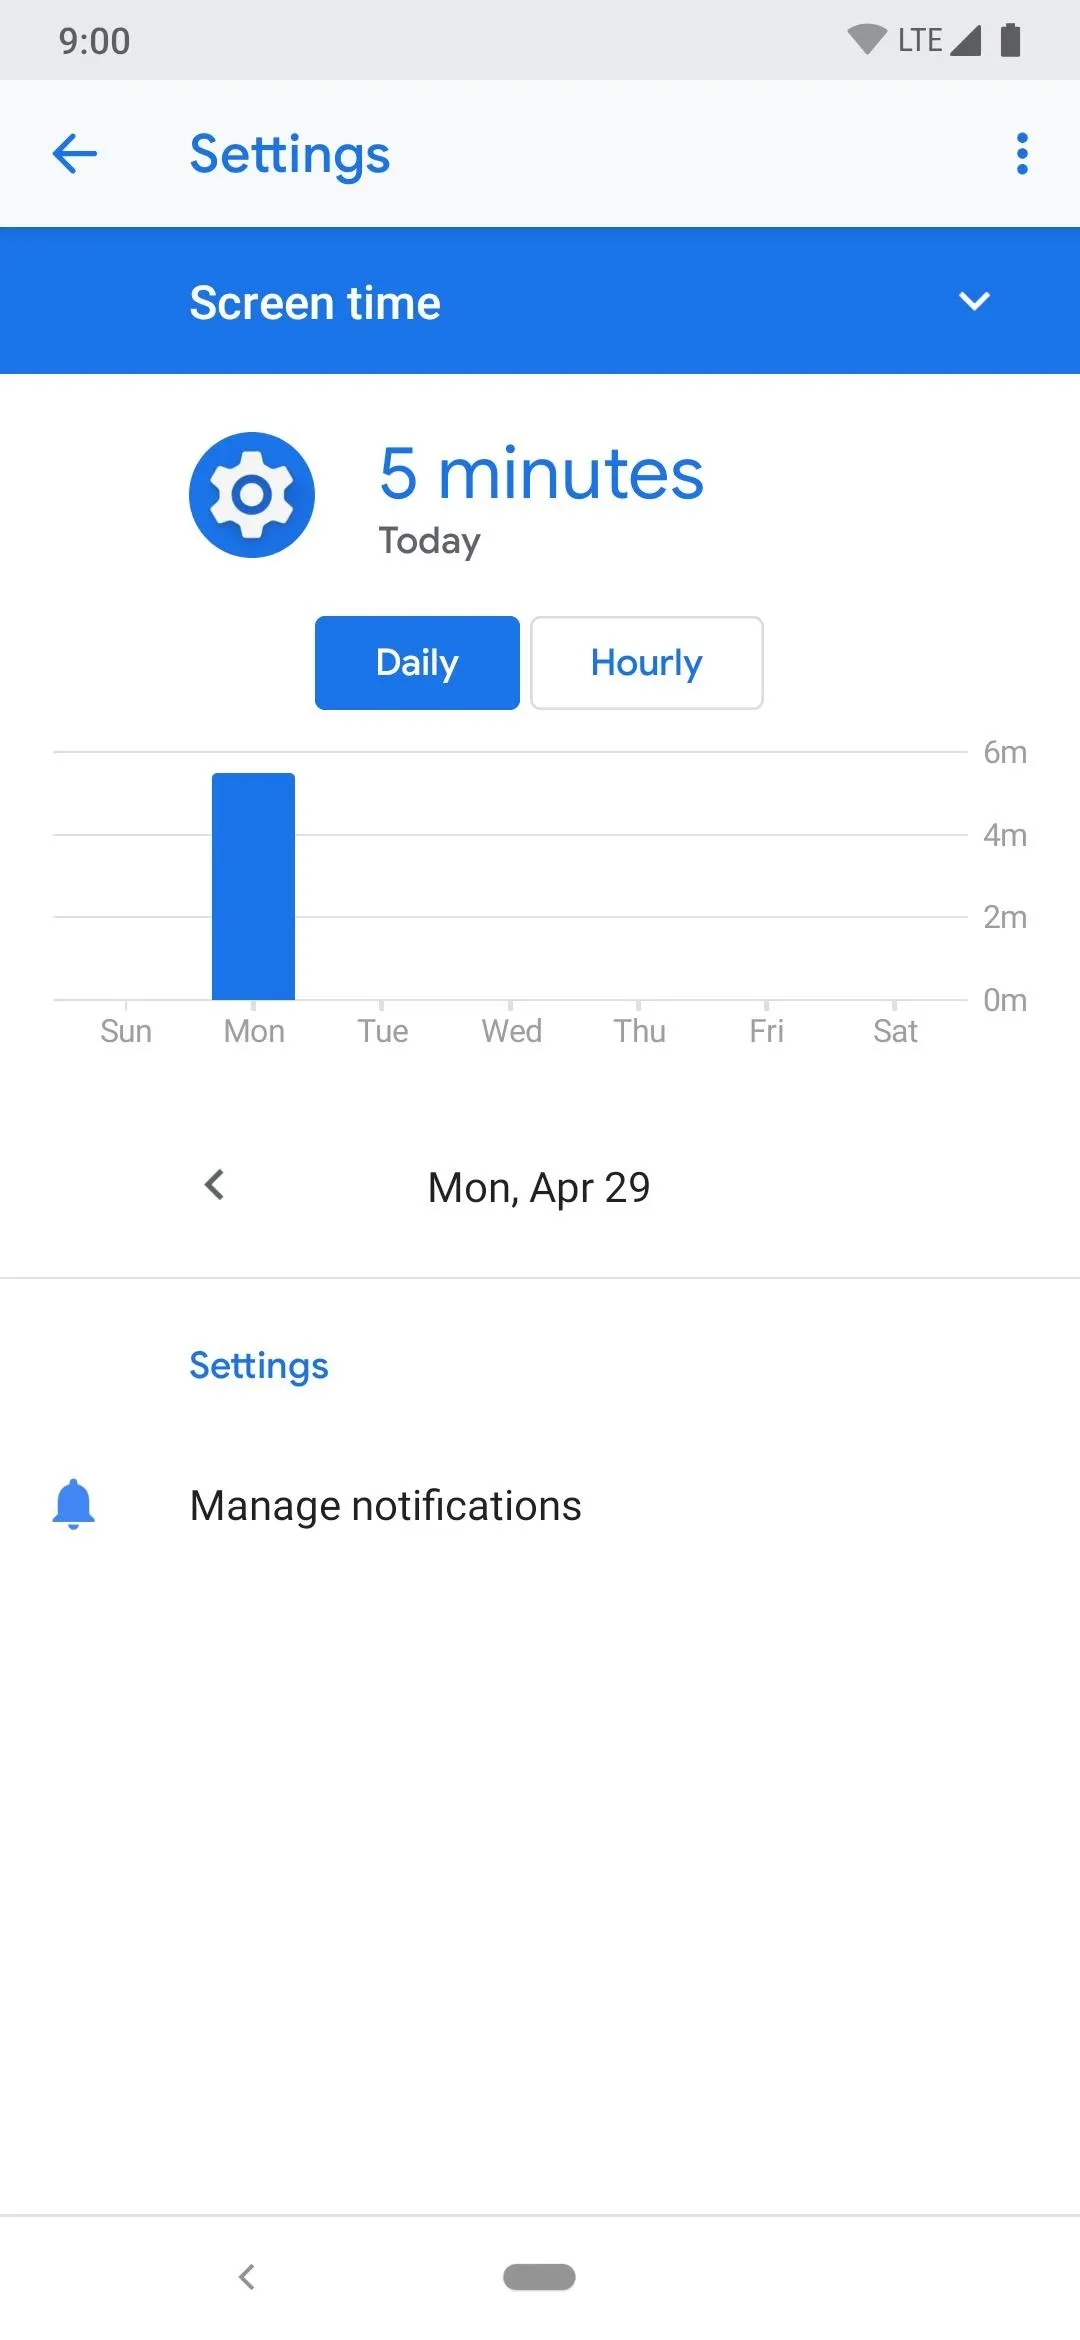
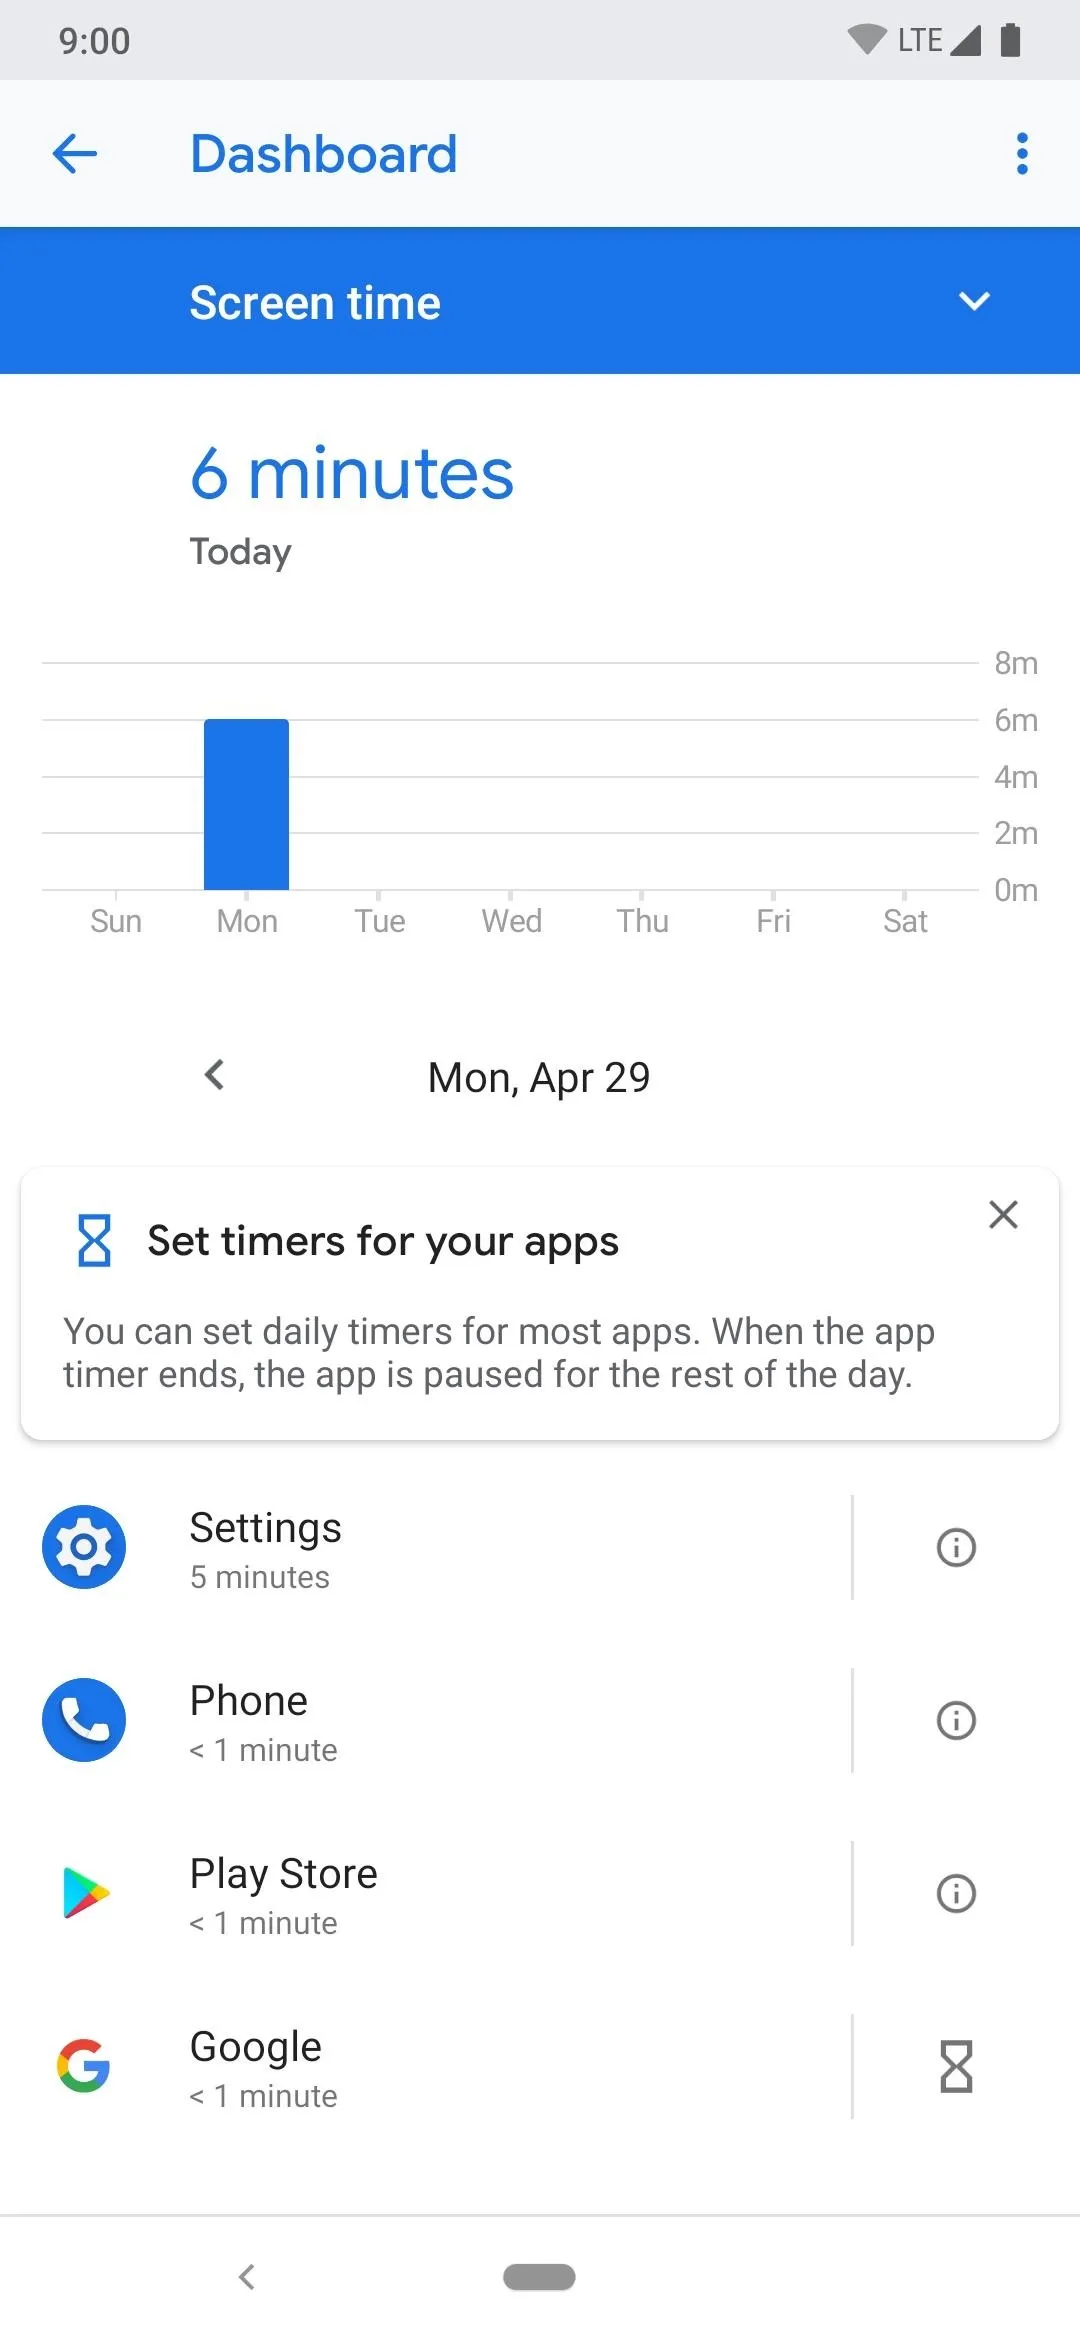
You can check how long you spend in each app, add timers to kick you out of an app when your time's up and keep track of how many times per day you unlock your device. It's quite a handy little feature to have if you find yourself watching more YouTube videos than you probably should every day.
Pixel Camera App with NightSight
One of the best things the Pixel smartphones are known for right now is their fantastic camera experience. You might have seen a lot of popular smartphones get ports of Google's now famous Camera app, and for a good reason too. They use machine learning algorithms, and some magic AI tricks to turn any smartphone camera into a better one overall.

Normal low light shot taken with the "Camera" option.
Enhanced low light shot taken with the "Night Sight" option.
Normal low light shot taken with the "Camera" option.
Enhanced low light shot taken with the "Night Sight" option.
When using this Pixel ROM, you won't have to deal with other Google Camera ports anymore — you'll be using a native Pixel camera mod built right into the system itself. This means you get one of the coolest camera features around right now — Night Sight turns your low light photos into something magical without ever needing the flash feature from your camera.
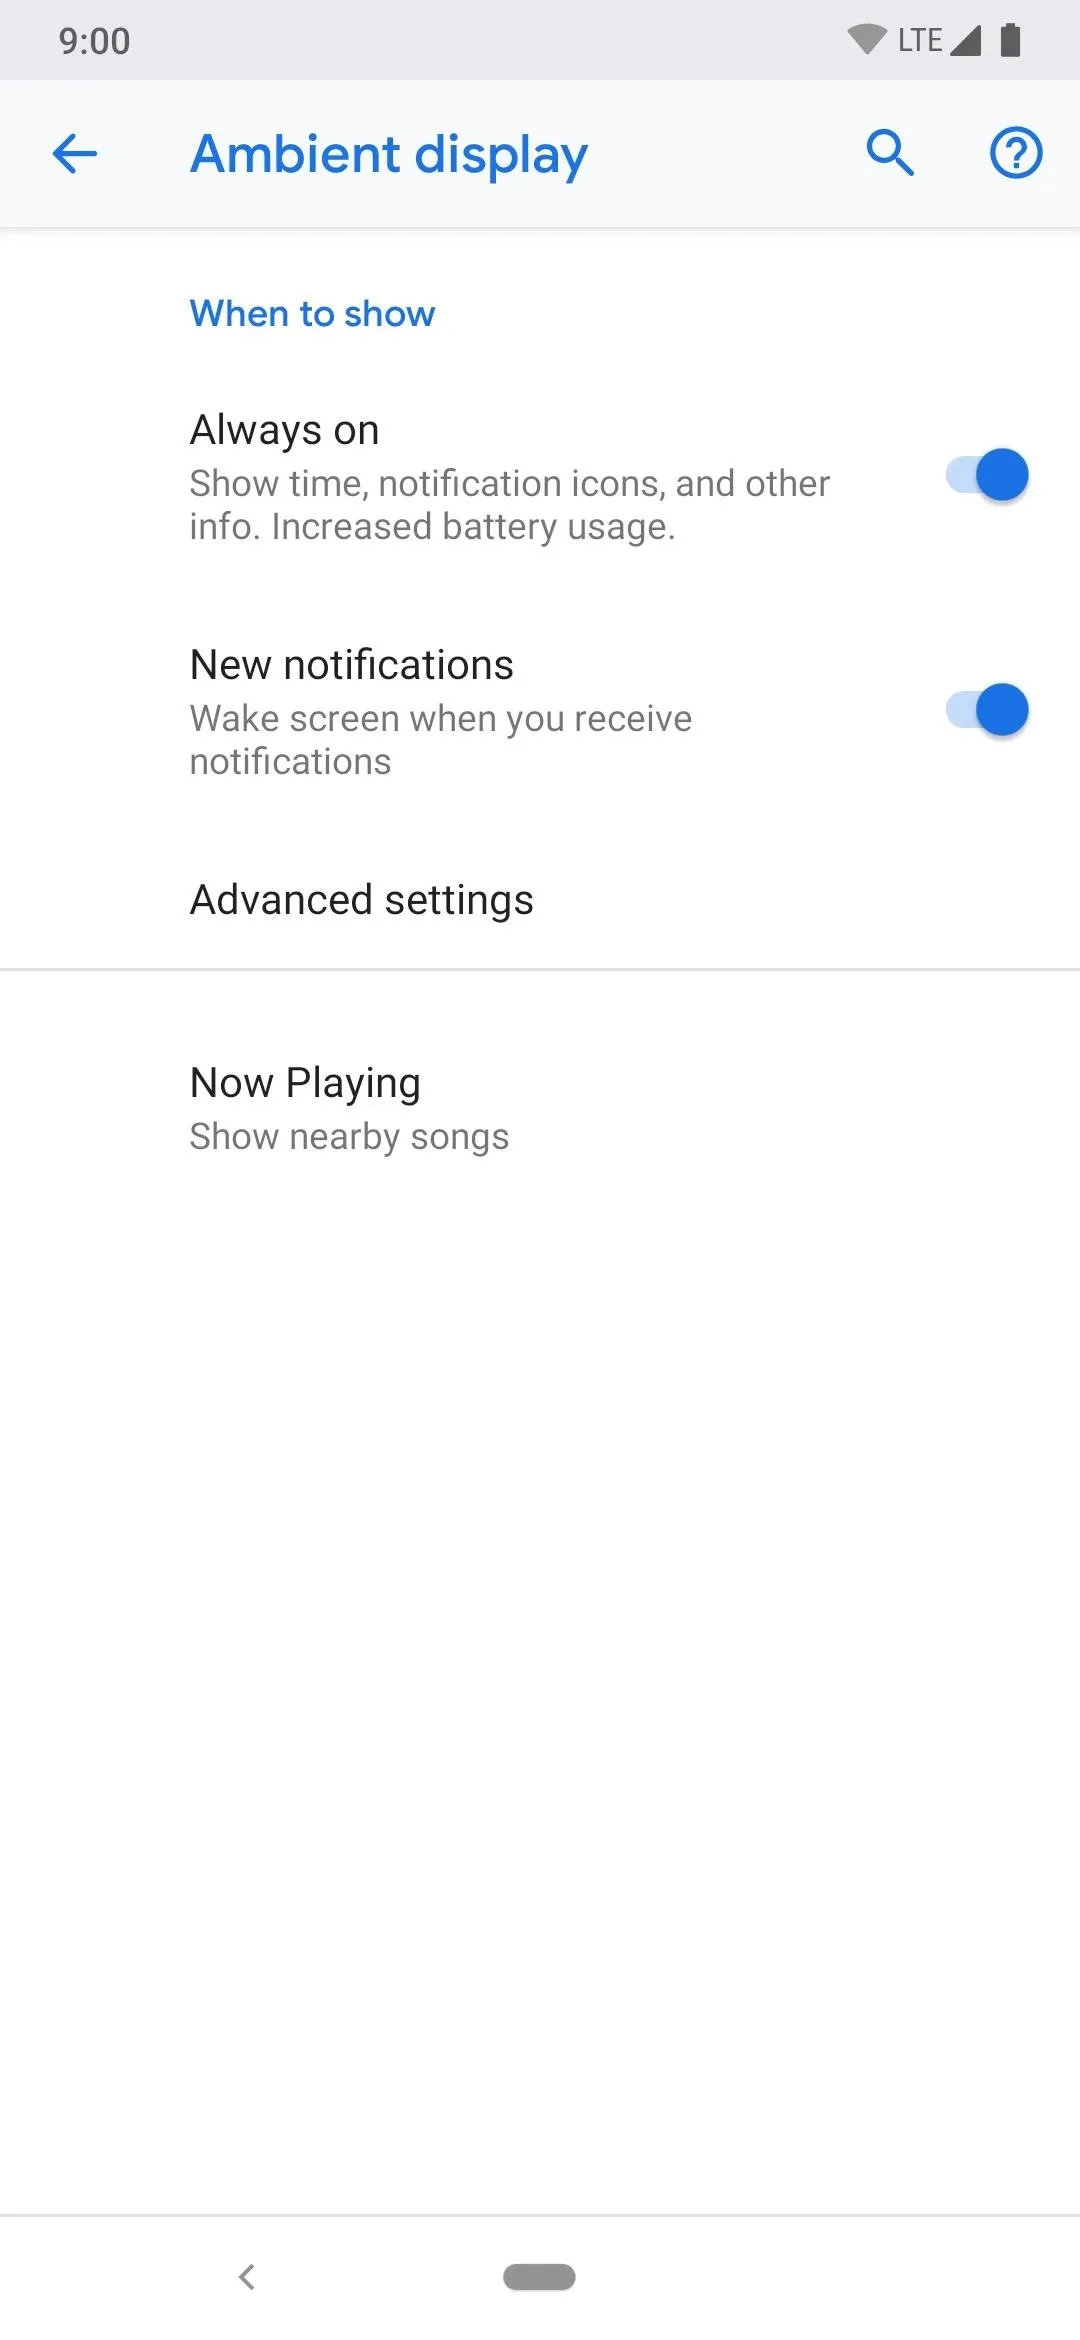
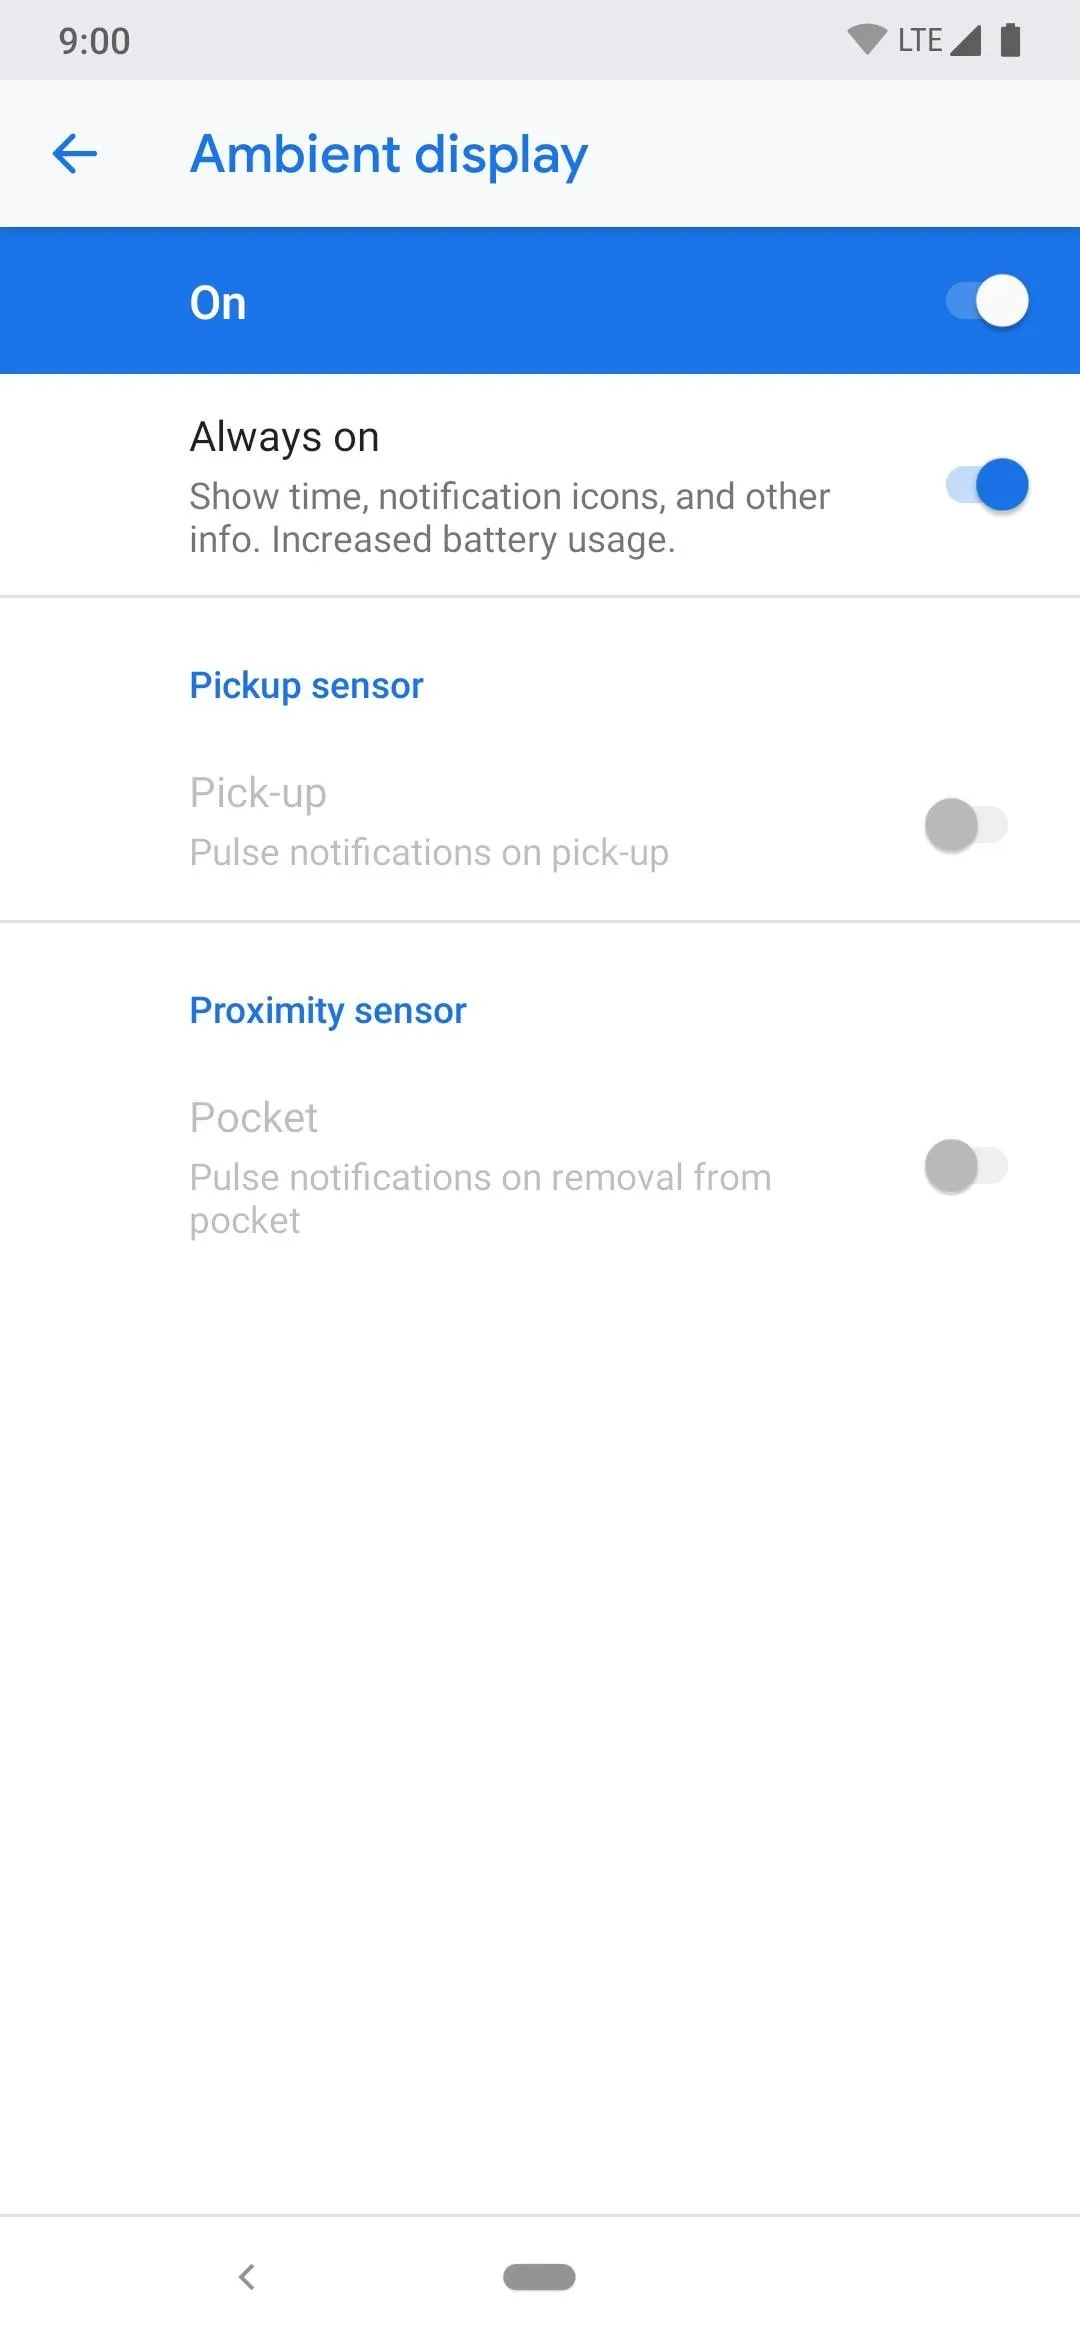
Ambient Display
OnePlus has already stated they've wanted to add a true always on display feature to their smartphones, but until then, you can try Ambient Display. It allows you to keep the display in a low powered state all the time so you can check notifications at a glance.
OxygenOS has this feature to an extent, but only when you tap the screen or get a new notification. Ambient Display appears to work only when your phone is plugged in and charging at the moment, but that's a good thing though since it could drain battery on the 6T anyway.
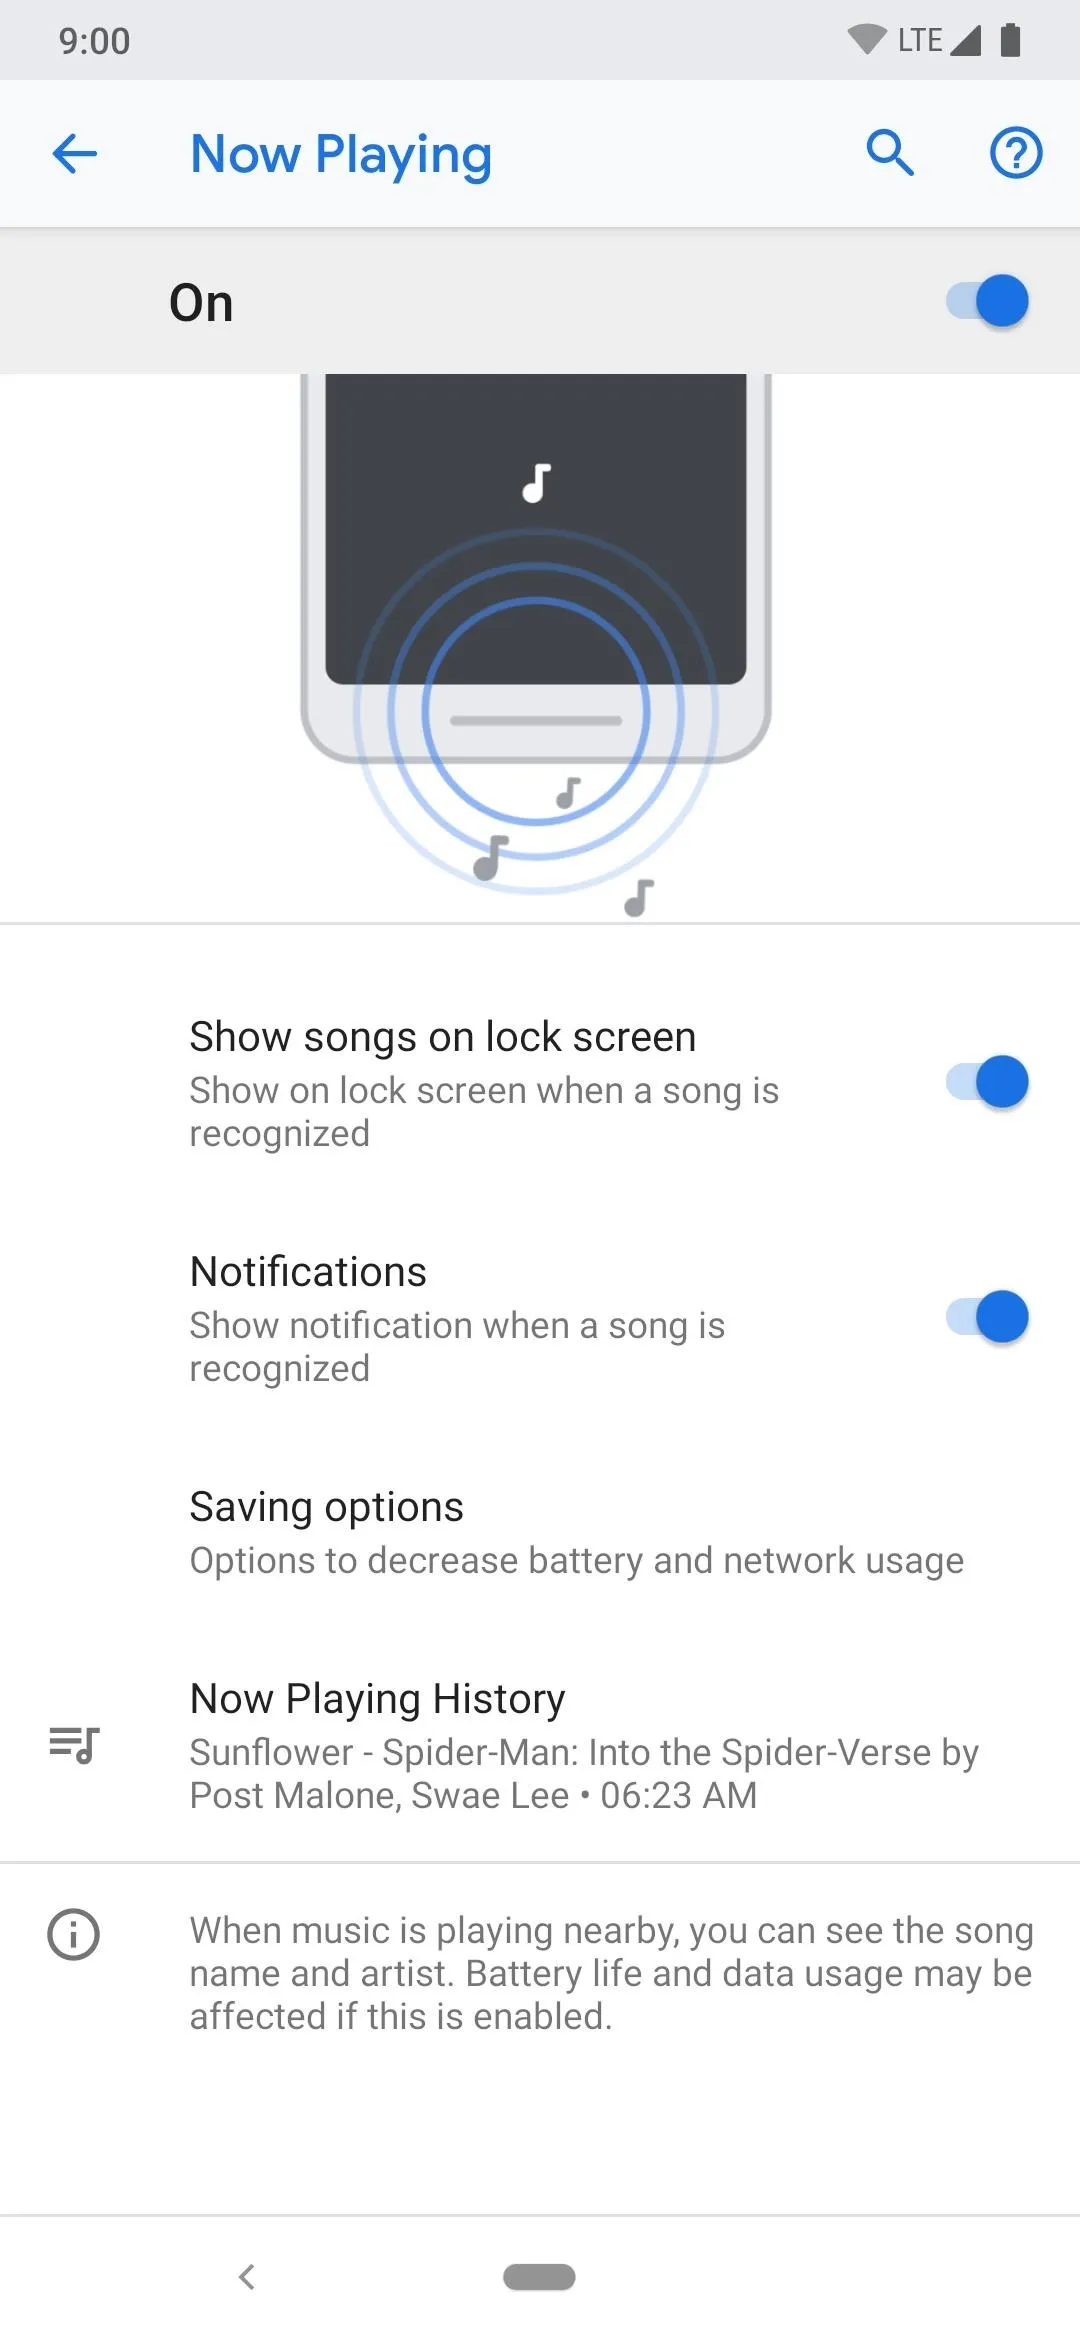
Now Playing
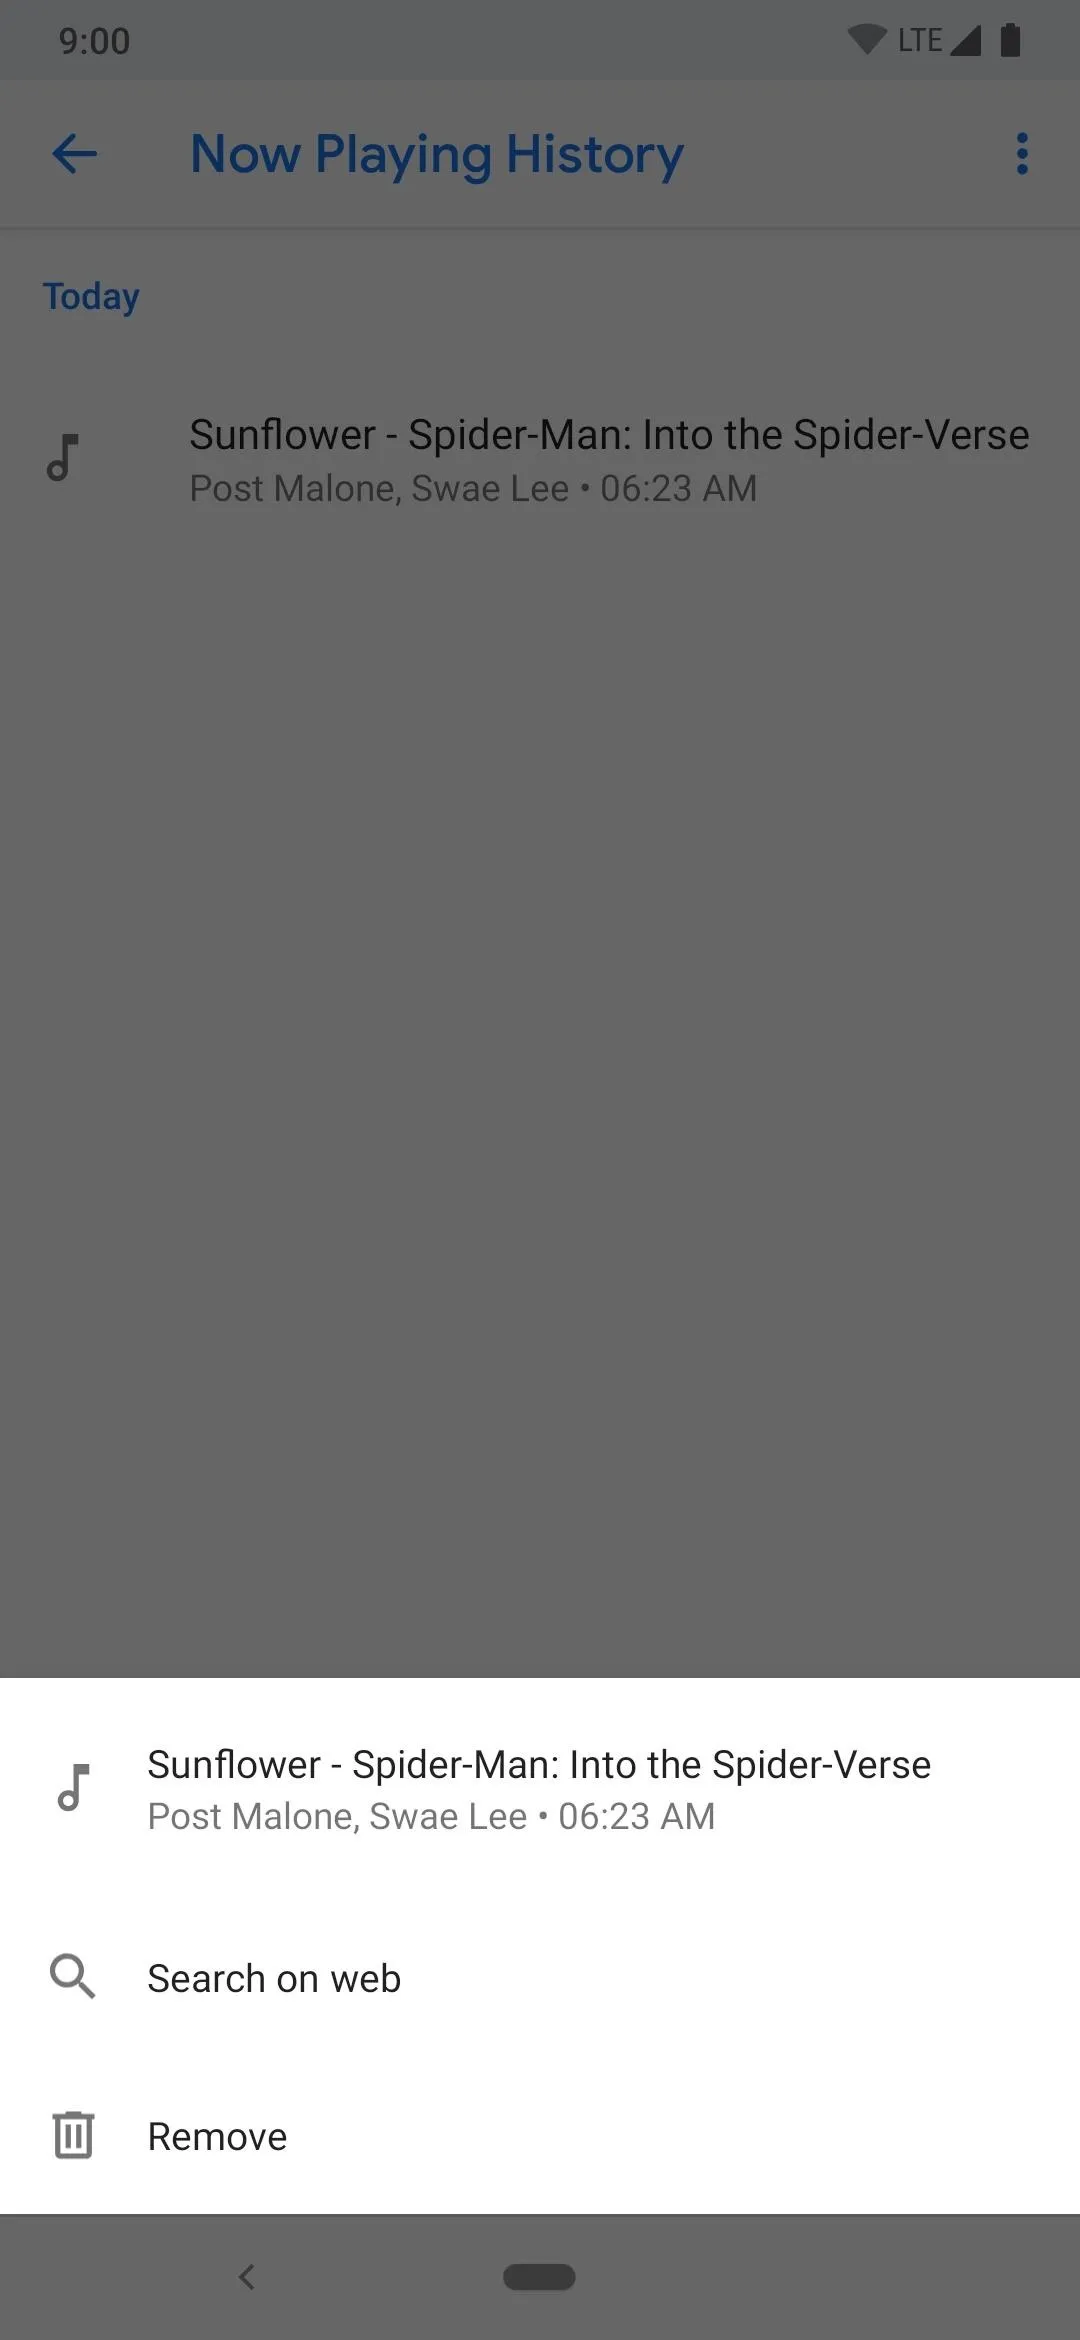
This feature allows your phone to display the song name and artist info right on your lock screen when it recognizes a song. The "Now Playing History" will store all the songs it picks up for viewing later. It's not going to be the same experience you get from a Pixel, but it offers a similar one using a custom ROM. That's pretty awesome, so it's still worth looking into!
If You Want to Revert Back to OxygenOS
Should you ever want to revert to the stock OxygenOS version that came with your phone, the easiest way would be to use the MSM Download Tool. It will wipe your data entirely and relock your bootloader, but you'll be back to OxygenOS. The tool is not only used to recover a bricked OnePlus 6T, but it's also the ideal method of getting back to stock since it flashes the OxygenOS system image. Follow the guide below, and you'll be back up and running in no time!

- Follow Gadget Hacks on Pinterest, Reddit, Twitter, YouTube, and Flipboard
- Sign up for Gadget Hacks' daily newsletter or weekly Android and iOS updates
- Follow WonderHowTo on Facebook, Twitter, Pinterest, and Flipboard
Cover image and screenshots by Stephen Perkins/Gadget Hacks


Comments
Be the first, drop a comment!