


Depending on your region, you may not be offered the same call recording option other OnePlus users have. But, as with most things Android, where there's a developer with a will, there's a way regardless. And the method we are about to describe is one of the easiest, most stable, and undetectable ways to do it. Perhaps we should discuss why OnePlus has been holding out you when it comes to this feature, though.
Have you ever heard this message when you called customer service: "Your call may be recorded for quality and and training purposes?" It's likely they are notifying you that you are being recorded because that's the law in that location (or at least it's necessary for the recording to be admissible in court). All OnePlus devices are sent from the factory with the ability to record calls, but based on information about your region, this option may be disabled or seem completely unavailable. You can change that with this mod, but you'll still want to be responsible for abiding by the laws of your region, of course.
Disclaimer
Before you start recording calls, you should first check if its legal in your state. While federal law permits recording telephone calls and in-person conversations with the consent of at least one of the parties (e.g., you), these laws can vary from state to state. California, for instance, has a two-party consent law, which means you have to get permission from the other person(s) before you can start recording.
Requirements
- OnePlus device
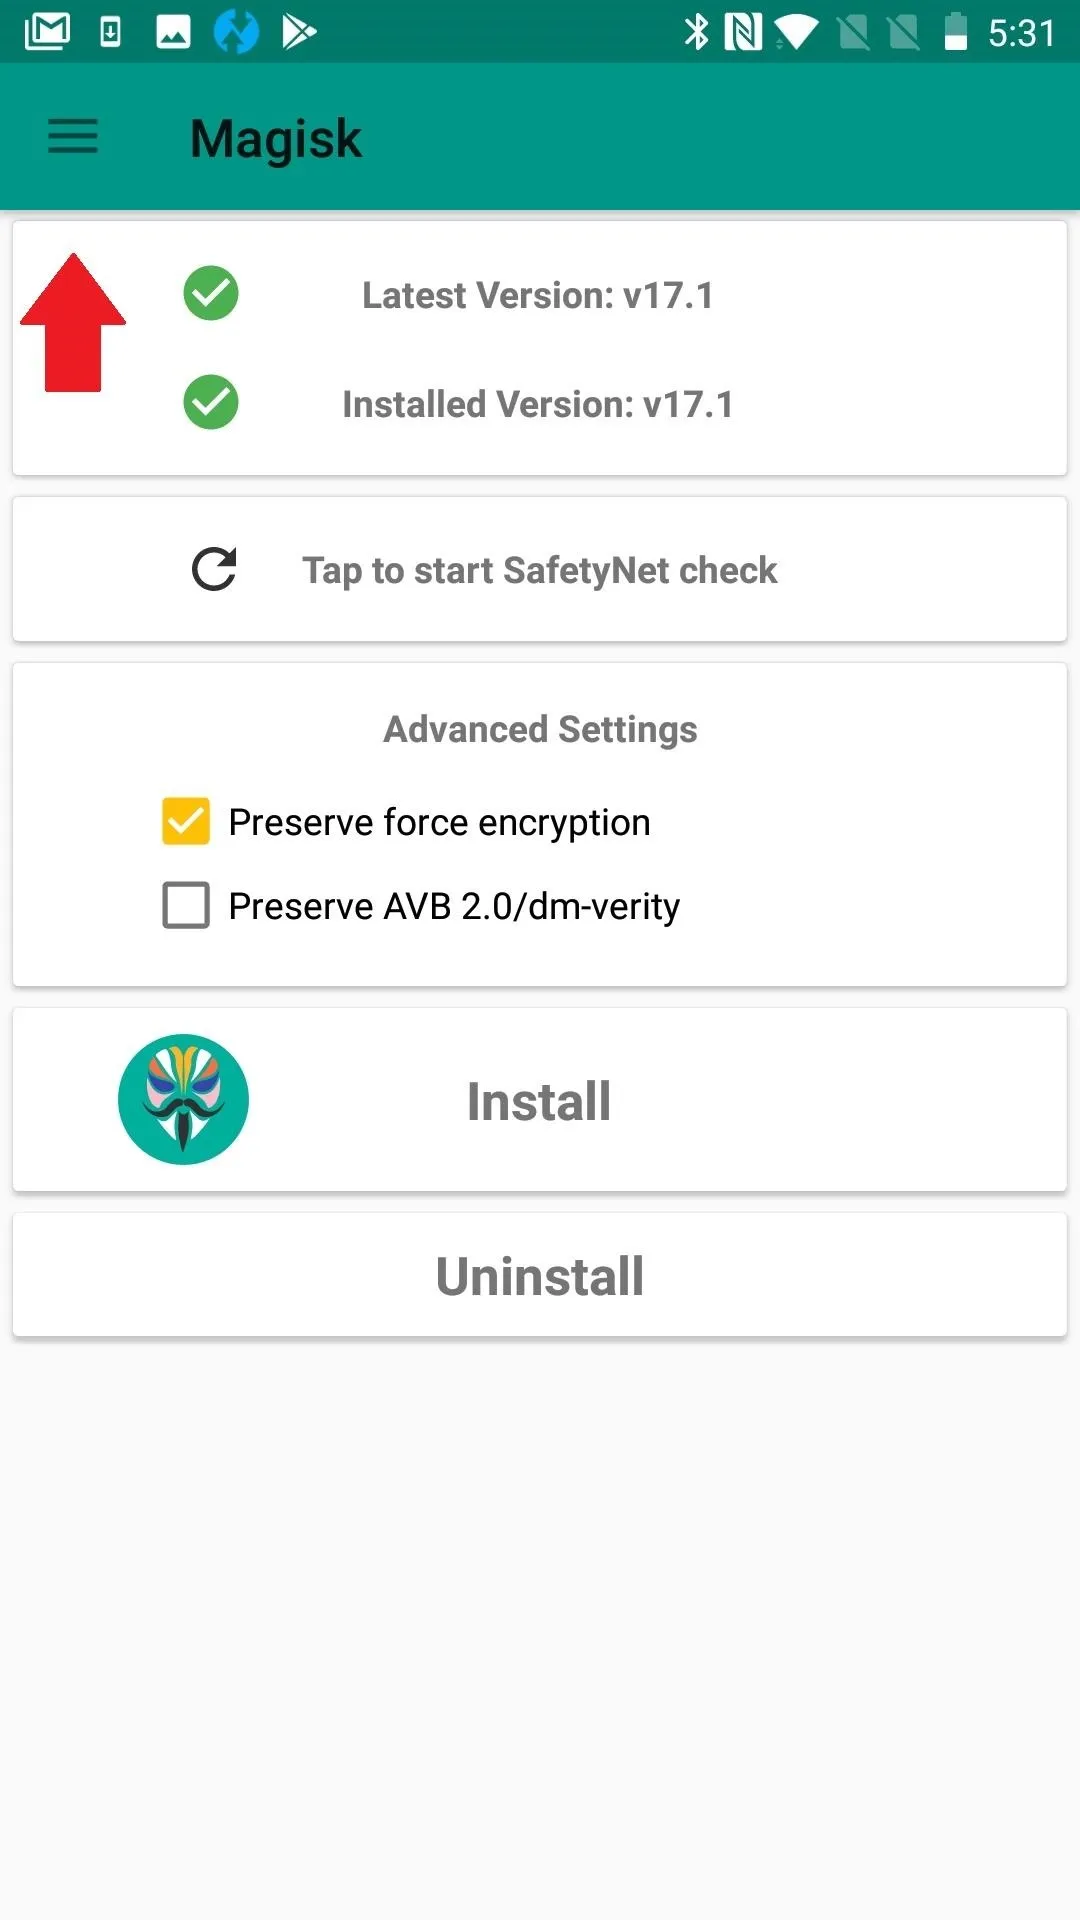
- Magisk framework v17.1 installed
- NANDroid Backup (just in case)
Download the OnePlus Call Recorder Magisk Module
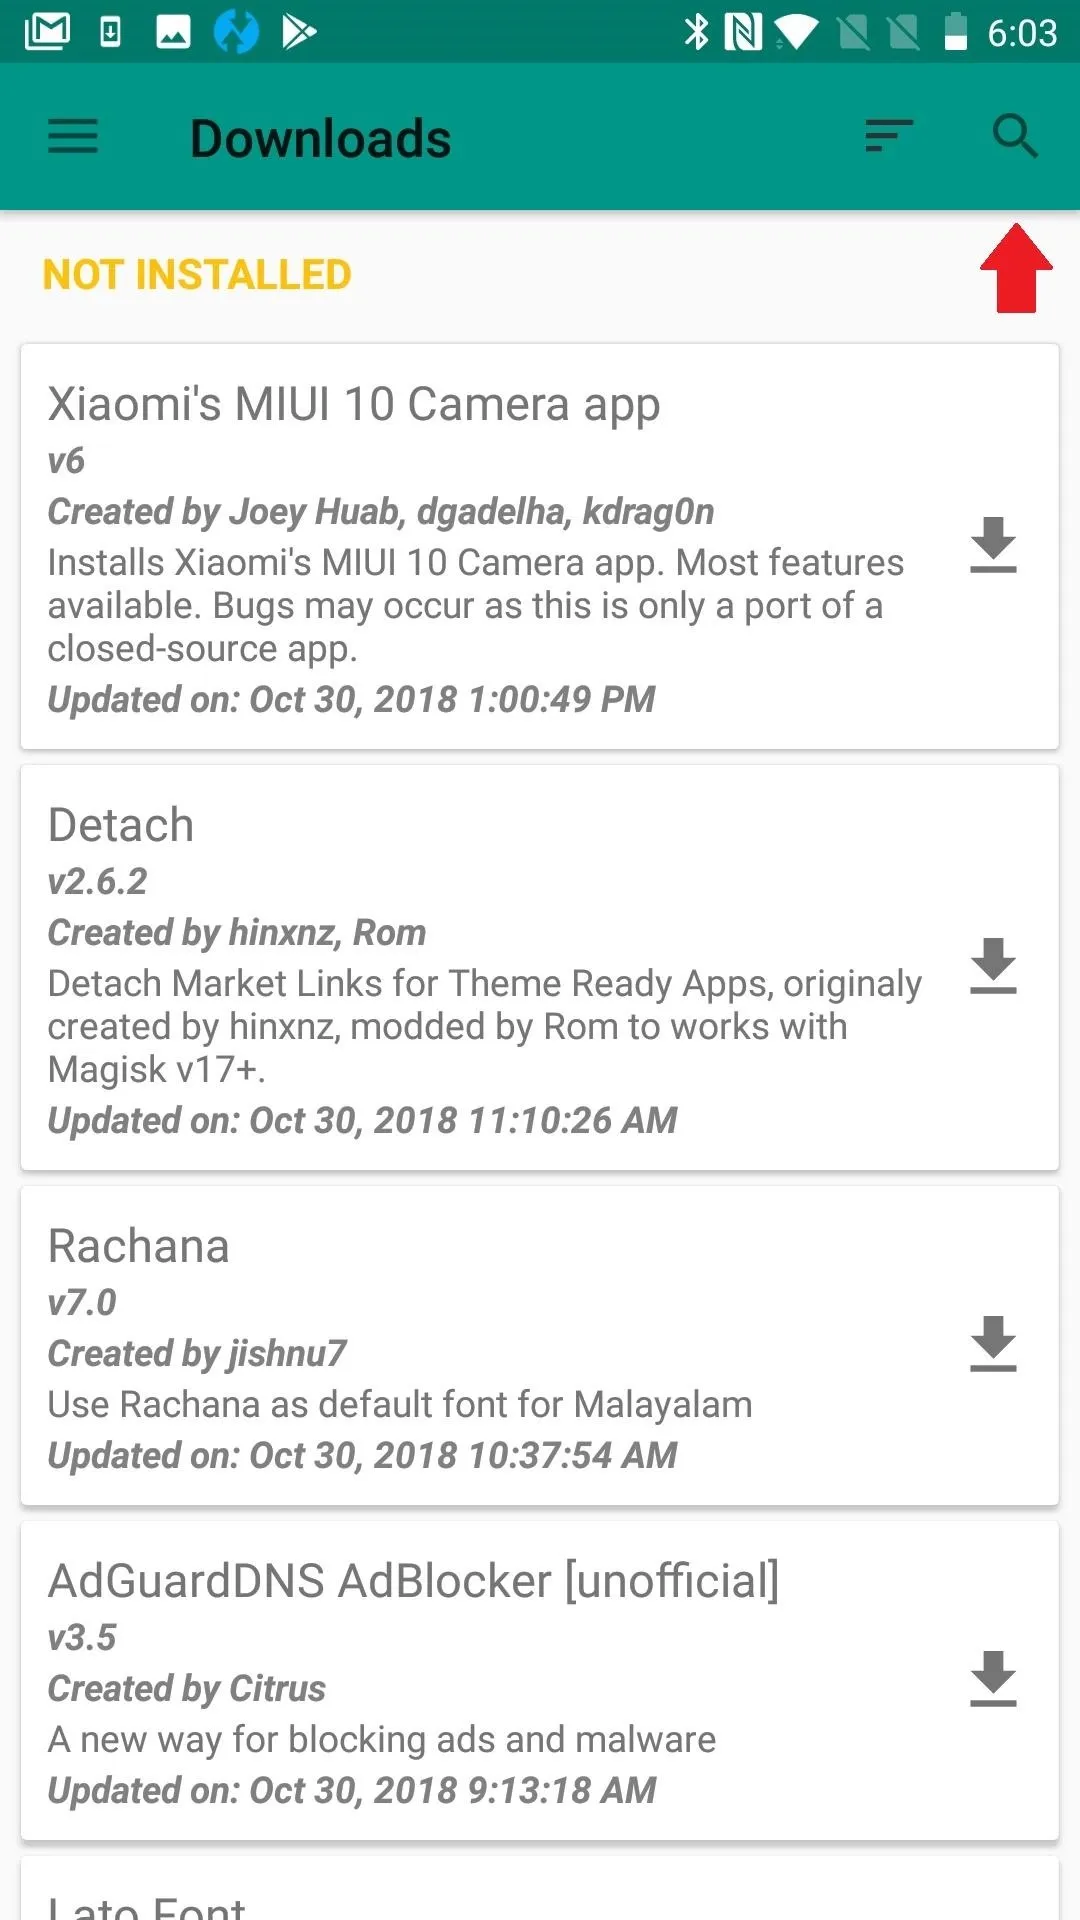
To start, open Magisk Manager, then access the navigation menu by either swiping from the far left to the right, or by tapping the 3 stacked parallel lines in the upper-left corner. Tap on "Downloads." Start typing the name of the module — the word "call." When you see the option titled "OOS Native Call Recording Enabler" appear below, press the download icon (downward-arrow pointing to a horizontal line.)

Flash the OnePlus Call Recorder Module
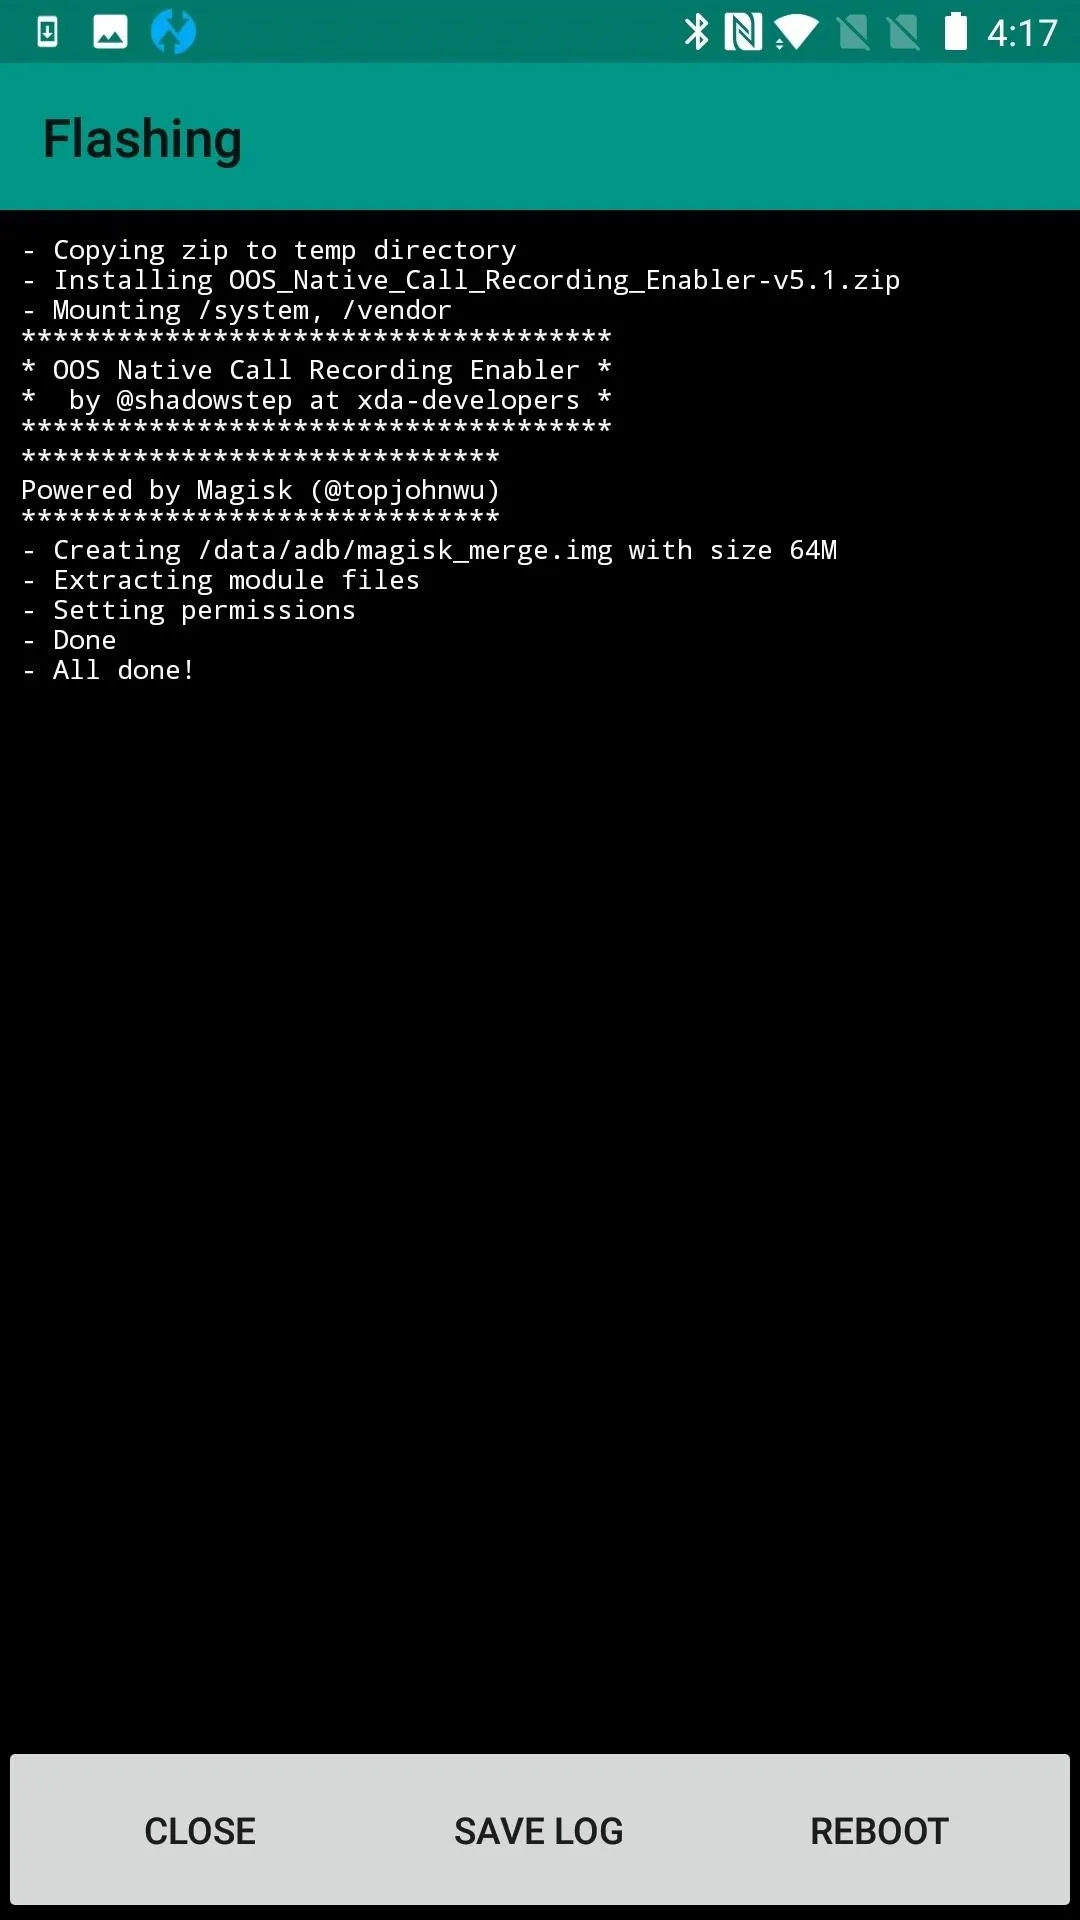
Next, tap "Install" and wait for the file to flash. You've already downloaded the file, so no need to do that a second time. You will see the flashing status on your screen, with an option to reboot when you are done.

Reboot
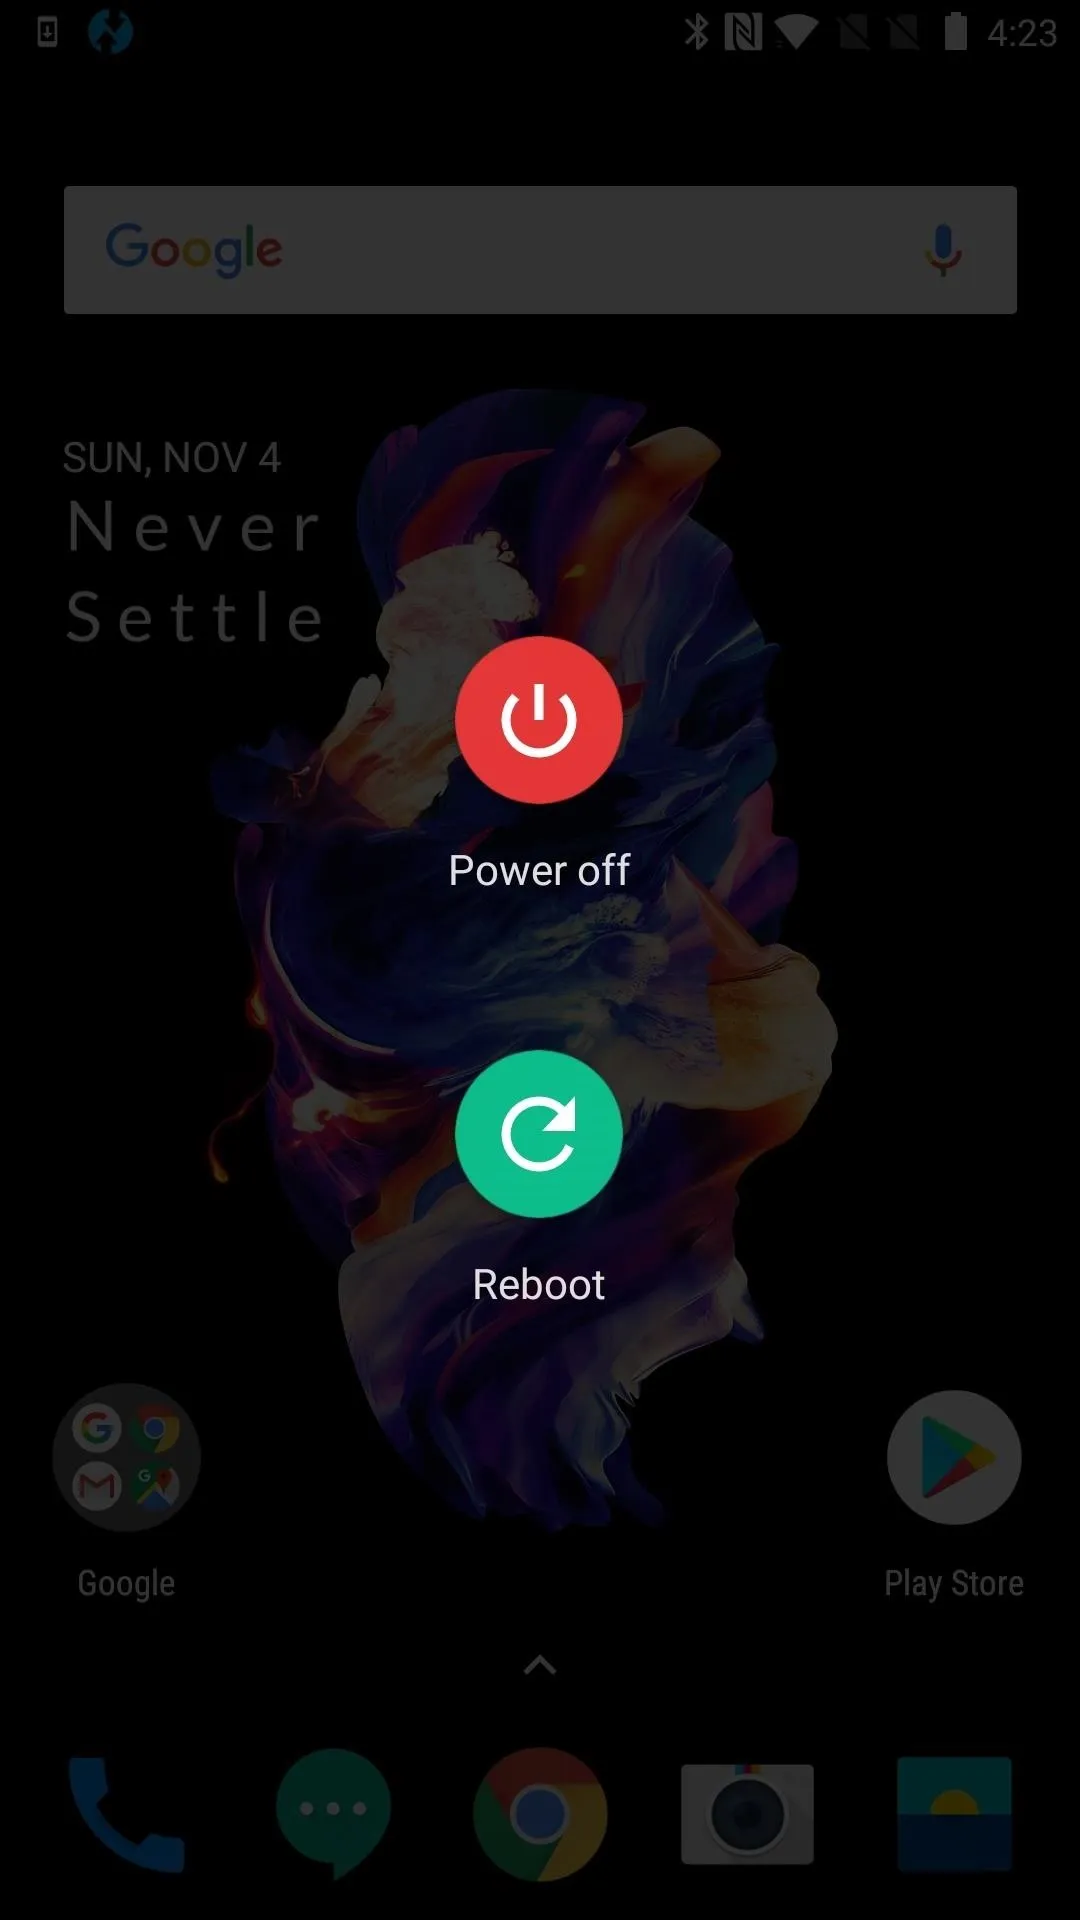
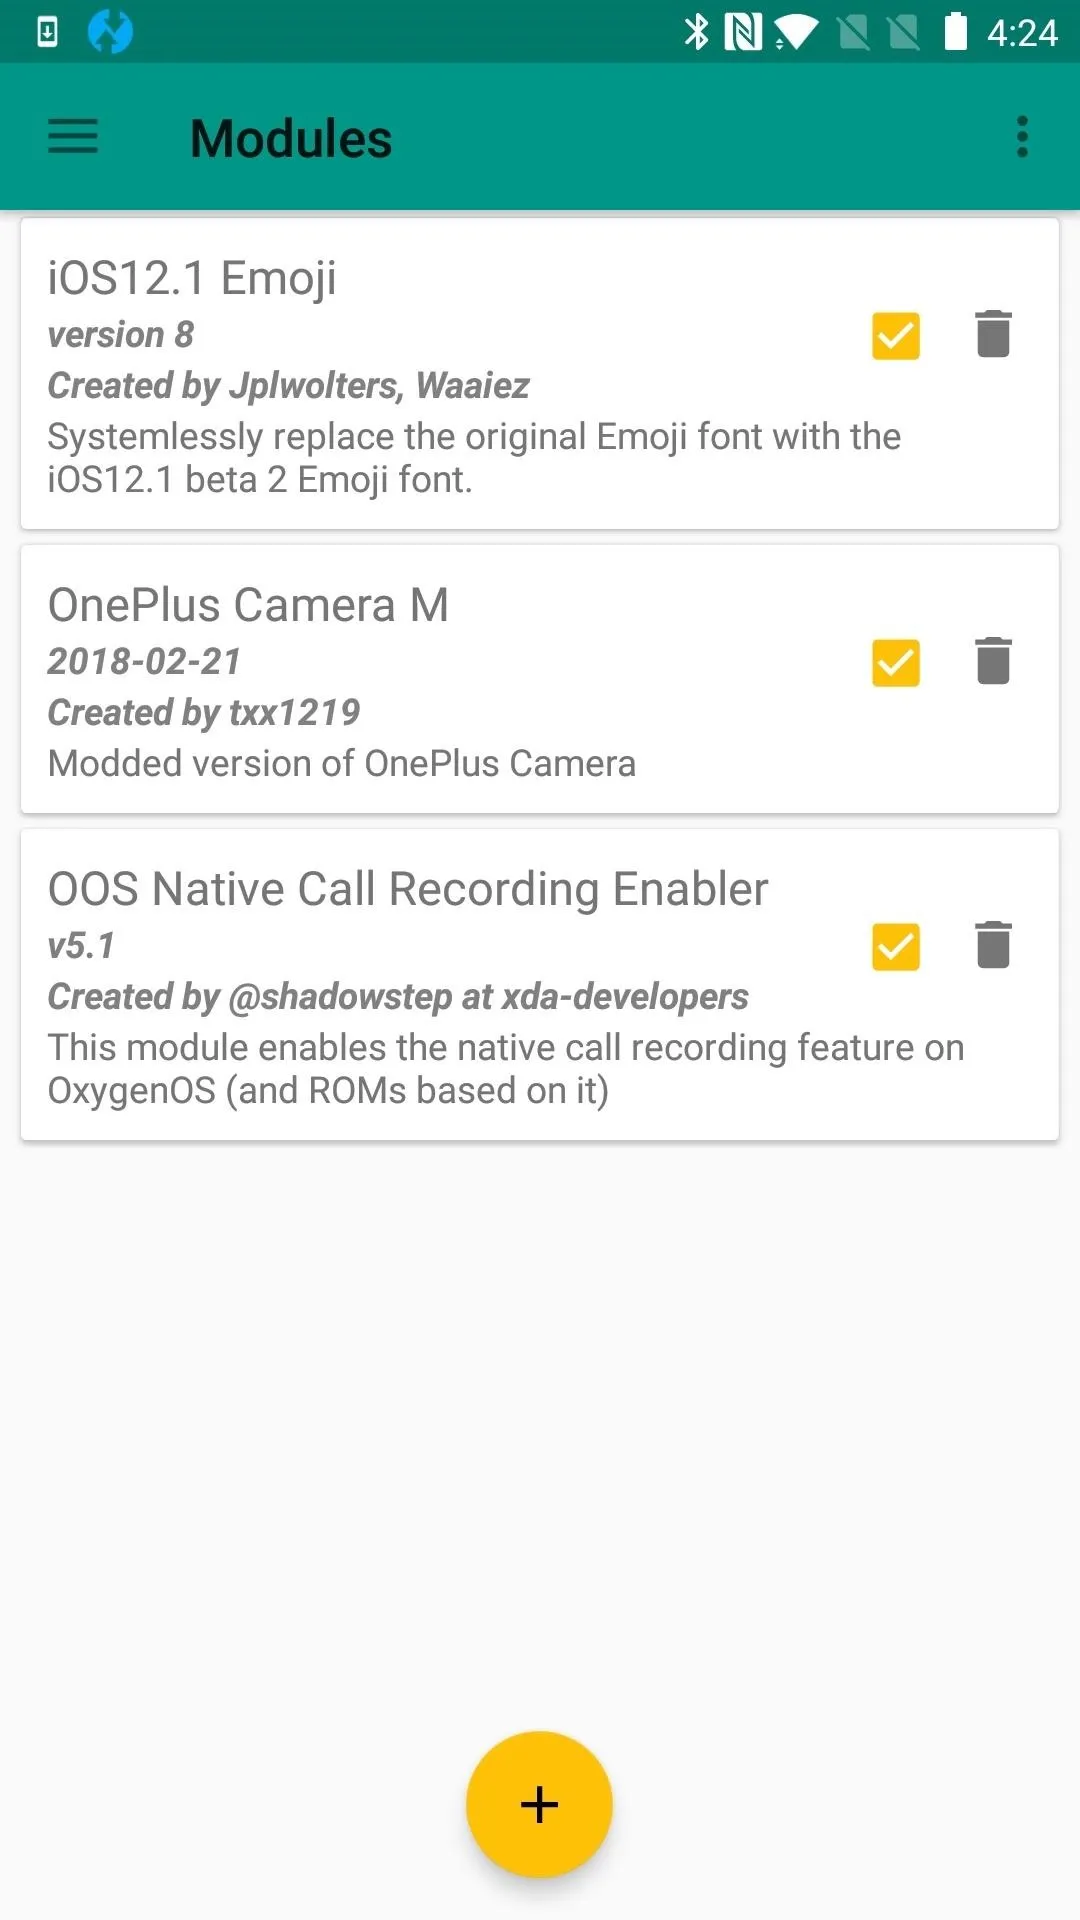
This Magisk module can survive a reboot, and it's actually required to enable the recording feature. Even if you accidentally closed out the reboot option on the flashing screen, long-press the Power button until you see the option to reboot. Confirm that you wish to restart. Now when you open Modules, you should see OOS Native Call Recording Enabler listed.
Realize Your Recording Potential
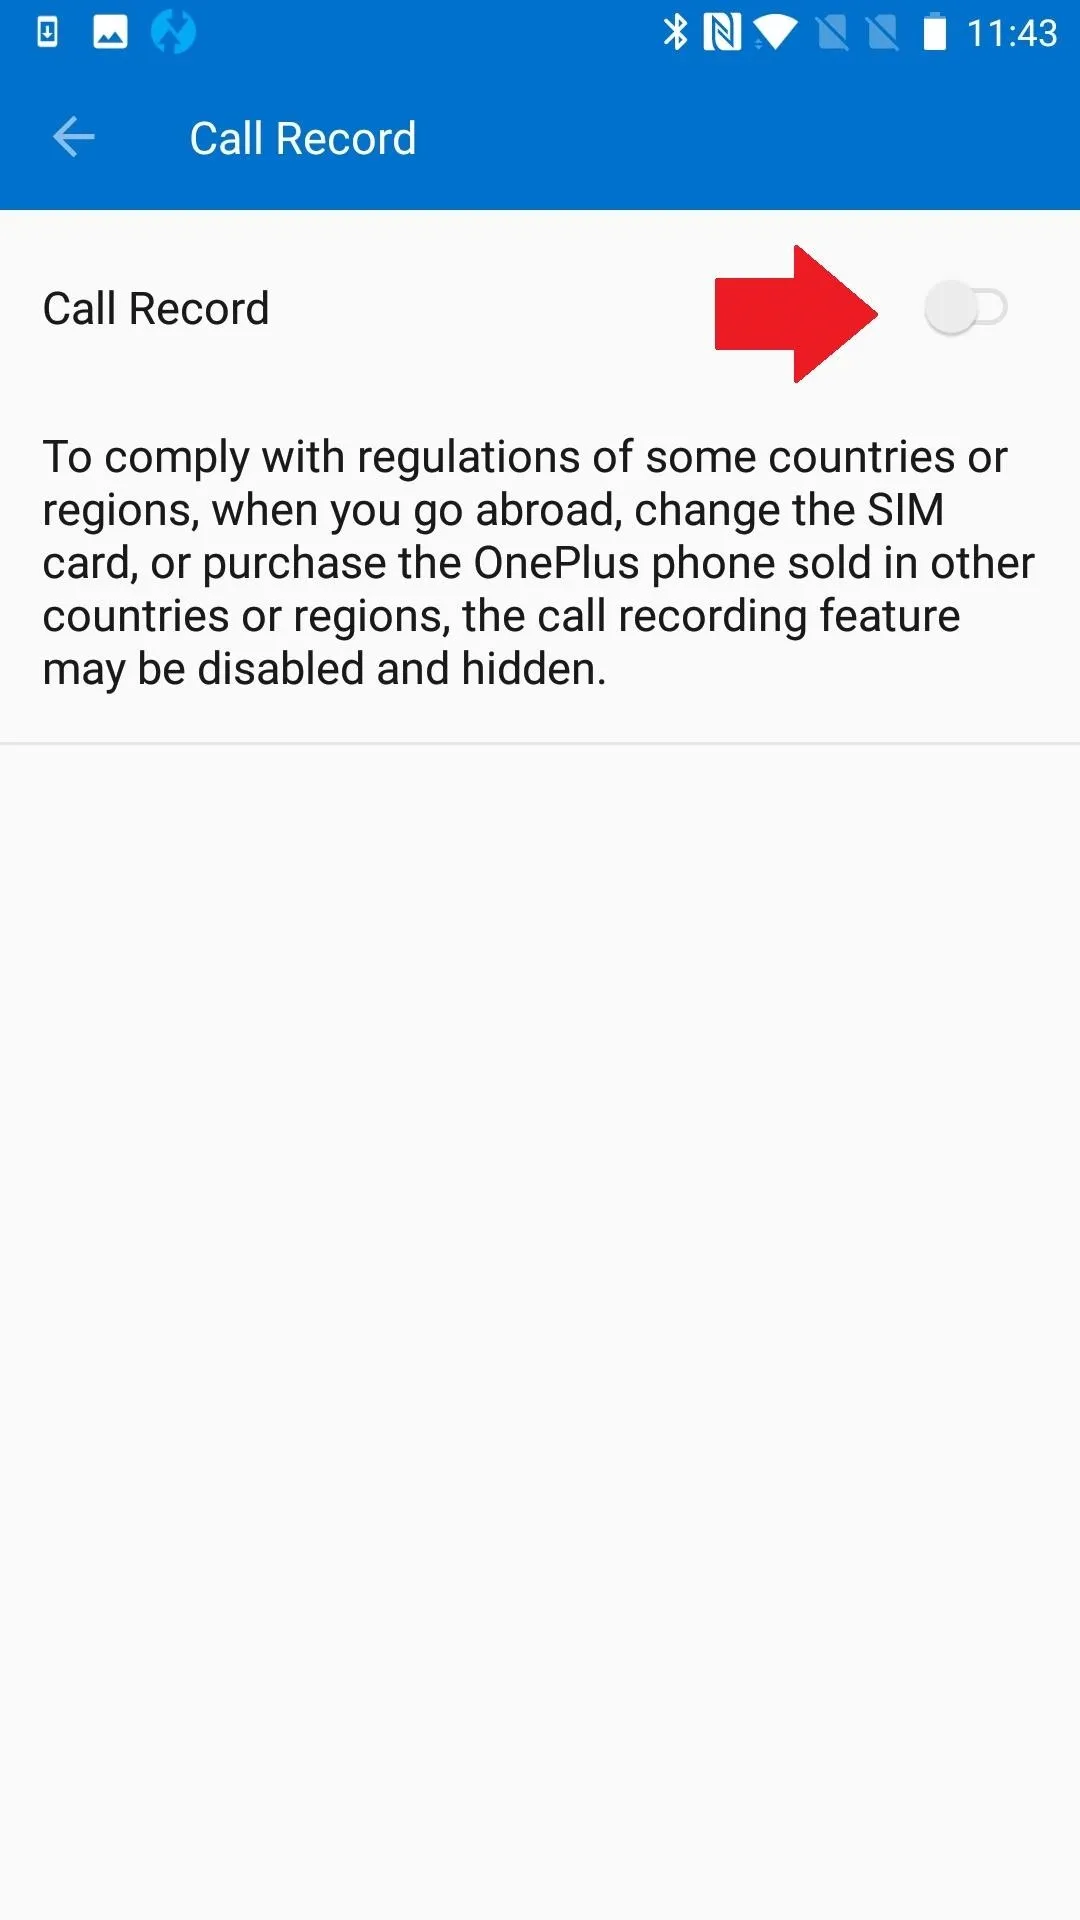
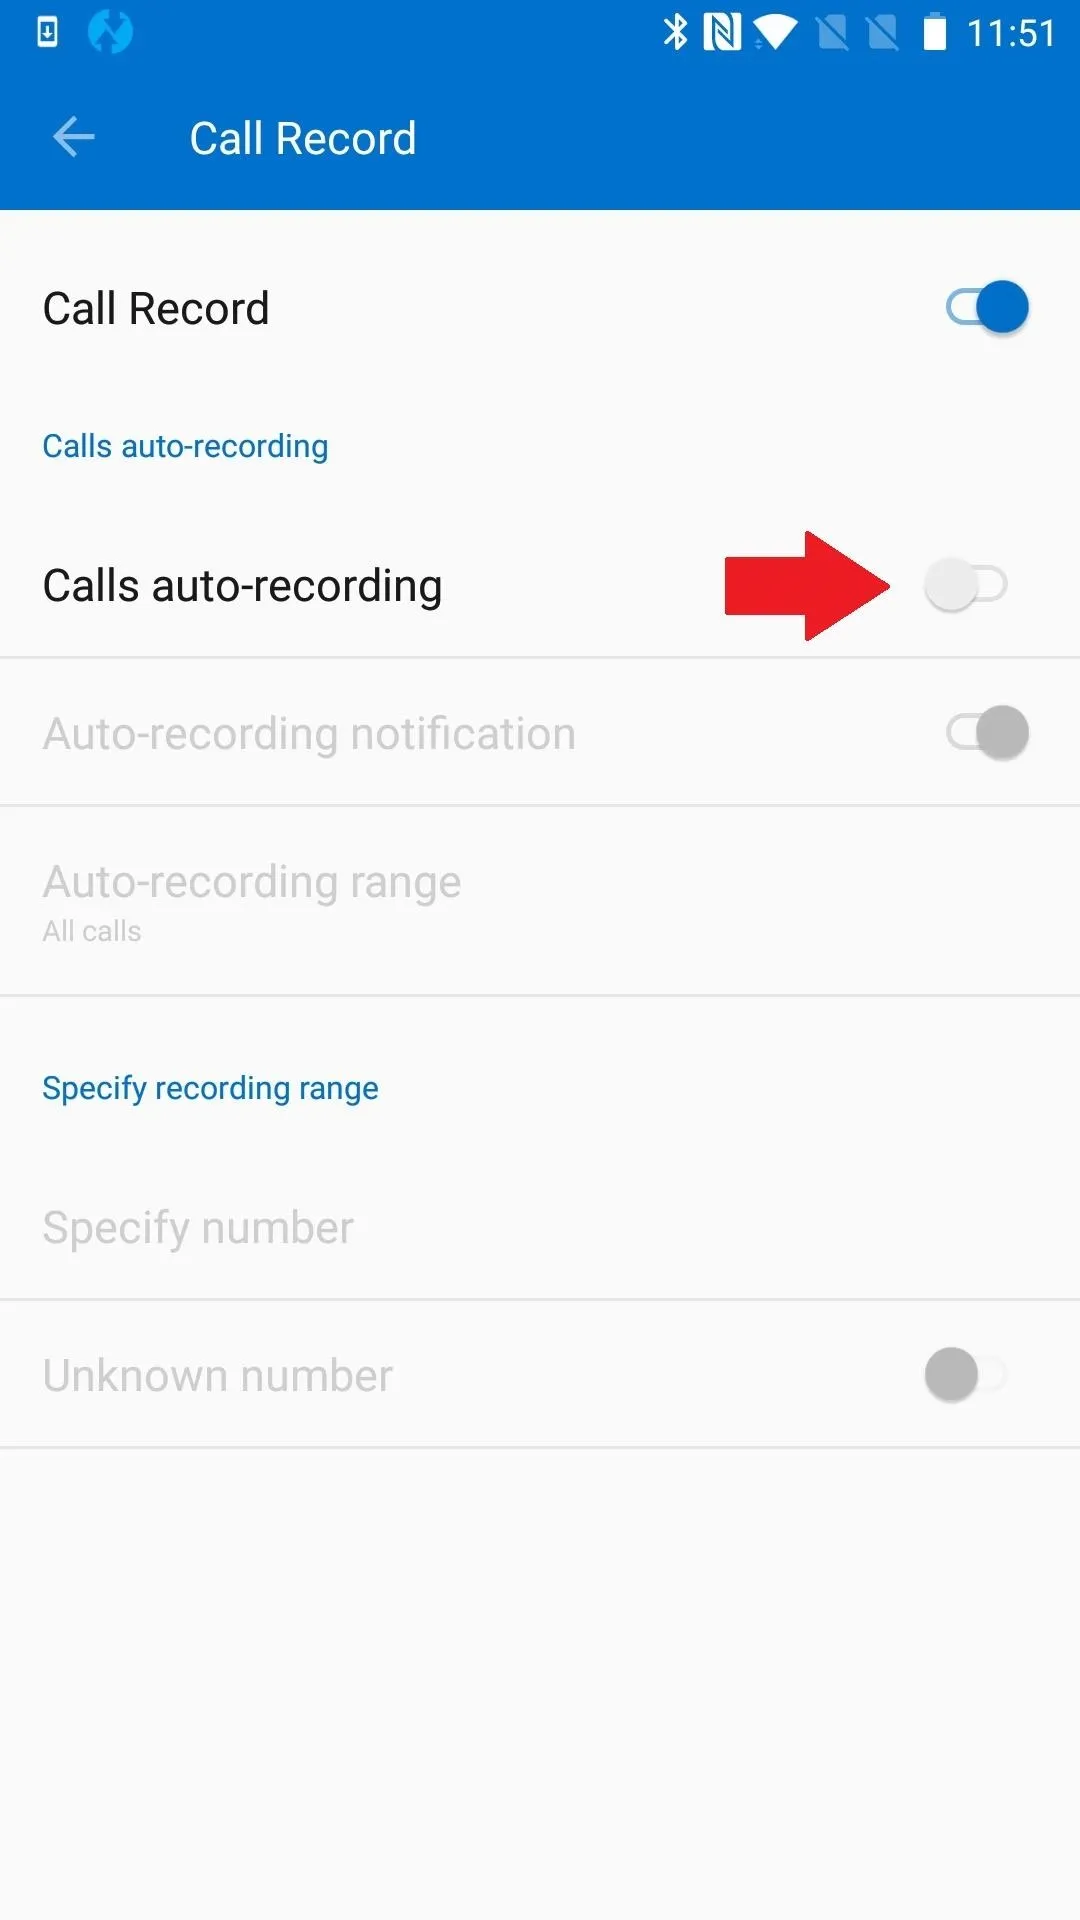
Here's how you enable your new recording feature within your phone (dialer) app: start by tapping the menu button in the upper-right corner. Select Settings. Choose "Call Record" and toggle the option to the "ON" position. After you tap the toggle, you will see an additional option to enable call auto-recording.
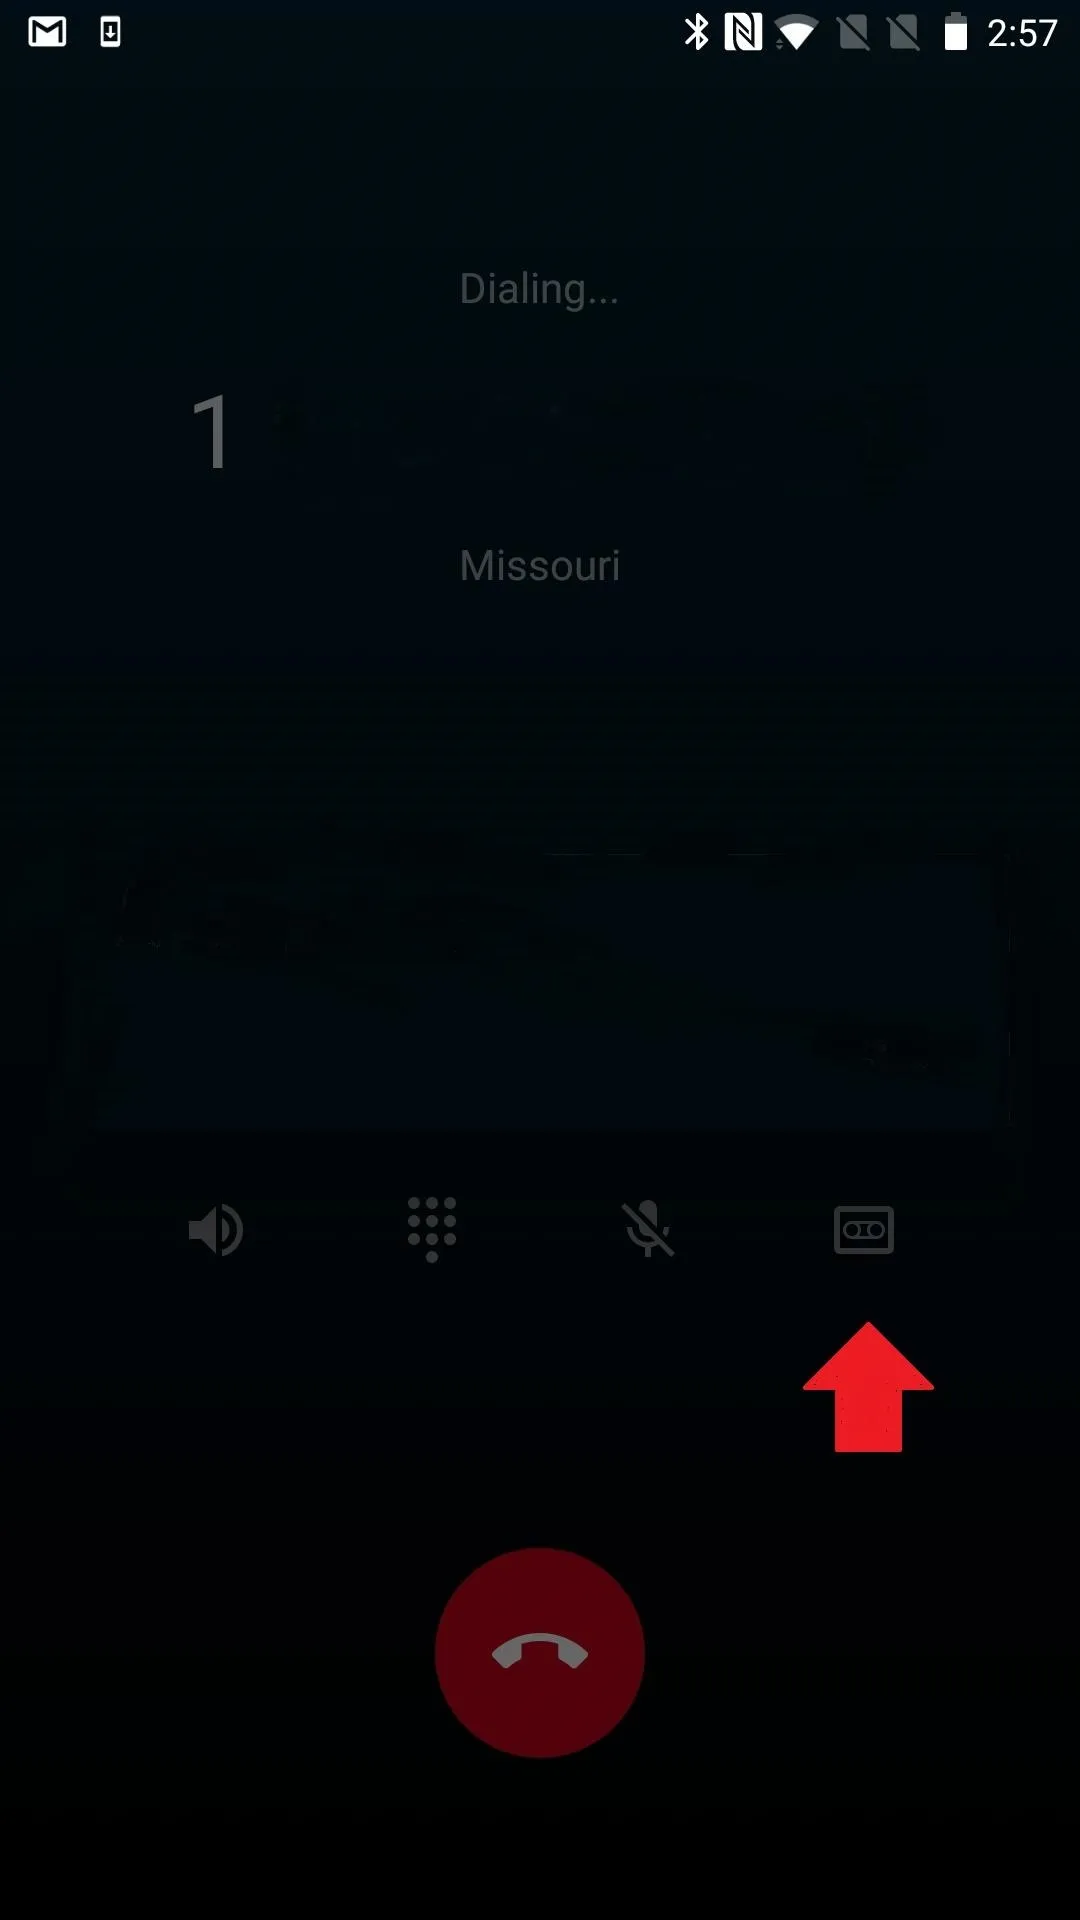
If you opted for manual call recording, you'll be able to record calls with a new tape recorder icon in the call UI. Recordings will be saved as MP3 files in a folder on your internal storage partition named "record."
- Follow Gadget Hacks on Pinterest, Reddit, Twitter, YouTube, and Flipboard
- Sign up for Gadget Hacks' daily newsletter or weekly Android and iOS updates
- Follow WonderHowTo on Facebook, Twitter, Pinterest, and Flipboard
Cover image and screenshots by Delani Clatfelter/Gadget Hacks


Comments
Be the first, drop a comment!