


OnePlus always seems to offer affordable yet powerful tools for videographers of all kinds. The camera hardware itself is crucial, but what's hardware without good software to highlight its real potential? It doesn't matter which version of the smartphone you have, they're all powered by the very same OnePlus camera app.
Starting with the OnePlus 5, the dual cameras on the back make for even better depth perception than previous models. The primary shooter on newer models also has support for EIS and OIS, which allows for stable video recording by reducing or removing most if not all video shake. These are all things OnePlus is doing to help give their users the best video-taking experience possible.
In the guide below, I'll highlight some of the best features, settings, and tips you should check out while using the OnePlus camera app to record videos. These are all general guidelines and not set in stone — feel free to try them out and see if they fit in with your personal video shooting needs for any situation you might encounter.
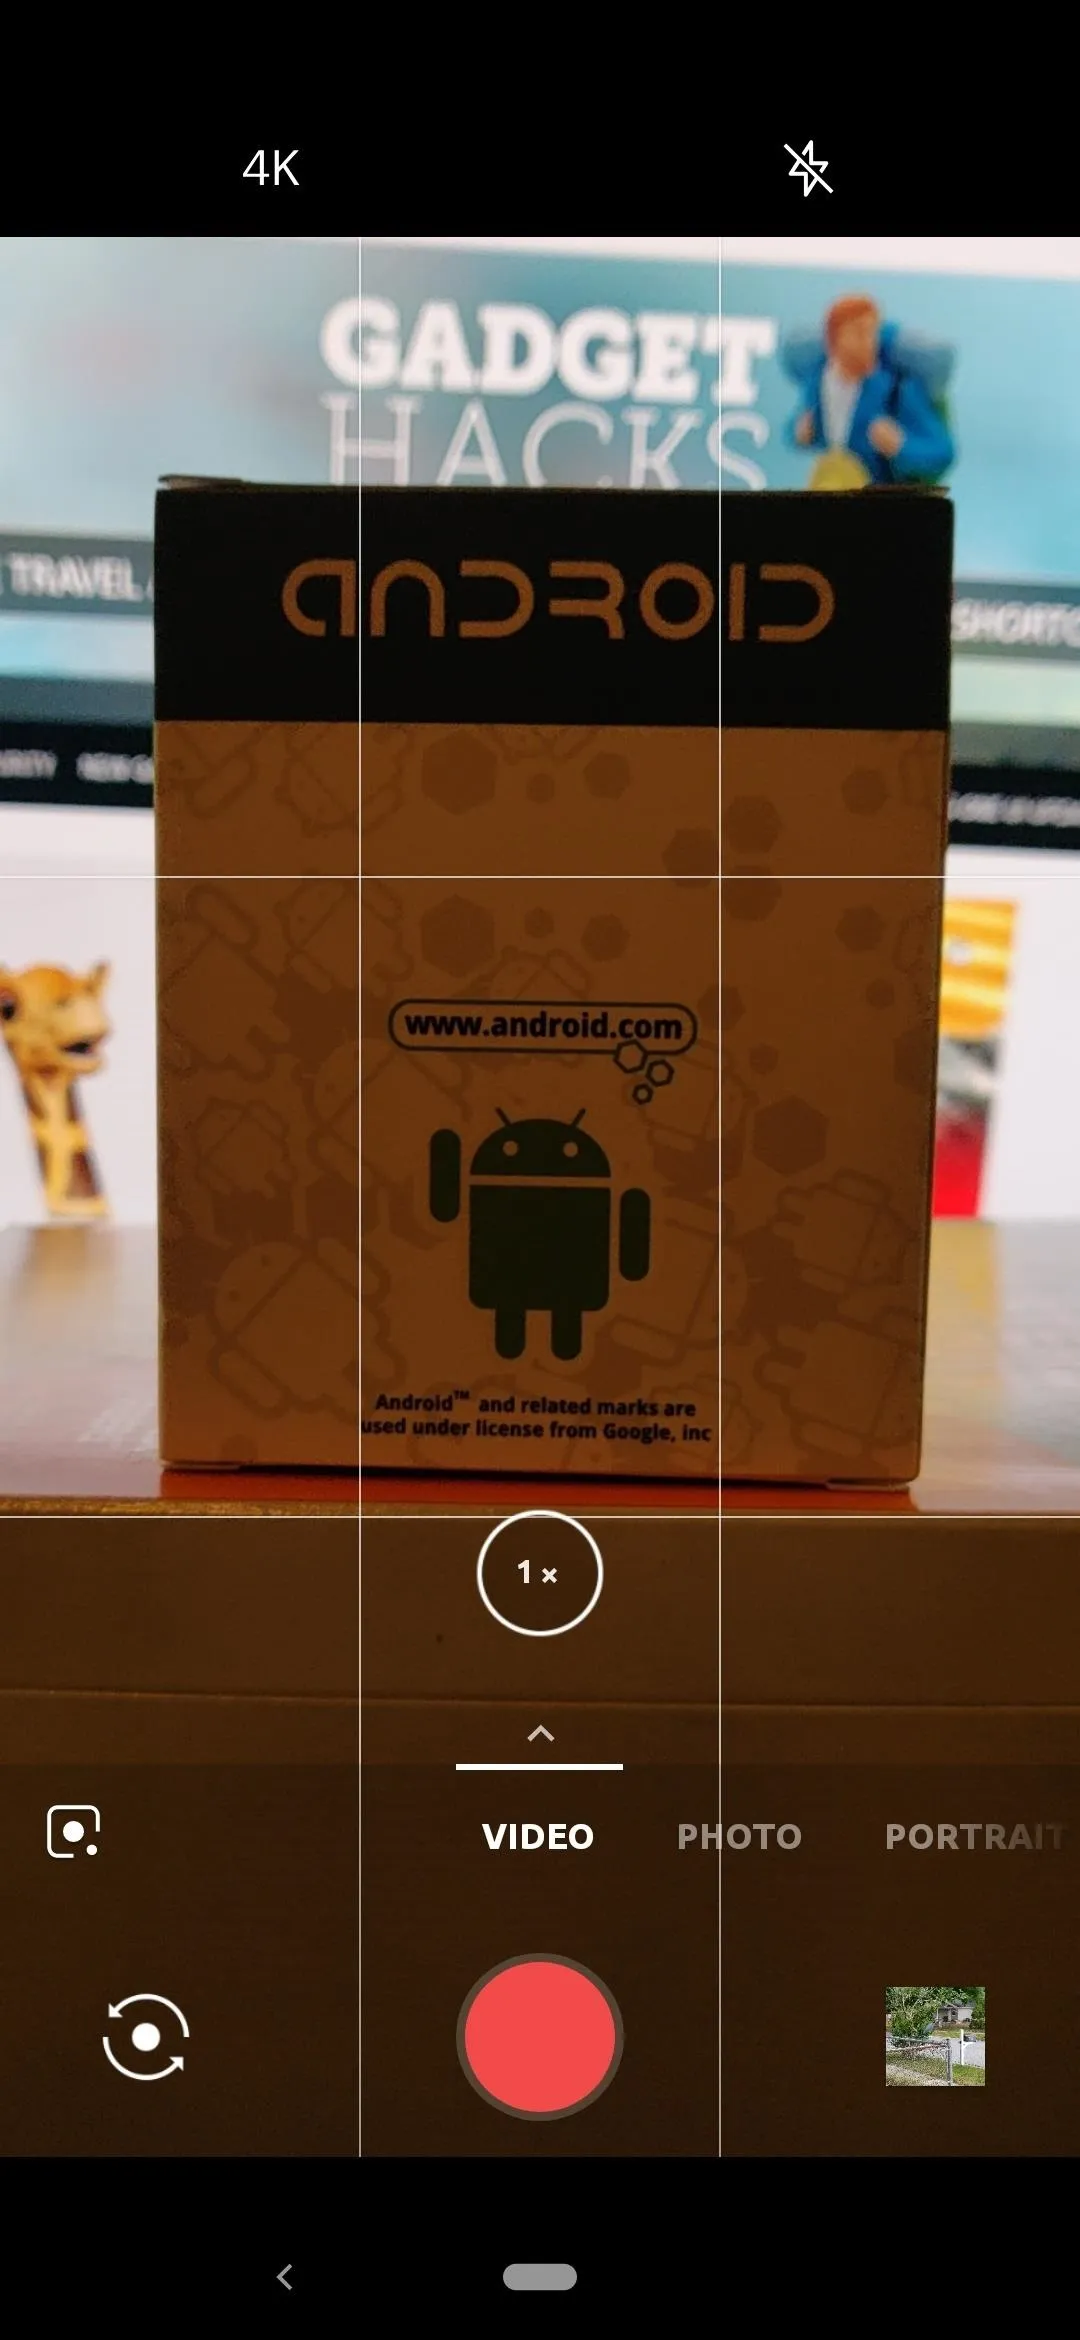
Use Grid Lines for Accuracy
OnePlus phones already offer OIS and EIS for video stabilization, but if you want highly accurate video shooting to the exact degree, you'll want to use grid lines.
Grid lines work exceptionally well for when you're trying to get the perfect shot while keeping it clean and symmetrical. You should try to follow the Rule of Thirds as a general guideline while shooting videos and snapping photos just the same. It's a great way to change your perspective on how you approach capturing your shots, especially if you're a newcomer to photography.
To get started with grid lines, swipe up on the main screen of the OnePlus camera app and head into "Settings." Tap "Grid," then select which grid type you would like to use. The default for the Rule of Thirds is the 3 x 3 option, but feel free to test out the other options to see what fits your needs.
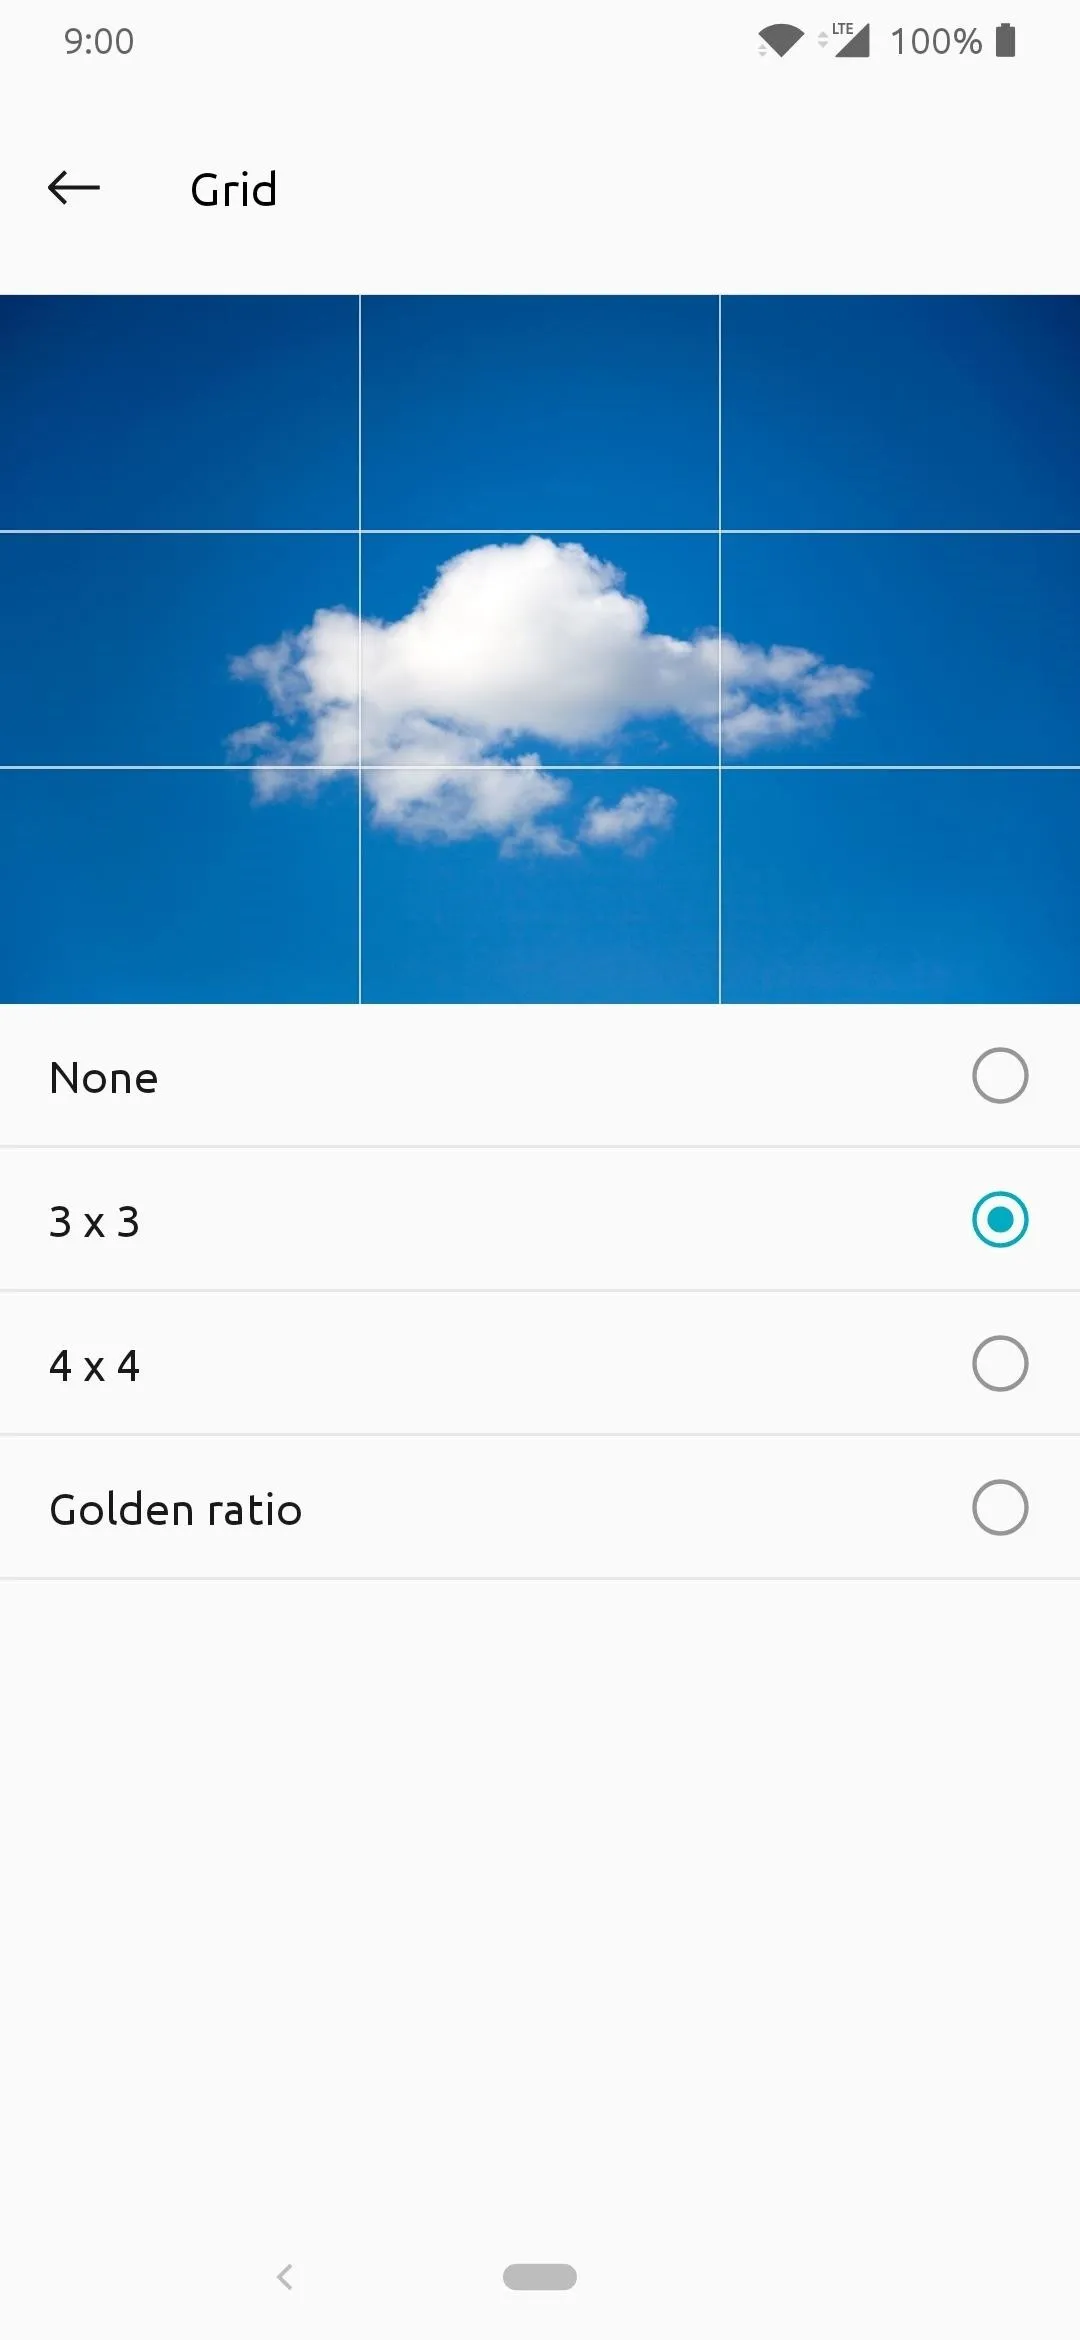
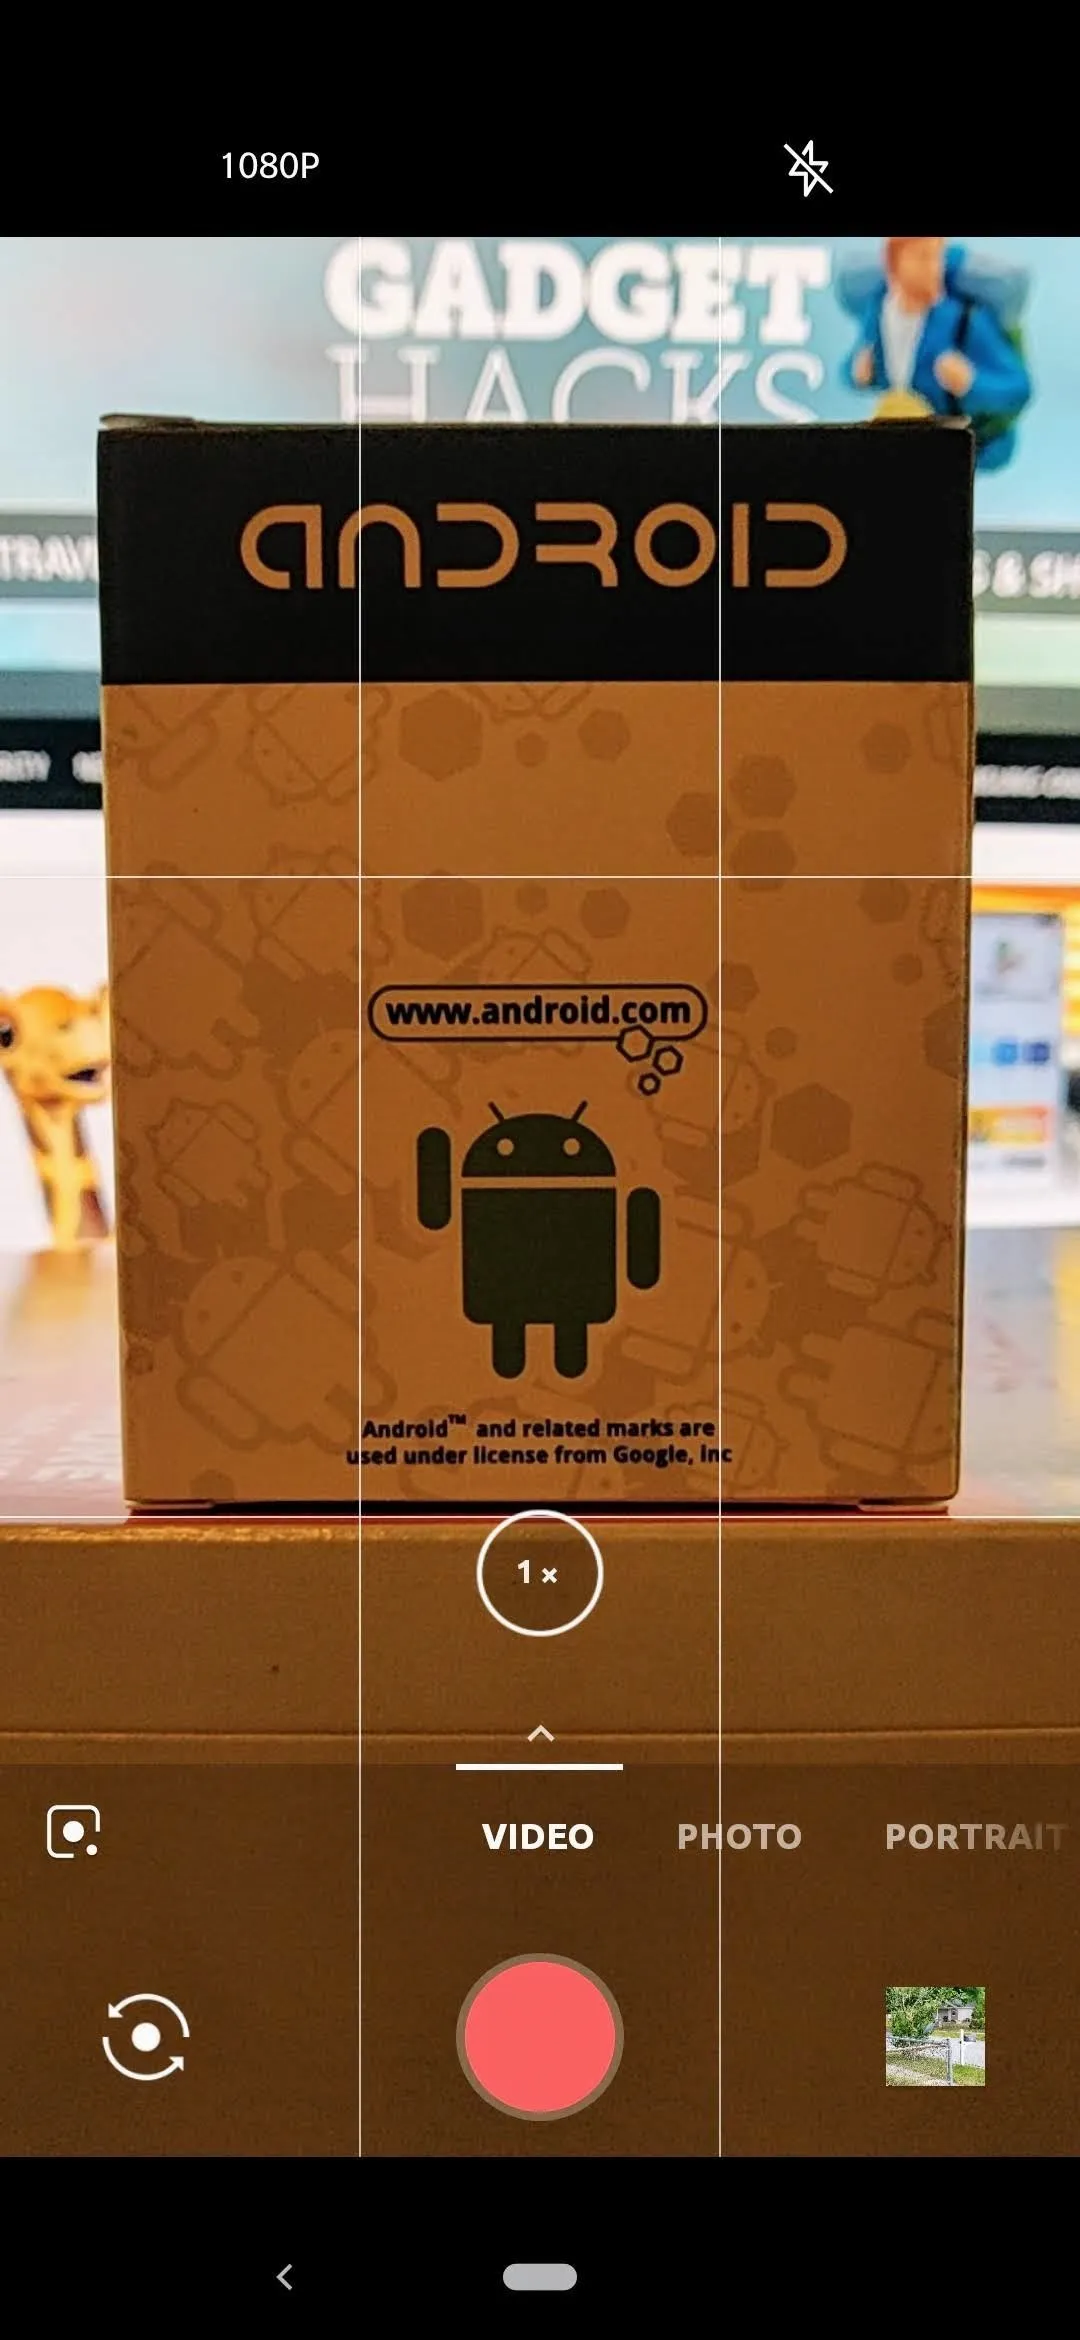
In the Rule of Thirds, the scene is broken down into nine total rectangles in a three-by-three segment going horizontally and vertically. This is depicted by the grid lines you just added to your viewfinder. Typically, by placing your subject at the intersection of two of these lines, you'll end up with a more visually appealing shot.
By adding this rule into your video and photo taking habits, you're creating what's called composition, which is the method of organizing and arranging your subject within the frame. If you want to learn more about the Rule of Thirds that includes all the technical jargon, visit the link below to see more details.
- Don't Miss: Improve Your Composition With the Rule of Thirds
Use 60 fps for Smoother Performance
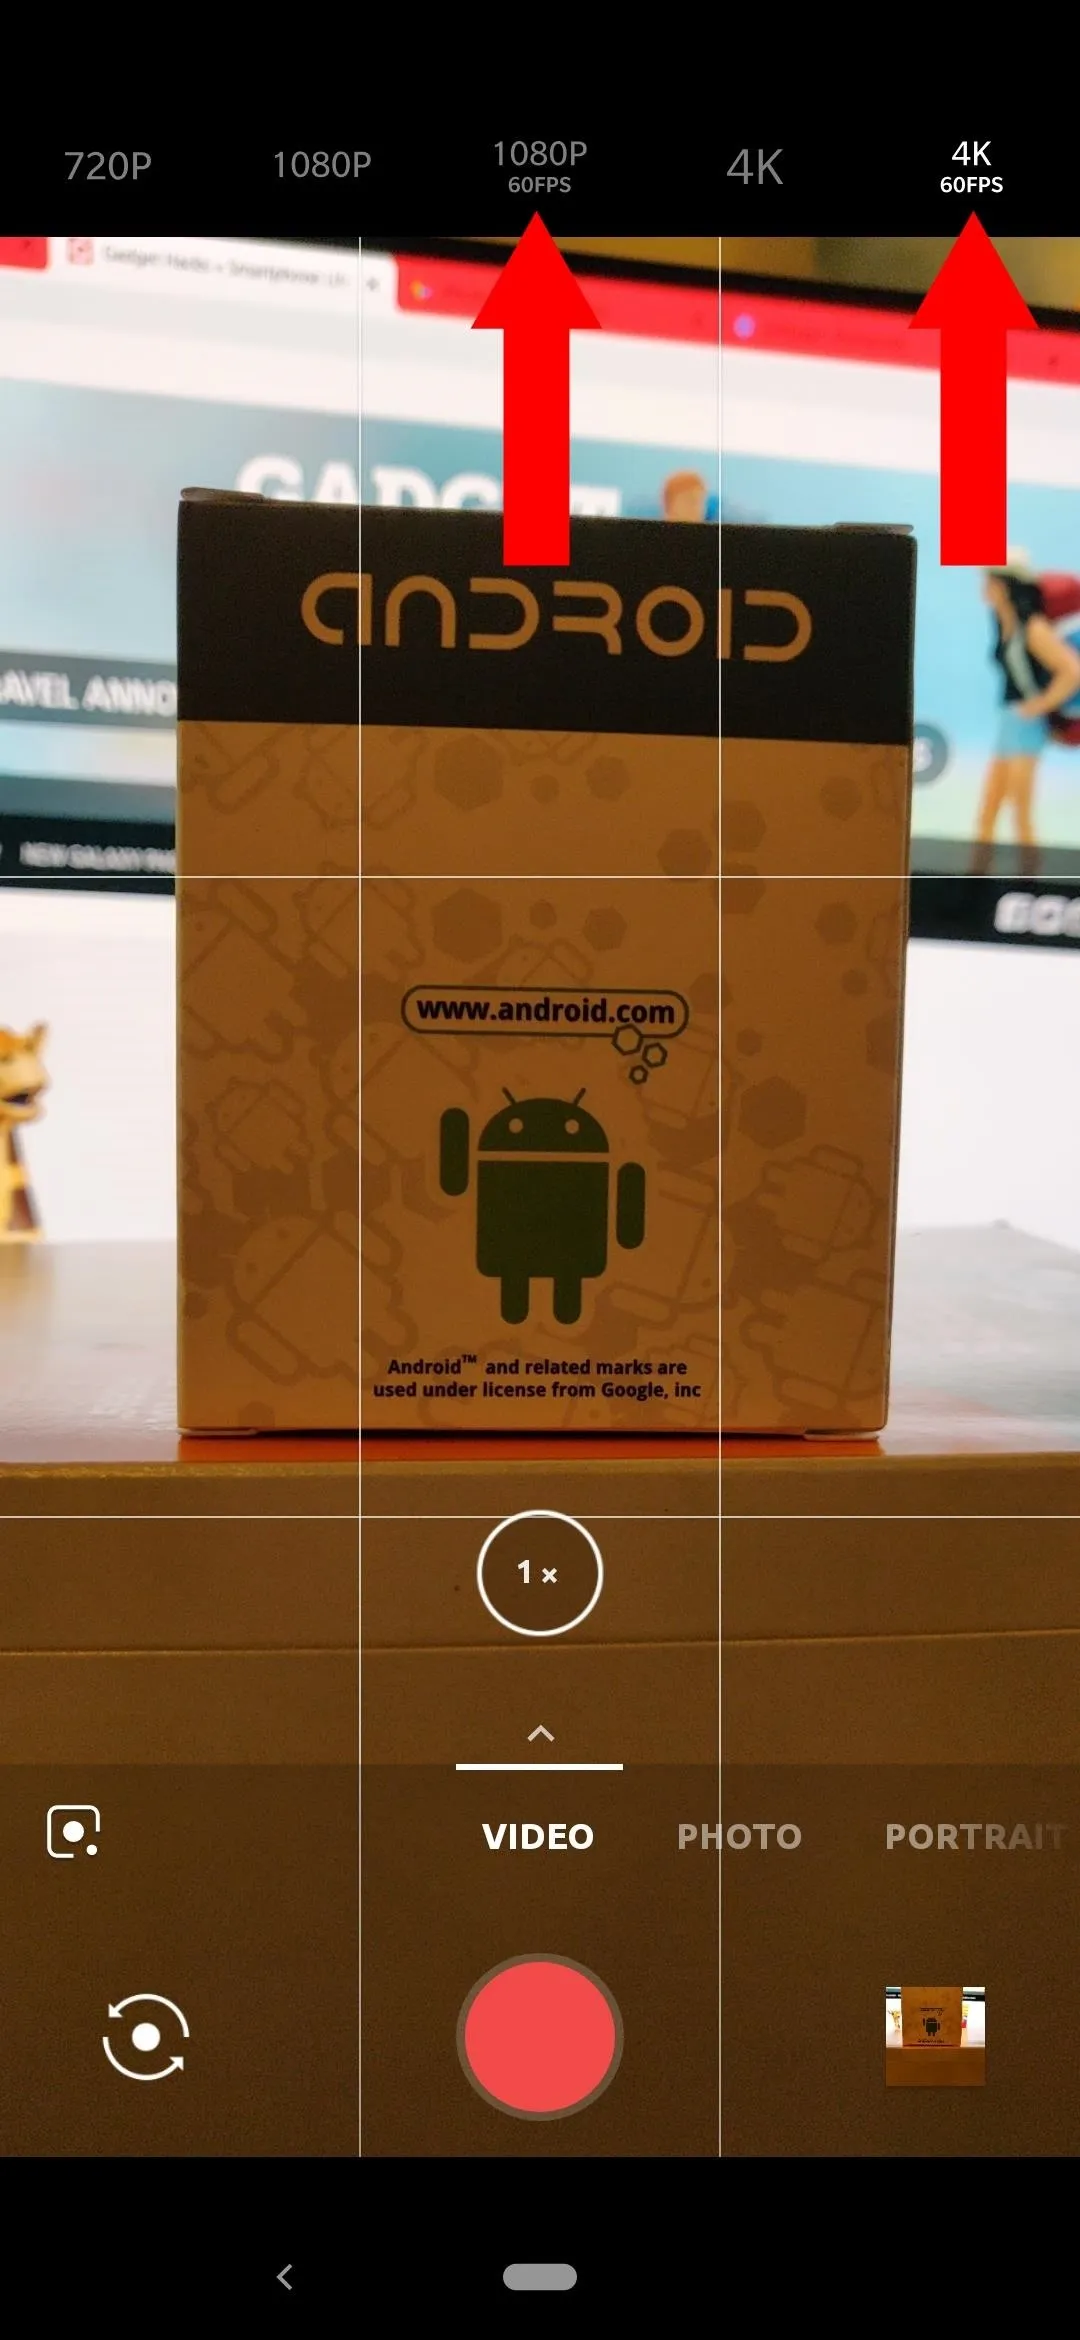
In recent years, the hardware in smartphones has finally gotten strong enough to support shooting live video in 60 fps, which allows for a much smoother playback when compared to the old way of 30 frames per second. Doubling the frames rate from 30 to 60 creates a silky smooth playback when it comes to video, and is often the go-to format for high speed or high-intensity shots.
- Don't Miss: Frame Rate: A Beginner's Guide
There's nothing wrong with 30 frames per second, but it depends on what you're trying to achieve. For a more cinematic and natural feel, you'll want to go with 30 fps — but for something more complex, such as a live sporting event, you'll most likely want to shoot with 60 fps. YouTube and other popular online video platforms support 60 fps playback, so feel free to take advantage of that if you prefer smoother video performance across the board.
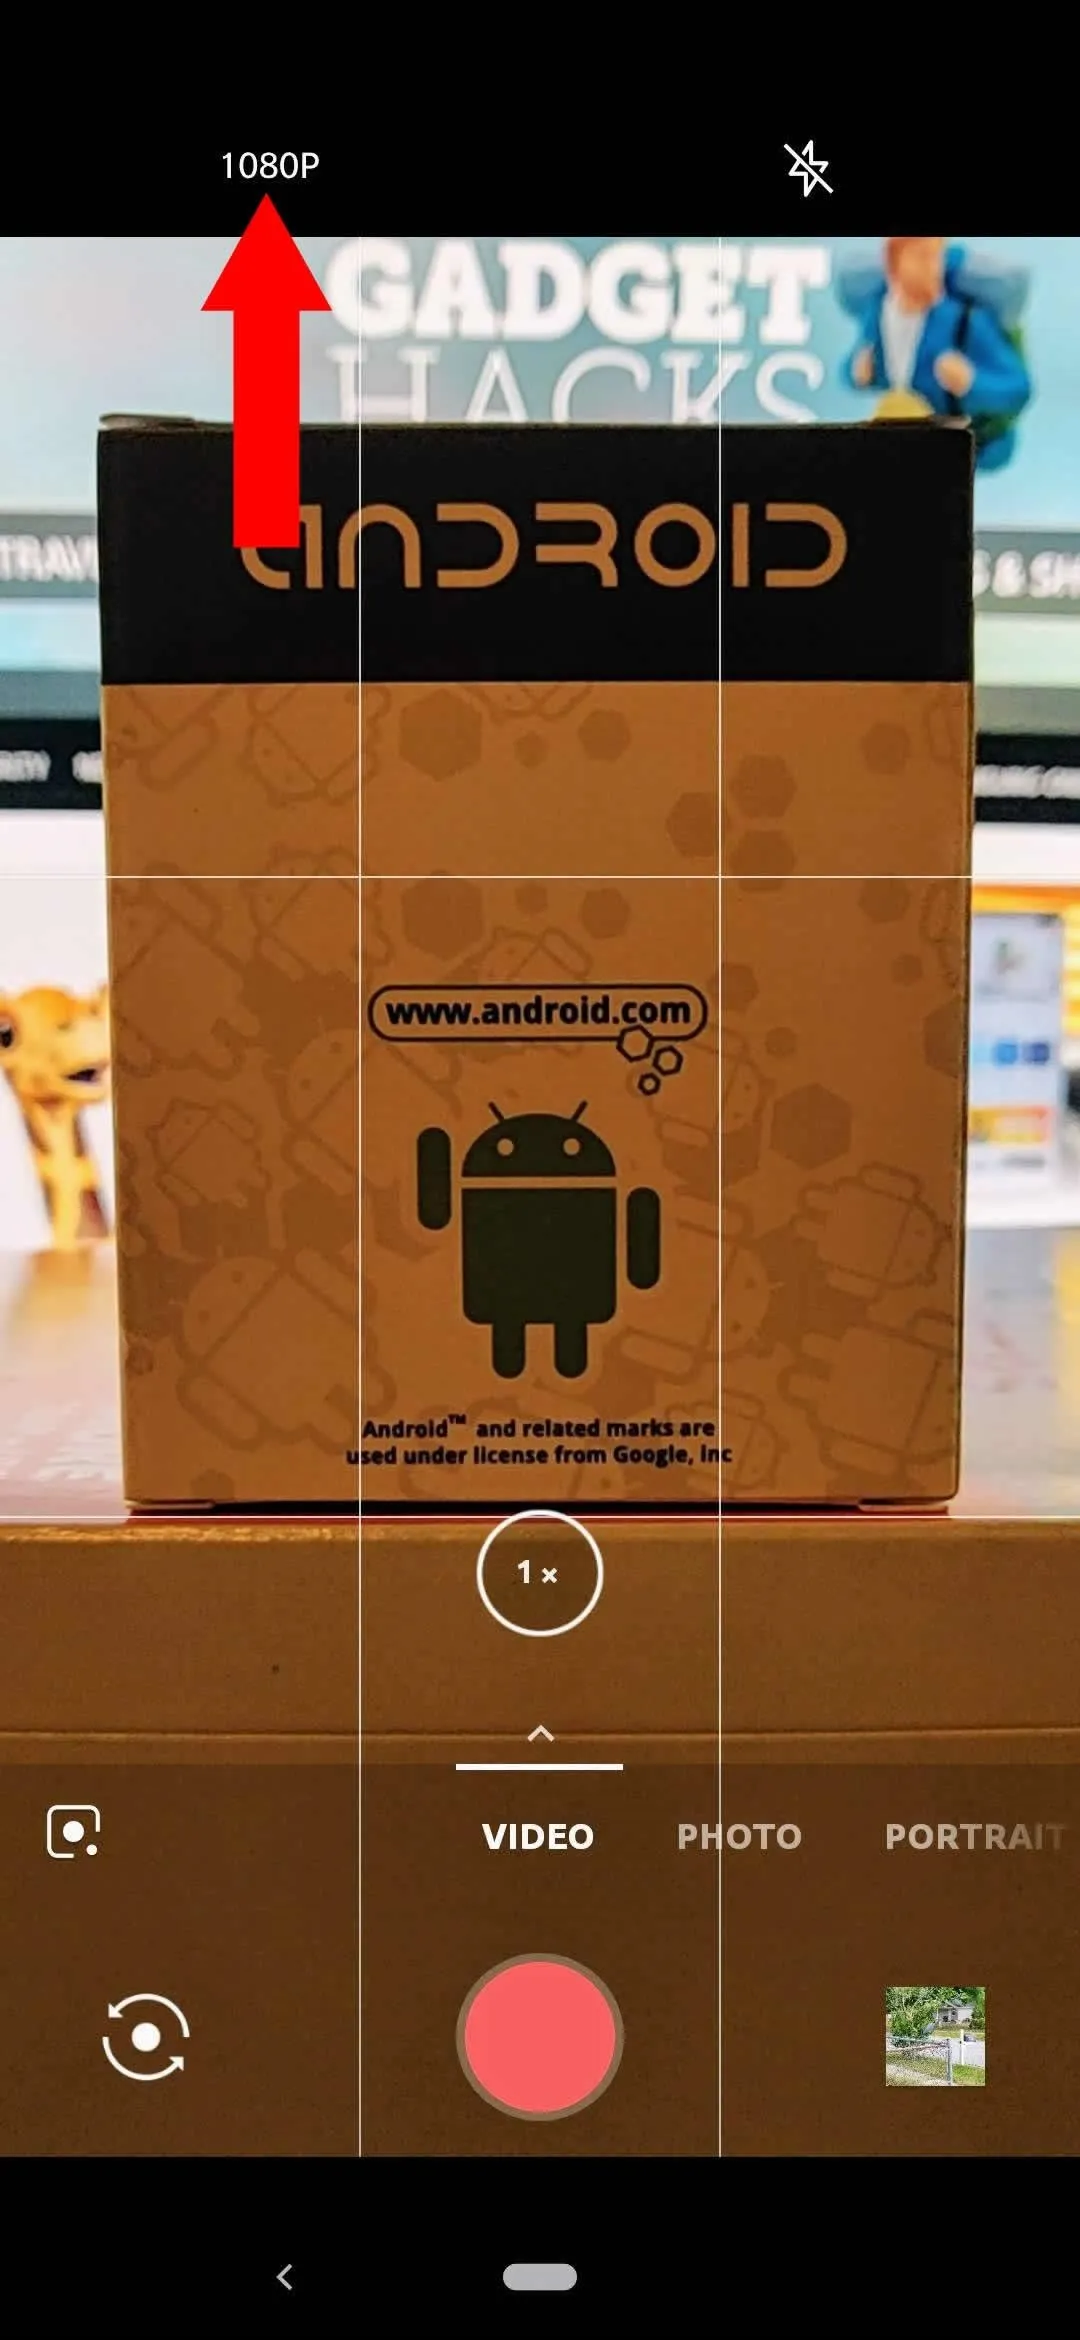
To get started with 60 fps video recording, head into the "Video" section of the OnePlus camera app, then tap the current video resolution in the upper-left corner. Select "1080P 60FPS" or "4K 60FPS" if your phone happens to support both formats.

The average refresh rate on consumer displays for smartphones and TVs is still pegged at 60 hertz (Hz), which equates to a maximum of 60 frames per second for video playback. Not all video content is recorded to take advantage of 60 Hz by default, but when it does, most should notice the difference if they know what to look for. Higher refresh rates for our displays are on the way, so expect future smartphones to record and play back even smoother video while the demand for more powerful hardware rises.
Enable 4K for the Highest Quality
Much like being able to use 60 fps for video performance, our smartphones were not powerful enough to record Ultra HD 4K video until recently. The standard for HD video for nearly a decade has been 1080p, and it's slowly starting to be replaced by 4K as the new default with every passing year. Most newer TVs are now equipped with a 4K display, and even some smartphones are adopting the very same technology.
4K has four times the pixel count of the standard Full HD 1080p, which means everything will look much sharper, especially evident with video content. It makes sense that newer phones can record in 4K, making it more ideal for use in today's society of entertainment. Since 4K has finally started to become more common in households, you'll want to take advantage of those extra pixels when recording videos on your smartphone.
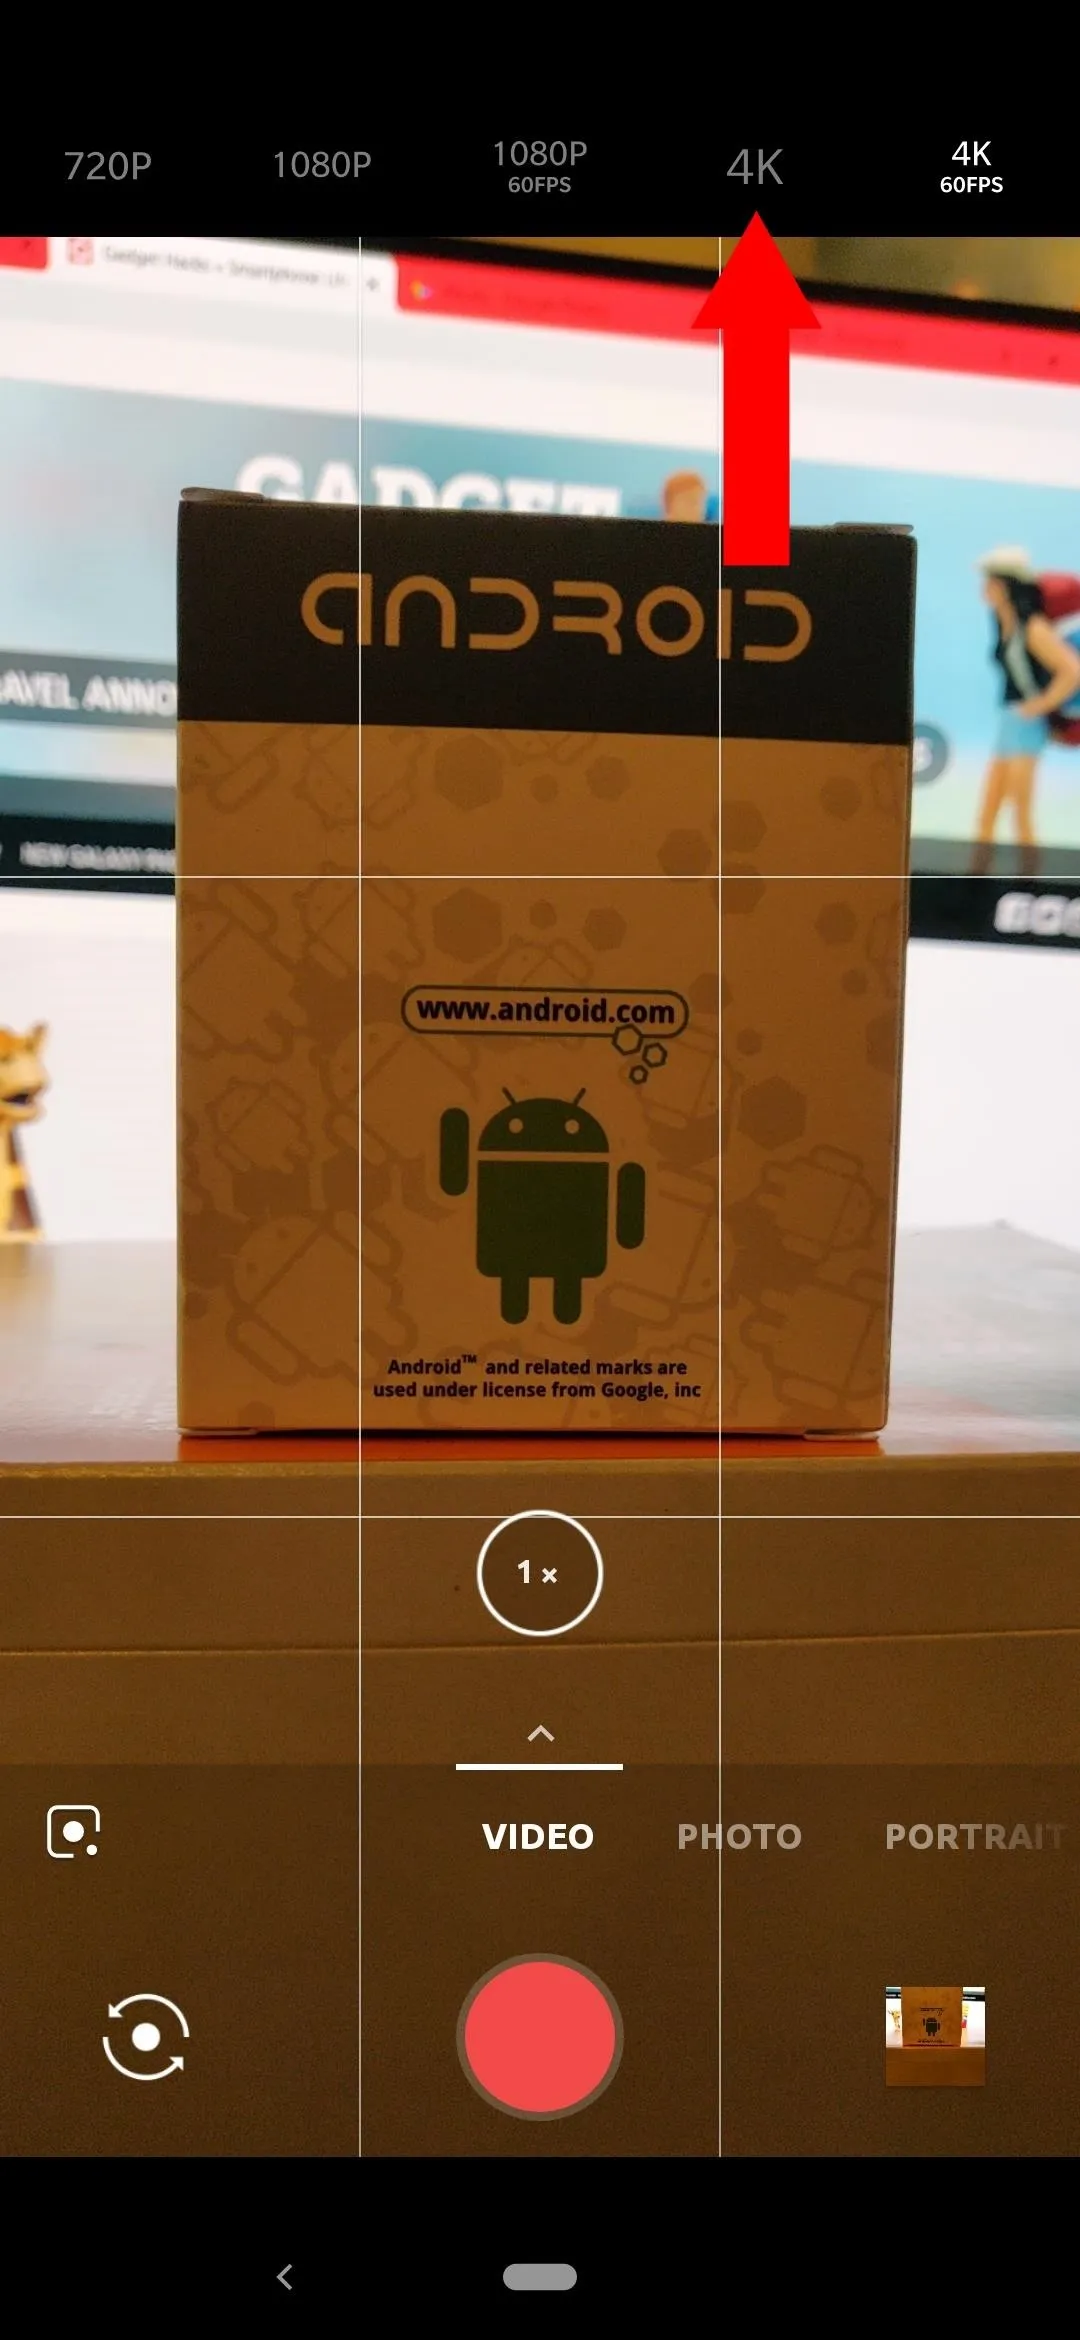
To get started with 4K video recording, head into the "Video" section of the OnePlus camera app, then tap the current video resolution in the upper-left corner. Select "4K," then the next time you record a video, it will be in a much higher quality than it was previously.
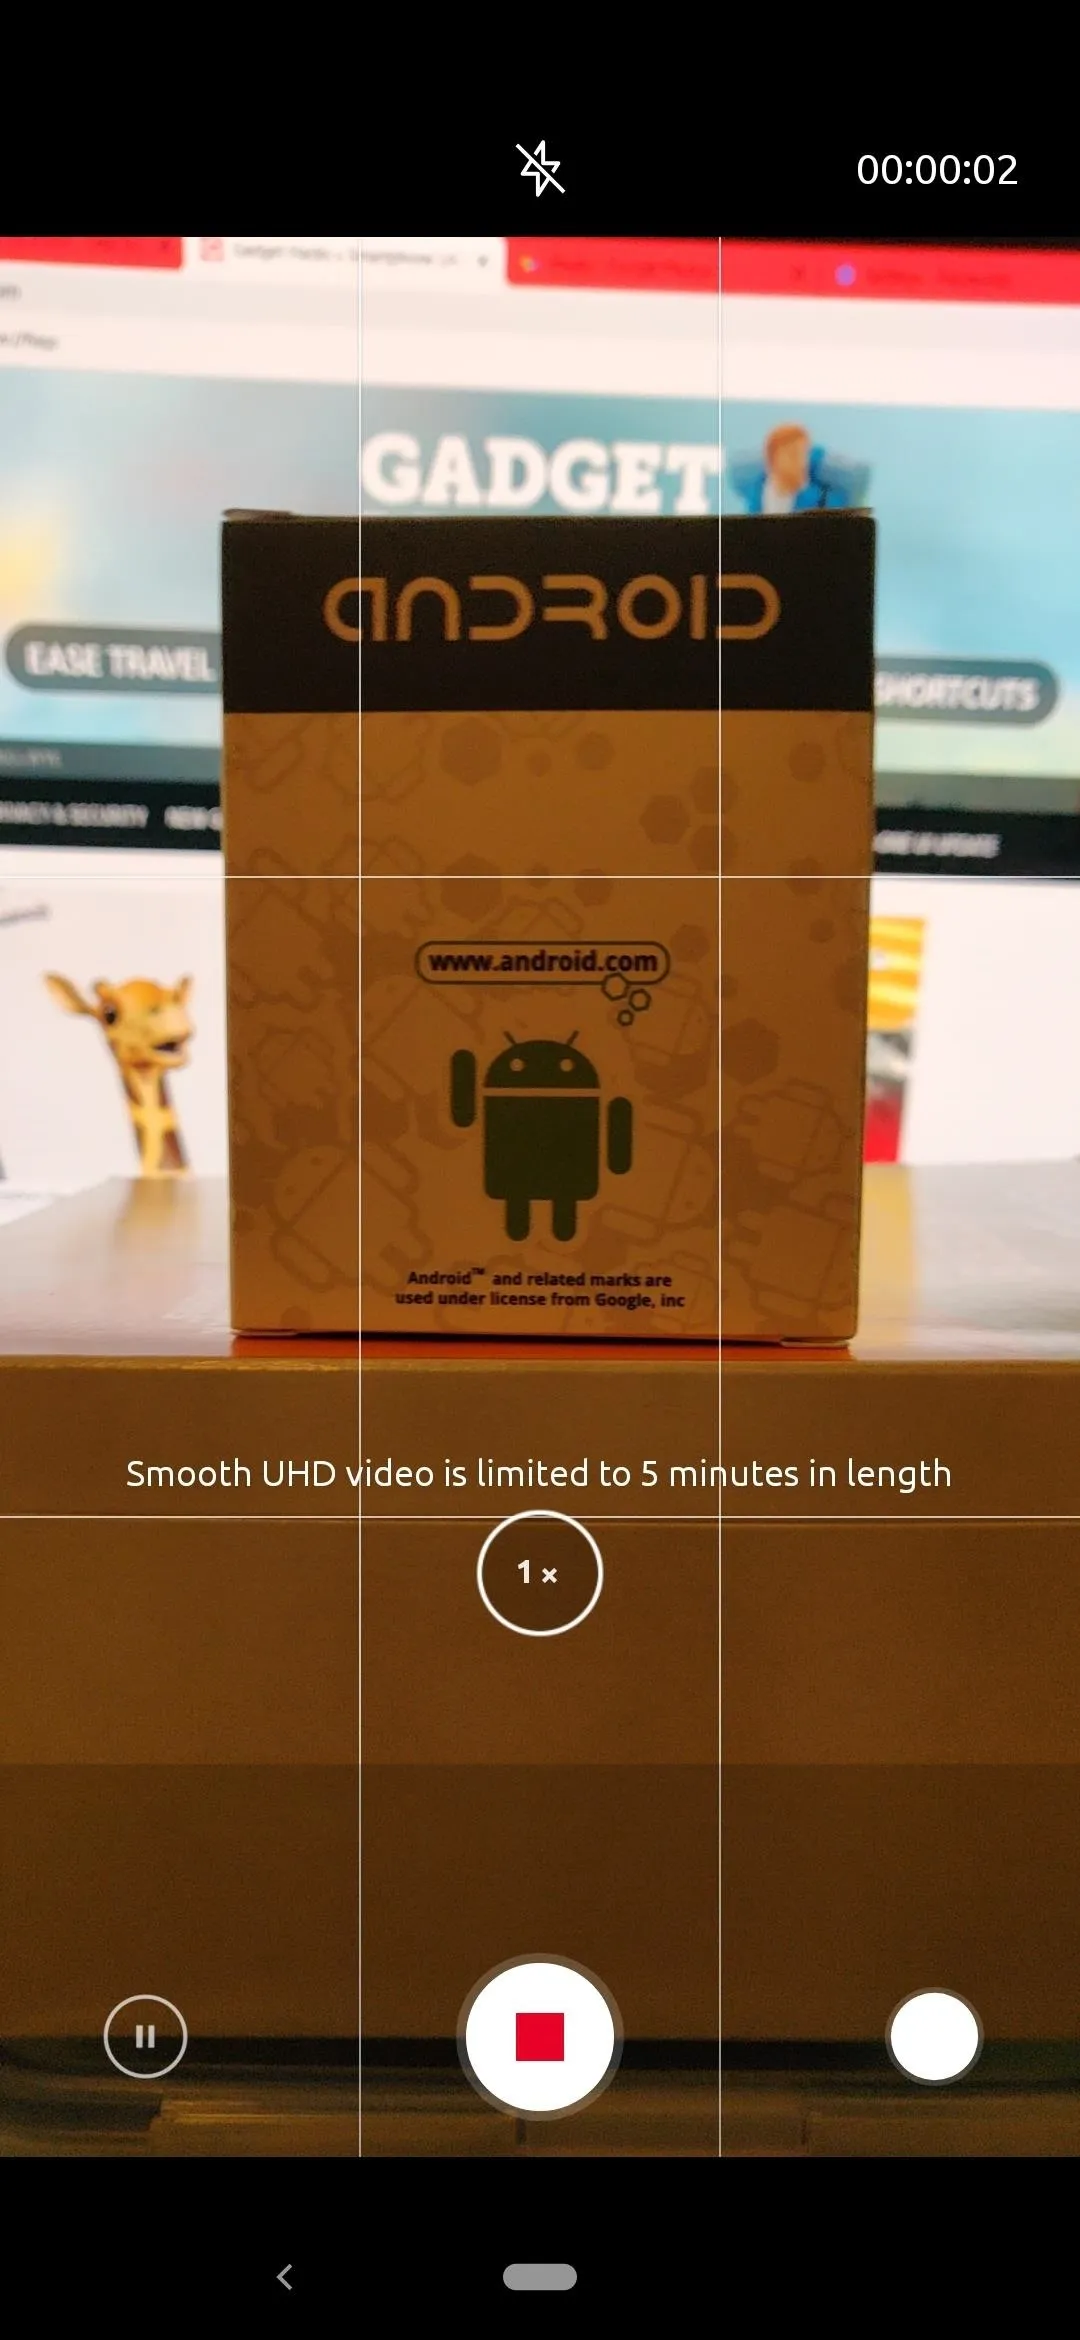
If your smartphone is new enough and has the hardware to do so, you can now pair 4K video recording with 60 fps for maximum quality and performance. However, there are a few things to note while using this feature. For starters, you'll only be able to record a consistent five minutes of video in most cases, because the file size for an extremely high-quality video will be massive.
Pushing that kind of power on your smartphone's internal hardware will make it work much harder, so heat on those components will rise. All the extra workload from recording such high-quality videos in real time will take a hit on battery life as well. Keeping that in mind, it's usually best to use 4K 60 fps to record your absolute best moments to maintain maximum visual performance until hardware advancements allow us to go beyond the current physical limitations.
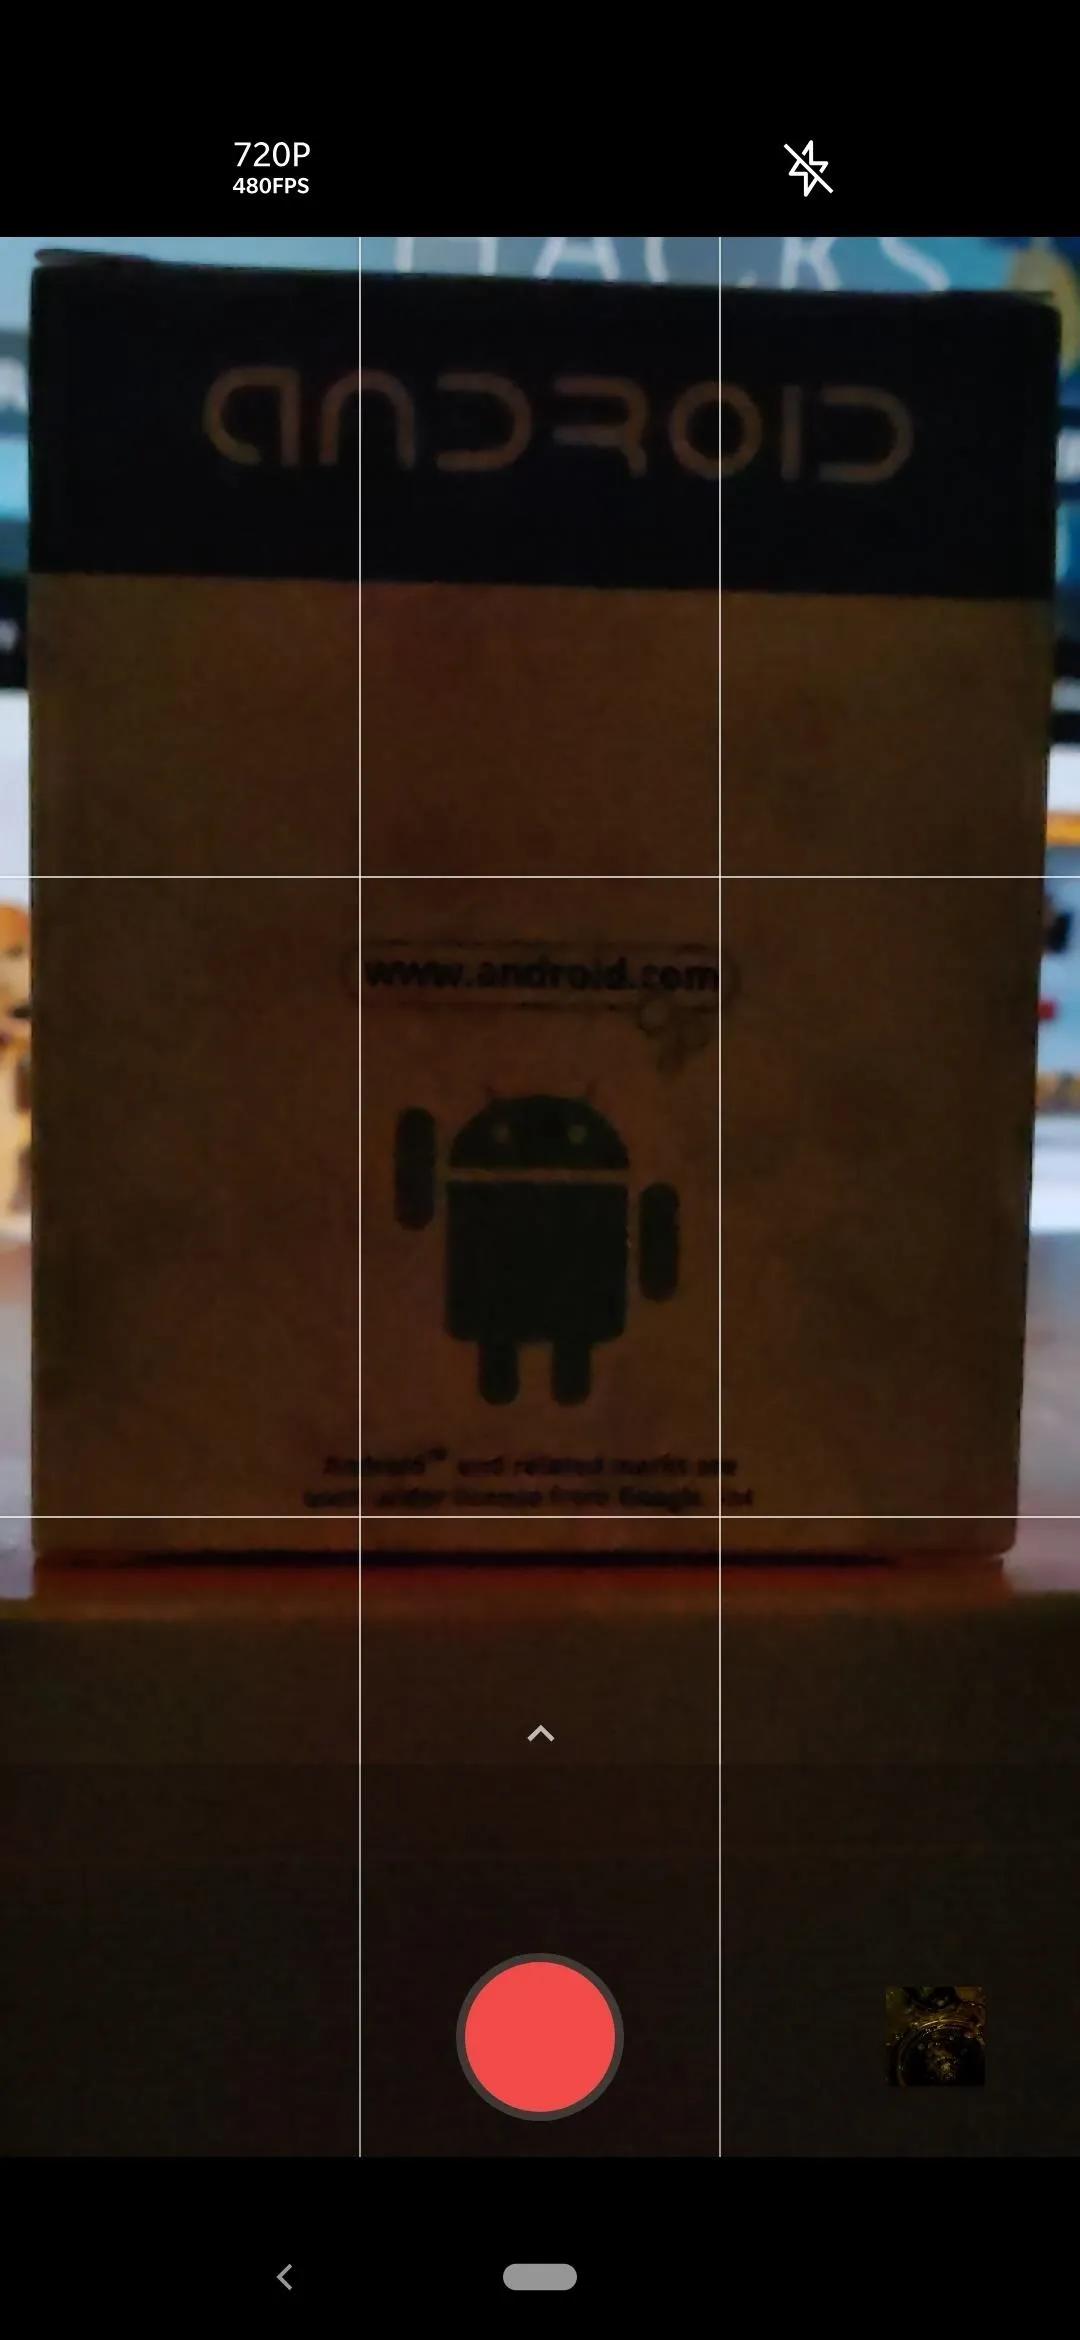
Manually Adjust the Scene Brightness
For the most part, the light in the scene being picked up by your camera does what it needs to do without having to touch manual controls. However, perhaps you wanted to lighten or darken a particular scene without having to make adjustments to your room lighting. Alternatively, maybe you prefer to alter the brightness level to meet a particular effect or to highlight your focal point better.
Either way, you can easily adjust the brightness of the scene by tapping where you want to make adjustments while recording a video from within the OnePlus camera app. Once you tap the location you want to alter, you'll see a brightness adjustment slider pop up to where to you can tweak the setting as you see fit. Sliding the bar up increases the level of brightness while dragging it down decreases it.
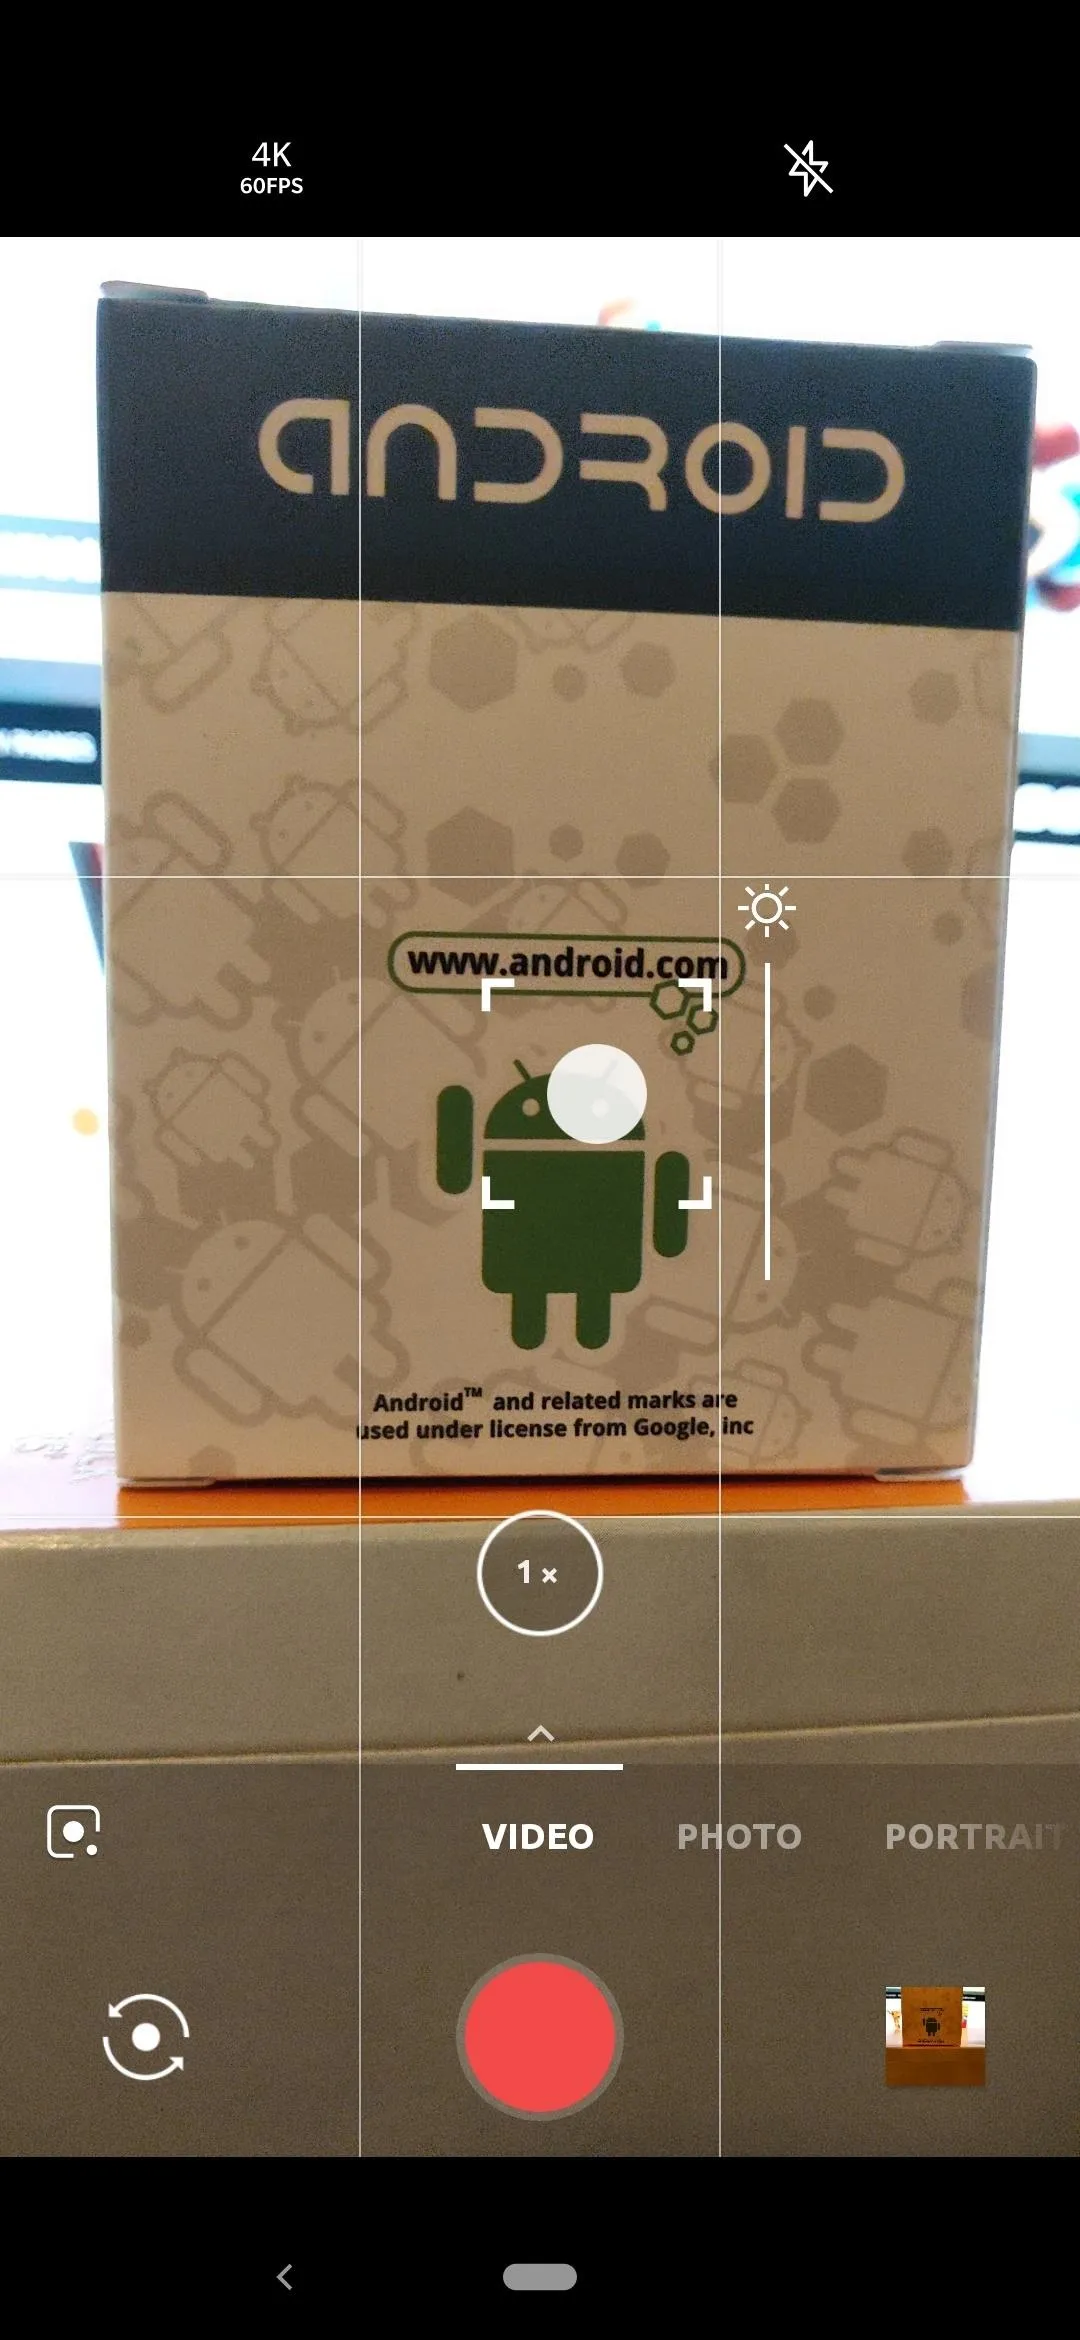
The brightness slider for the scene is all the way up.
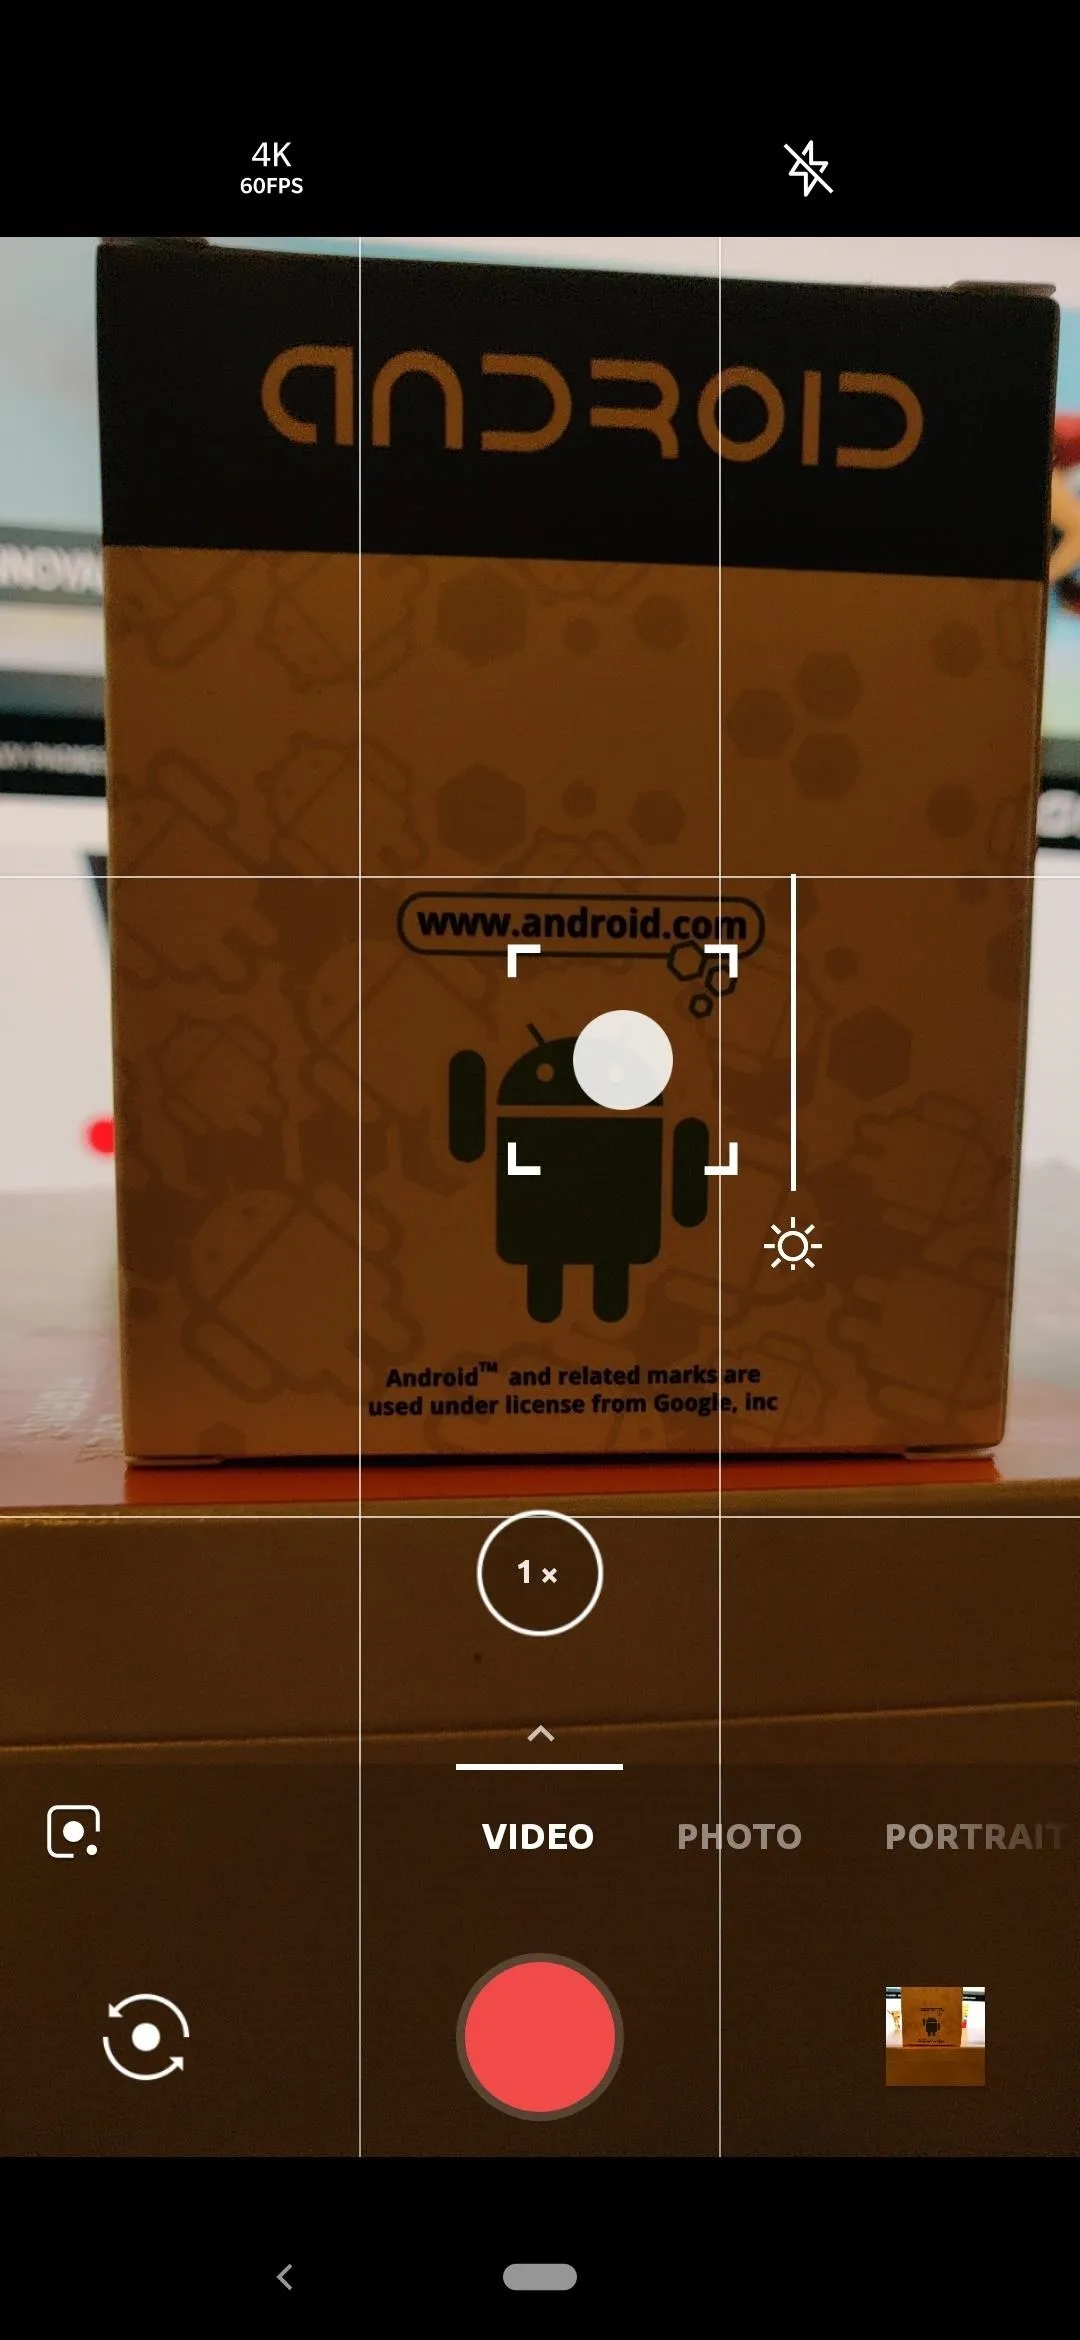
The brightness slider for the scene is all the way down.
The brightness slider for the scene is all the way up.
The brightness slider for the scene is all the way down.
Use Slow Motion for Cool Effects
Catching cool moments on video using slow motion is not something you'll be doing every single day, but you should go for it whenever you have the chance. Depending on which OnePlus smartphone you have, you'll see different options while using the slow motion feature from within the OnePlus camera app.
The most common frame rates for 720p slow motion video shots one the OnePlus phones will be 120, 240, or even 480 fps. Likewise, the standard frame rate you'll find for 1080p slow motion is 120 or 240 fps. When it comes to slow motion video capture, the higher the frame rate, the slower you'll be able to capture whatever is in your scene.
To get started with slow motion video recording, head into the "Slow motion" section of the OnePlus camera by swiping up on the main screen. In the upper left-hand corner, you can select the resolution and the frame rate options as needed.
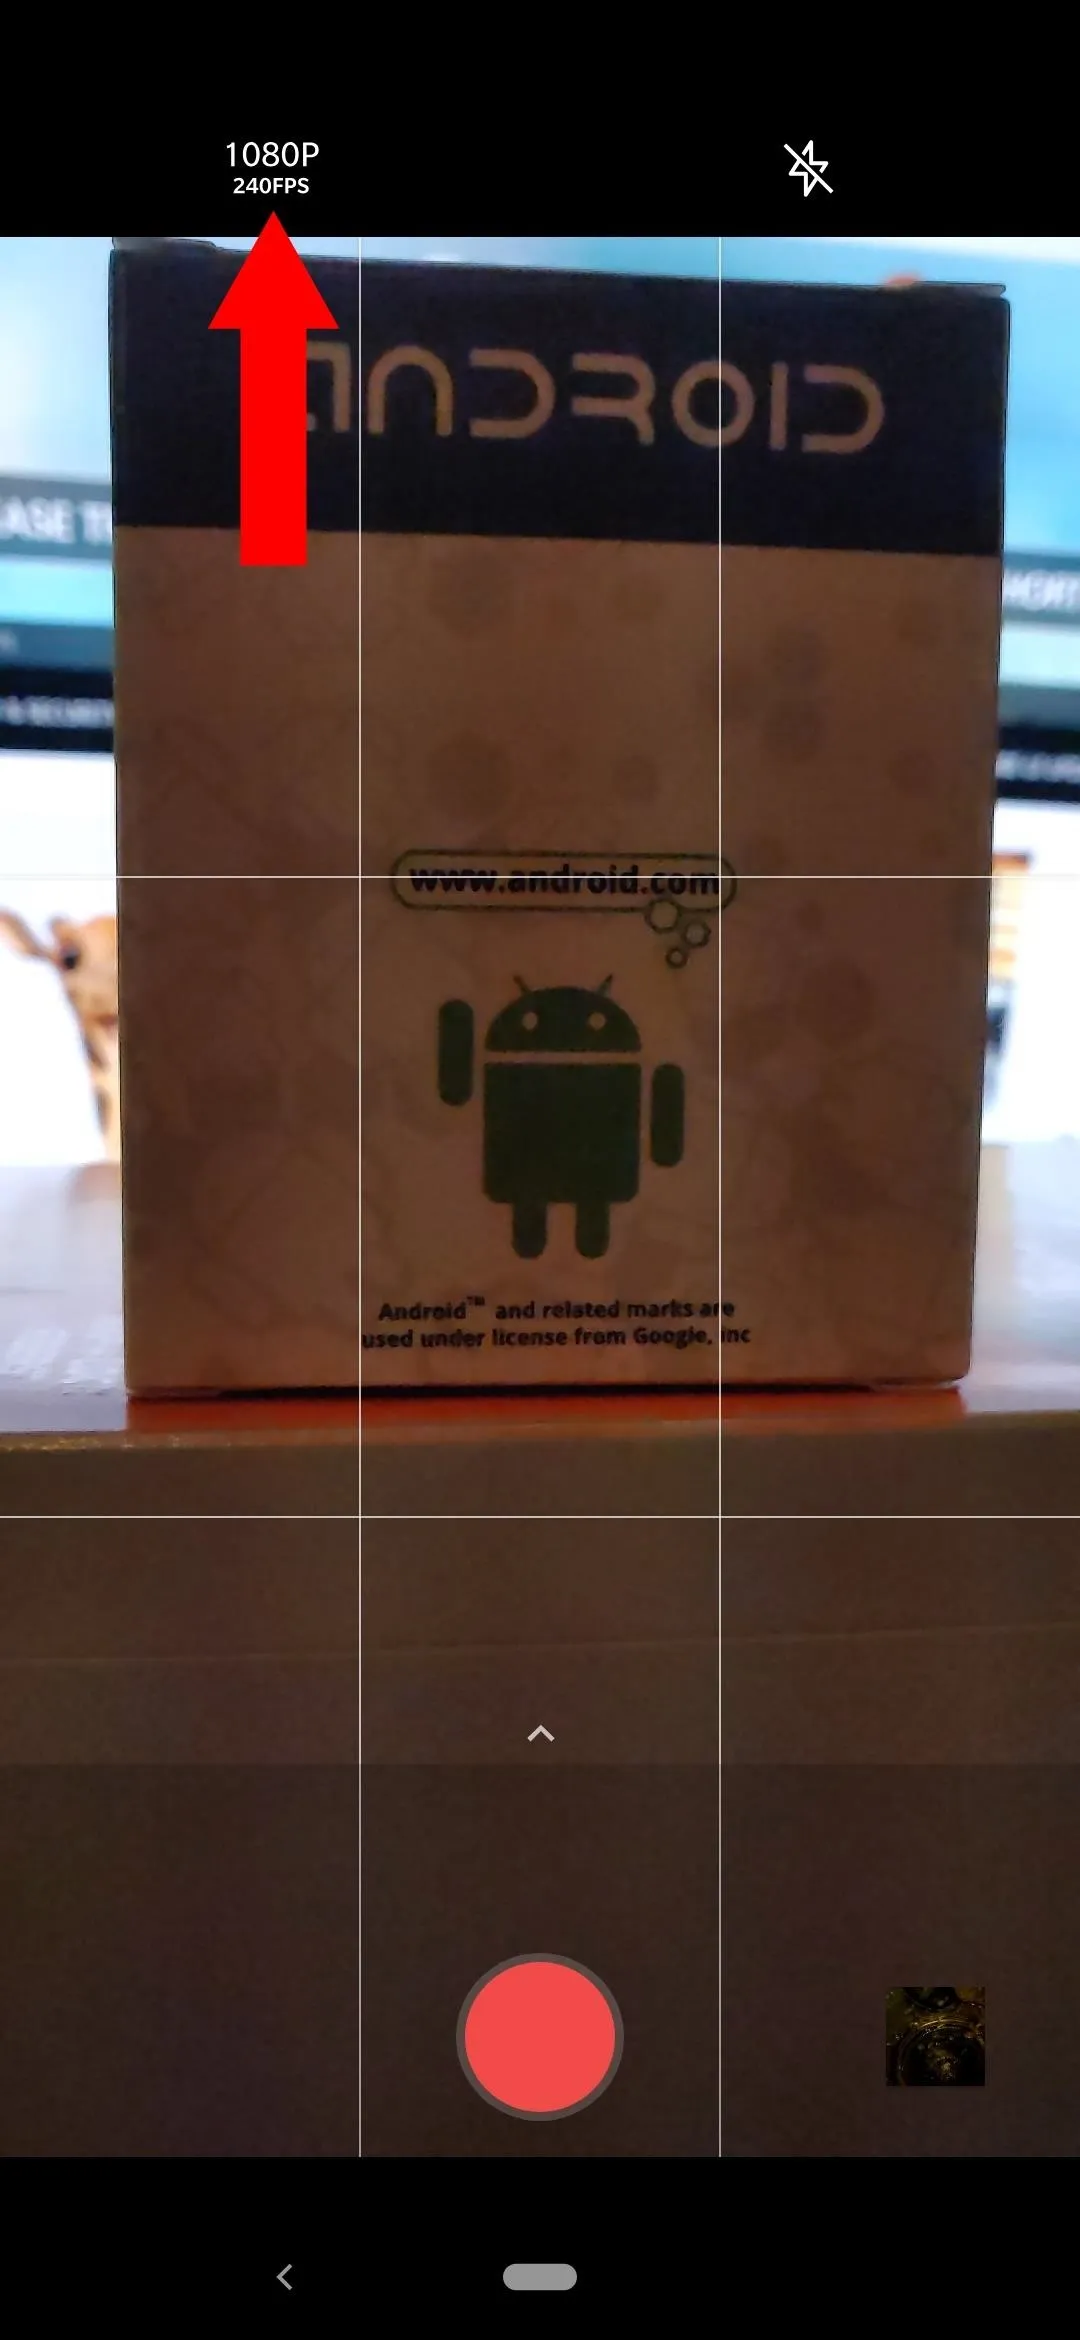
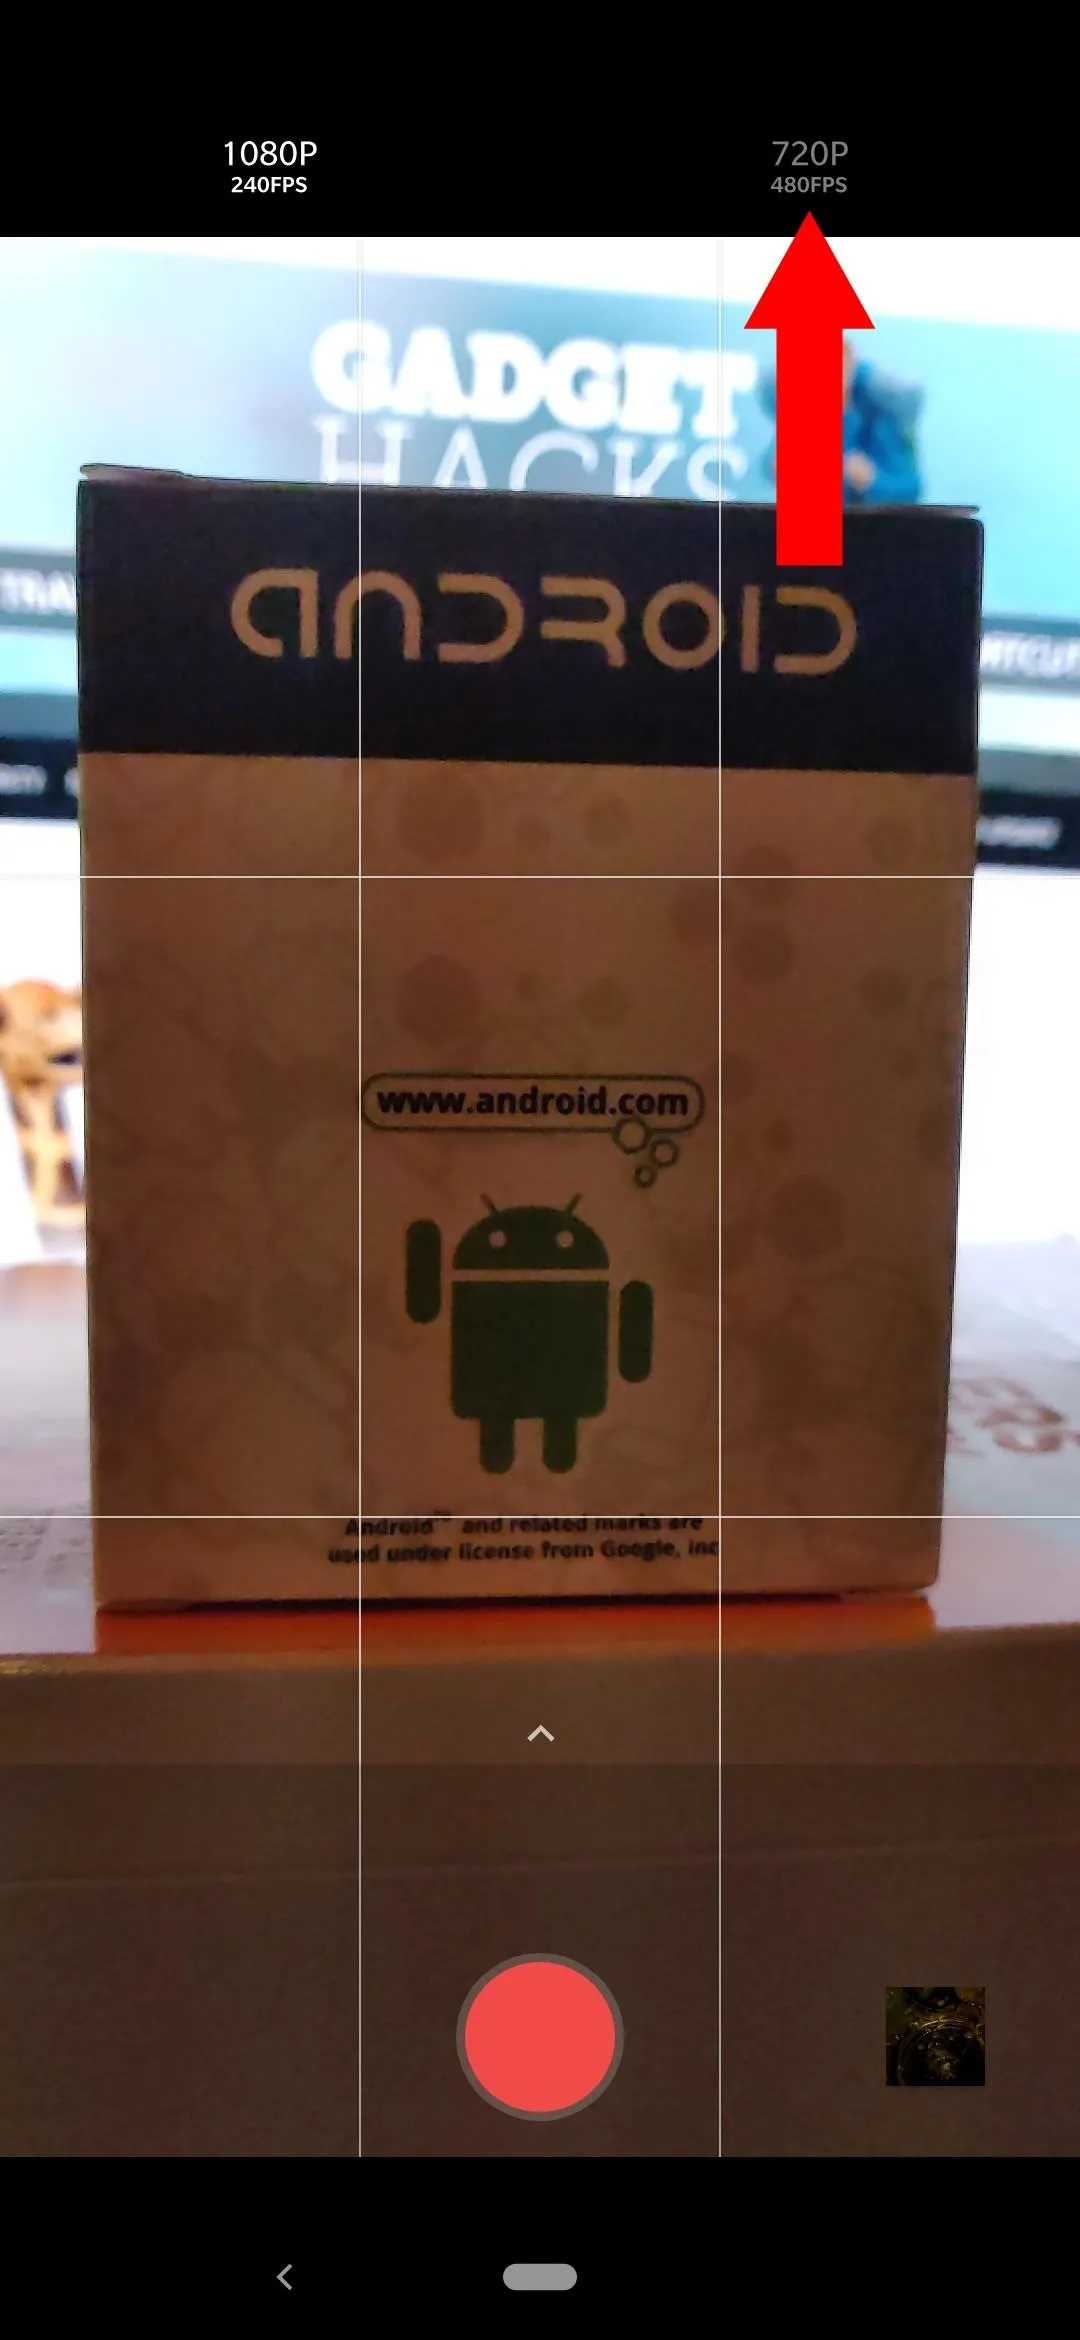
You should also note that the higher the resolution, the lower the frame rate you'll be able to shoot. This ultimately means the lower resolutions will always be able to capture better slow motion video, but at a reduced level of clarity when compared to higher resolutions. That's the trade off — you get to decide which works better for your particular needs at that time.
This article was produced during Gadget Hacks' special coverage on smartphone-based video creator tips for filming and editing. Check out the whole Videography series.
- Follow Gadget Hacks on Pinterest, Reddit, Twitter, YouTube, and Flipboard
- Sign up for Gadget Hacks' daily newsletter or weekly Android and iOS updates
- Follow WonderHowTo on Facebook, Twitter, Pinterest, and Flipboard
Cover image and screenshots by Stephen Perkins/Gadget Hacks


Comments
Be the first, drop a comment!